¶ Navigation
OAE Assembly Part 1: RA Gearbox
OAE Assembly Part 2: Base
OAE Assembly Part 3: DEC
OAE Assembly Part 4: AZ Base
OAE Assembly Part 5: ALT and Final Assembly
OAE Additional Assembly
¶ Preparation
¶ Screw Torque
Different screws on OAE need to be fastened with different strength. Since almost no one has a proper torque wrench laying around, the assembly guide will reference 5 different tightening settings. Please follow them carefully to avoid damage to parts and ensure optimal rigidity.
1: Almost loose. Use the short side of your hex key and tighten it just past the screw biting.
2: Lightly tight. Use the short side of your hex key and tighten it with light force.
3: Use the short side of your hex key and give it a good twist. Do not use the long side.
4: Use the long side of your hex key and tighten it, but dont give it everything you got.
5: Use the long side of your hex key and tighten it as good as you can without stripping out the screwhead.
¶ Assembly techniques
¶ Print Helpers
Occasionally you'll find a thin printed layer blocking a hole. This is done for better print results. You can either drill this out or push a screw, hex key or similar through the hole to get rid of the material.
¶ Nut insertion
On some parts you'll find that nuts don't go in easily. Take a fitting screw as help, and use it to pull the nut into its slot.
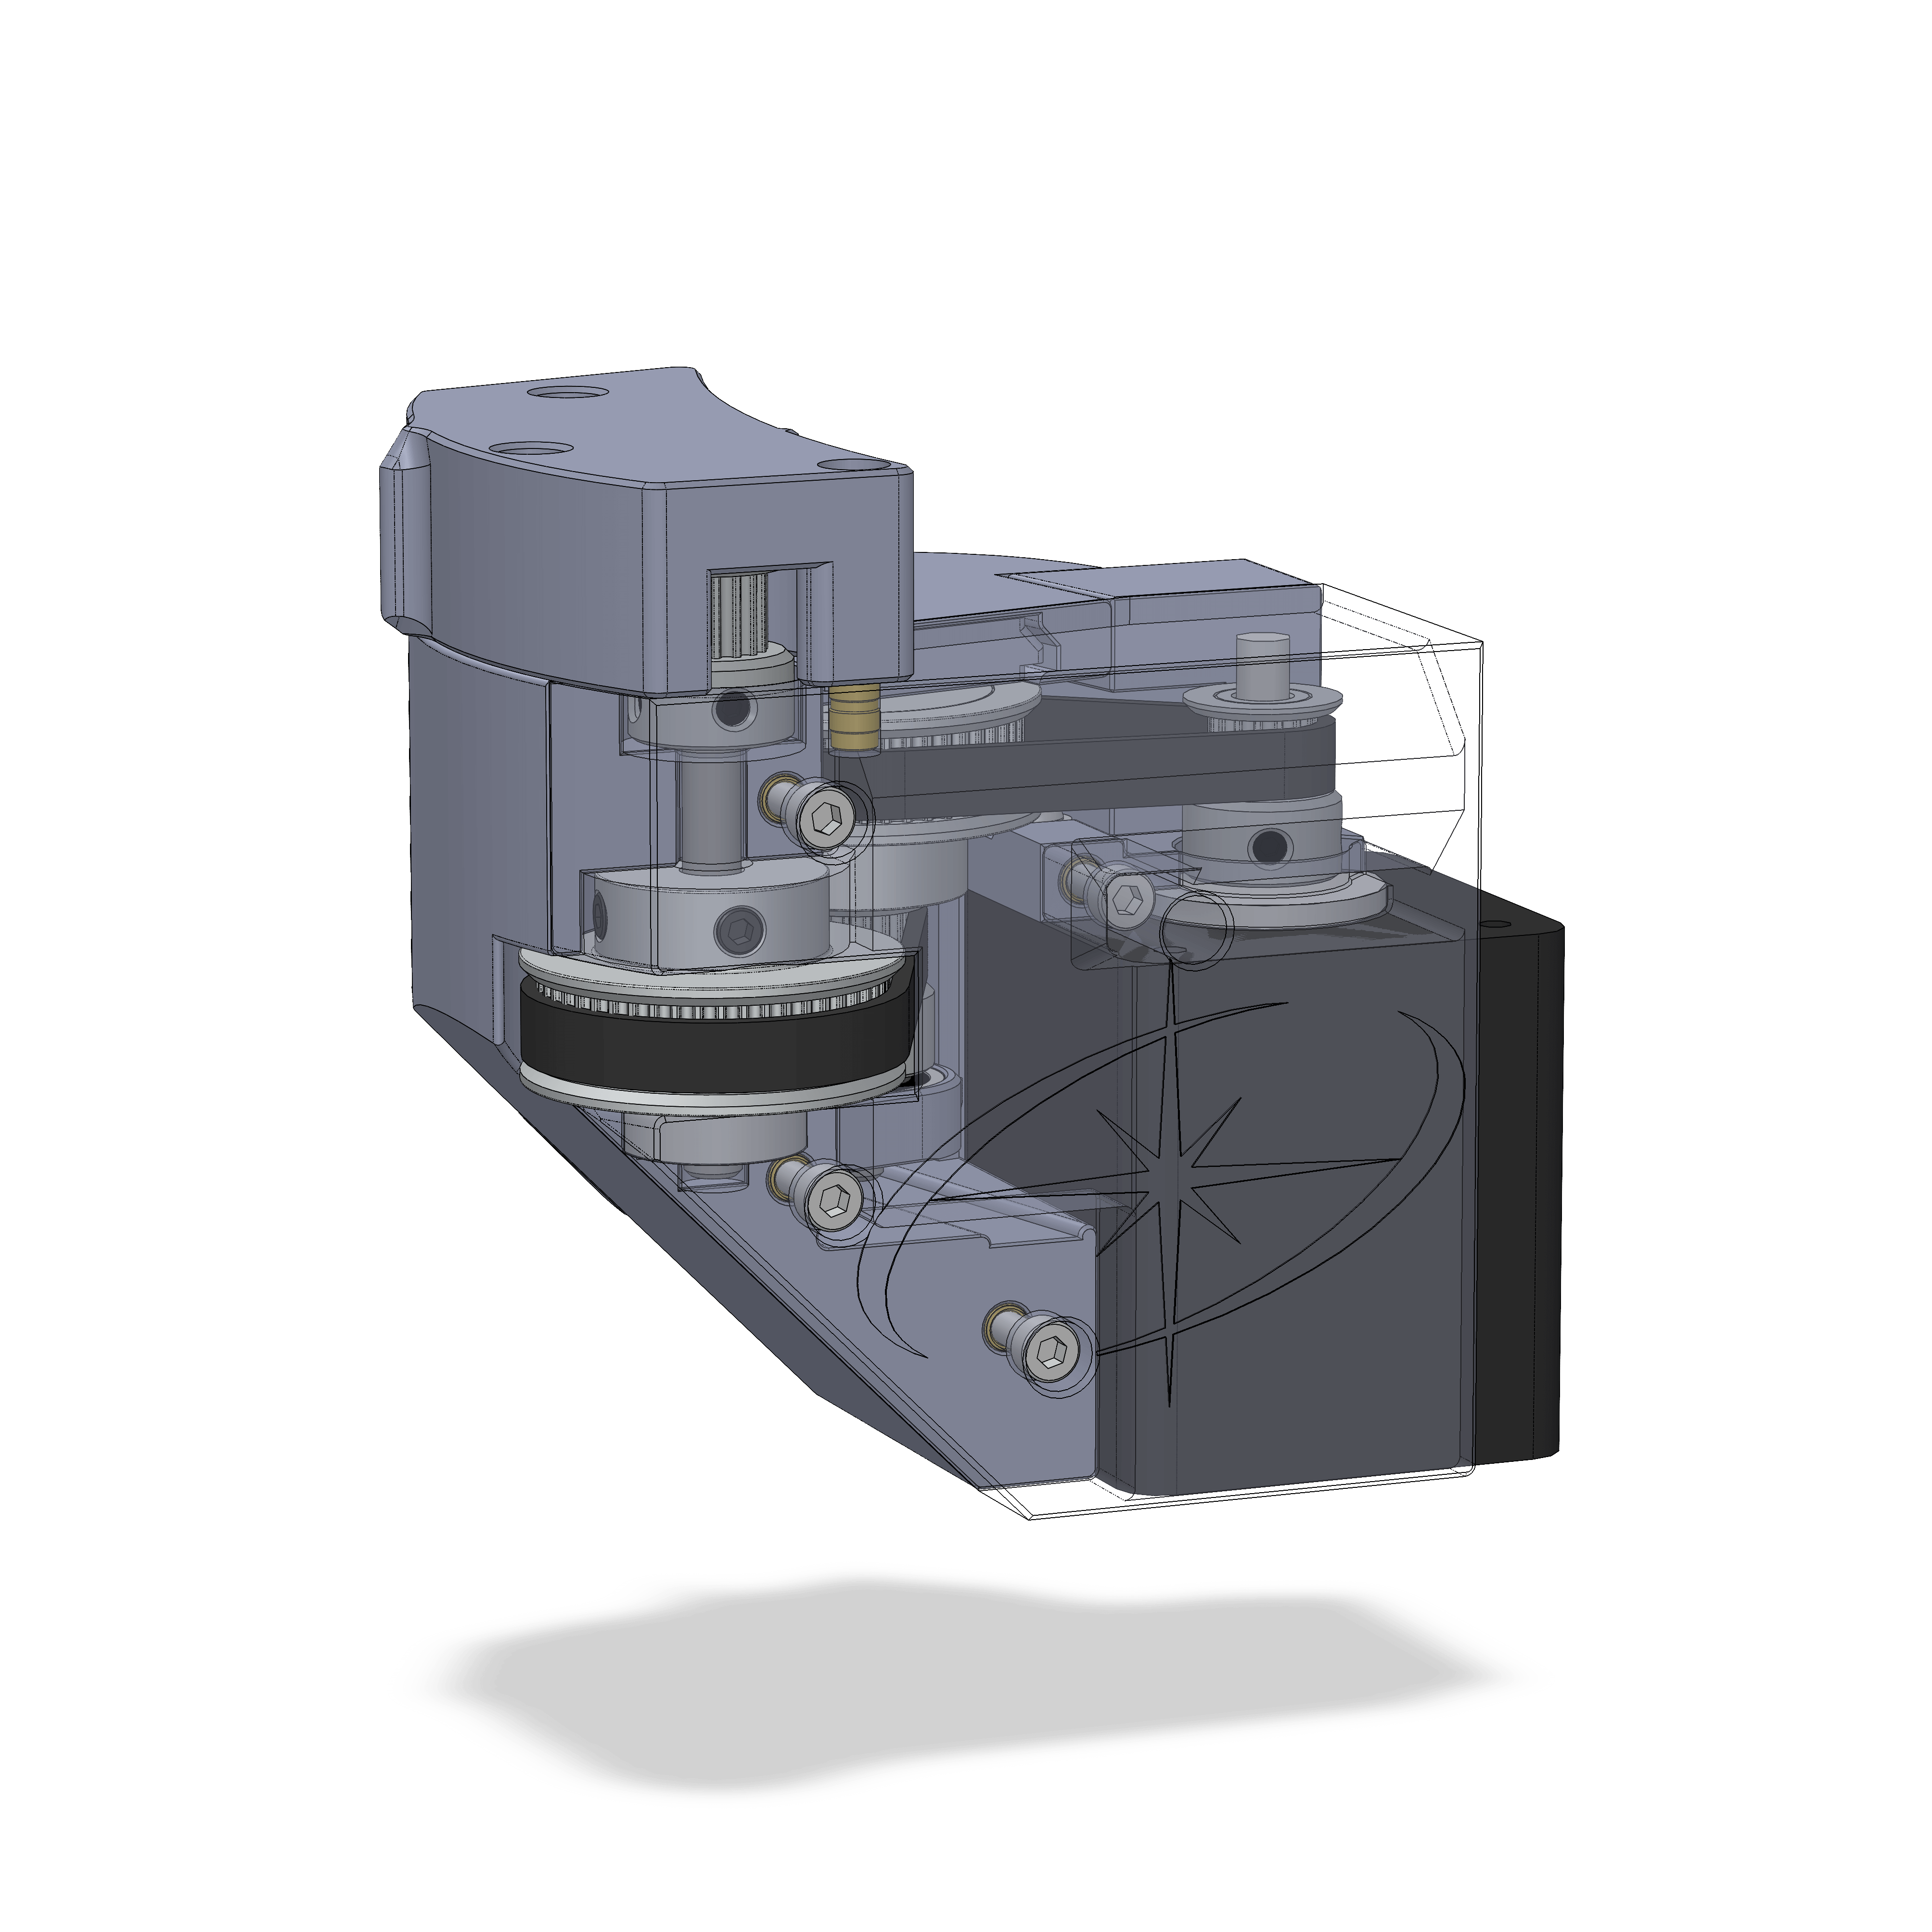
¶ OpenAstroExplorer Assembly Part 1: RA Gearbox
In this step:
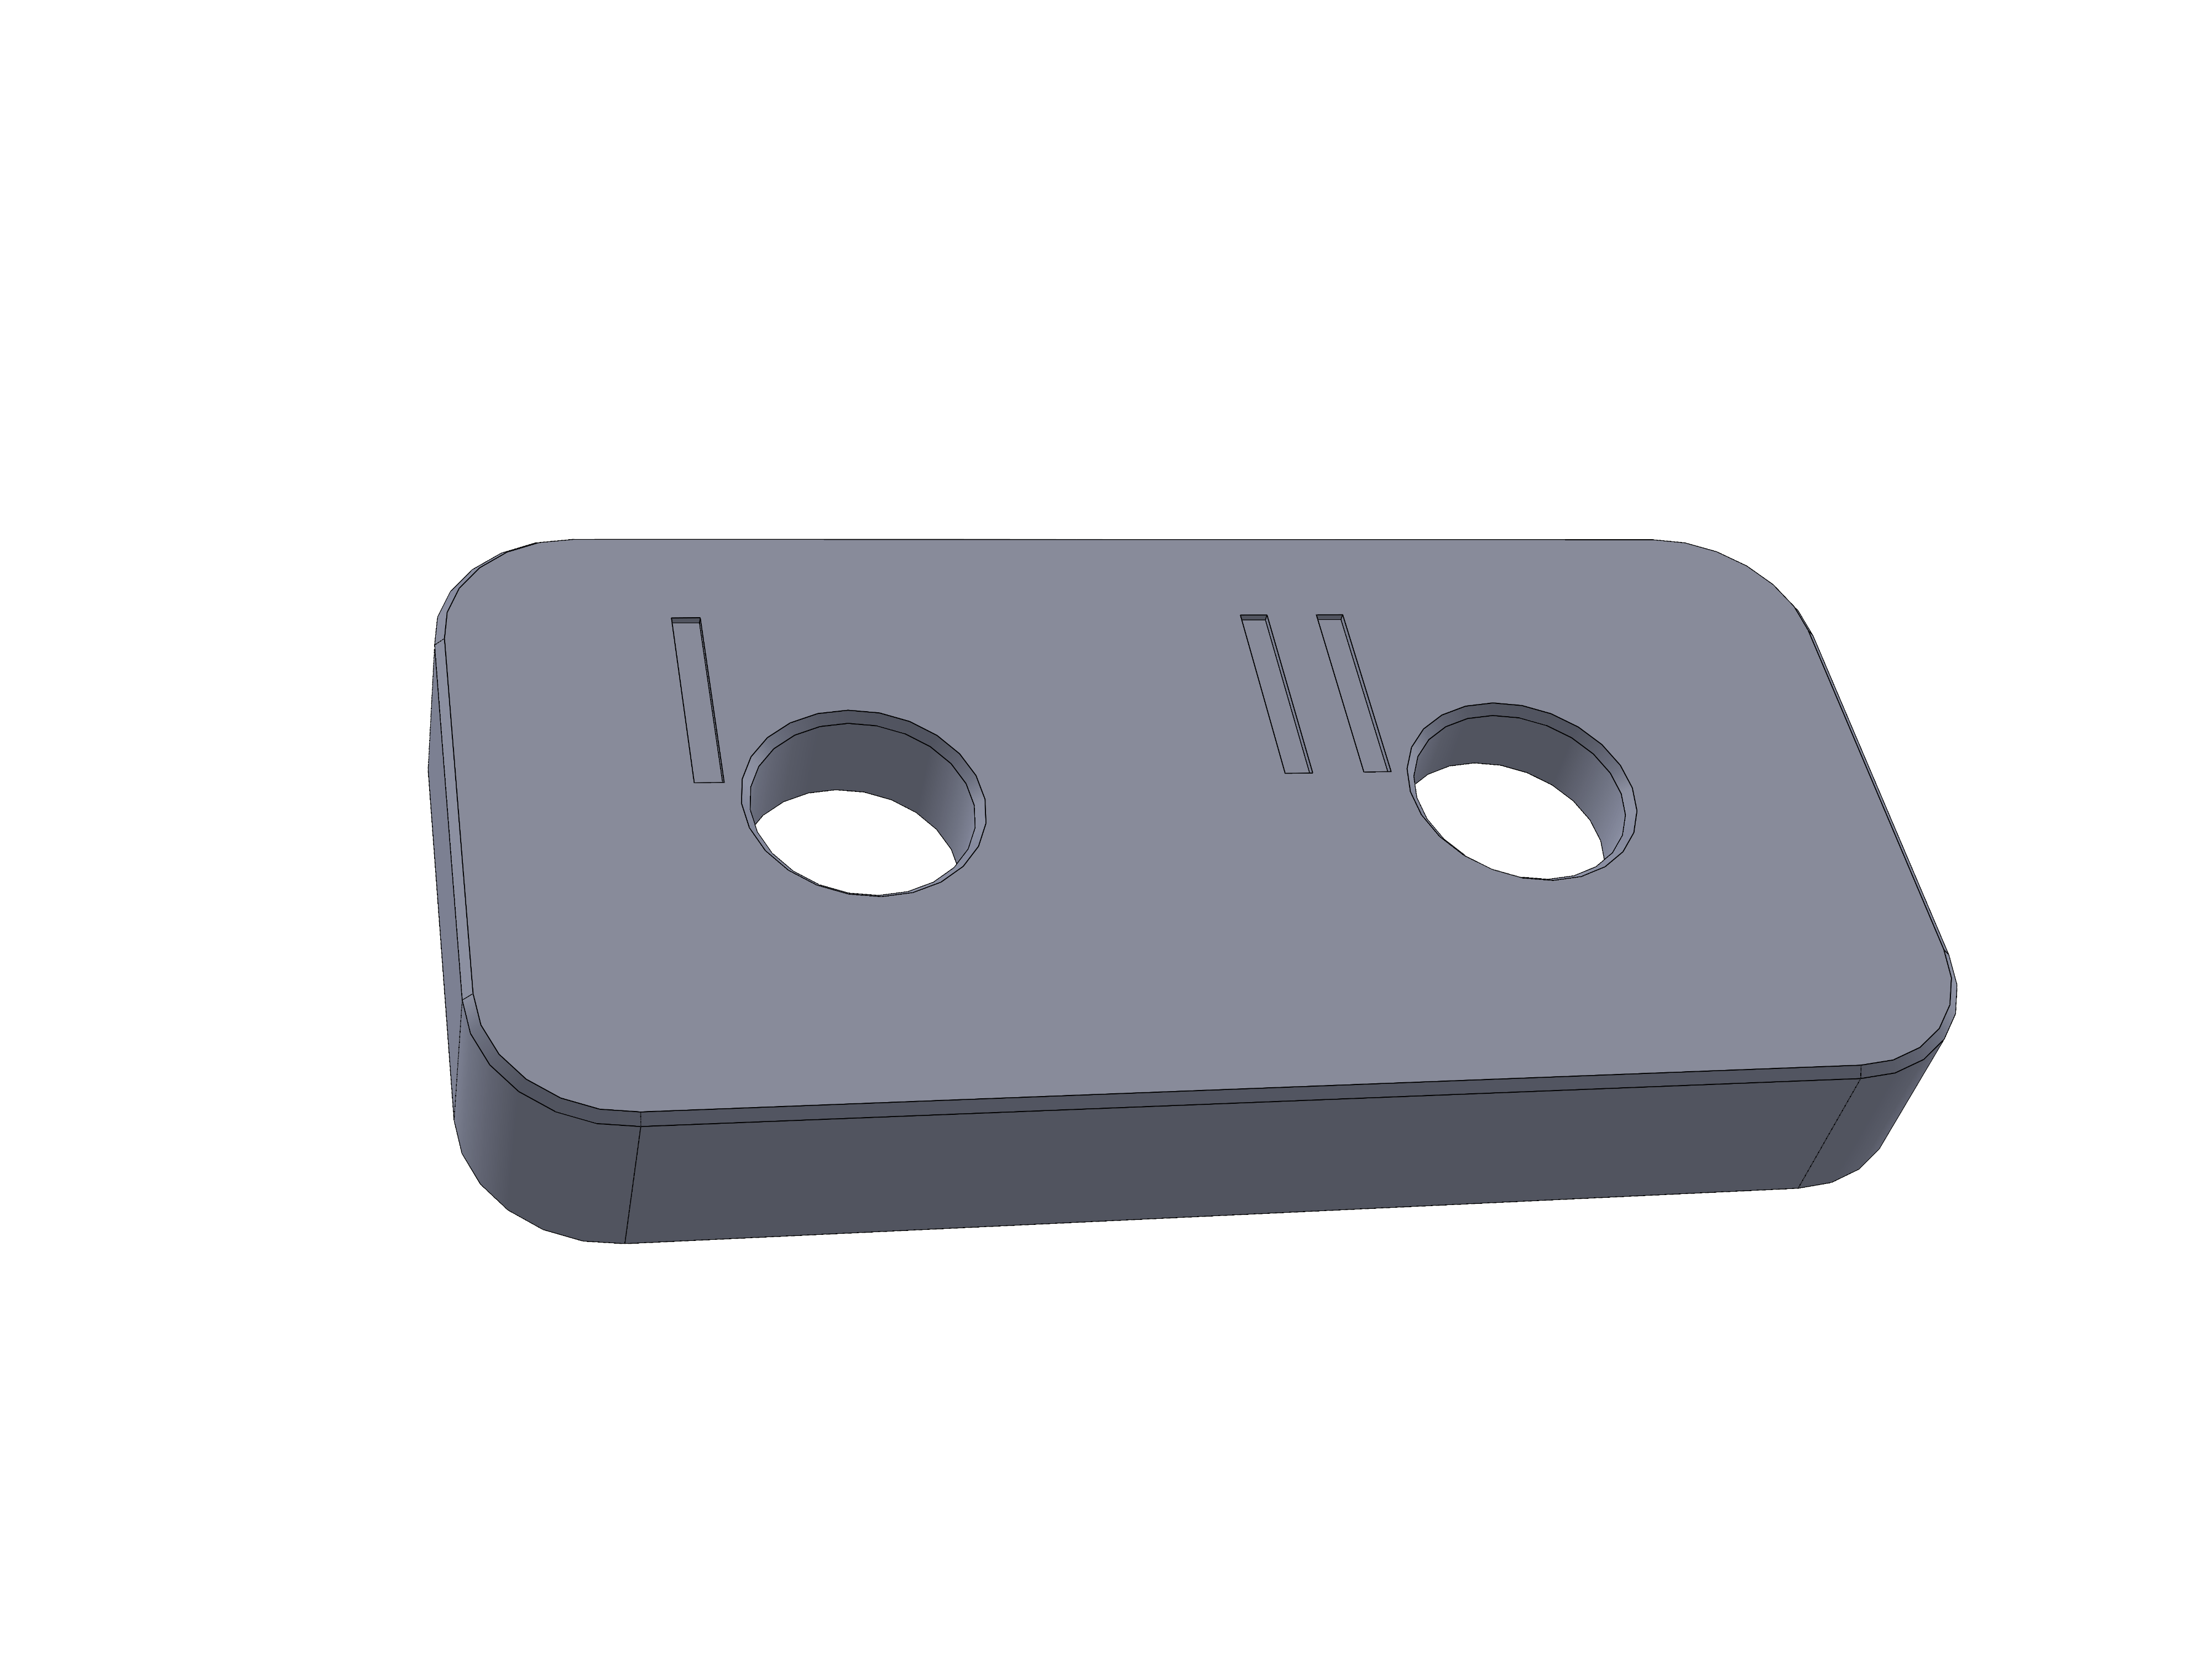
¶ Bearing Alignment Tool
The Bearing Alignment Tool has two positions, referenced by Position I and II.
¶ Step 1
- Assembly
- Parts
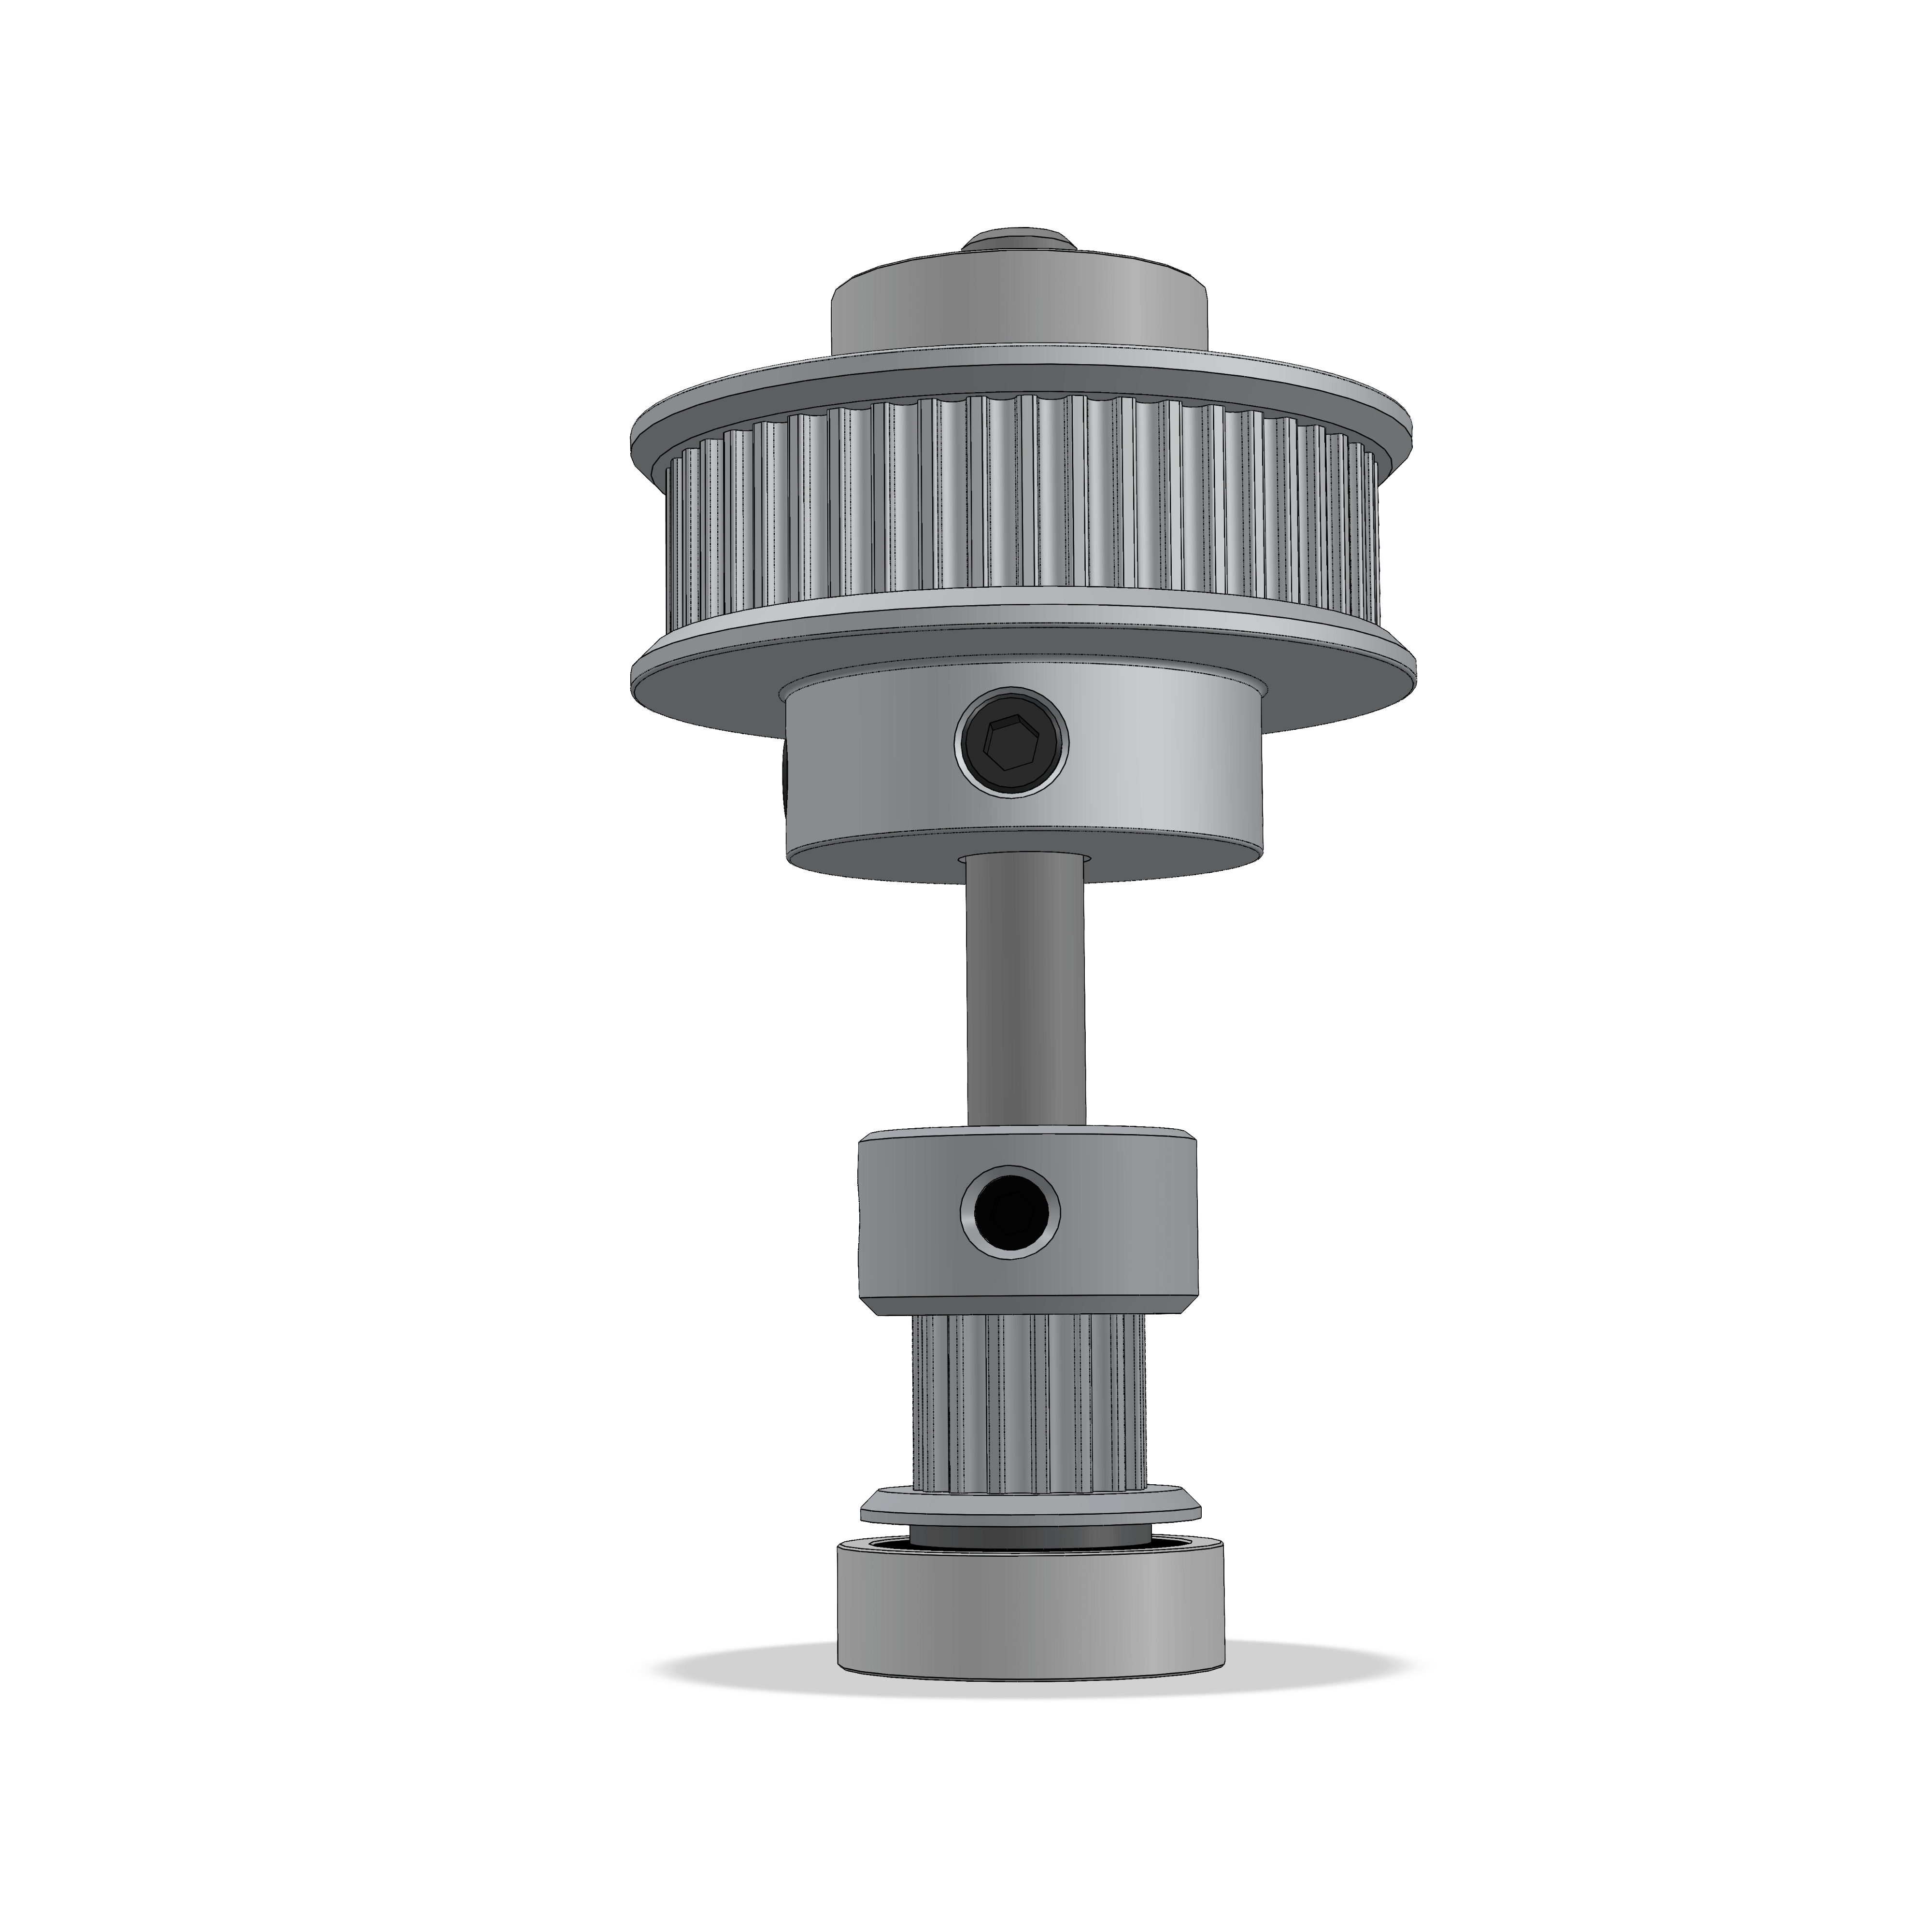
- Insert a 625 bearing into Postion I of the alignment tool.
- Insert the 5x50mm shaft so that it's flush with the bottom of the tool. You might need a hammer if its tight.
- Then slide a Shim and the Pulleys on as shown. All parts should touch each other. Tighten the grub screws to torque 3.
- Slide the other Shim and 625 bearing on the top. The bearing should be flush with the shaft now. If it's not, adjust the position of the 48T pulley accordingly.
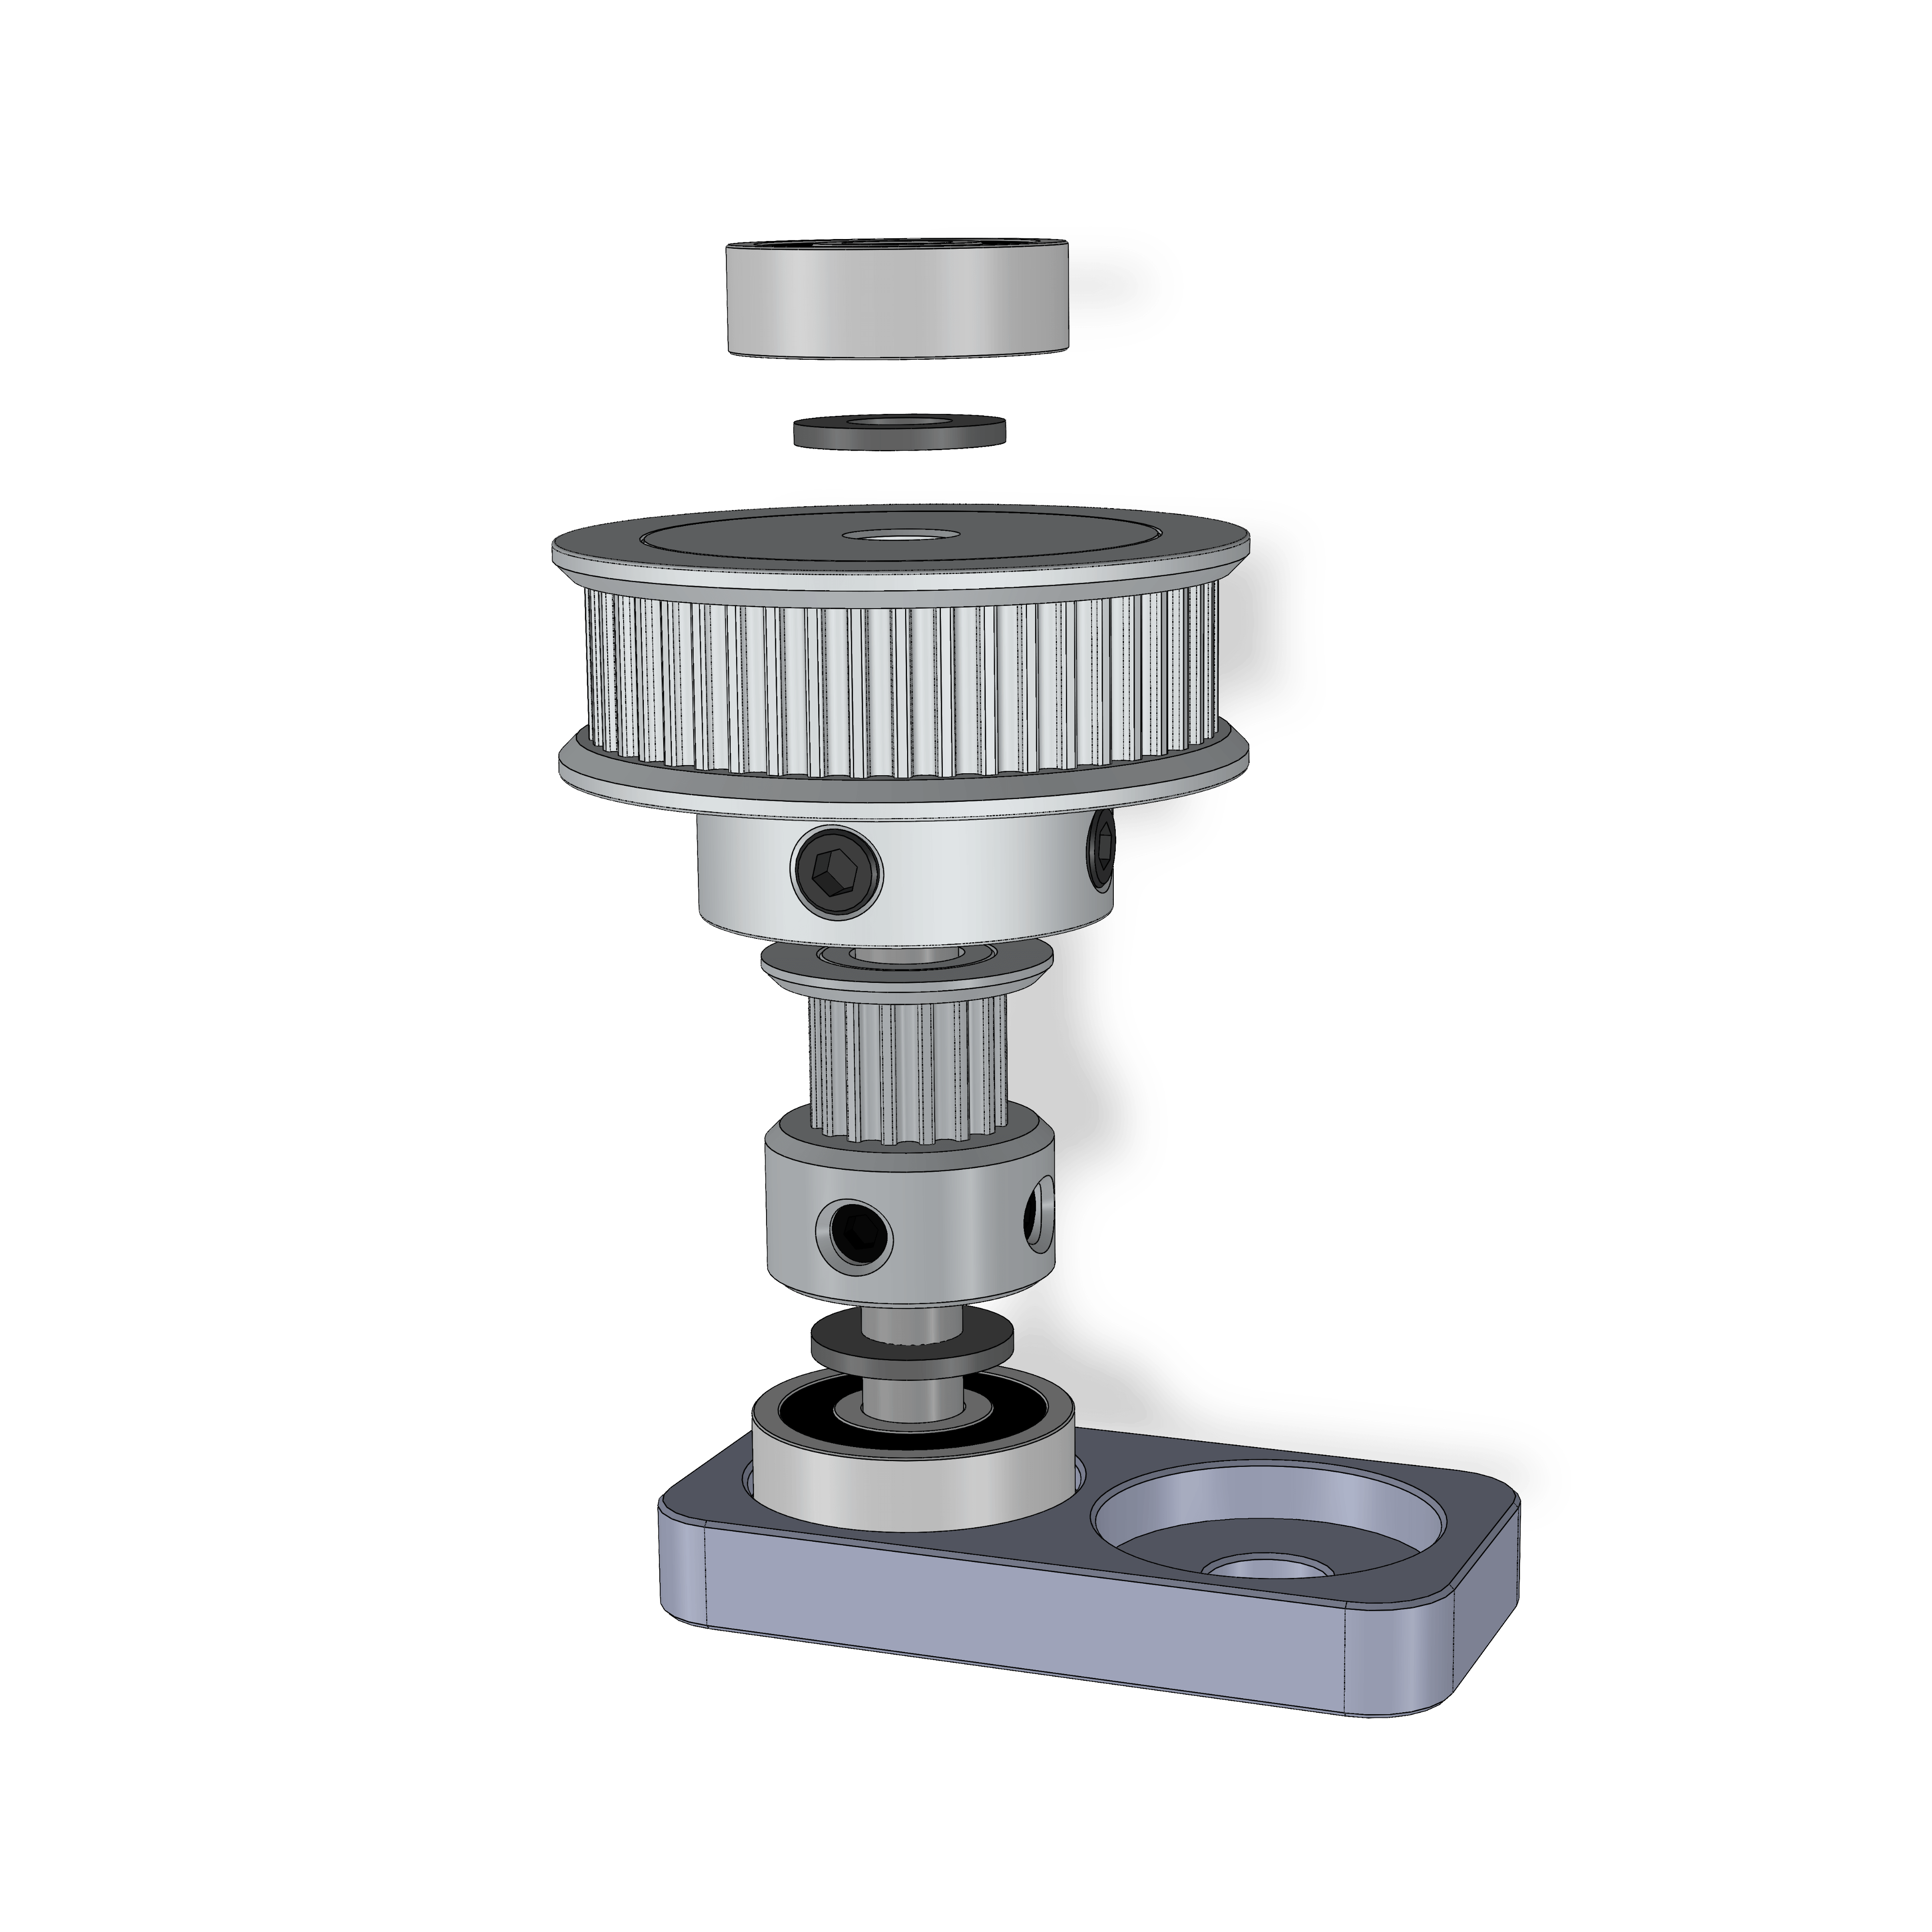
¶ Step 2

- Assembly
- Parts
- Put the gearbox_625_top & bottom parts on the bearings as shown.
¶ Step 3
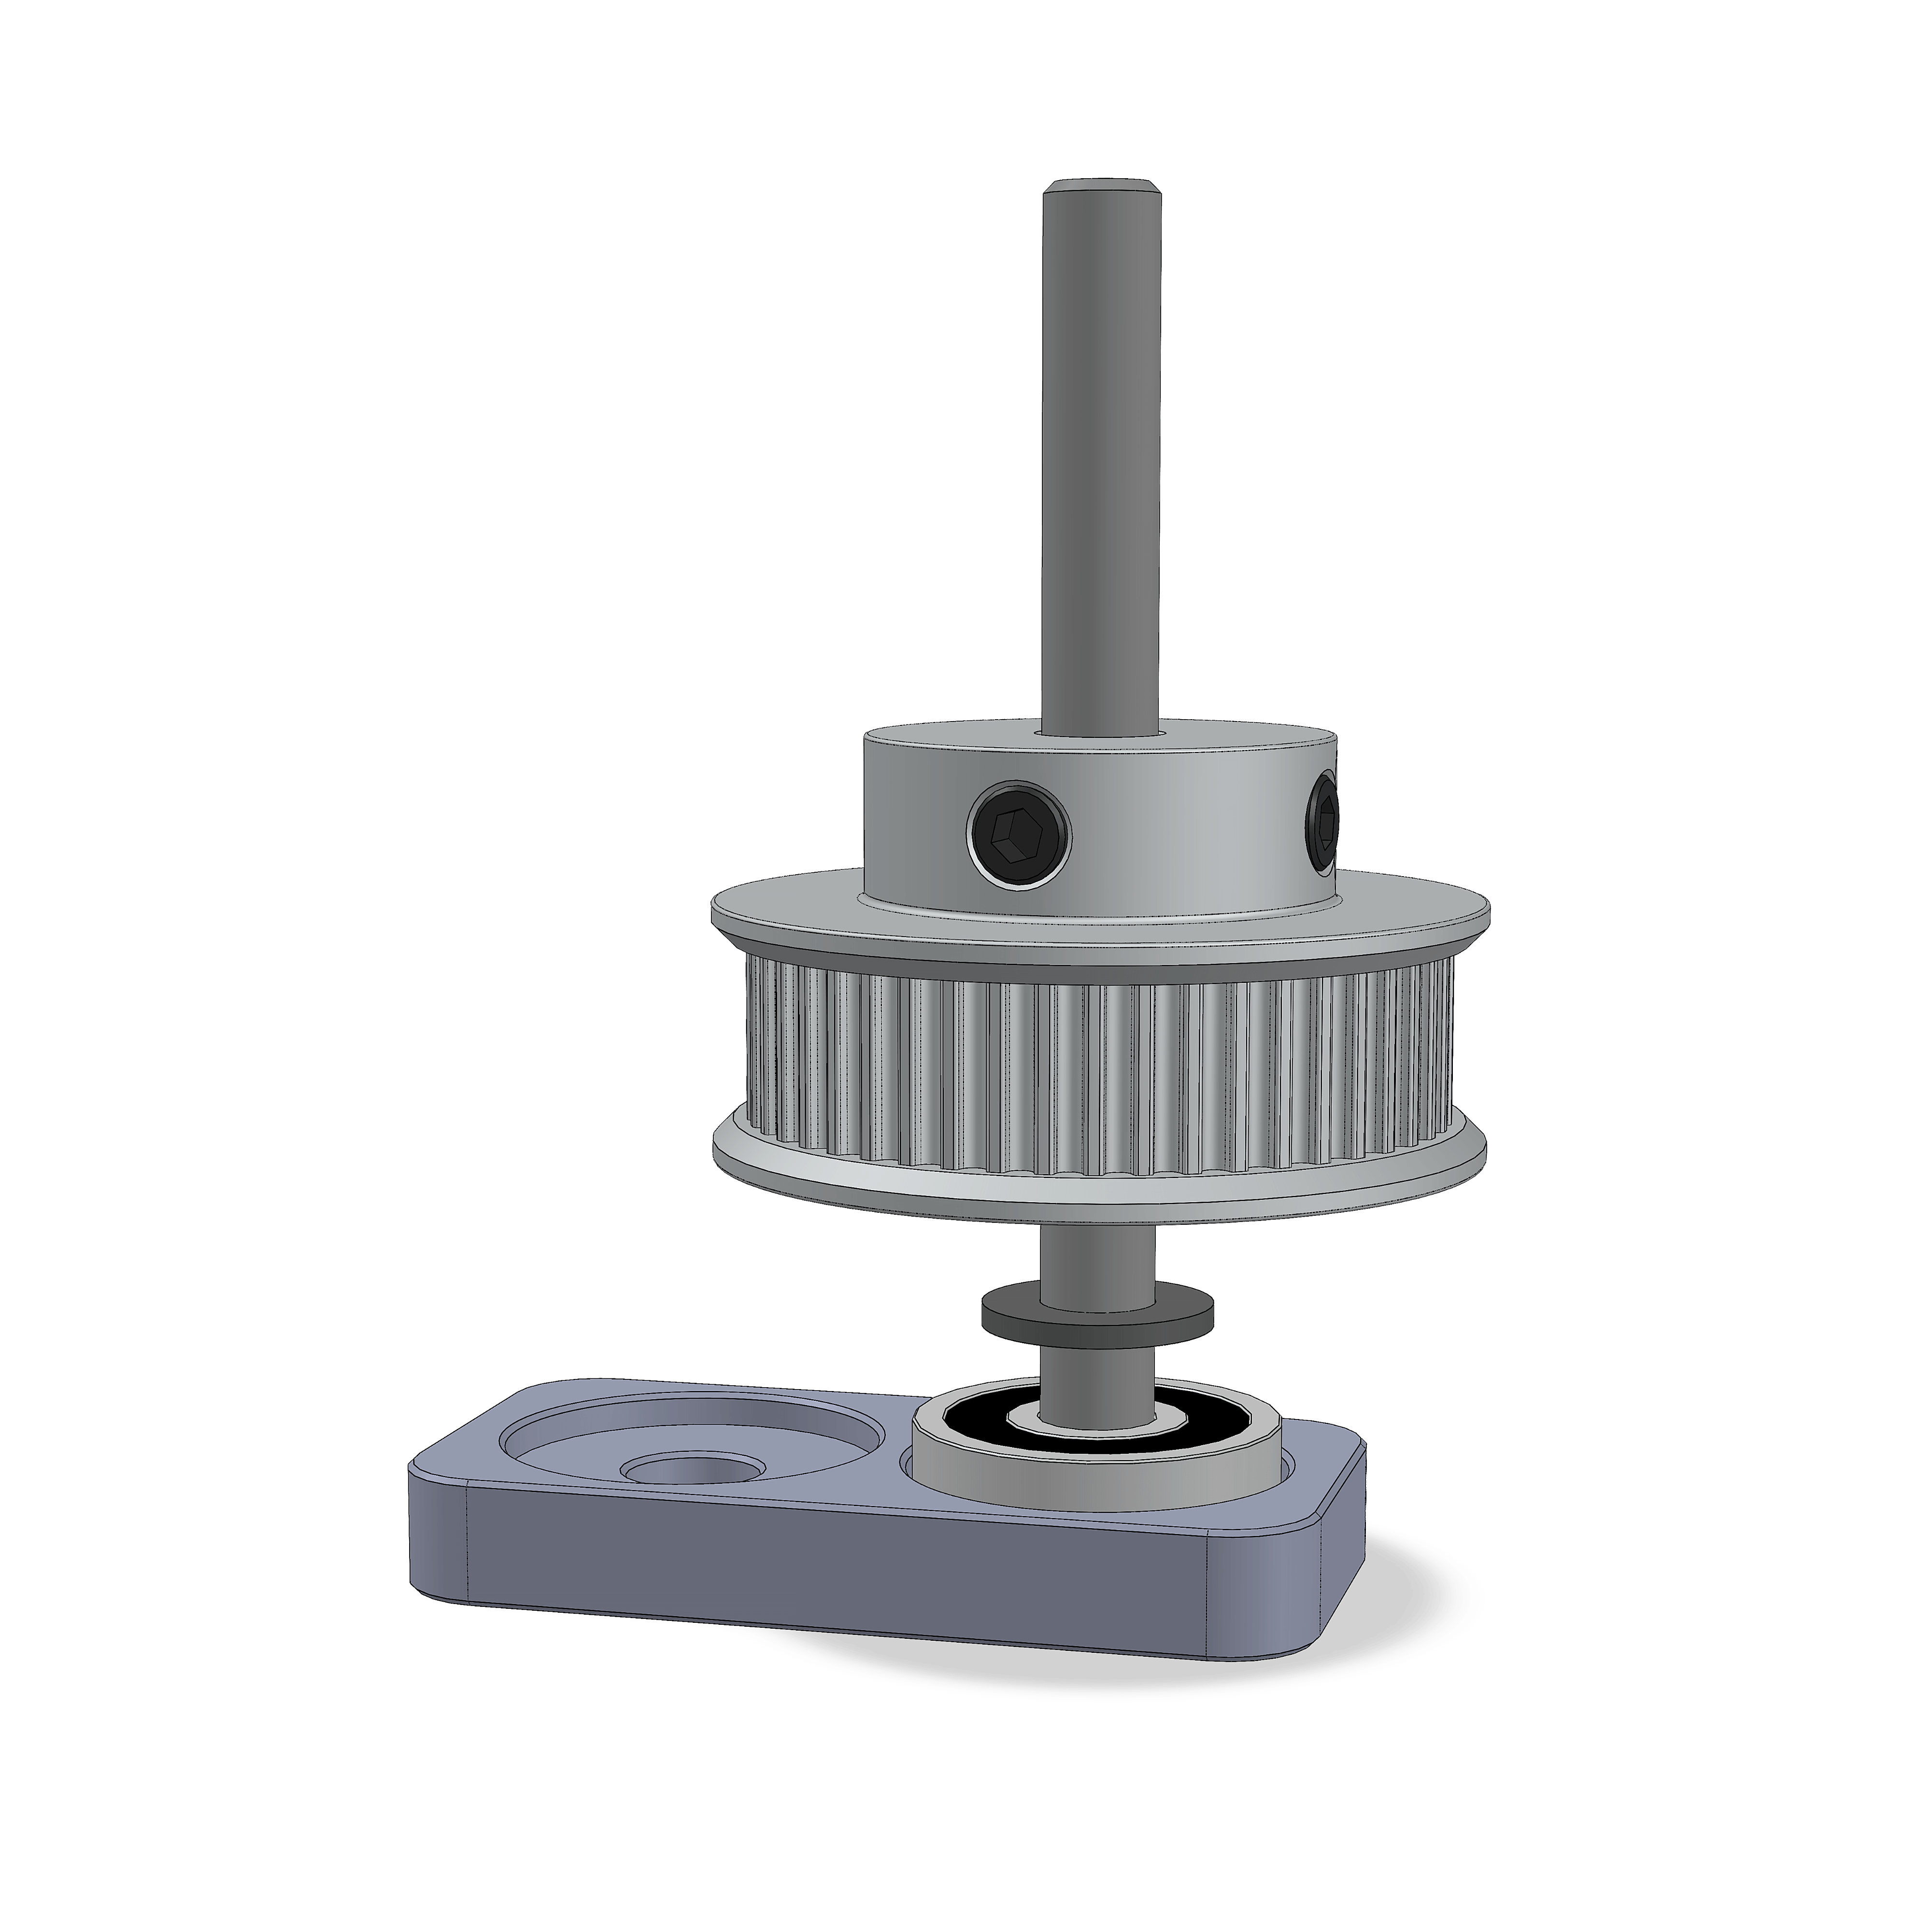
- Assembly
- Parts
- Insert a 625 bearing into Position II of the alignment tool.
- Insert the 5x60mm shaft so that it's flush with the bottom of the tool. You might need a hammer if its tight.
- Slide a Shim and a GT2 48T pulley on top as shown, all parts should touch each other. Tighten the grub screws to torque 3.
¶ Step 4
- Assembly
- On the other end, add the GT2 16T pulley, a Shim and 625 bearing. The bearing should be flush with the end of the shaft. Tighten the grub screws to torque 3.
¶ Step 5
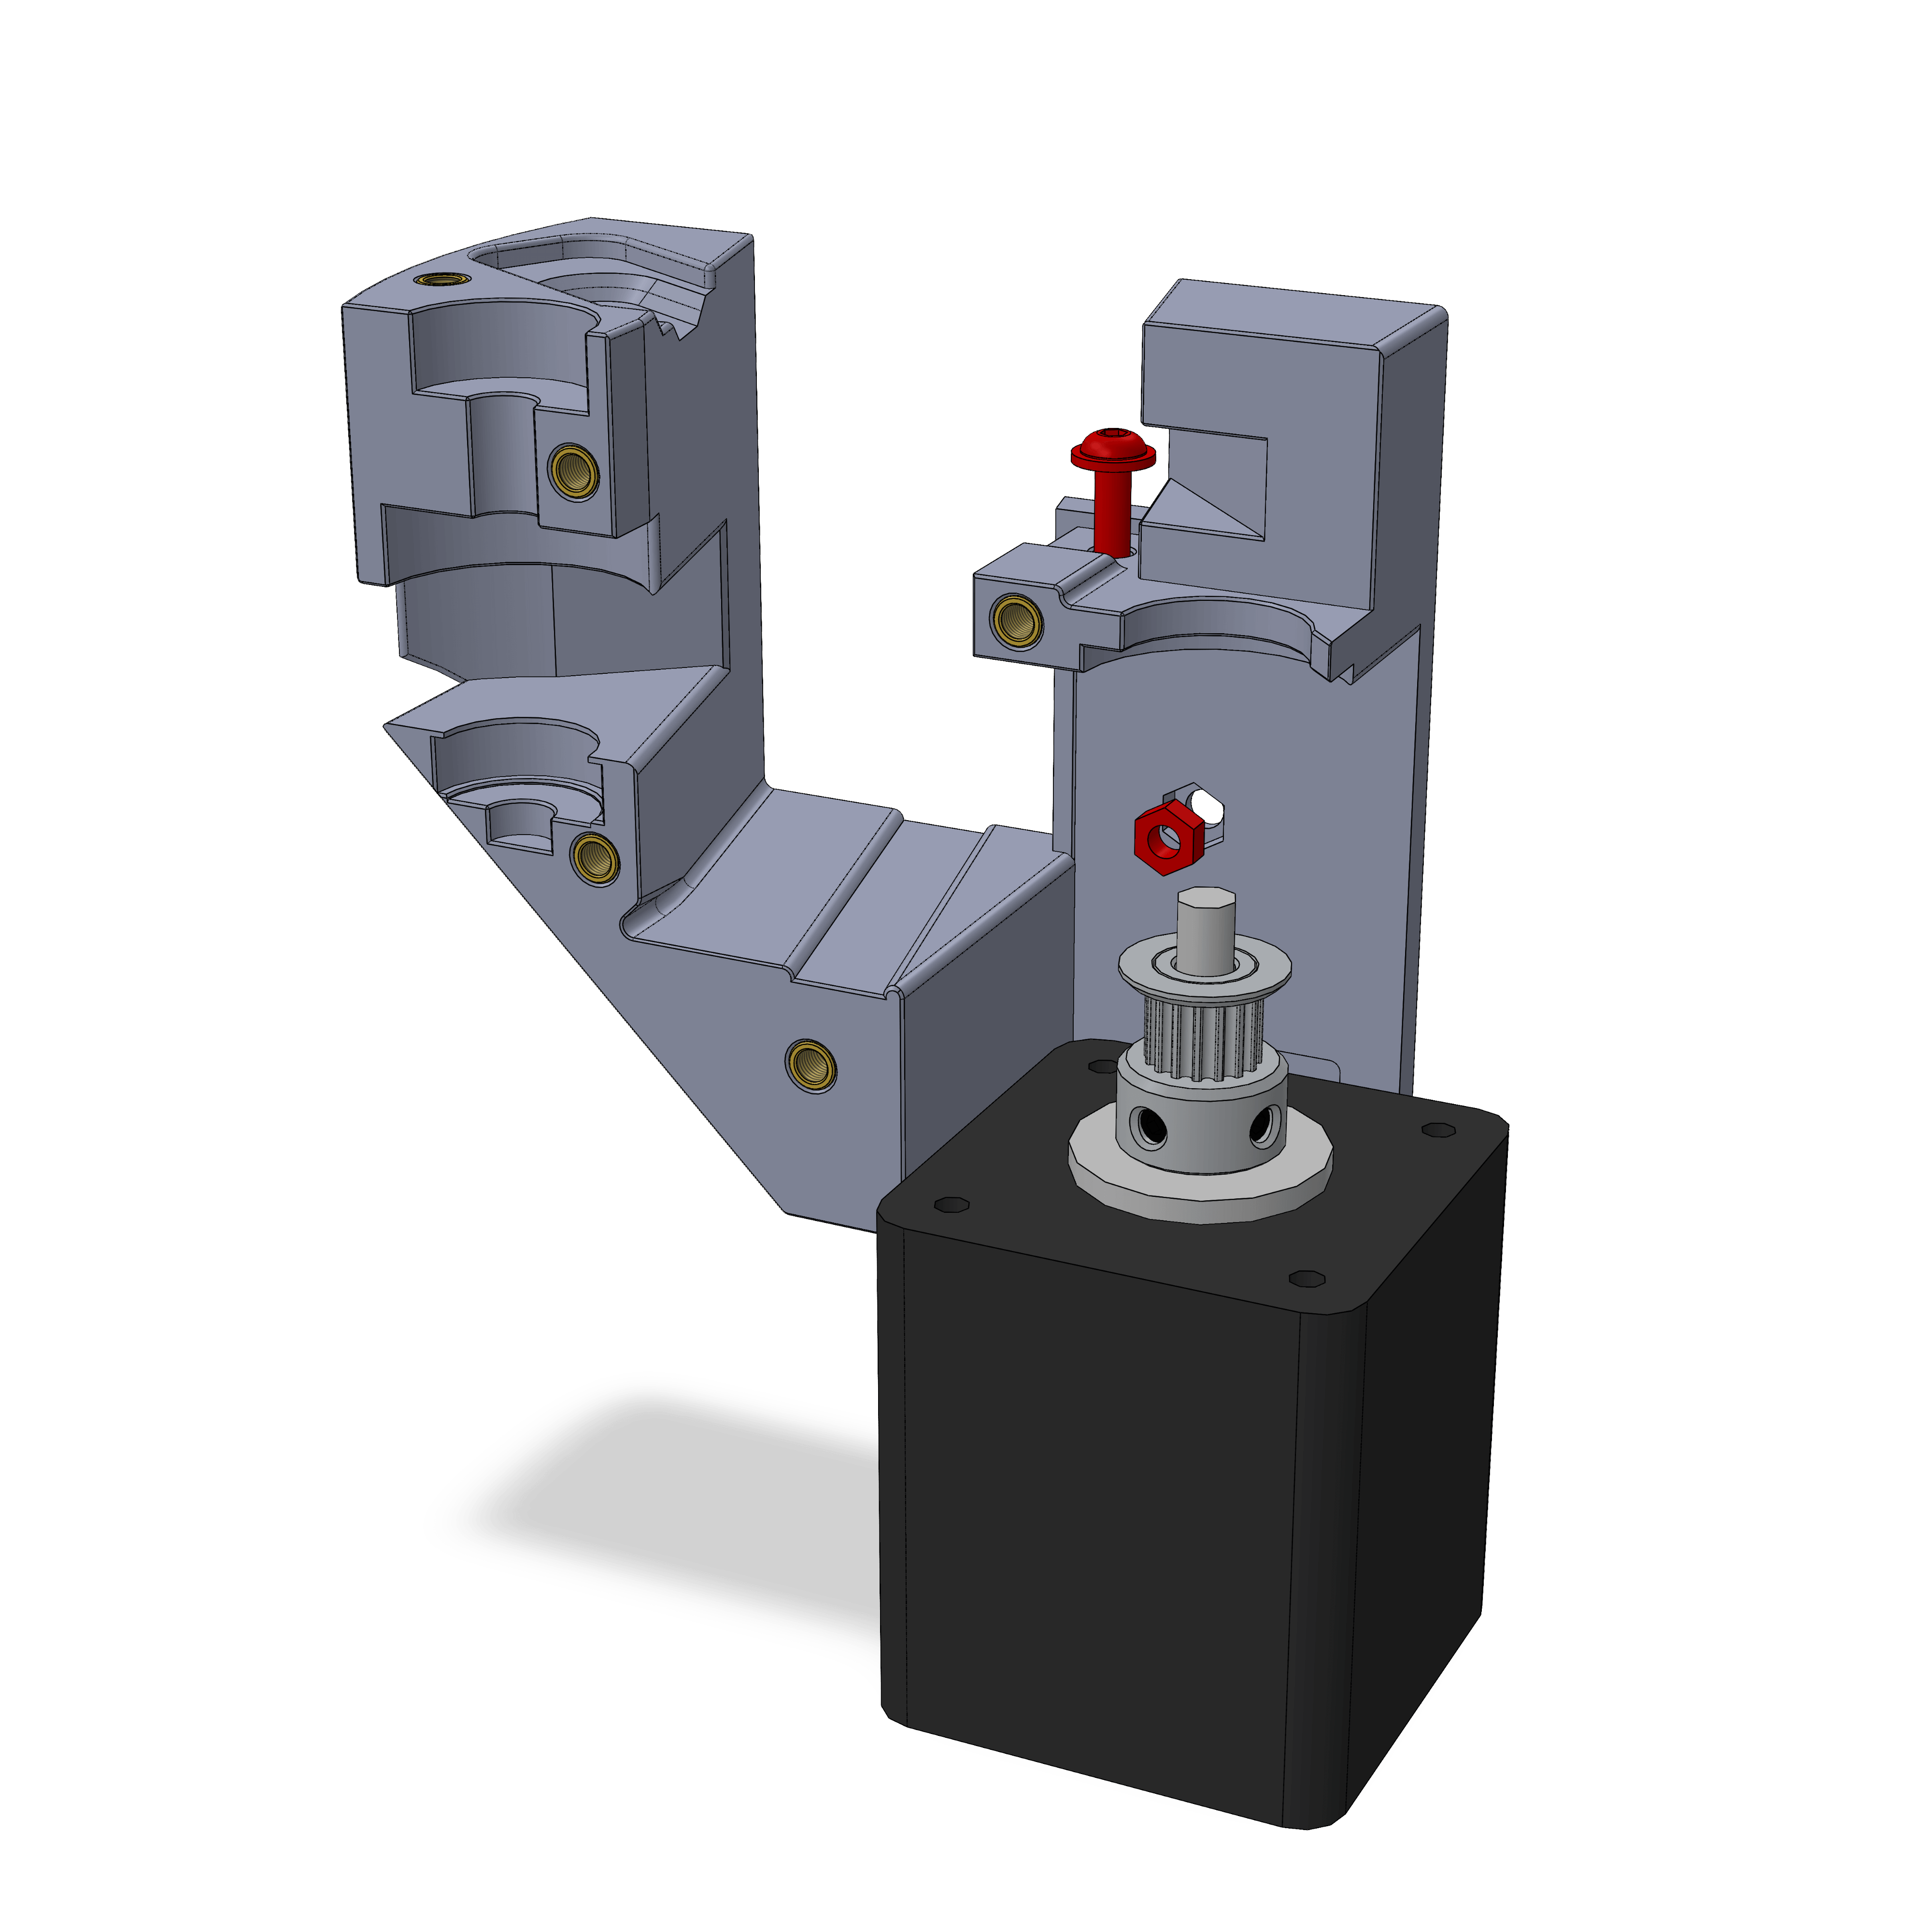
- Assembly
- Parts
- Insert the M3 Nut as shown. You might have to pull it into its slot as described above.
- Attach the pulley to the stepper. It should have a little gap to the base of the stepper, about the width of a M3 washer. Tighten the grub screws to torque 3, make sure one of them aligns with the D-Cut if your stepper has one.
- Attach the stepper with a M3x10 flathead and washer. Orient it so the wire is on the backside and goes into the little cutout. Tighten to torque 3.
¶ Step 6
- Assembly
- Parts
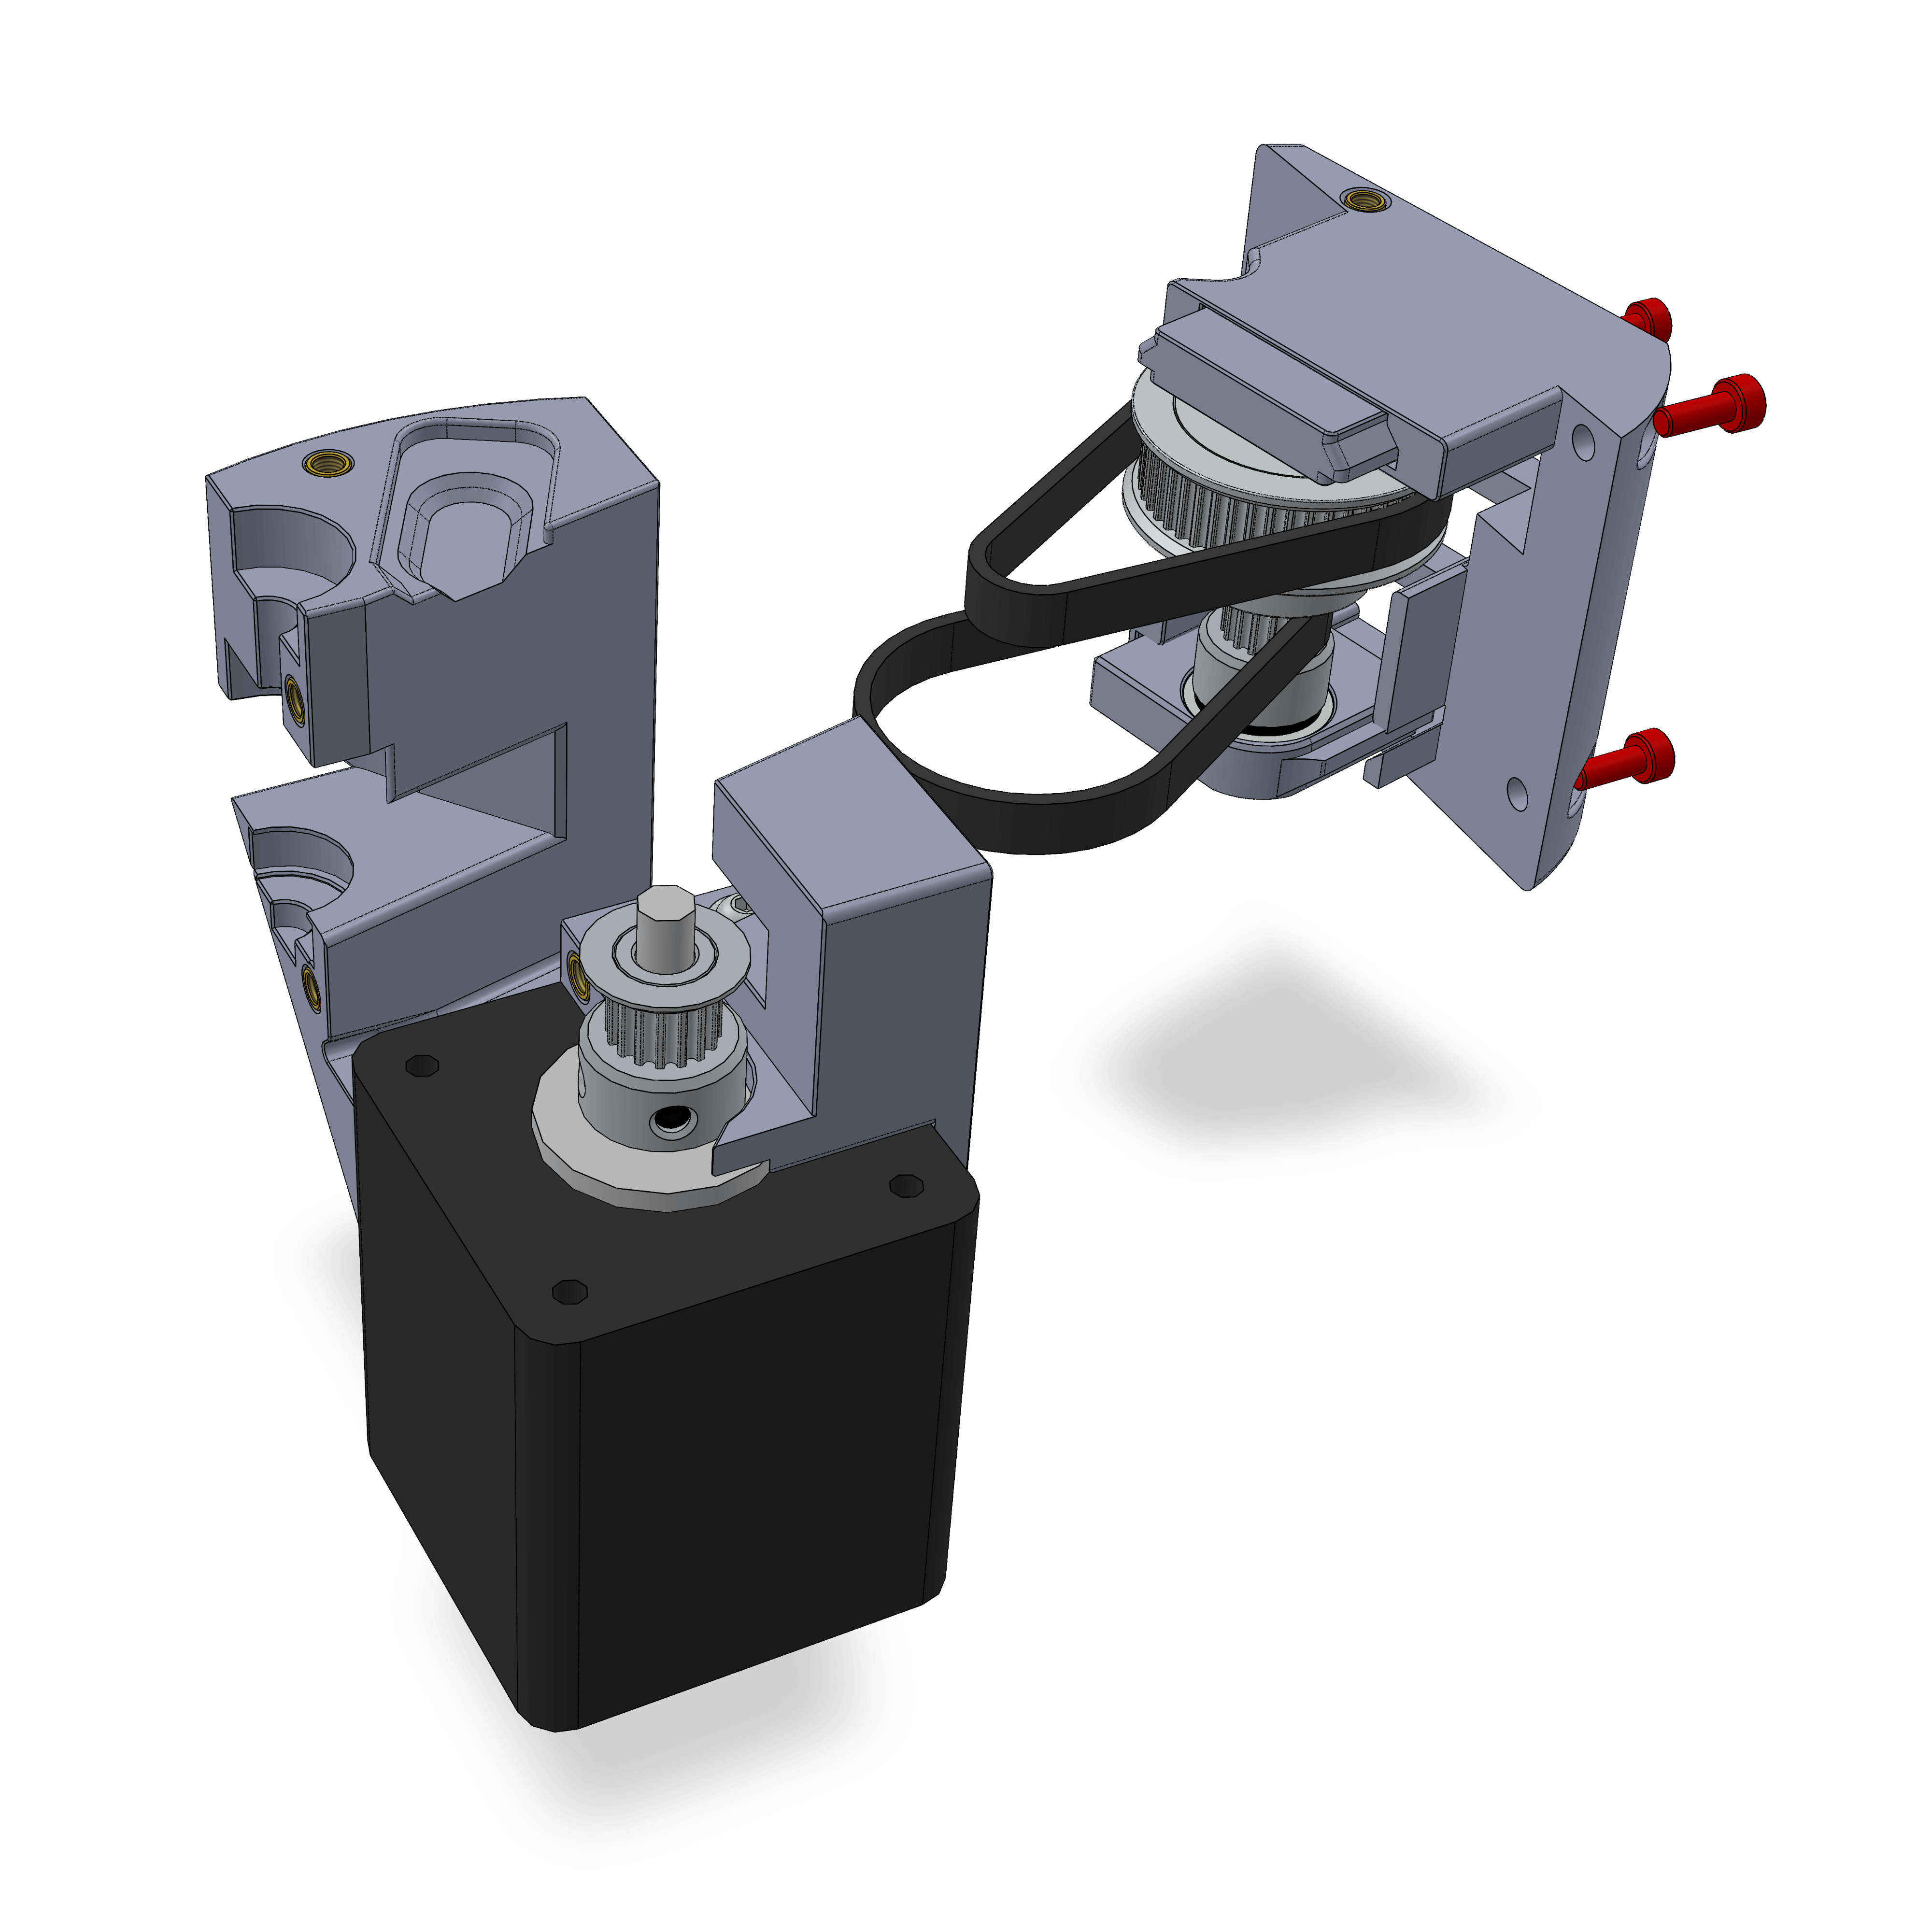
- Put the belts around the pulleys and hold them in place.
- Slide the Assembly from Step 2 into the
gearbox_tensioner_topwith the inserts facing away. - Slide the
gearbox_tensioner_topinto the gearbox body. - Tighten to torque 2 with M3x8 screws
¶ Parts
- gearbox_tensioner_top
- Assembly from Step 2
¶ Hardware
- 3x M3x8 screws
- 2x GT2 belt 142mm - 71T
¶ Step 7
- Assembly
- Parts
- Put the top belt over the stepper pulley. Make sure the belt doesn't rub on any printed part and the large pulley doesn' collide with any screw.
- Put the bottom belt around the larger pulley of the Step 4 Assembly, then push its bearing into the gearbox body.
¶ Hardware
- Assembly from Step 4
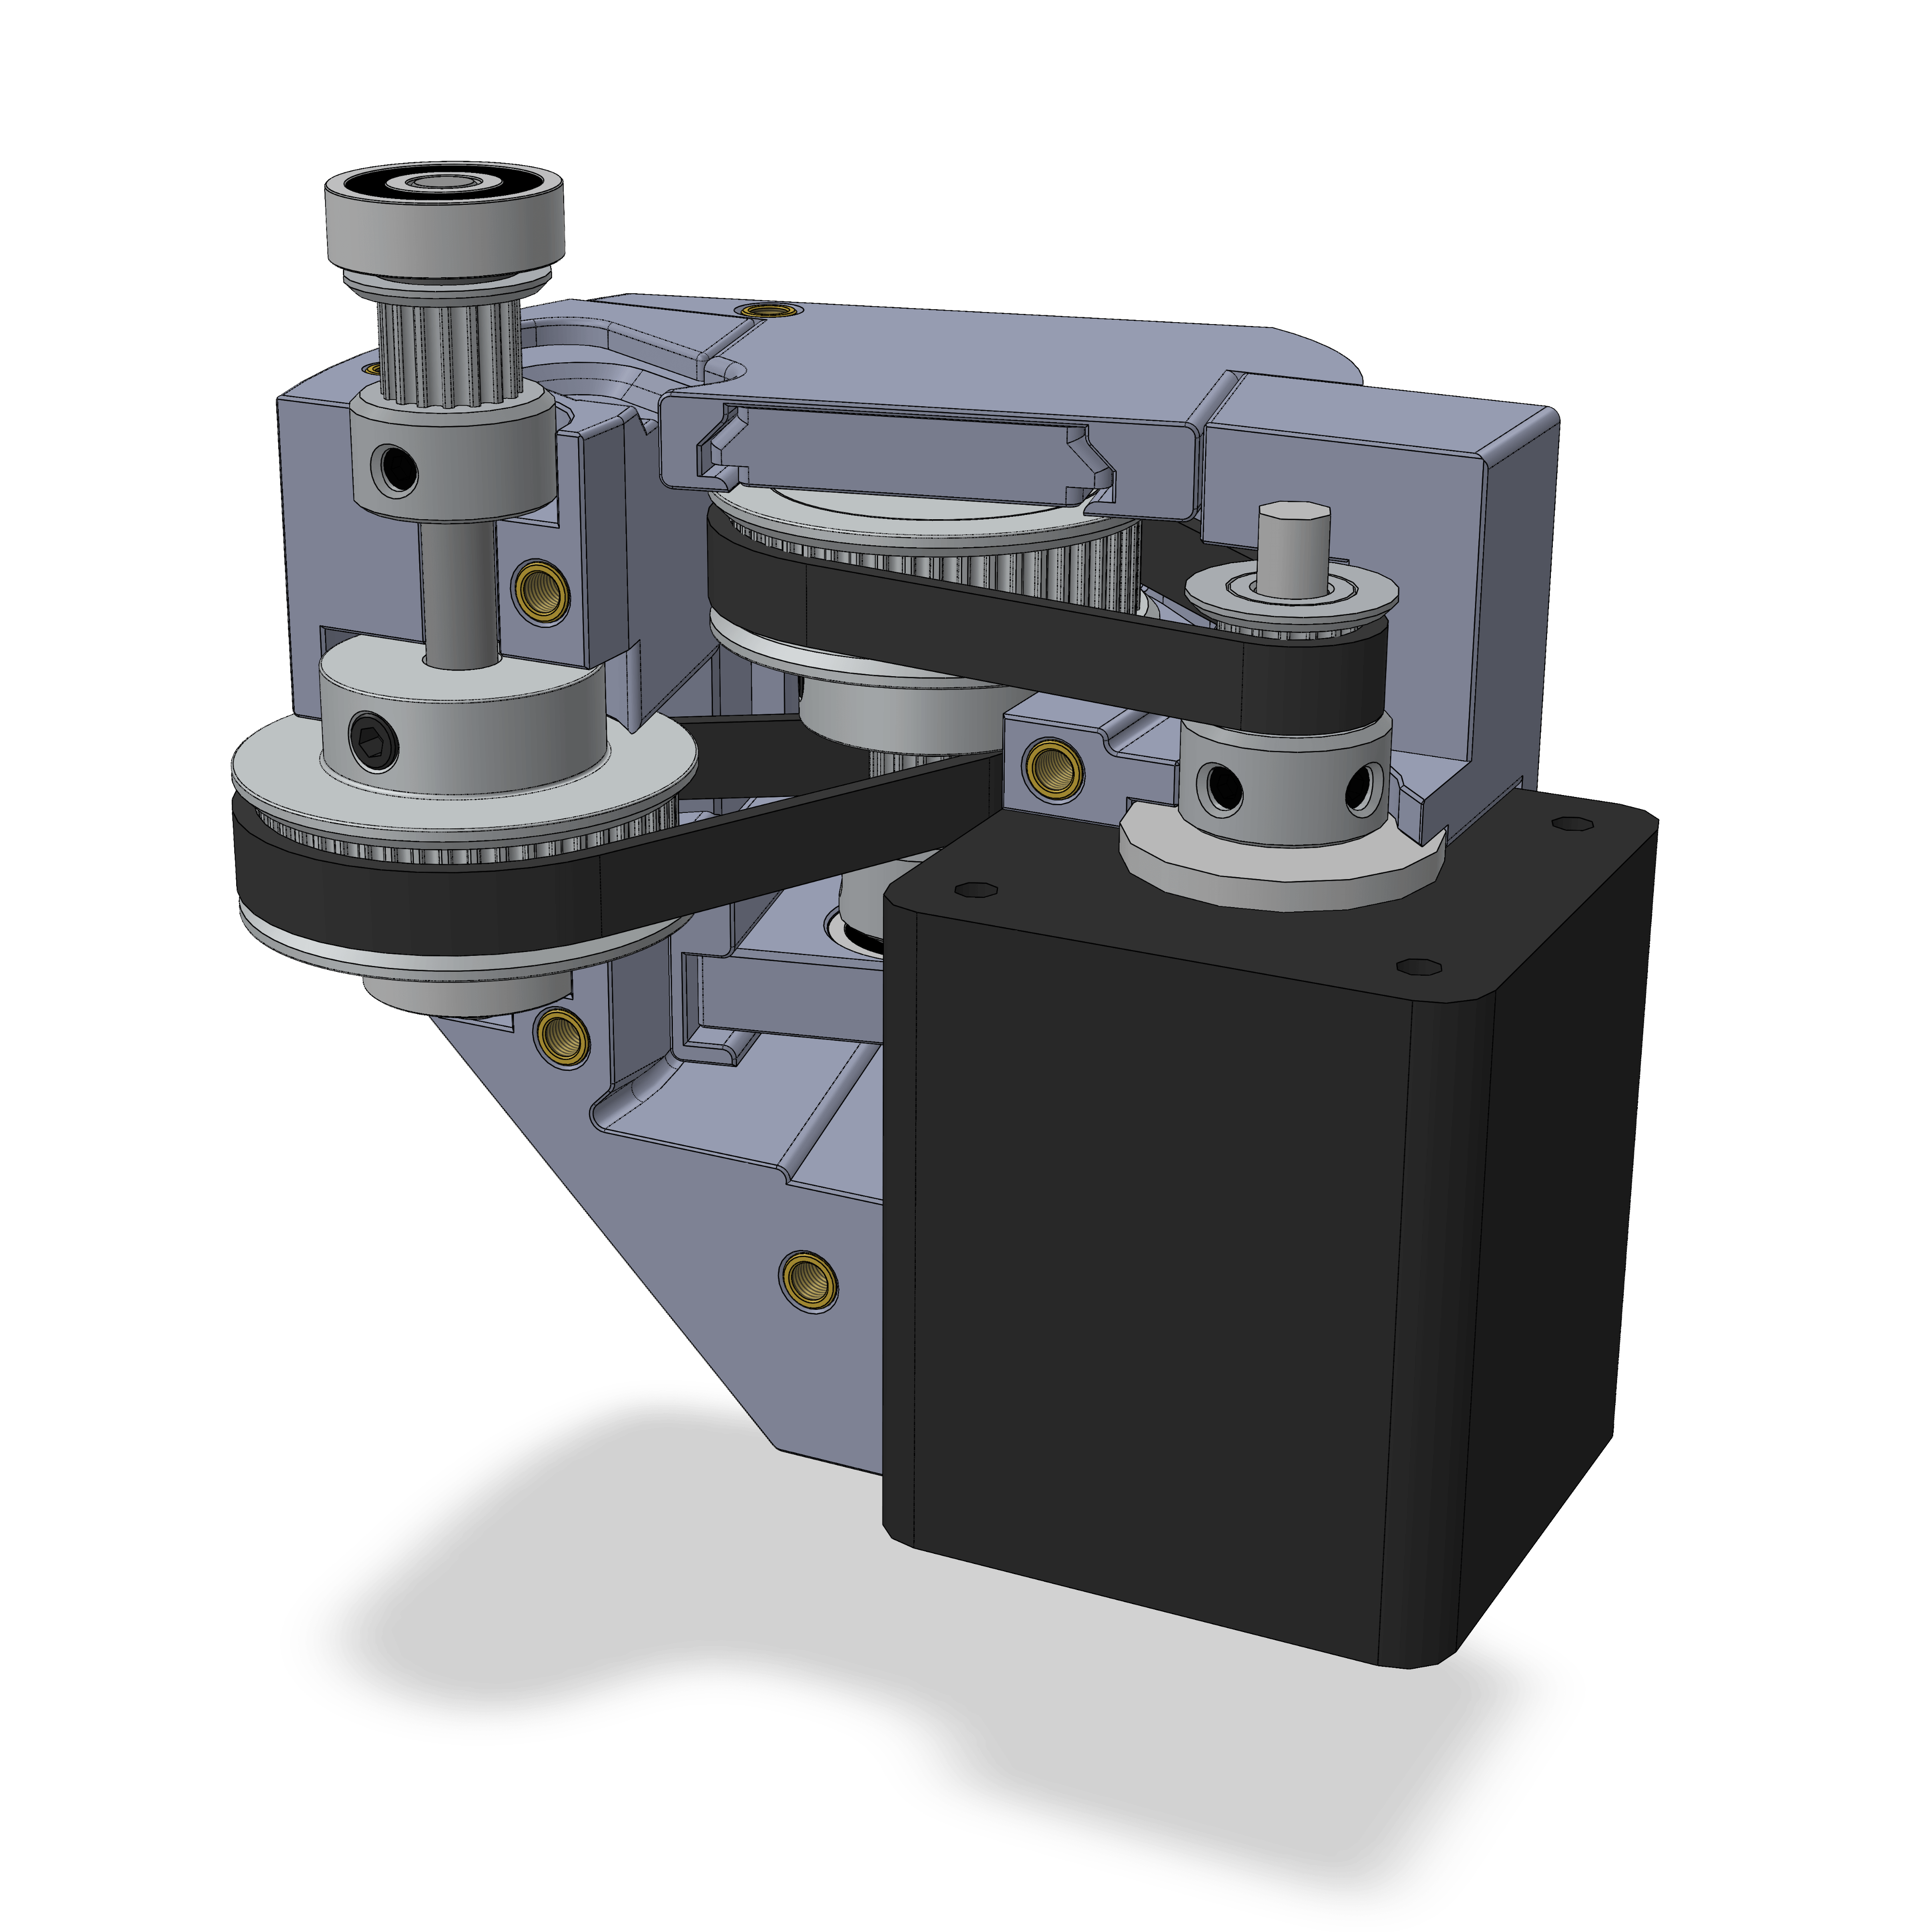
¶ Step 8 (2x)
- Assembly
- Parts
- Insert the bearings in the printed part as shown and tighten with the M5 screw. Only tighten lightly, if the bearings can't spin freely that's too tight.
- Make sure the bearings can spin without resistance.
- Make two of the tensioners.
¶ Step 9
- Assembly
- Parts
- Place one of the tensioners in its channel, with the screw head facing down.
- Push the
drive_pulley_holderon top of the bearing and fasten with two M3x12 screws to torque 2. - Verify the outer shaft and pulleys can spin well.
¶ Step 10
- Assembly
- Parts
- Attach the
Tensioner_lidwith 3 M3x10 flathead screws. Tighten to torque 2. - The Thumbscrews with washers go into the inserts on the 625 bearing holders (Step 2). They are used to tension both of the belts at the same time.
- Now is a good chance to test the tension, as you can still access the belts. The Thumbscrews should not be tightened with force, rather they need suprisingly little. Overtensioning the belts has a detrimental effect to performance. They should be tensioned so that there is no backlash, but you can still deflect the belt several mm when pushing on them.
When storing the mount for a longer time, remove the tension entirely.
¶ Step 11
- Assembly
- Parts
- Attach the
gearbox_sidewith 5 M3x12 screws and tighten to torque 2.
You may attach or remove the part at any point, it is just a cover and doesn't affect the function of the gearbox.
OAE Assembly Part 1: RA Gearbox
OAE Assembly Part 2: Base
OAE Assembly Part 3: DEC
OAE Assembly Part 4: AZ Base
OAE Assembly Part 5: ALT and Final Assembly
OAE Additional Assembly