¶ Navigation
OAE Assembly Part 1: RA Gearbox
OAE Assembly Part 2: Base
OAE Assembly Part 3: DEC
OAE Assembly Part 4: AZ Base
OAE Assembly Part 5: ALT and Final Assembly
OAE Additional Assembly
¶ OpenAstroExplorer Assembly Part 2: Base
In this step:

¶ Step 12
- Assembly
- Parts
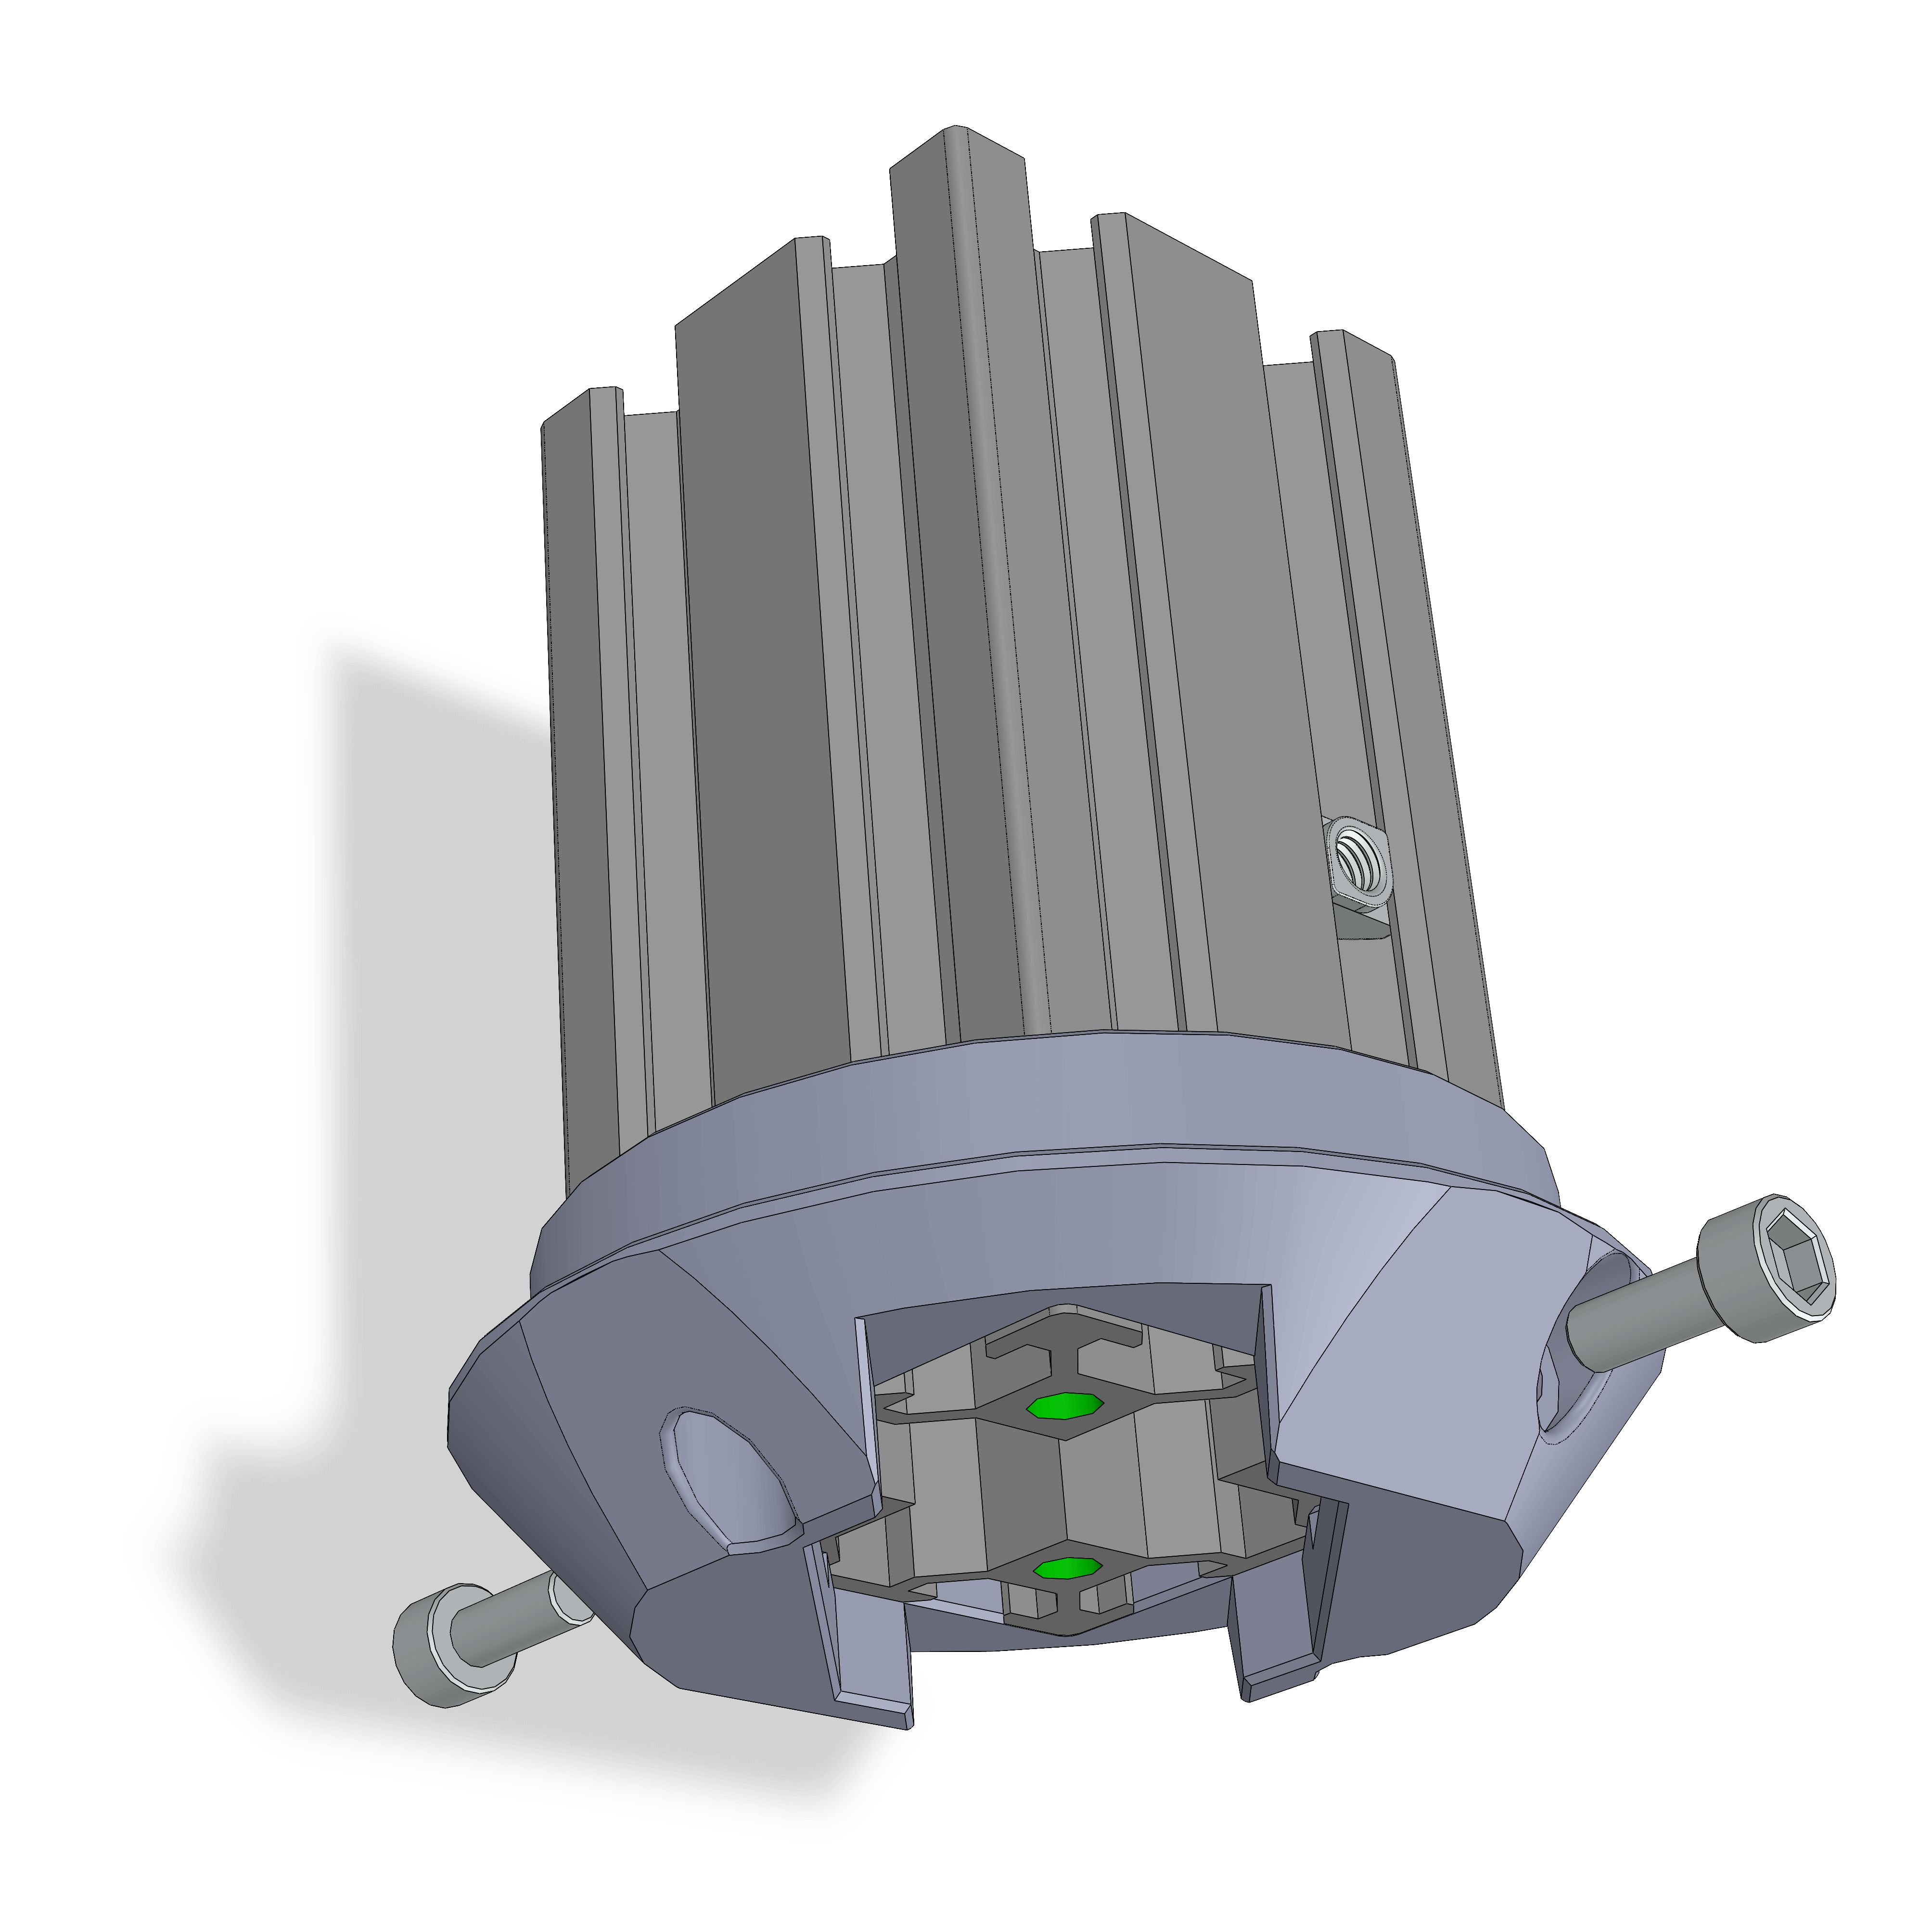
- Ensure the green holes have been tapped (5mm or 6mm depending on your extrusion) to accept an M5x12 or M6x12 button top bolt.
- Slide the printed part until snug.
- Using a flat-head screwdriver that fits within the extrusion, insert the M4 TNut to line up with the 4040adapter_front holes and tighten.
¶ Step 13
- Assembly
- Parts
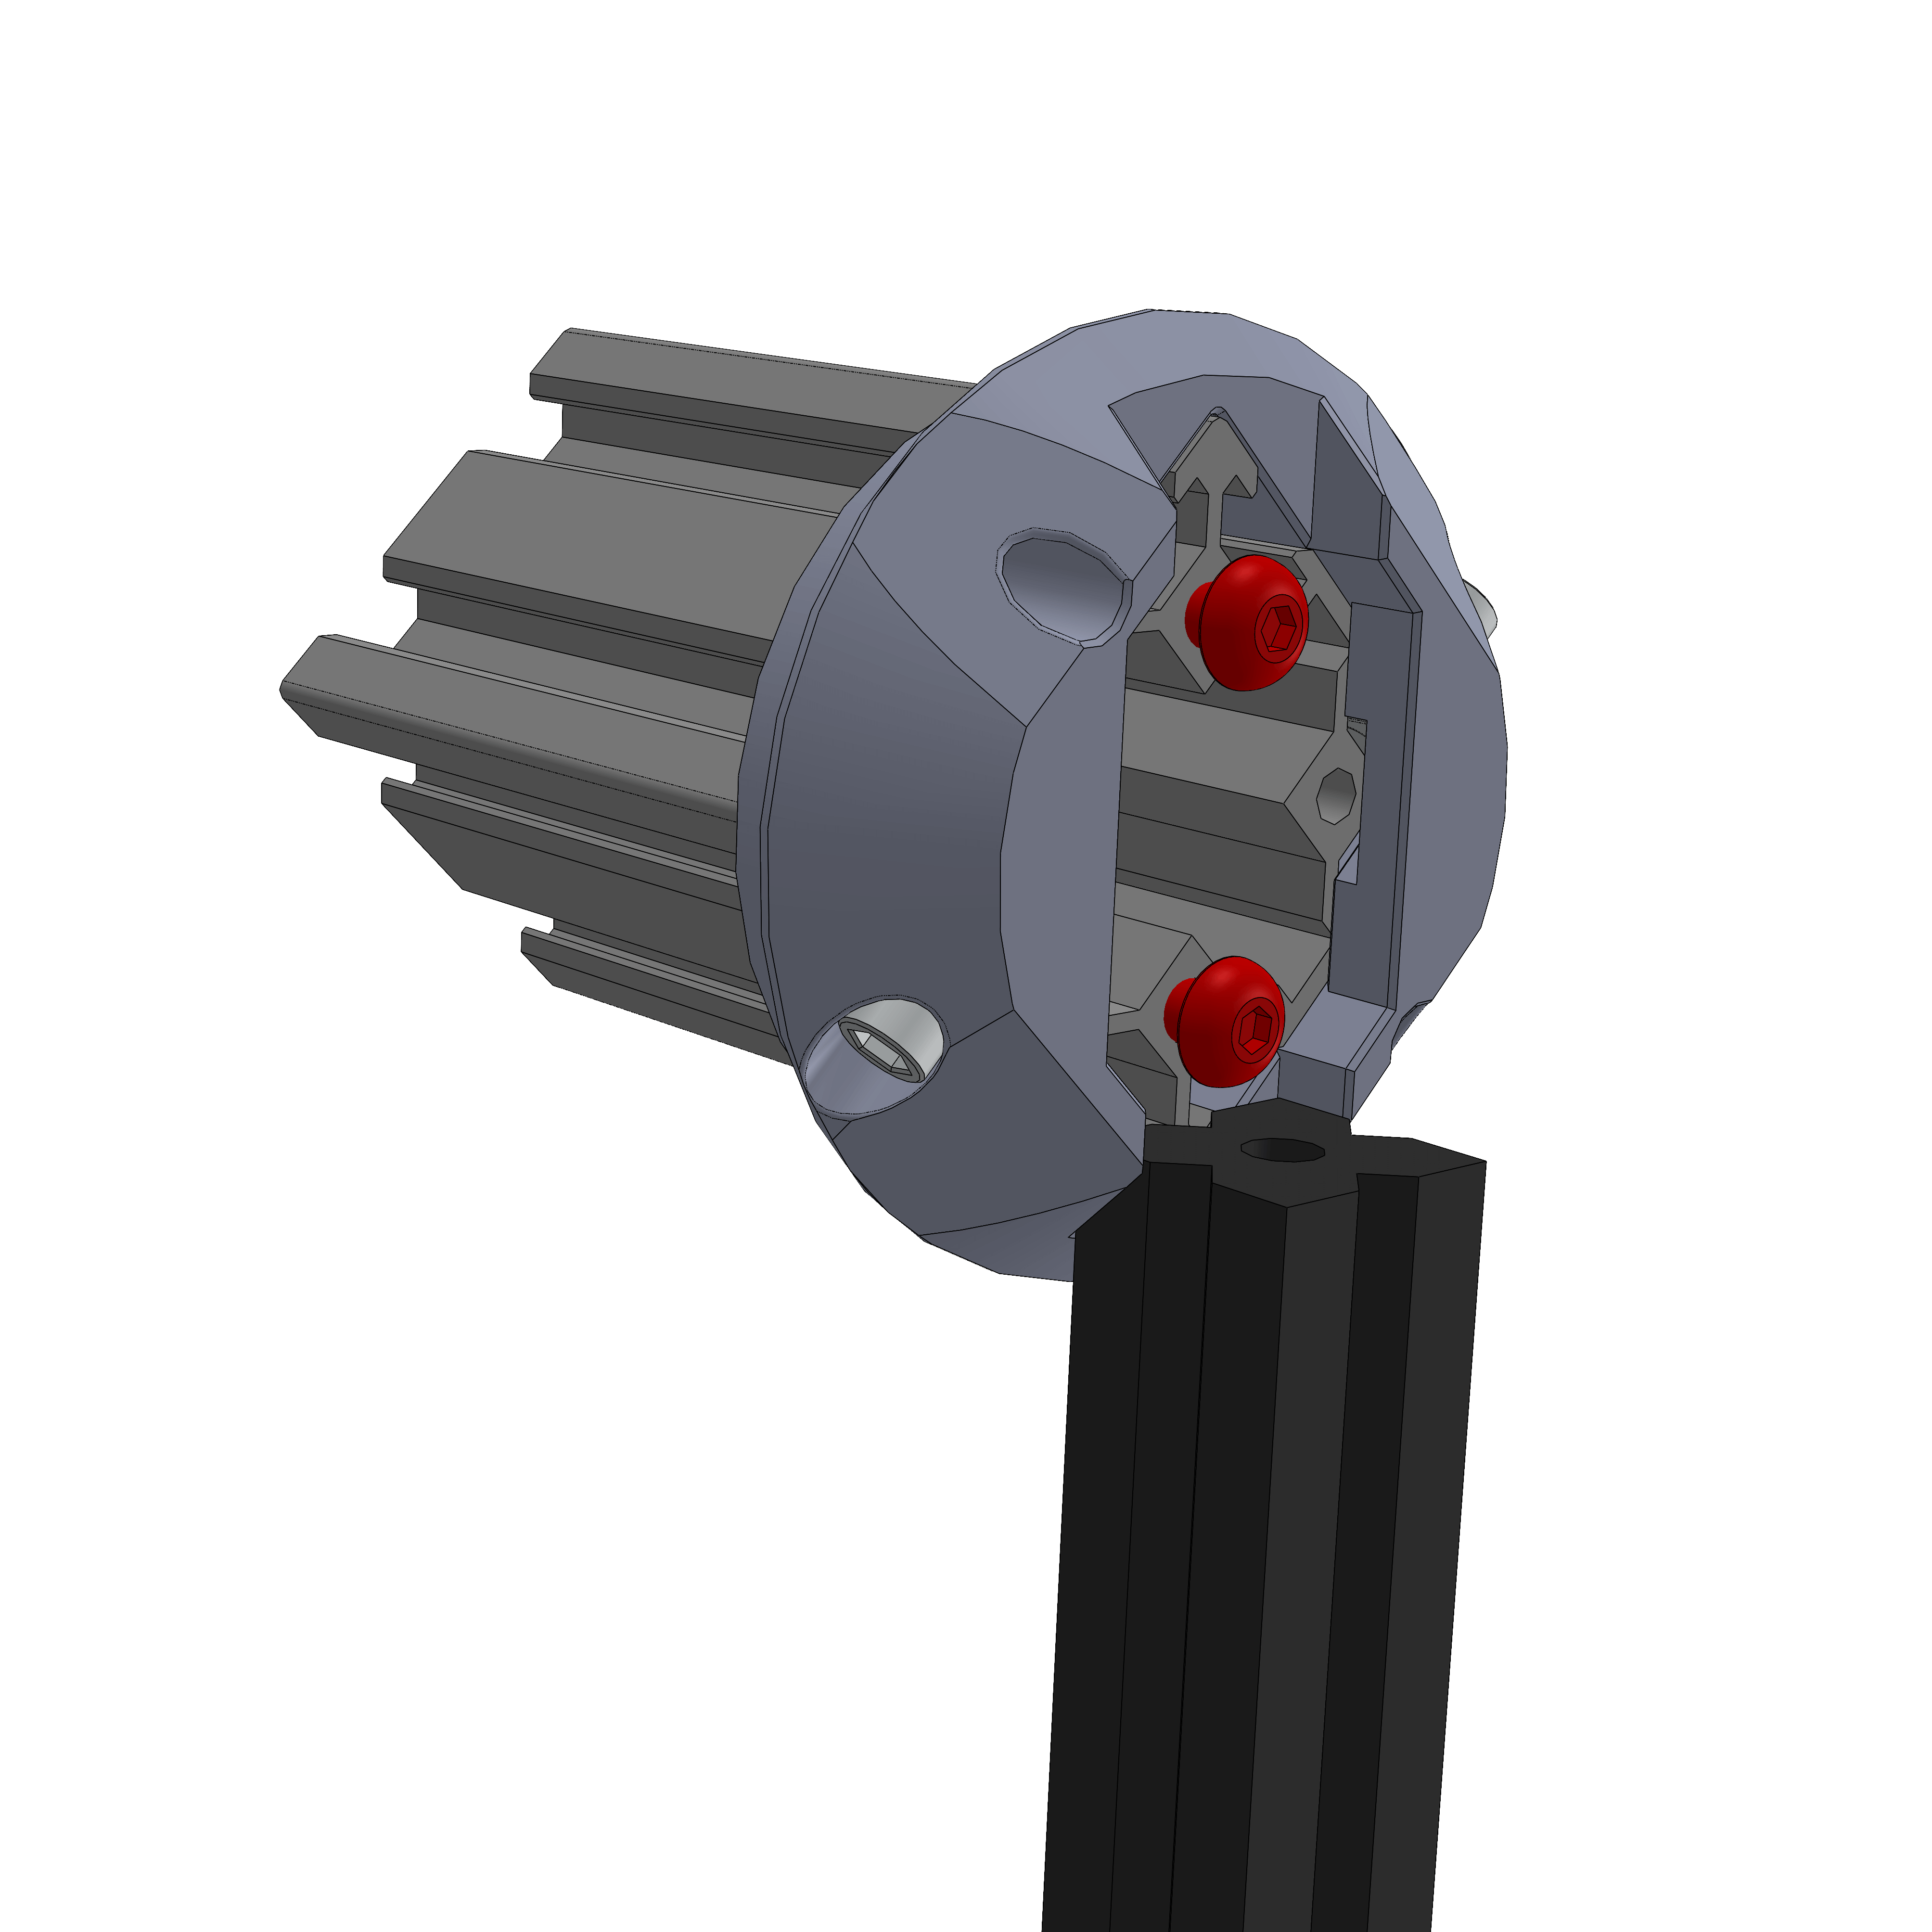
- Slide the 200mm 2020 Extrusion and line up the holes. Ensure you have drilled the 6mm holes which are used to tighten the bolt.
¶ Hardware
- 2x M5 or M6x20 Flathead screw
- 2020 x 200mm
¶ Step 14
- Assembly
- Parts
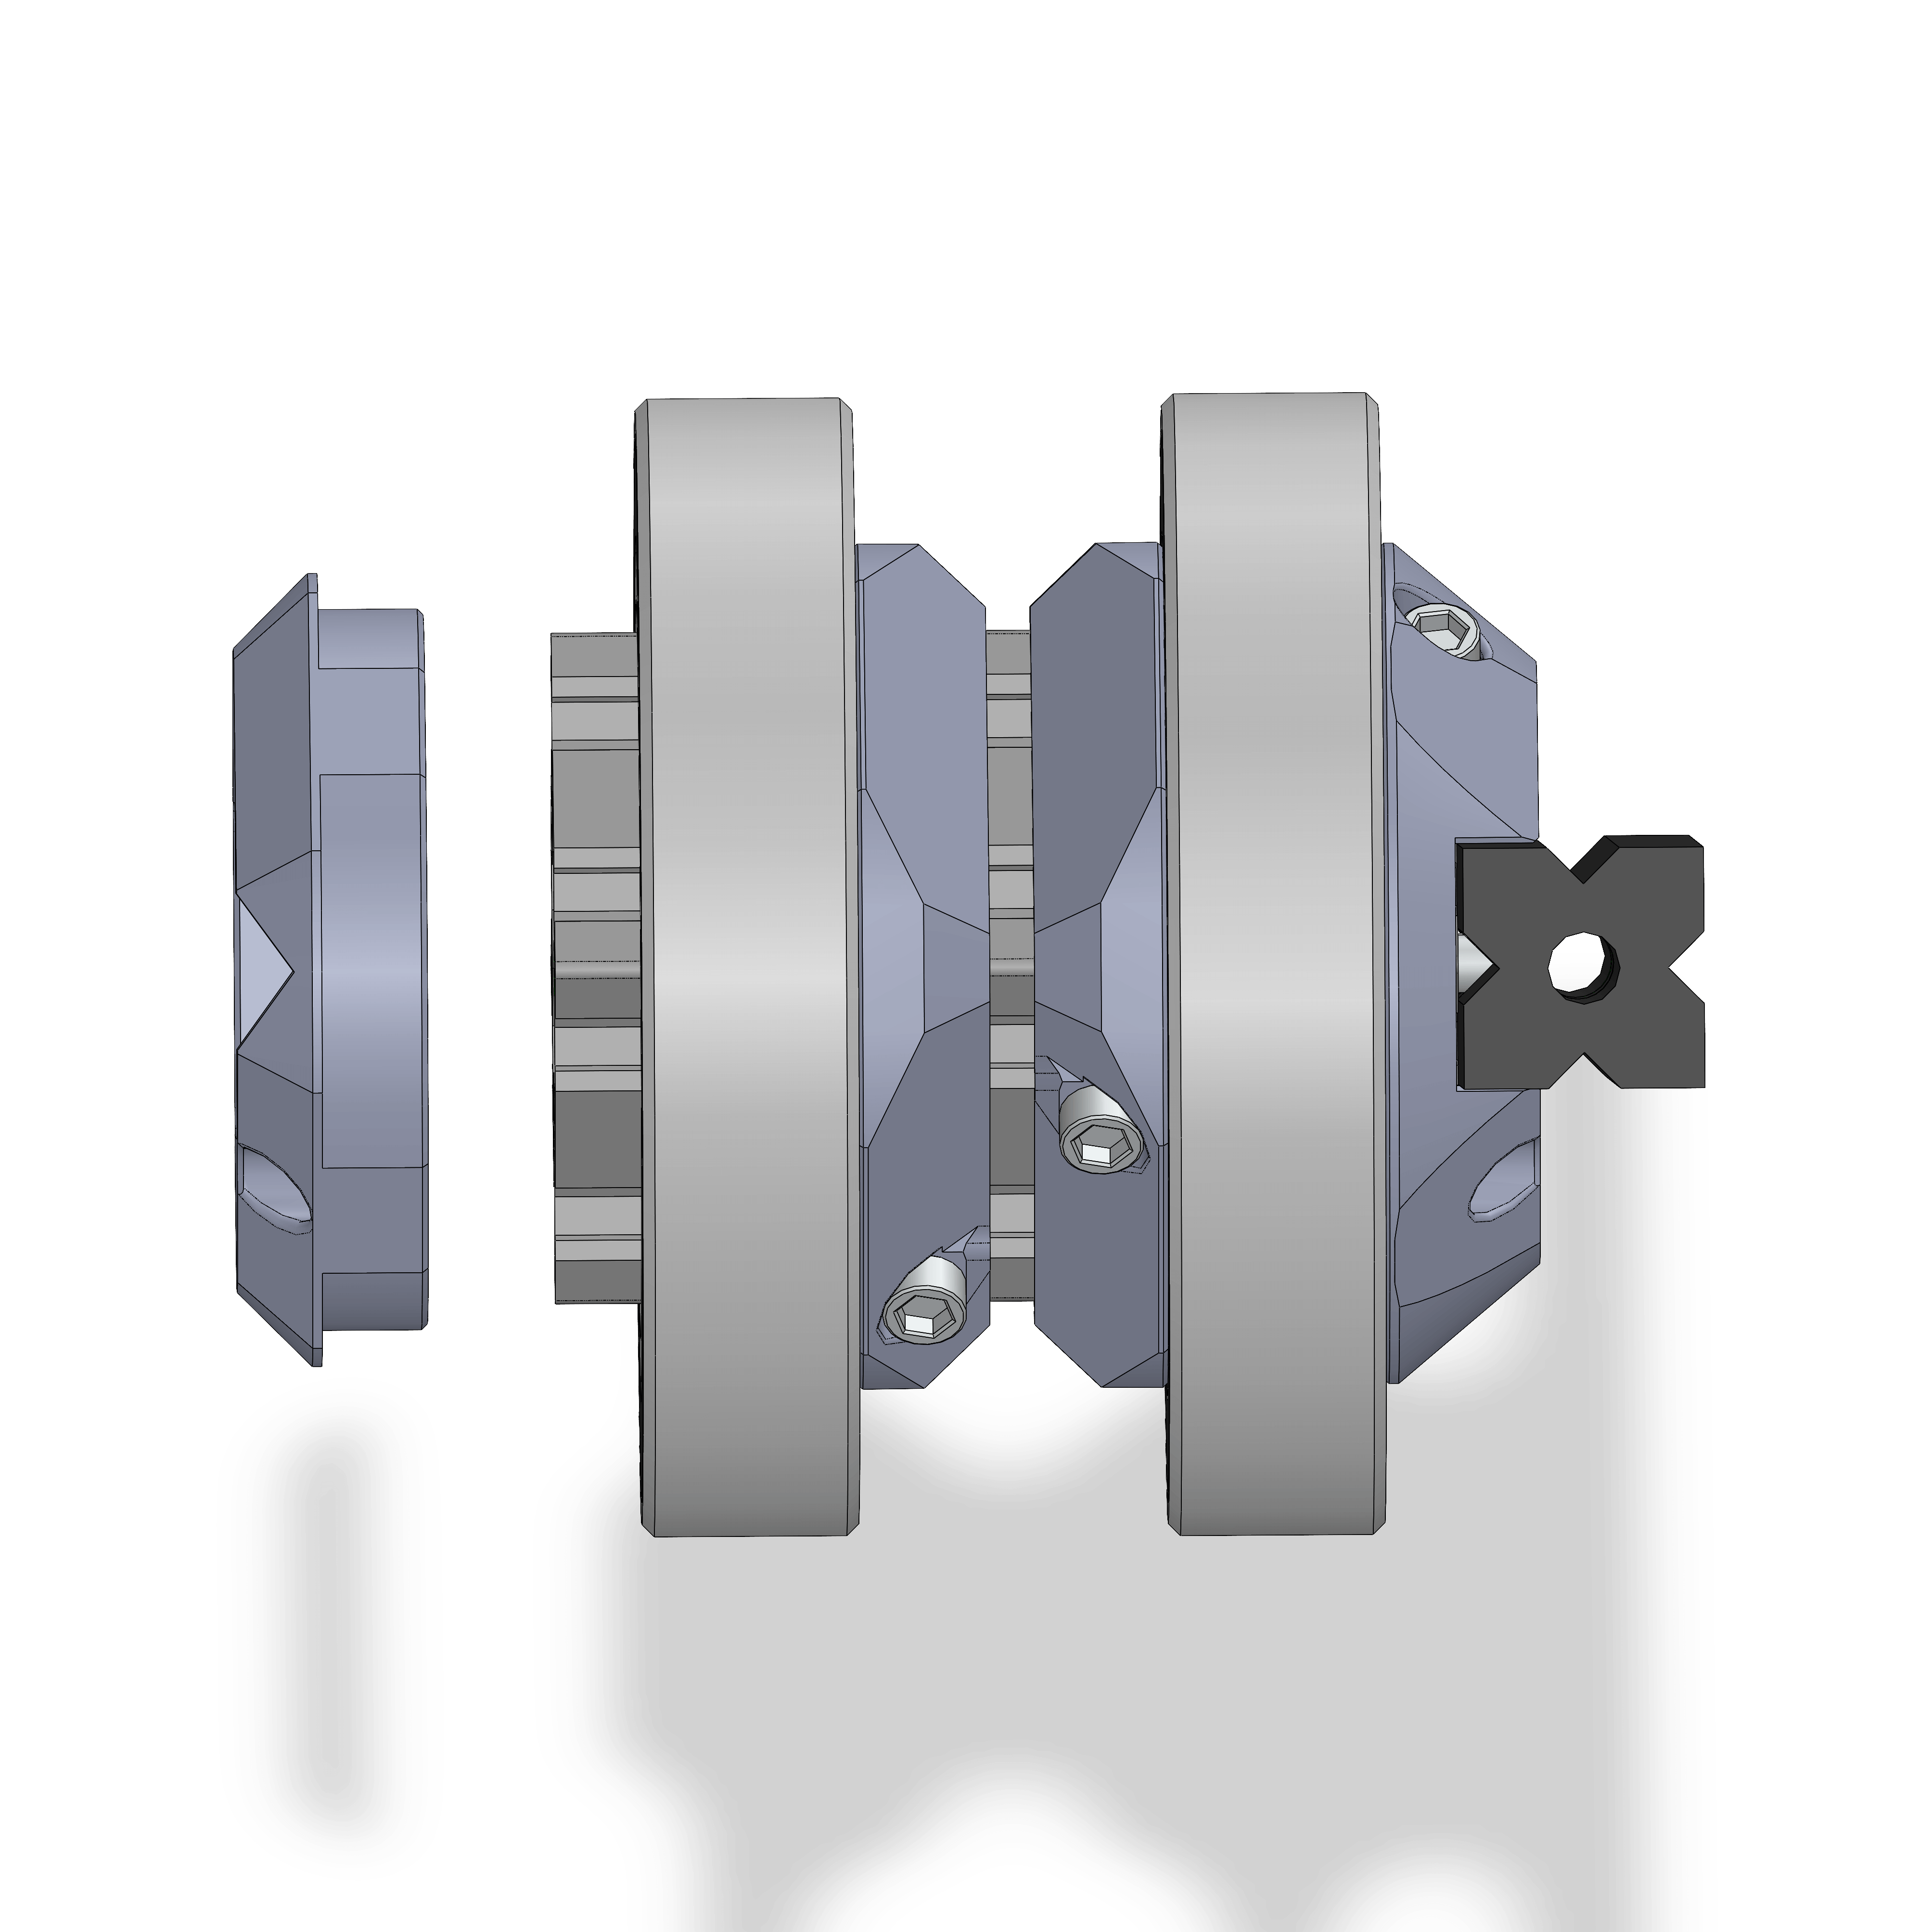
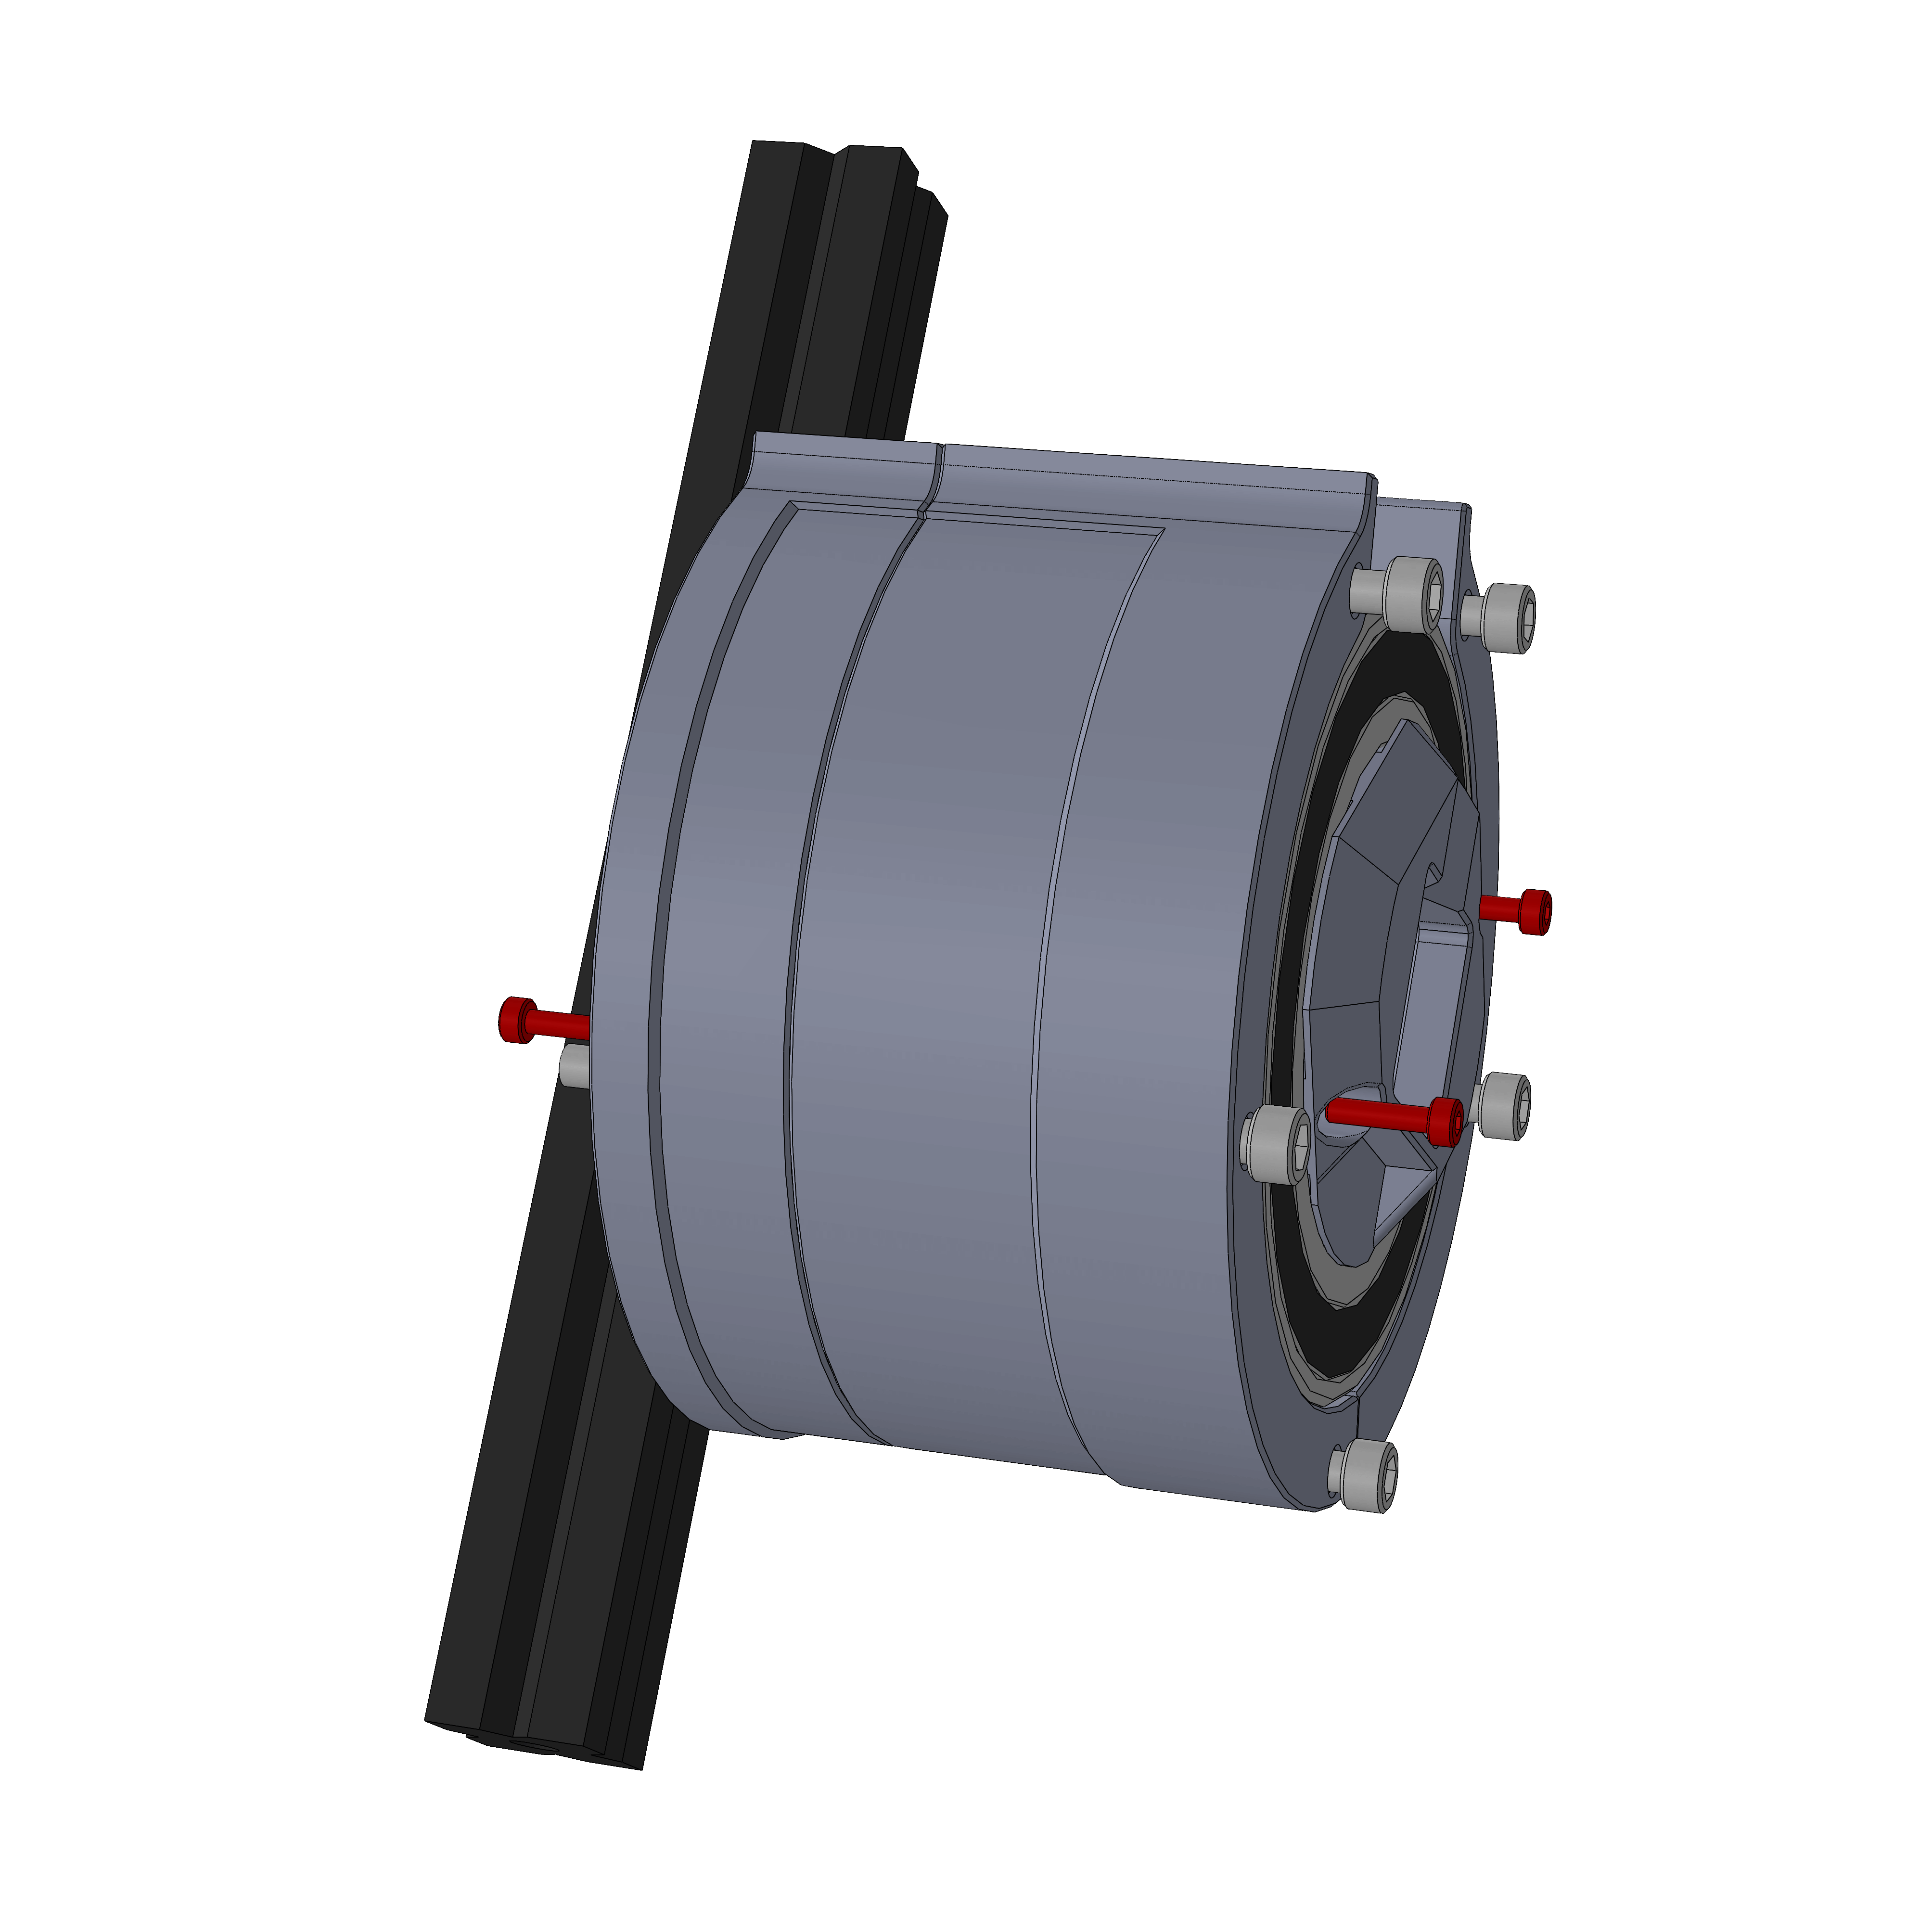
- Force the 6012 bearing onto 4040adapter_front with tight fit.
- Slide the 4040adapter_mid into the other side of the first 6012 bearing. Make sure the inserts align with the holes. Use two M3x12 screws from the front and tighten to torque 3. Then fasten the M4 screws.
- Slide the second 4040adapter_mid onto the 4040 extrusion.
- Slide the second 6012 bearing onto the second 4040adapter_mid snugly. If the 4040adapter slides on the extrusion that's ok, it should not be fastened in this step.
- Using a flat-head screwdriver that fits within the extrusion, insert the M4 TNut to line up with the 4040adapter_mid holes and insert the M4x12. Do not tighten them yet, the rear bearing should still be able to slide.
- Slide 4040adapter_rear onto the end. The cutouts on it's rear should line up with the 2020 extrusion. If not, rotate by 90°. Also make sure the inserts stay aligned with the screw holes. Attach it with 2 M3x12 screws.
¶ Step 15

- Assembly
- Parts
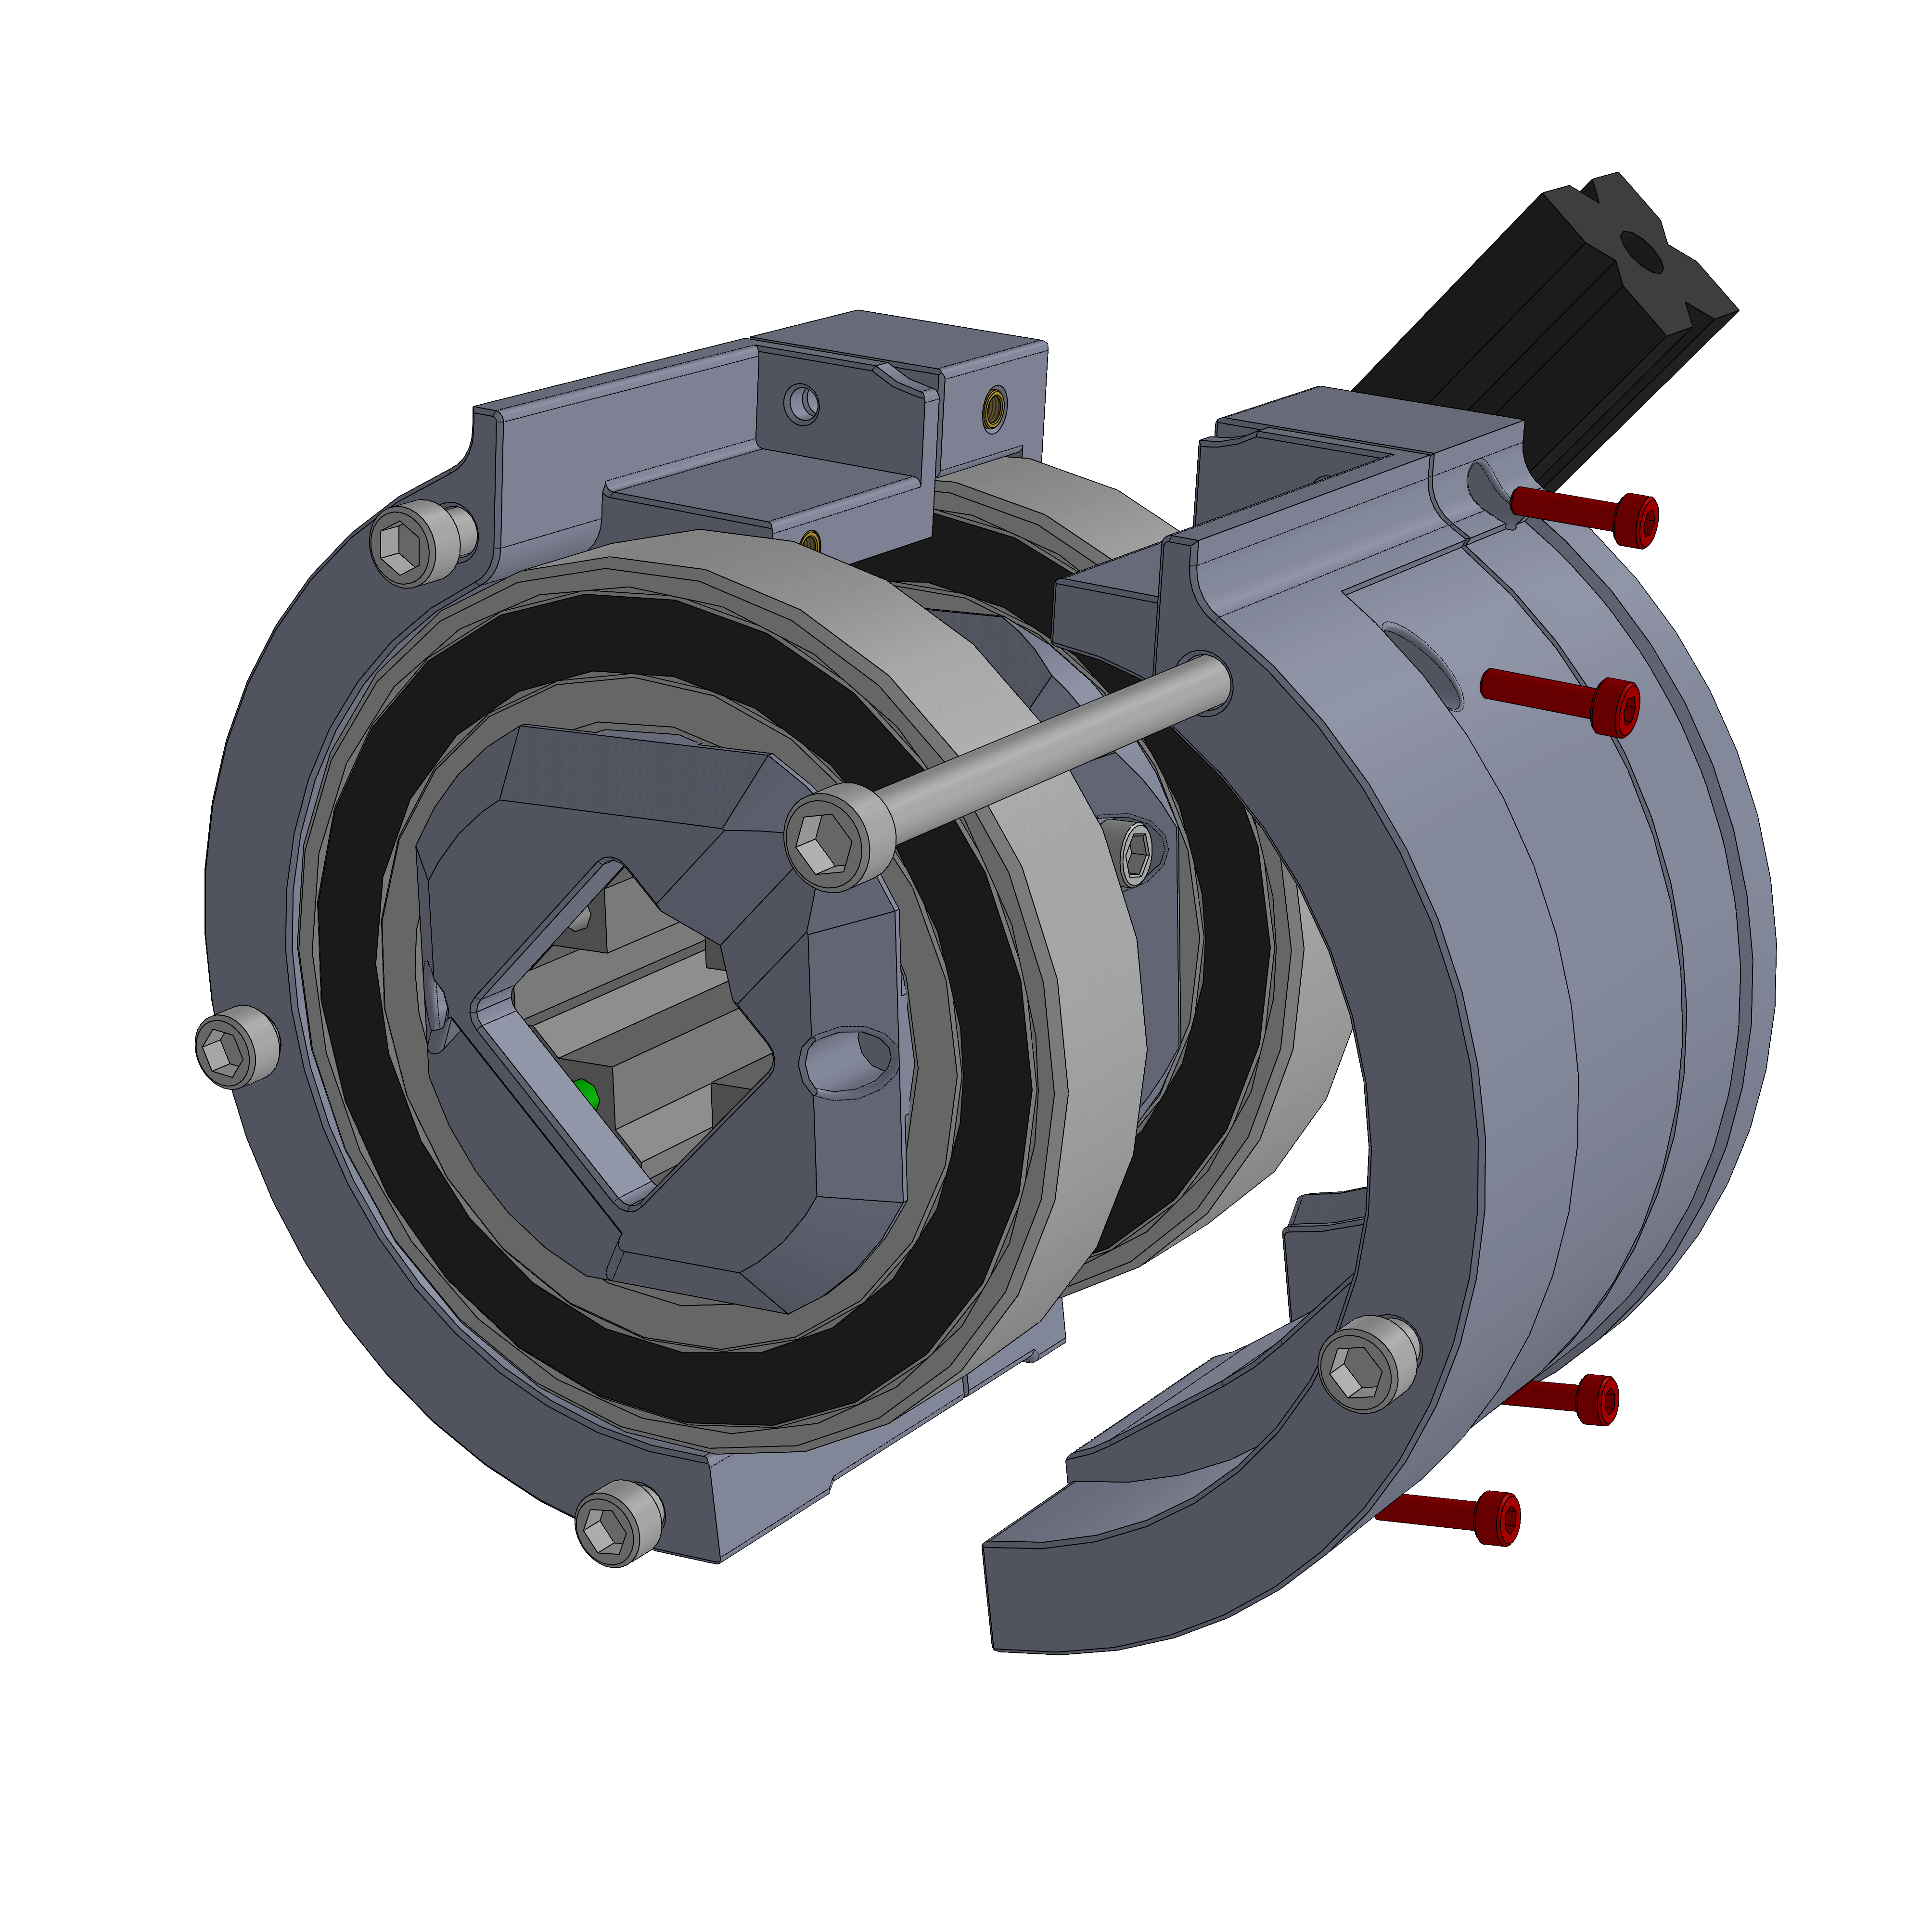
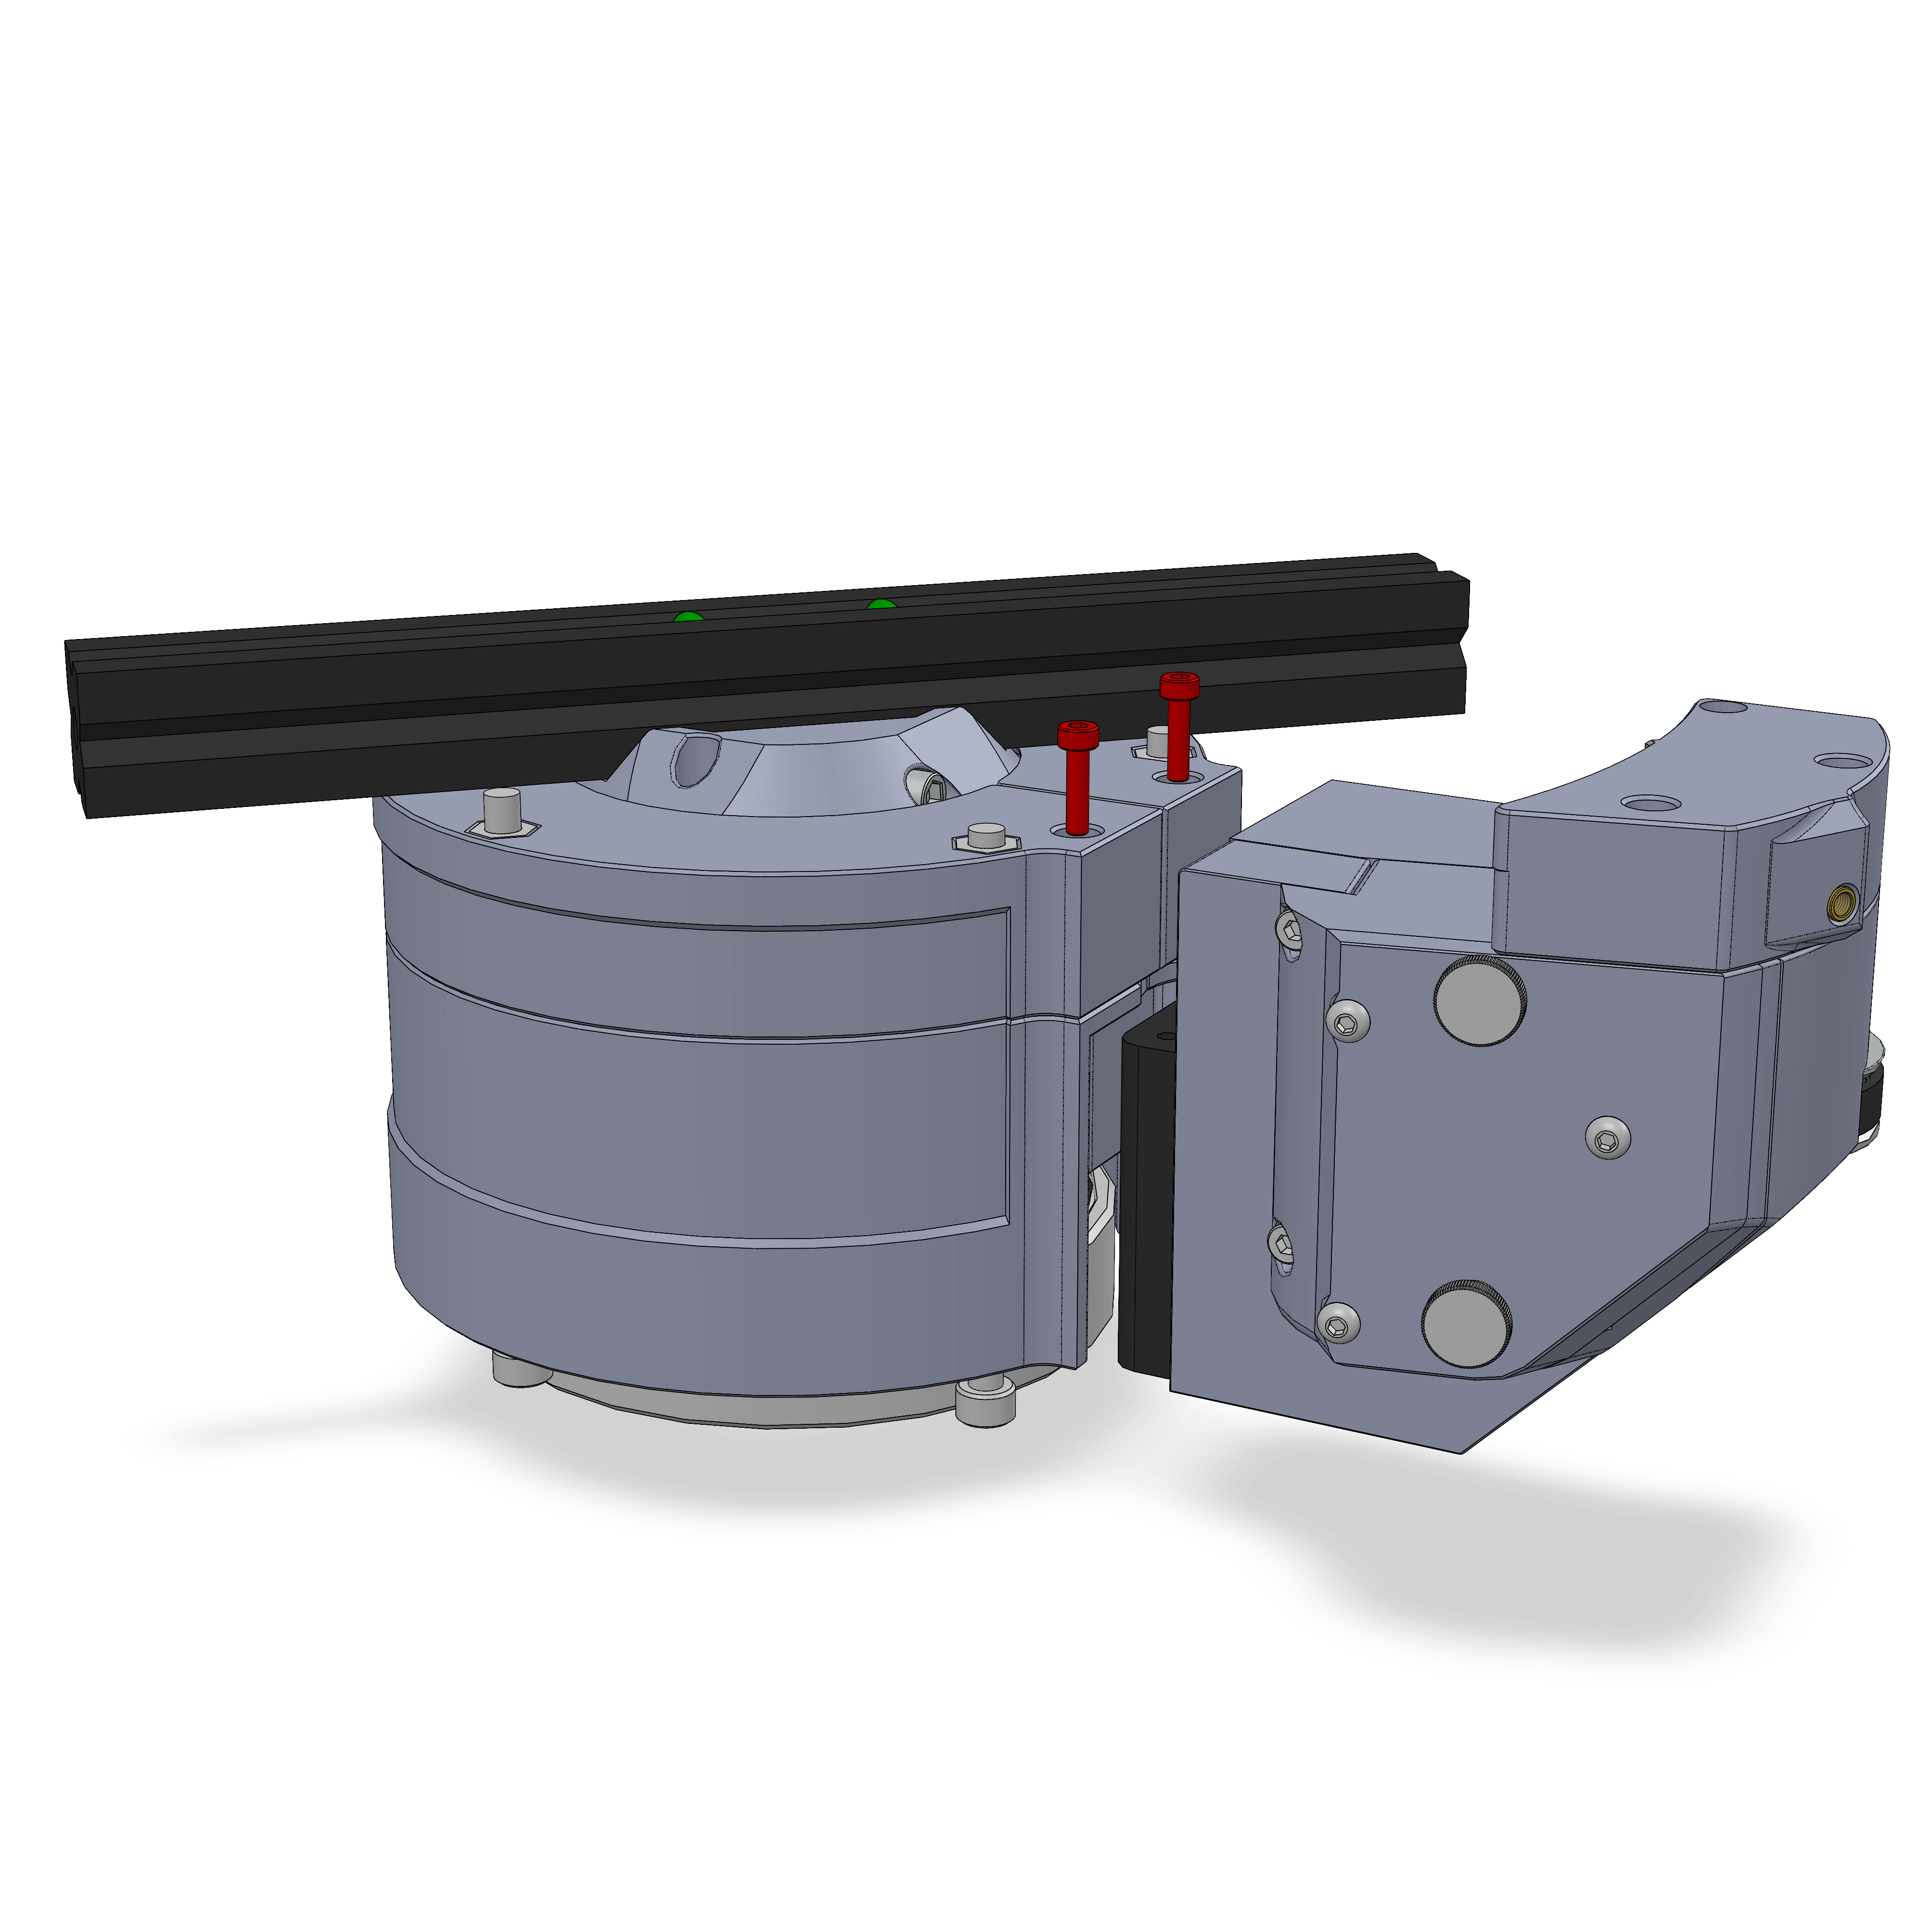
- Use 3 M5x80 and M5 Nuts to fasten the two base parts together. Only attach them far enough so that they don't stick out at the front.
- Insert the bearing assembly as shown. The bearing on the rear (or left side in the picture) should still be able to slide on the 4040. Slide it until it's flush against the printed edge, then tighten the M4 screws.
¶ Step 16
- Assembly
- Parts
- Connect the two halves until snug. The M3x12 might be difficult to line up, so squeeze until one latches, then do the other on the same side. Repeat for the other side.
- Inser the M5x80 and tighten with M5 nut. If you prematurely inserted this M5x80, remove it to insert M3x12 and tighten that first, then reinsert M5x80.
¶ Step 17
- Assembly
- Parts
- Verify the 4 M3x12 screws are installed on both ends.
- Rotate the inner part to check clearance with the 2020 extrusion. The rotation should be smooth and have no sticky spots.
¶ Hardware
- 4x M3x12
¶ Step 18
- Assembly
- Parts
- Puncture through the two holes for the M3x12 and connect 2 M3x12 bolts onto the stepper motor housing.
OAE Assembly Part 1: RA Gearbox
OAE Assembly Part 2: Base
OAE Assembly Part 3: DEC
OAE Assembly Part 4: AZ Base
OAE Assembly Part 5: ALT and Final Assembly
OAE Additional Assembly