¶ Navigation
OAE Assembly Part 1: RA Gearbox
OAE Assembly Part 2: Base
OAE Assembly Part 3: DEC
OAE Assembly Part 4: AZ Base
OAE Assembly Part 5: ALT and Final Assembly
OAE Additional Assembly
¶ OpenAstroExplorer Assembly Part 5: ALT and Final Assembly
In this step:
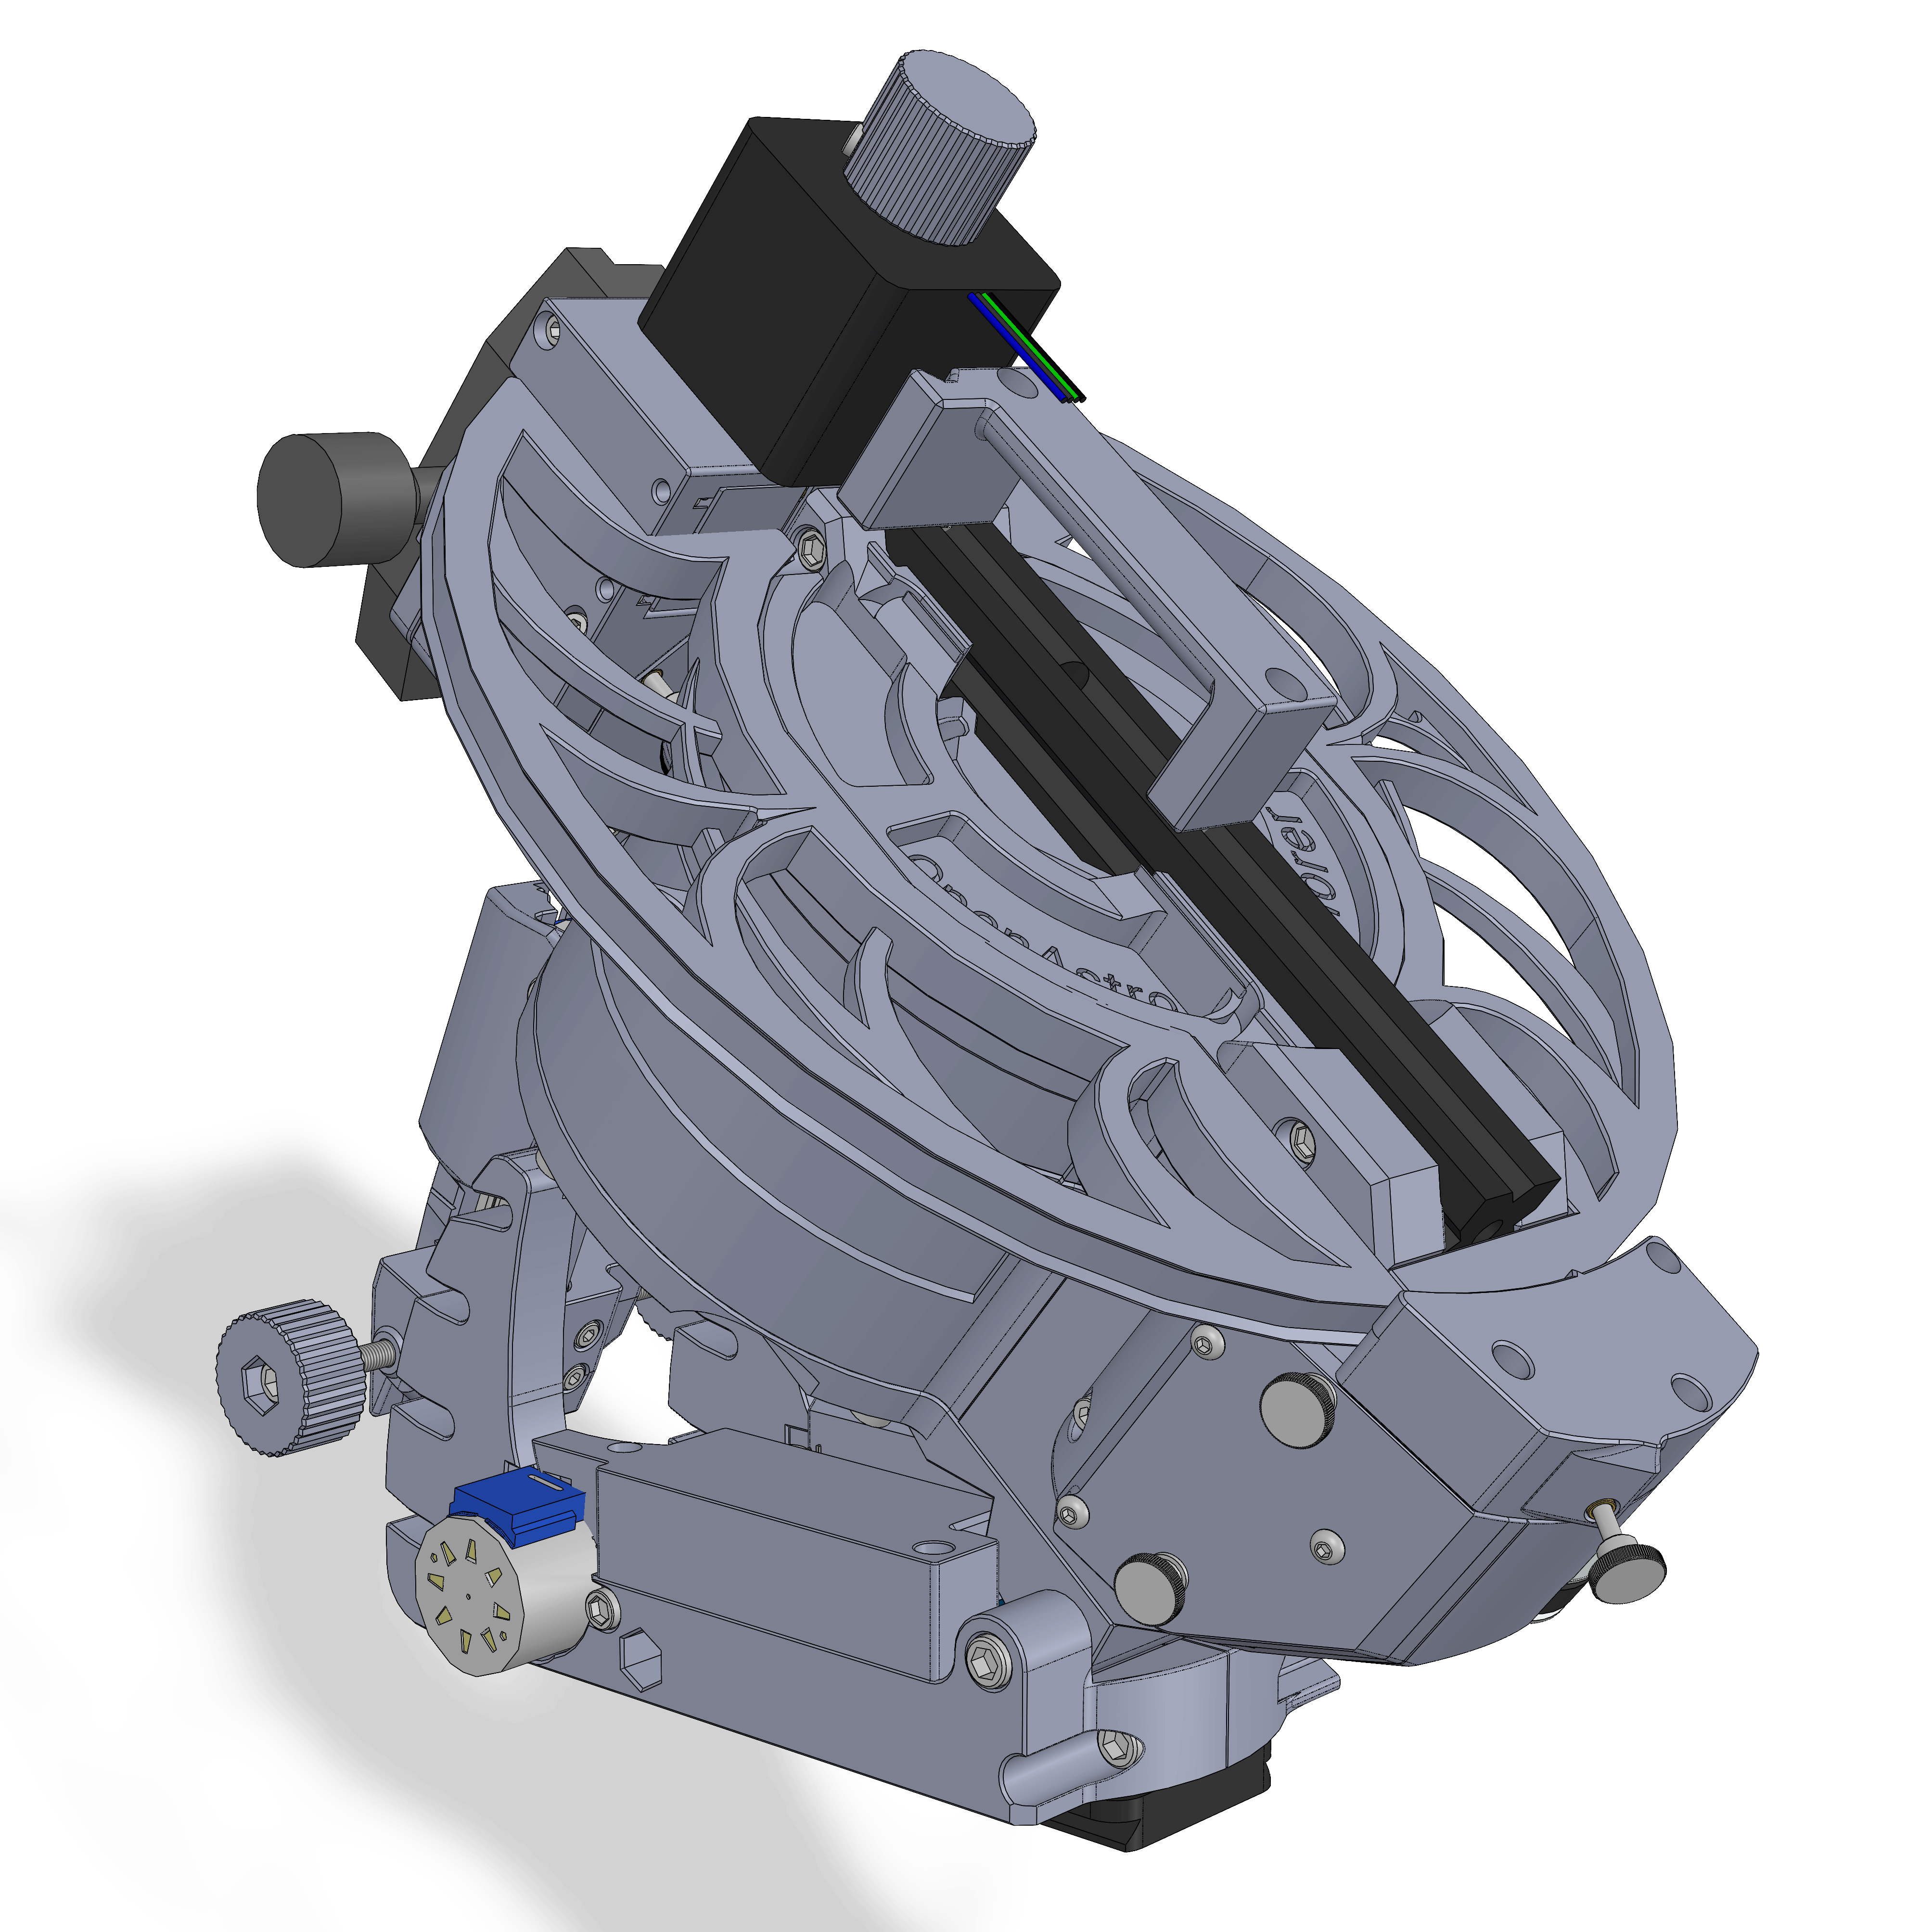
¶ Step 50
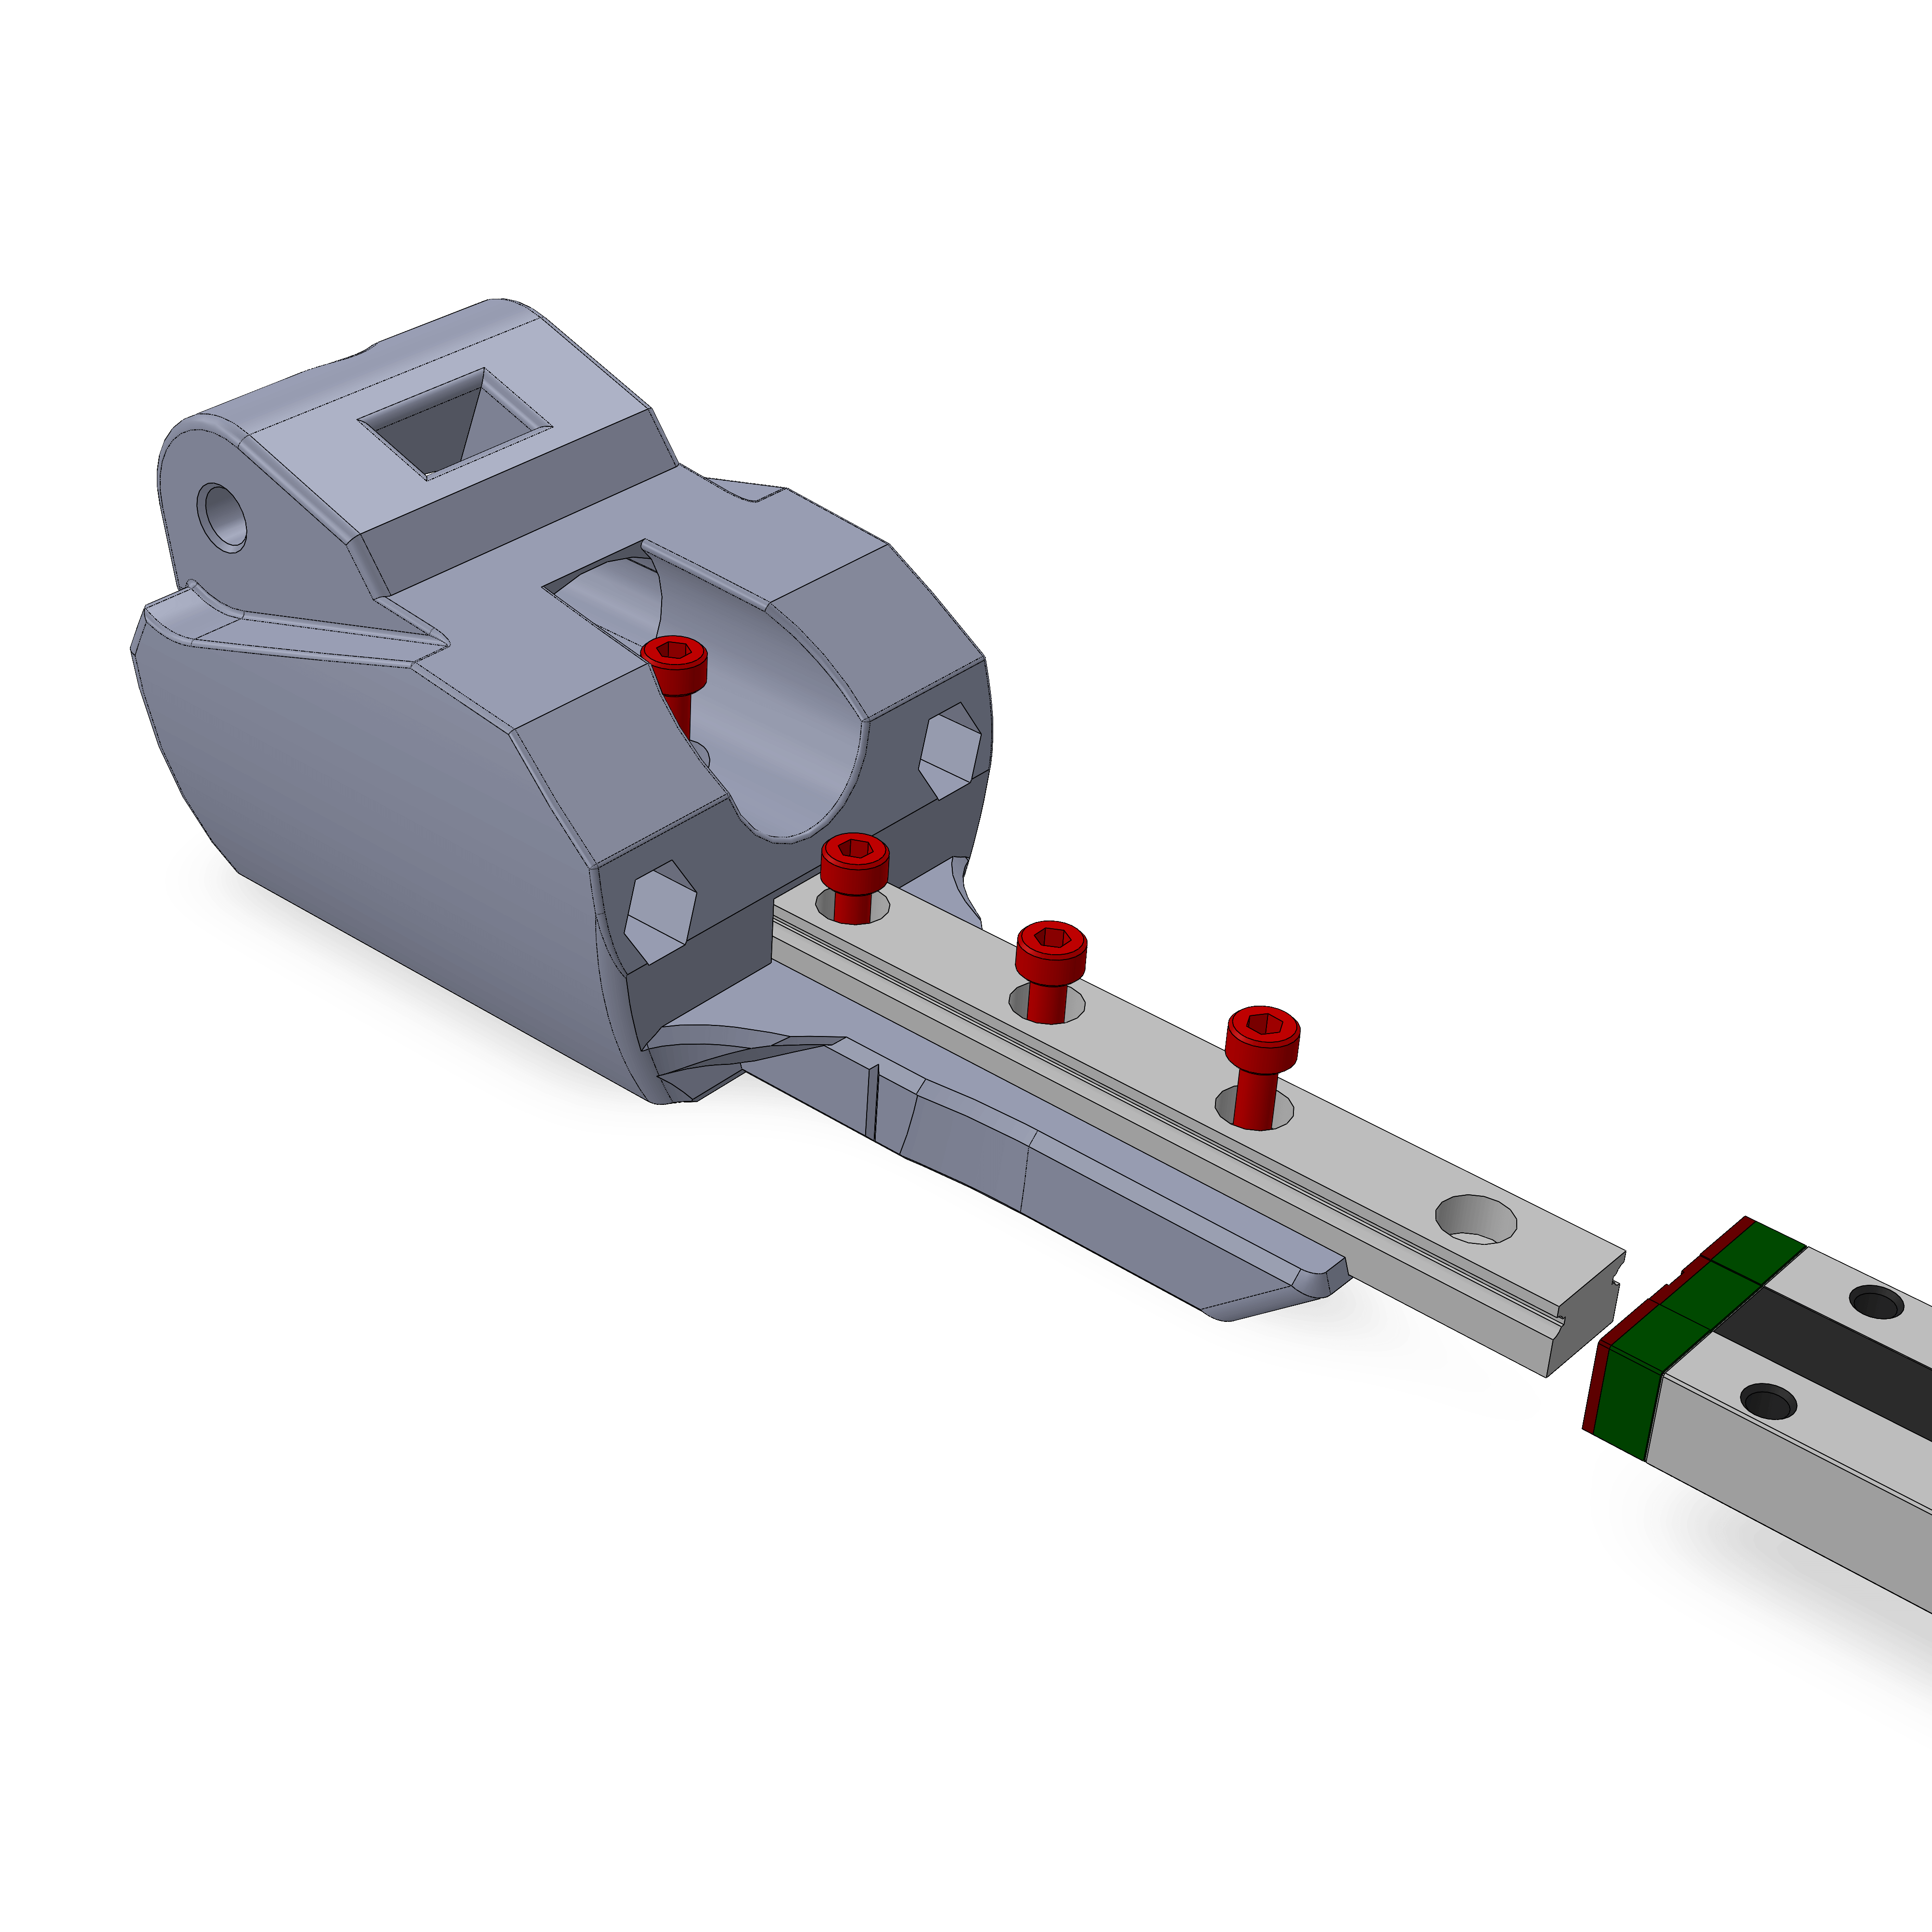
- Assembly
- Parts
- Slide the MGN track into the part and attach with 4 M3x10. Don't actually remove the slider as its hard to get on again.
¶ Step 51
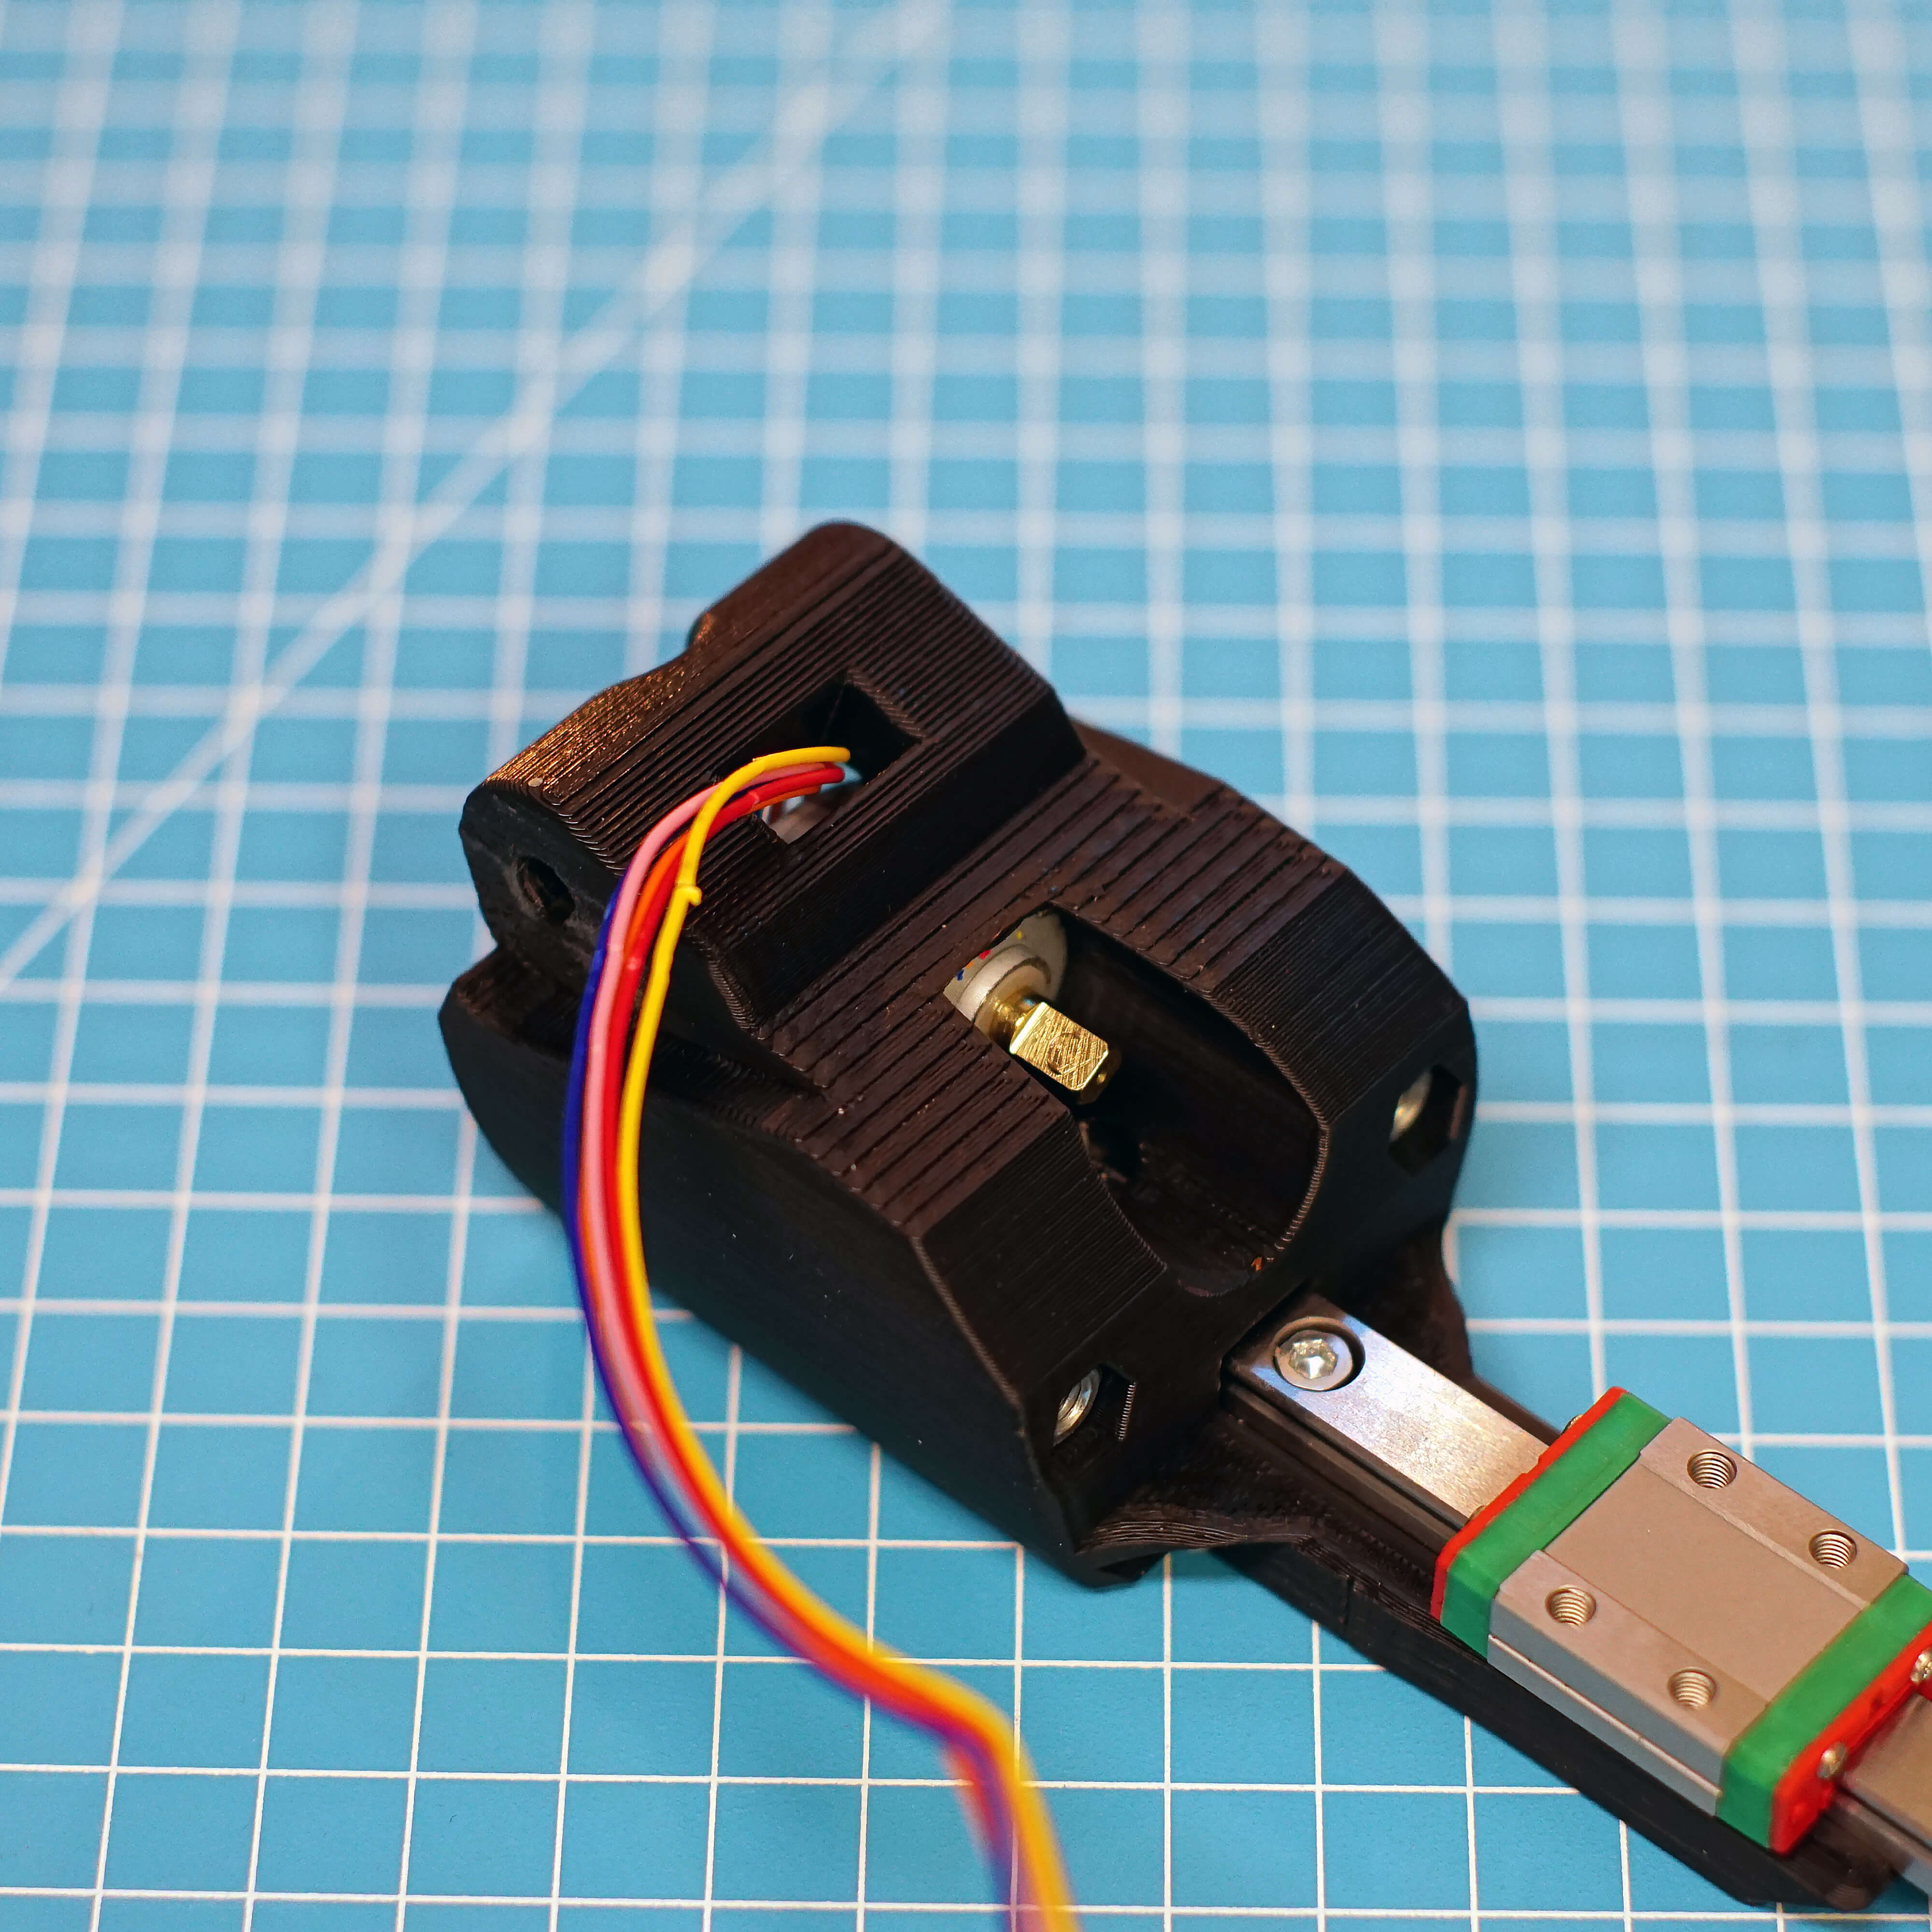
- Assembly
- Parts
- First insert the cable through the hole in the top. Then slide in the stepper. Take care not to damage the cable while doing this. If the fit is too tight at the top, cut some material away with a knife.
¶ Hardware
- 28BYJ-48 (with long cable)
¶ Step 52
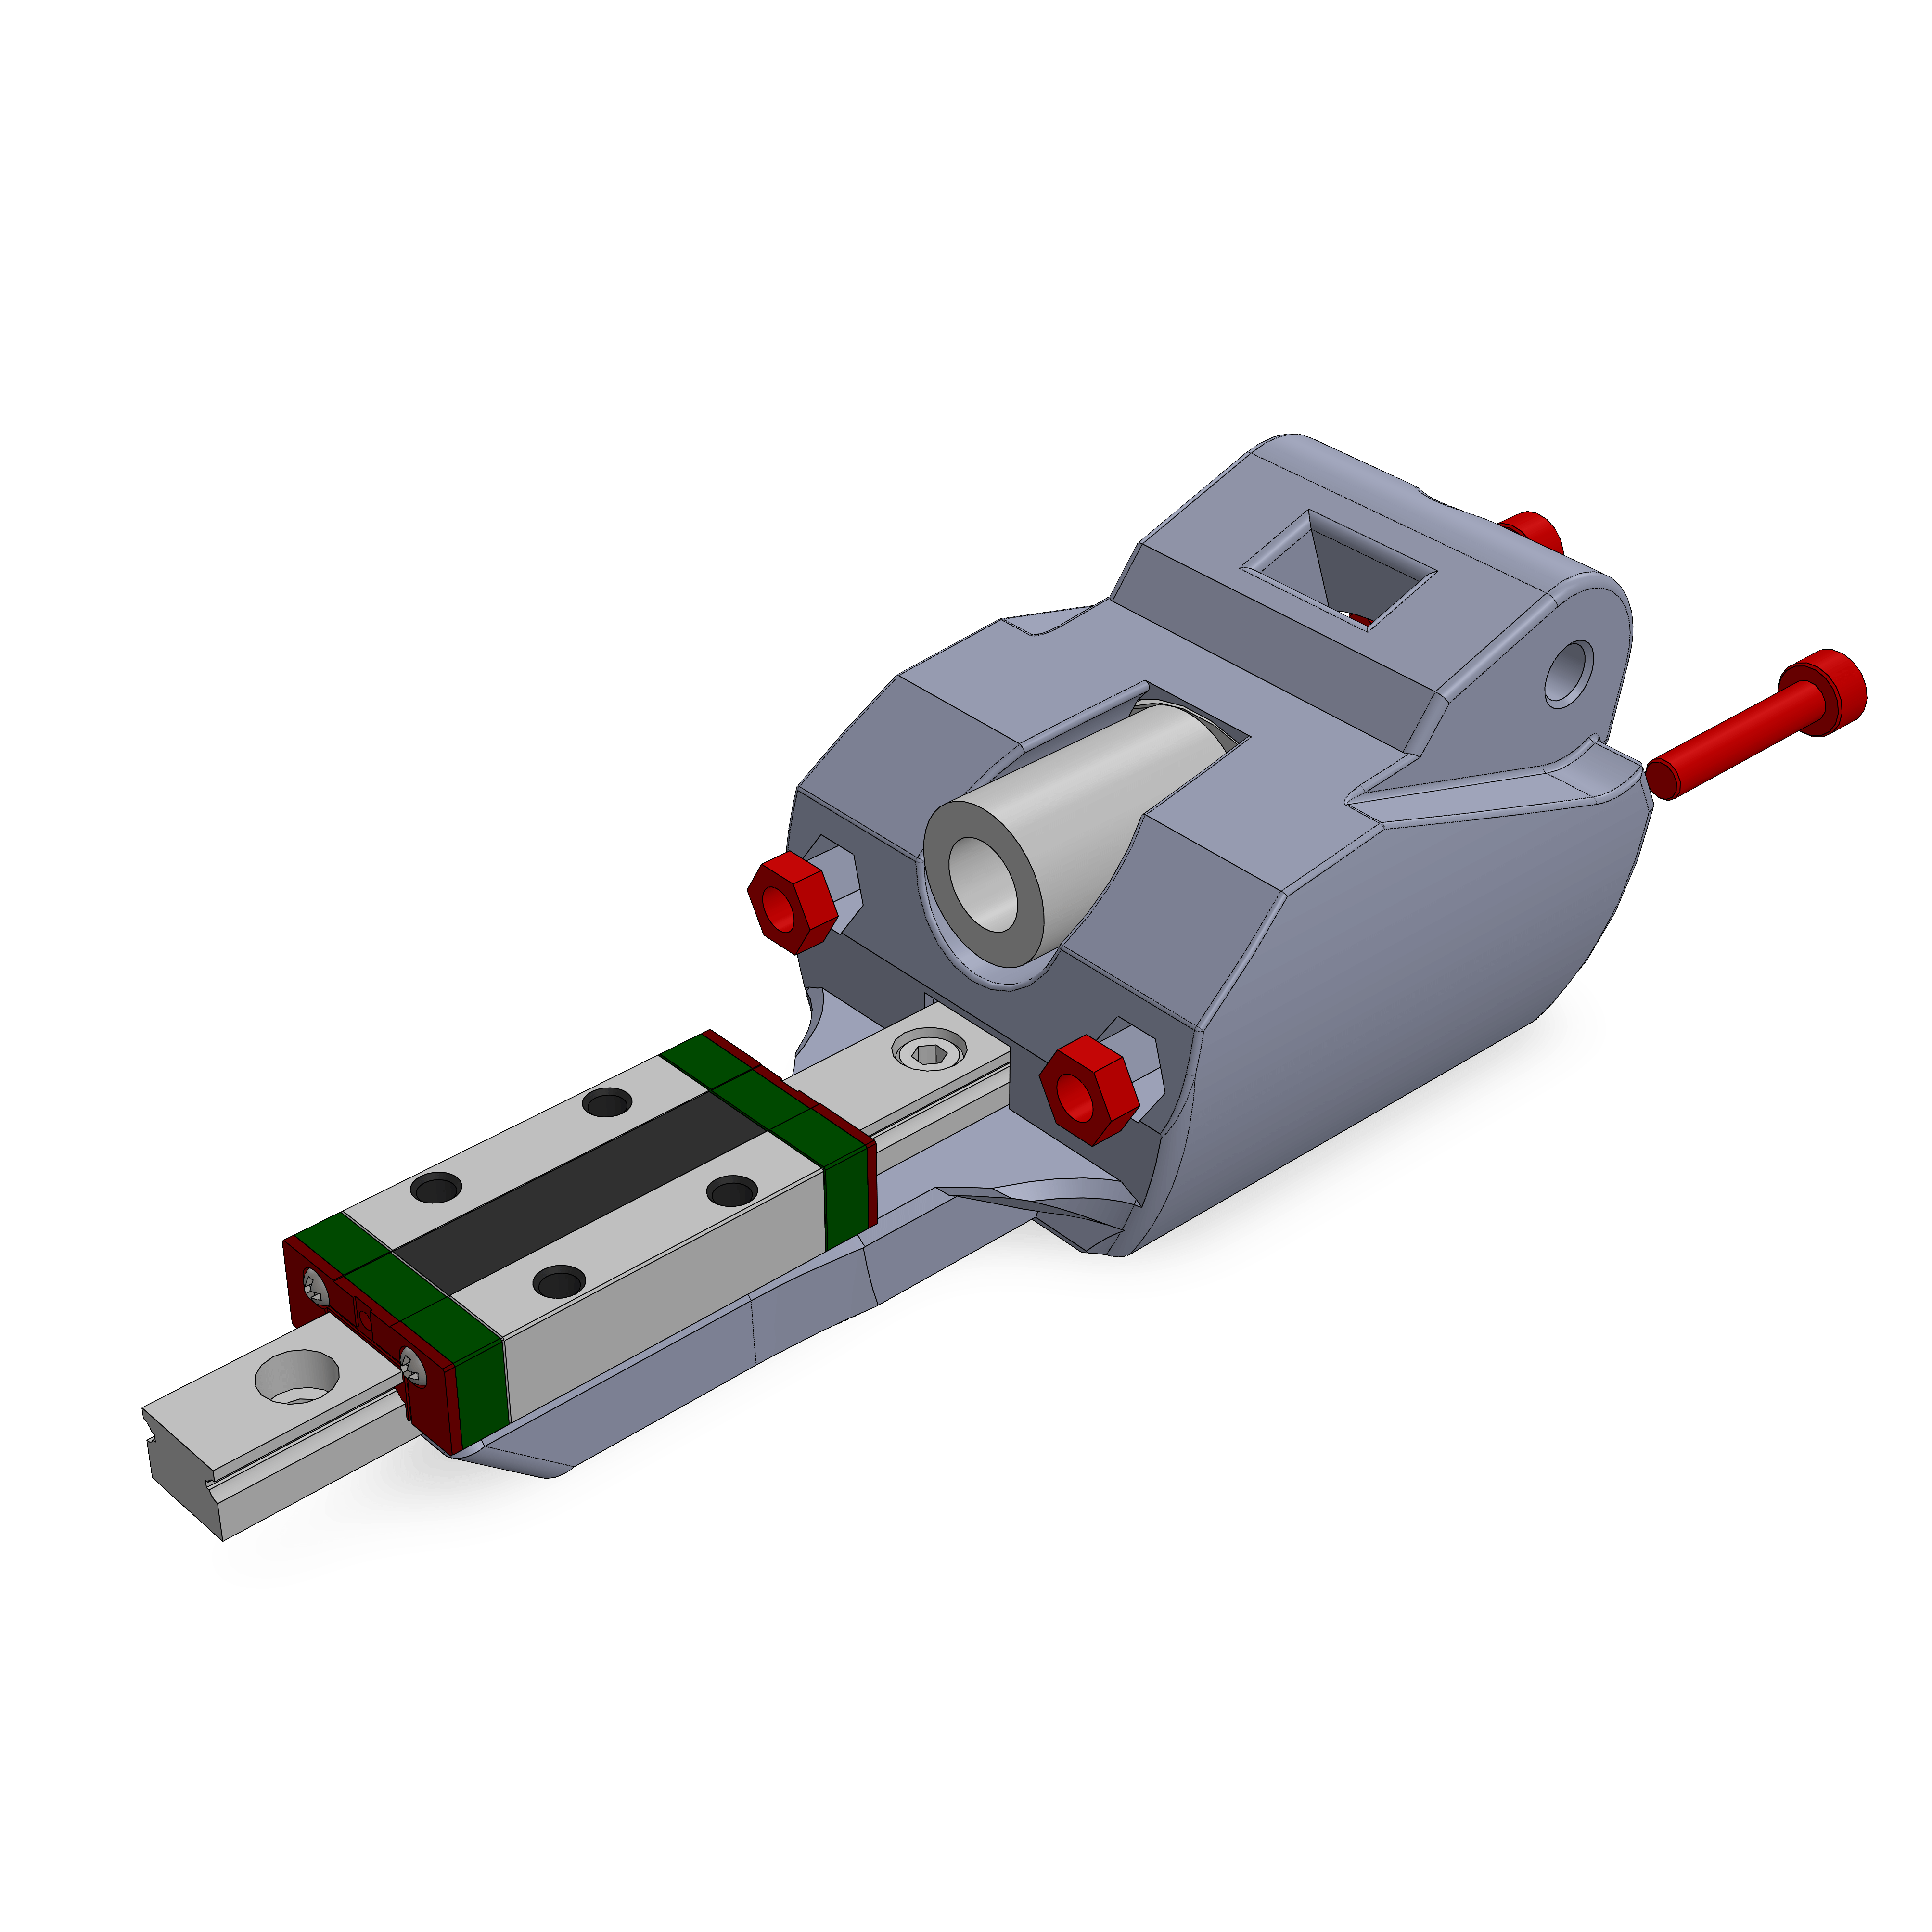
- Assembly
- Parts
- Insert two M4 Nuts and tighten the M4 screws through the mounting holes in the stepper.
¶ Hardware
- 2x M4x20
- 2x M4 Nut
- 5-8 shaft coupler
¶ Step 53
- Assembly
- Parts
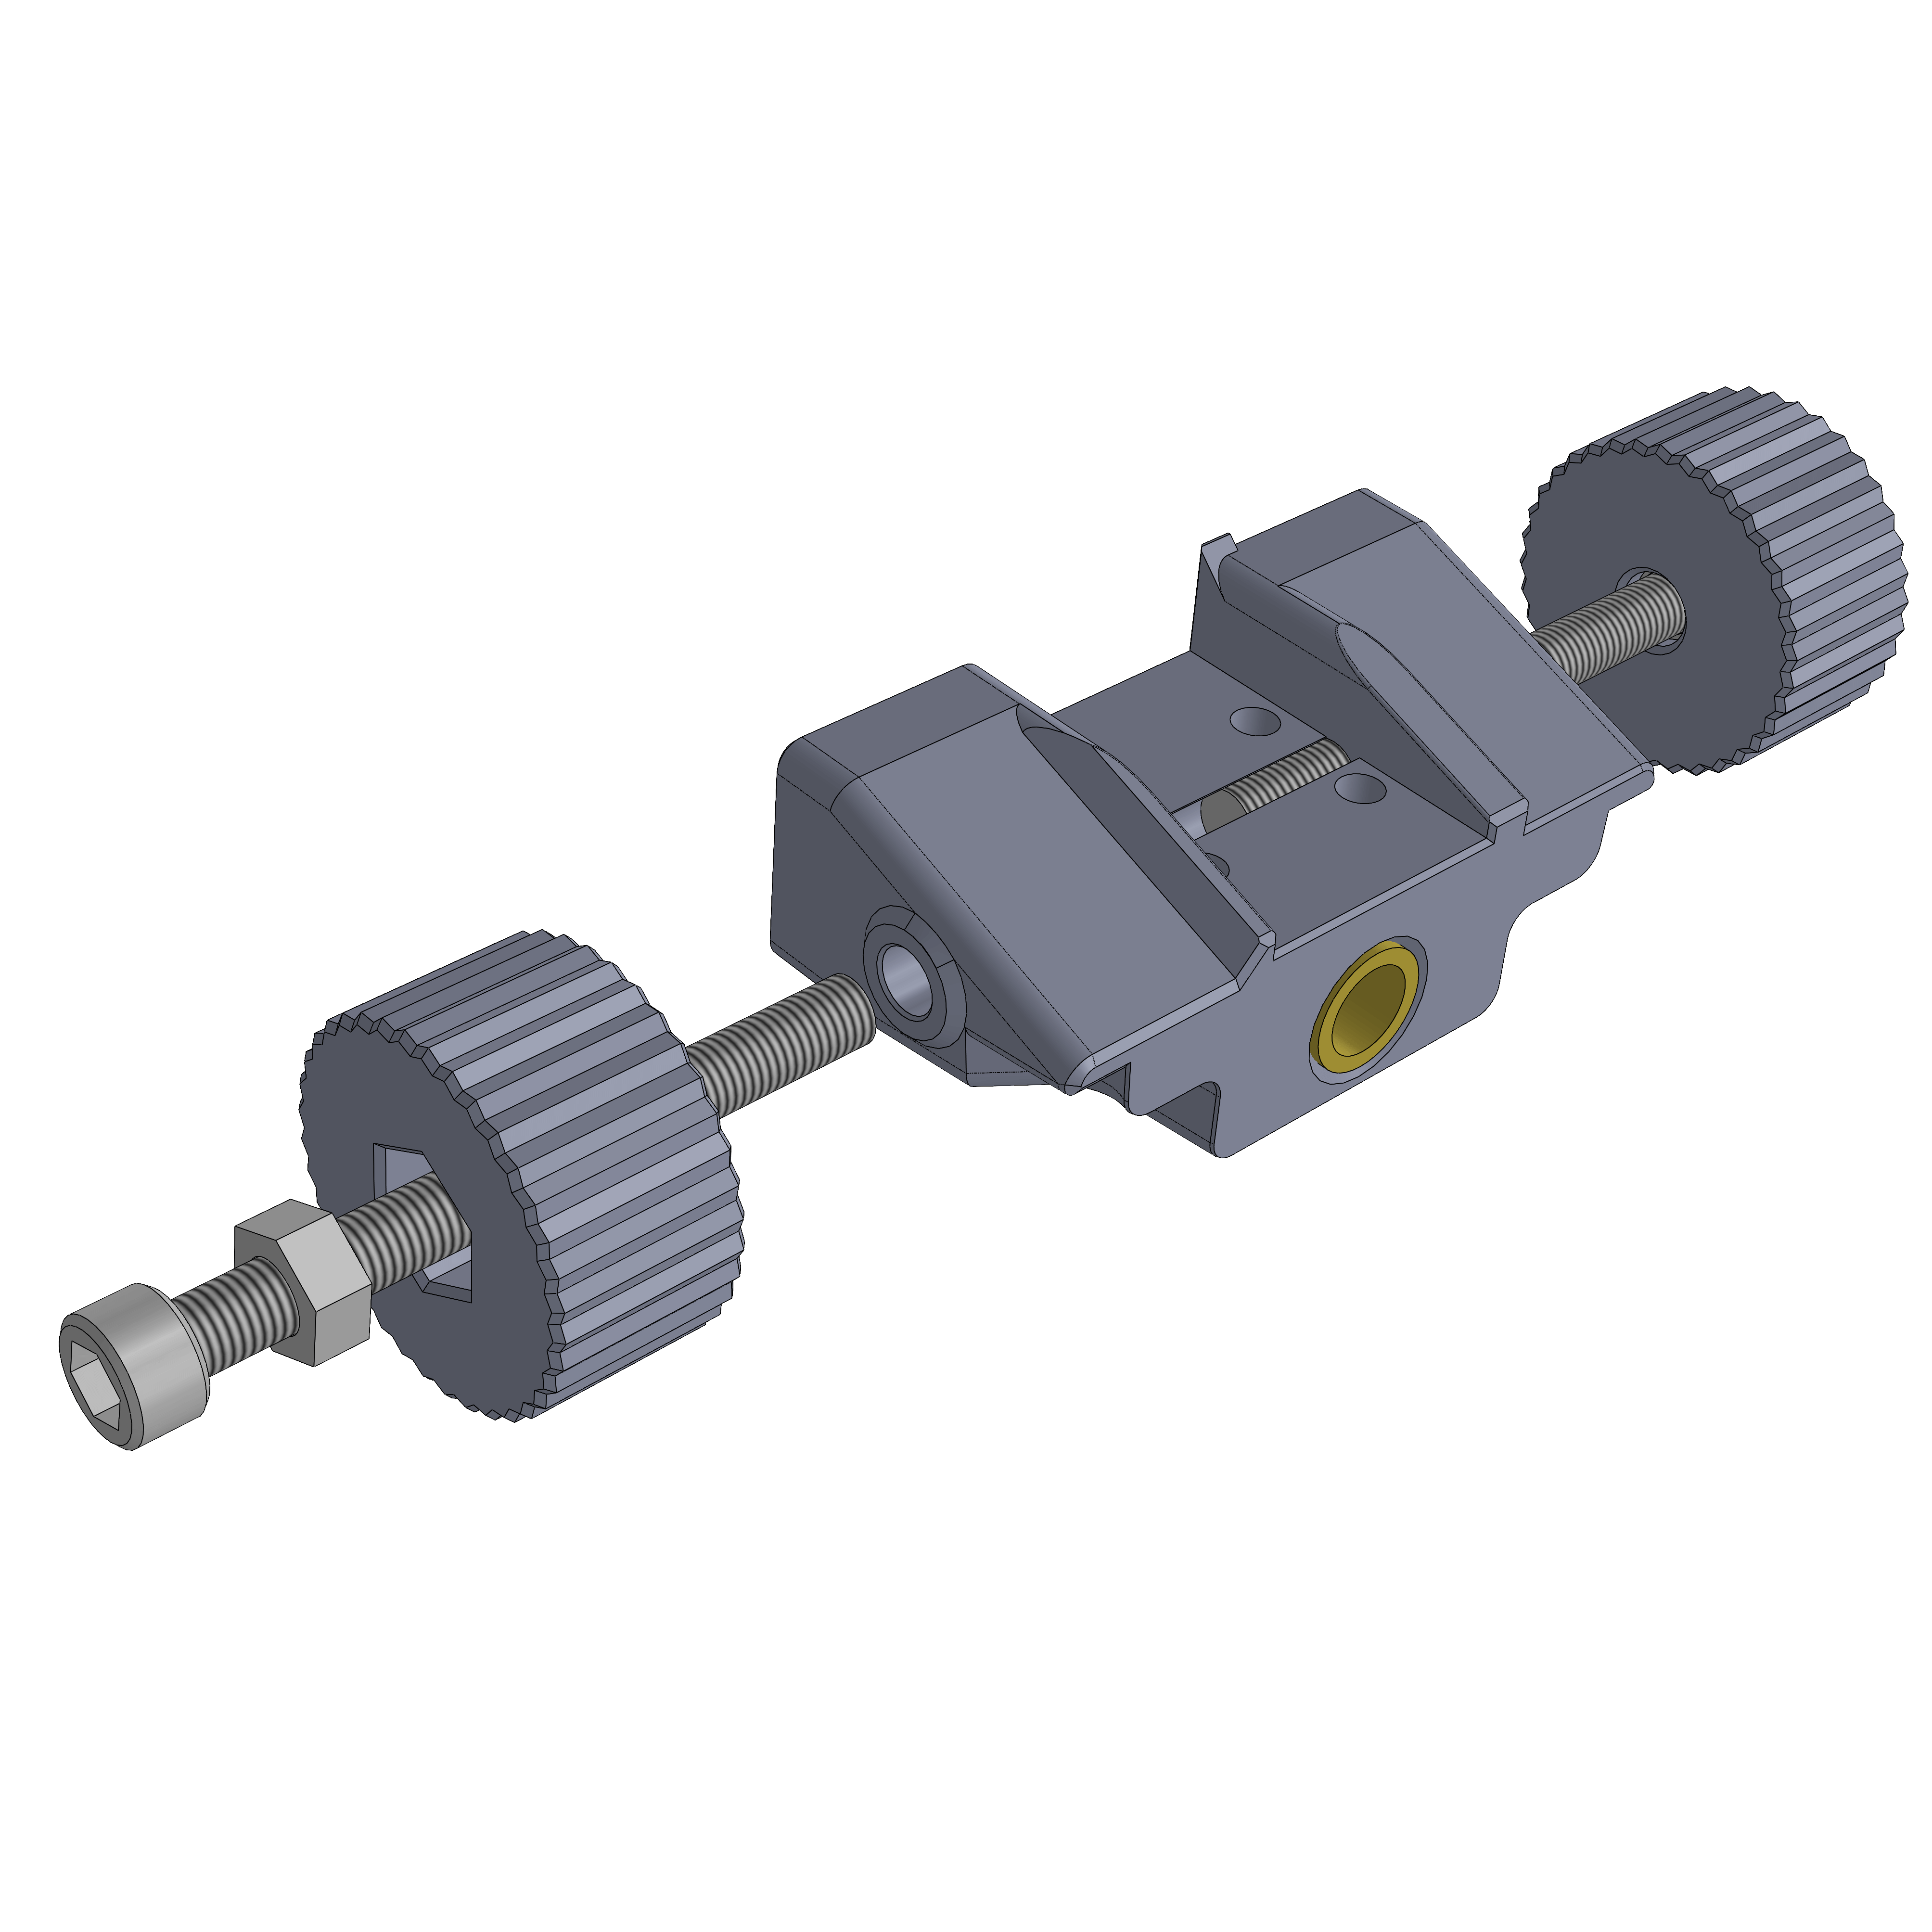
- Put the M5 Nuts all the way to the end of the screws, then push them into the knobs. Screw both screws into the MGN9C adapter, so that they touch the middle.
¶ Step 54
- Assembly
- Parts
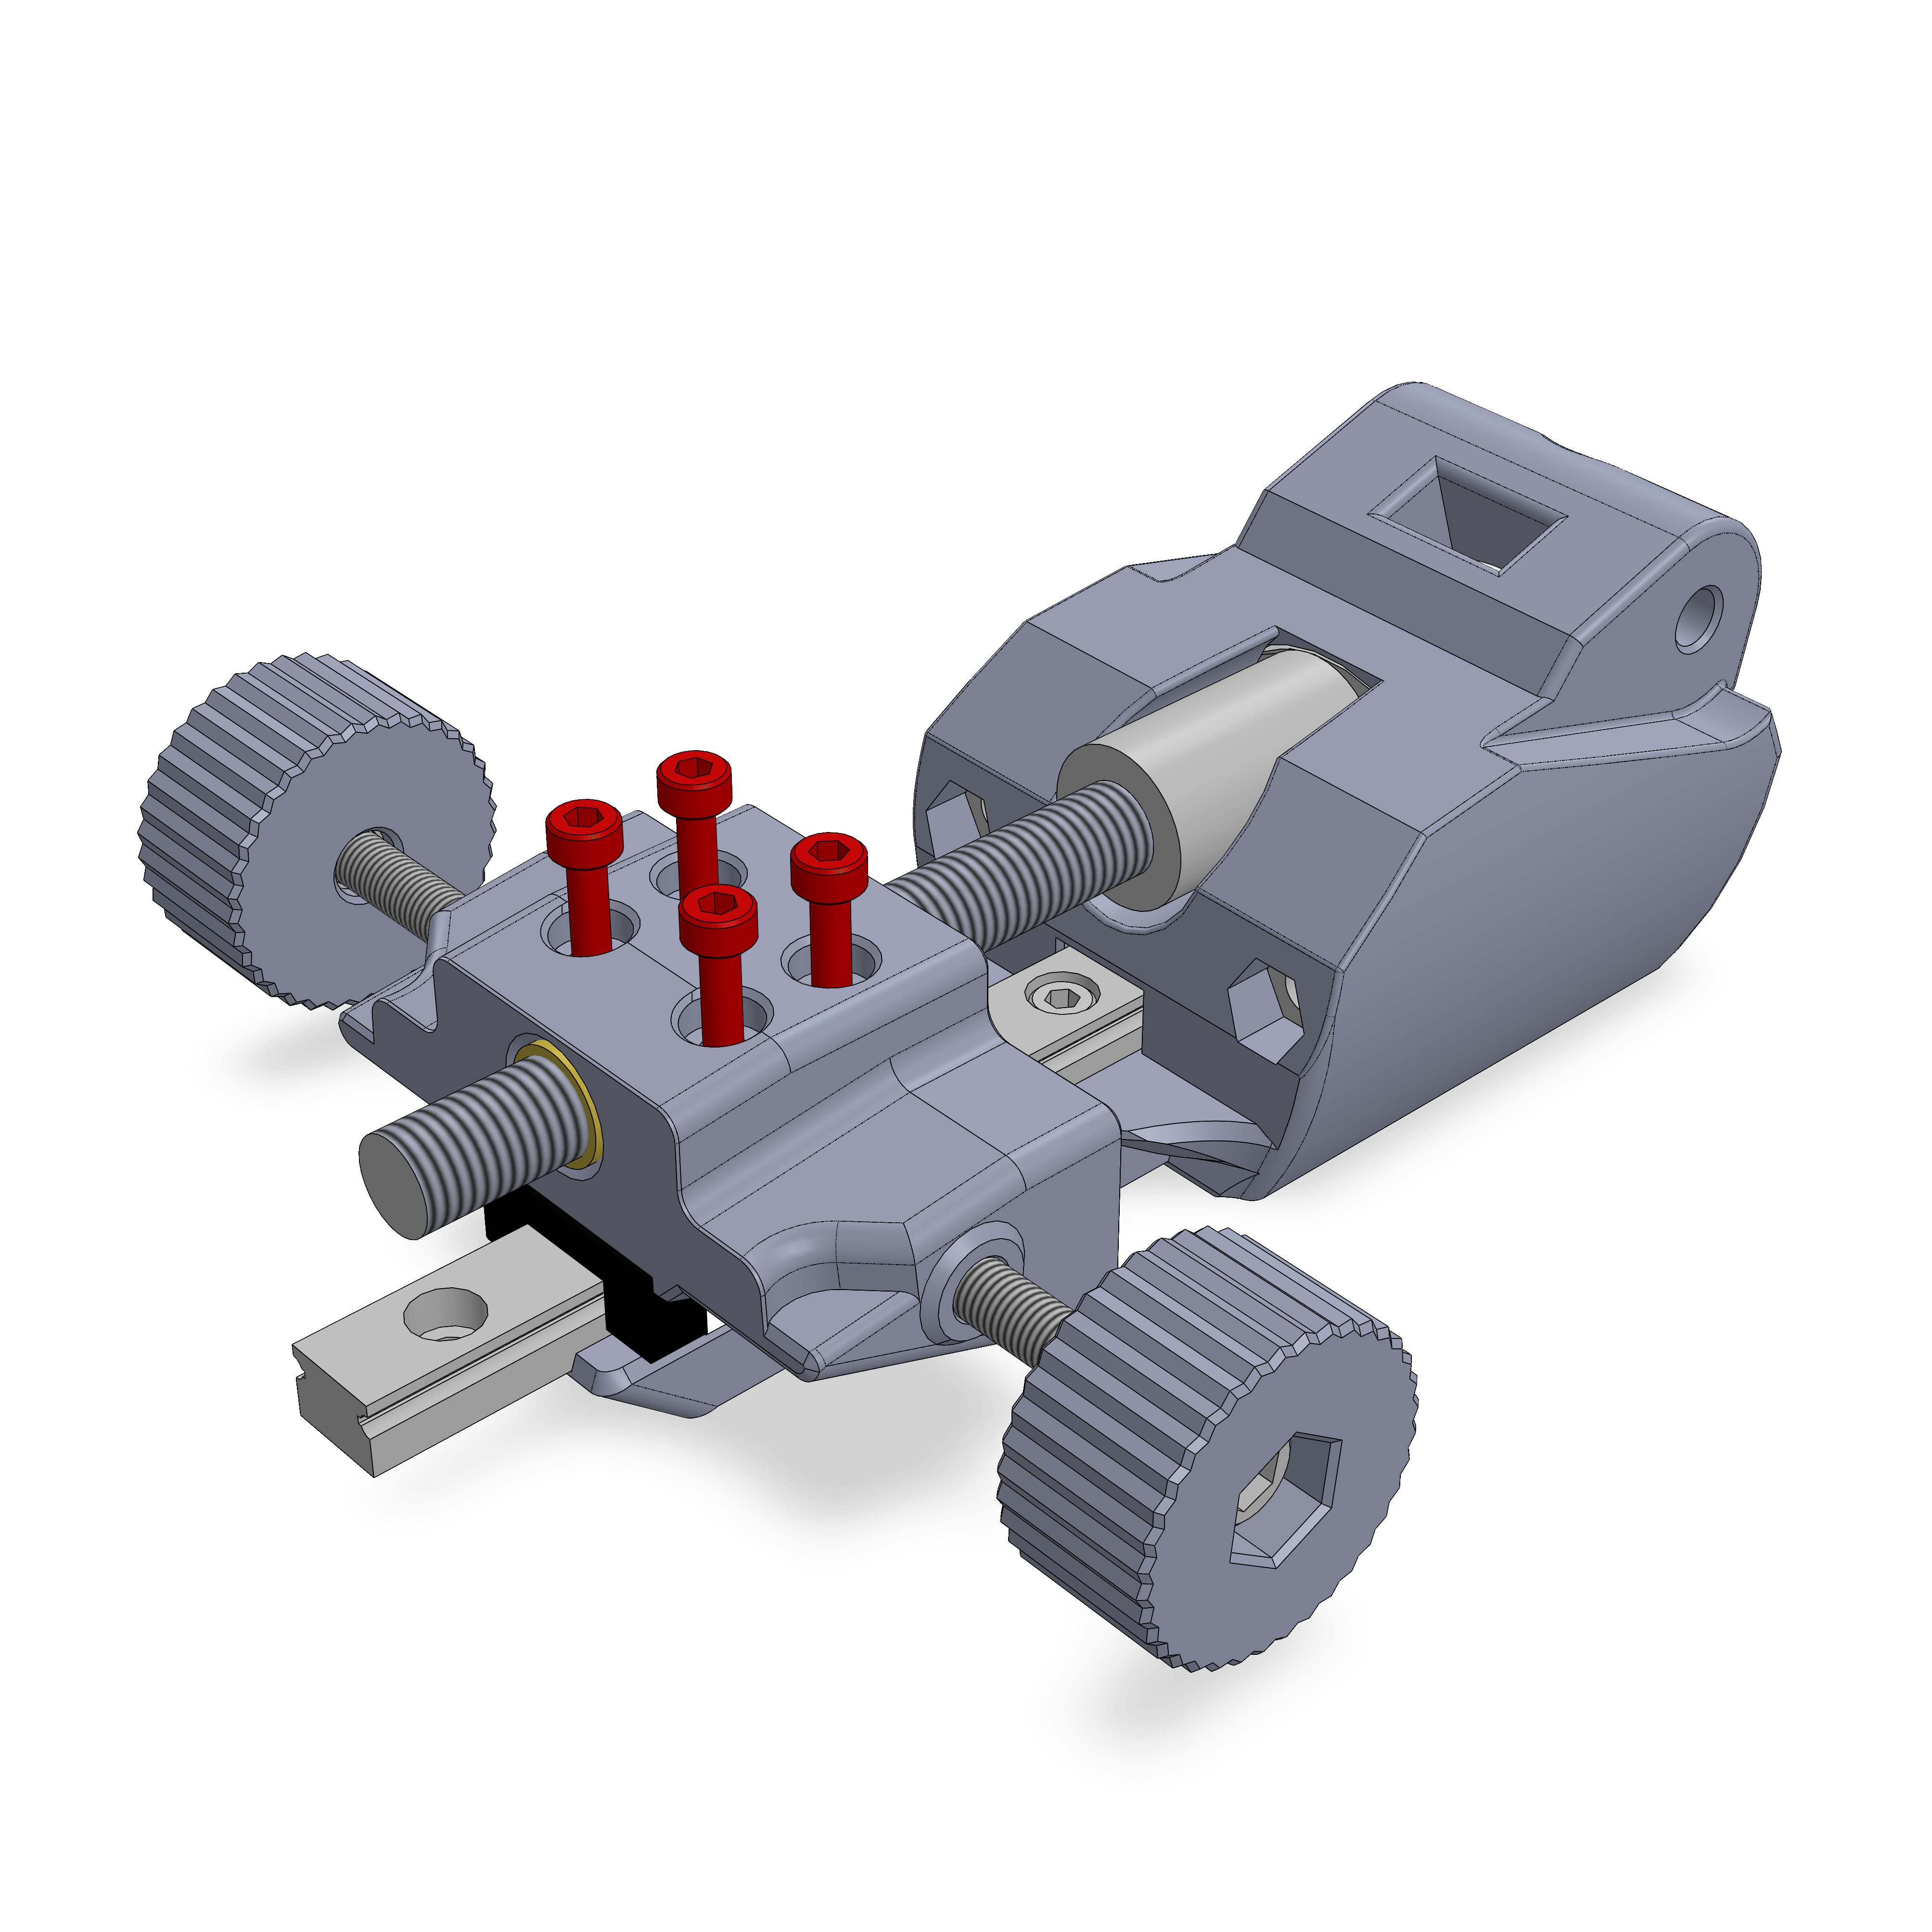
- Screw in the M8 rod, then attach the MGN9C adapter to the MGN9C slider.
- Attach with 4 M3x16 screws. Don't tighten these too much, or the rail might bind.
- Insert the rod into the shaft coupler and tighten the grub screws.
¶ Hardware
- 4x M3x16
¶ Step 55
- Assembly
- Parts
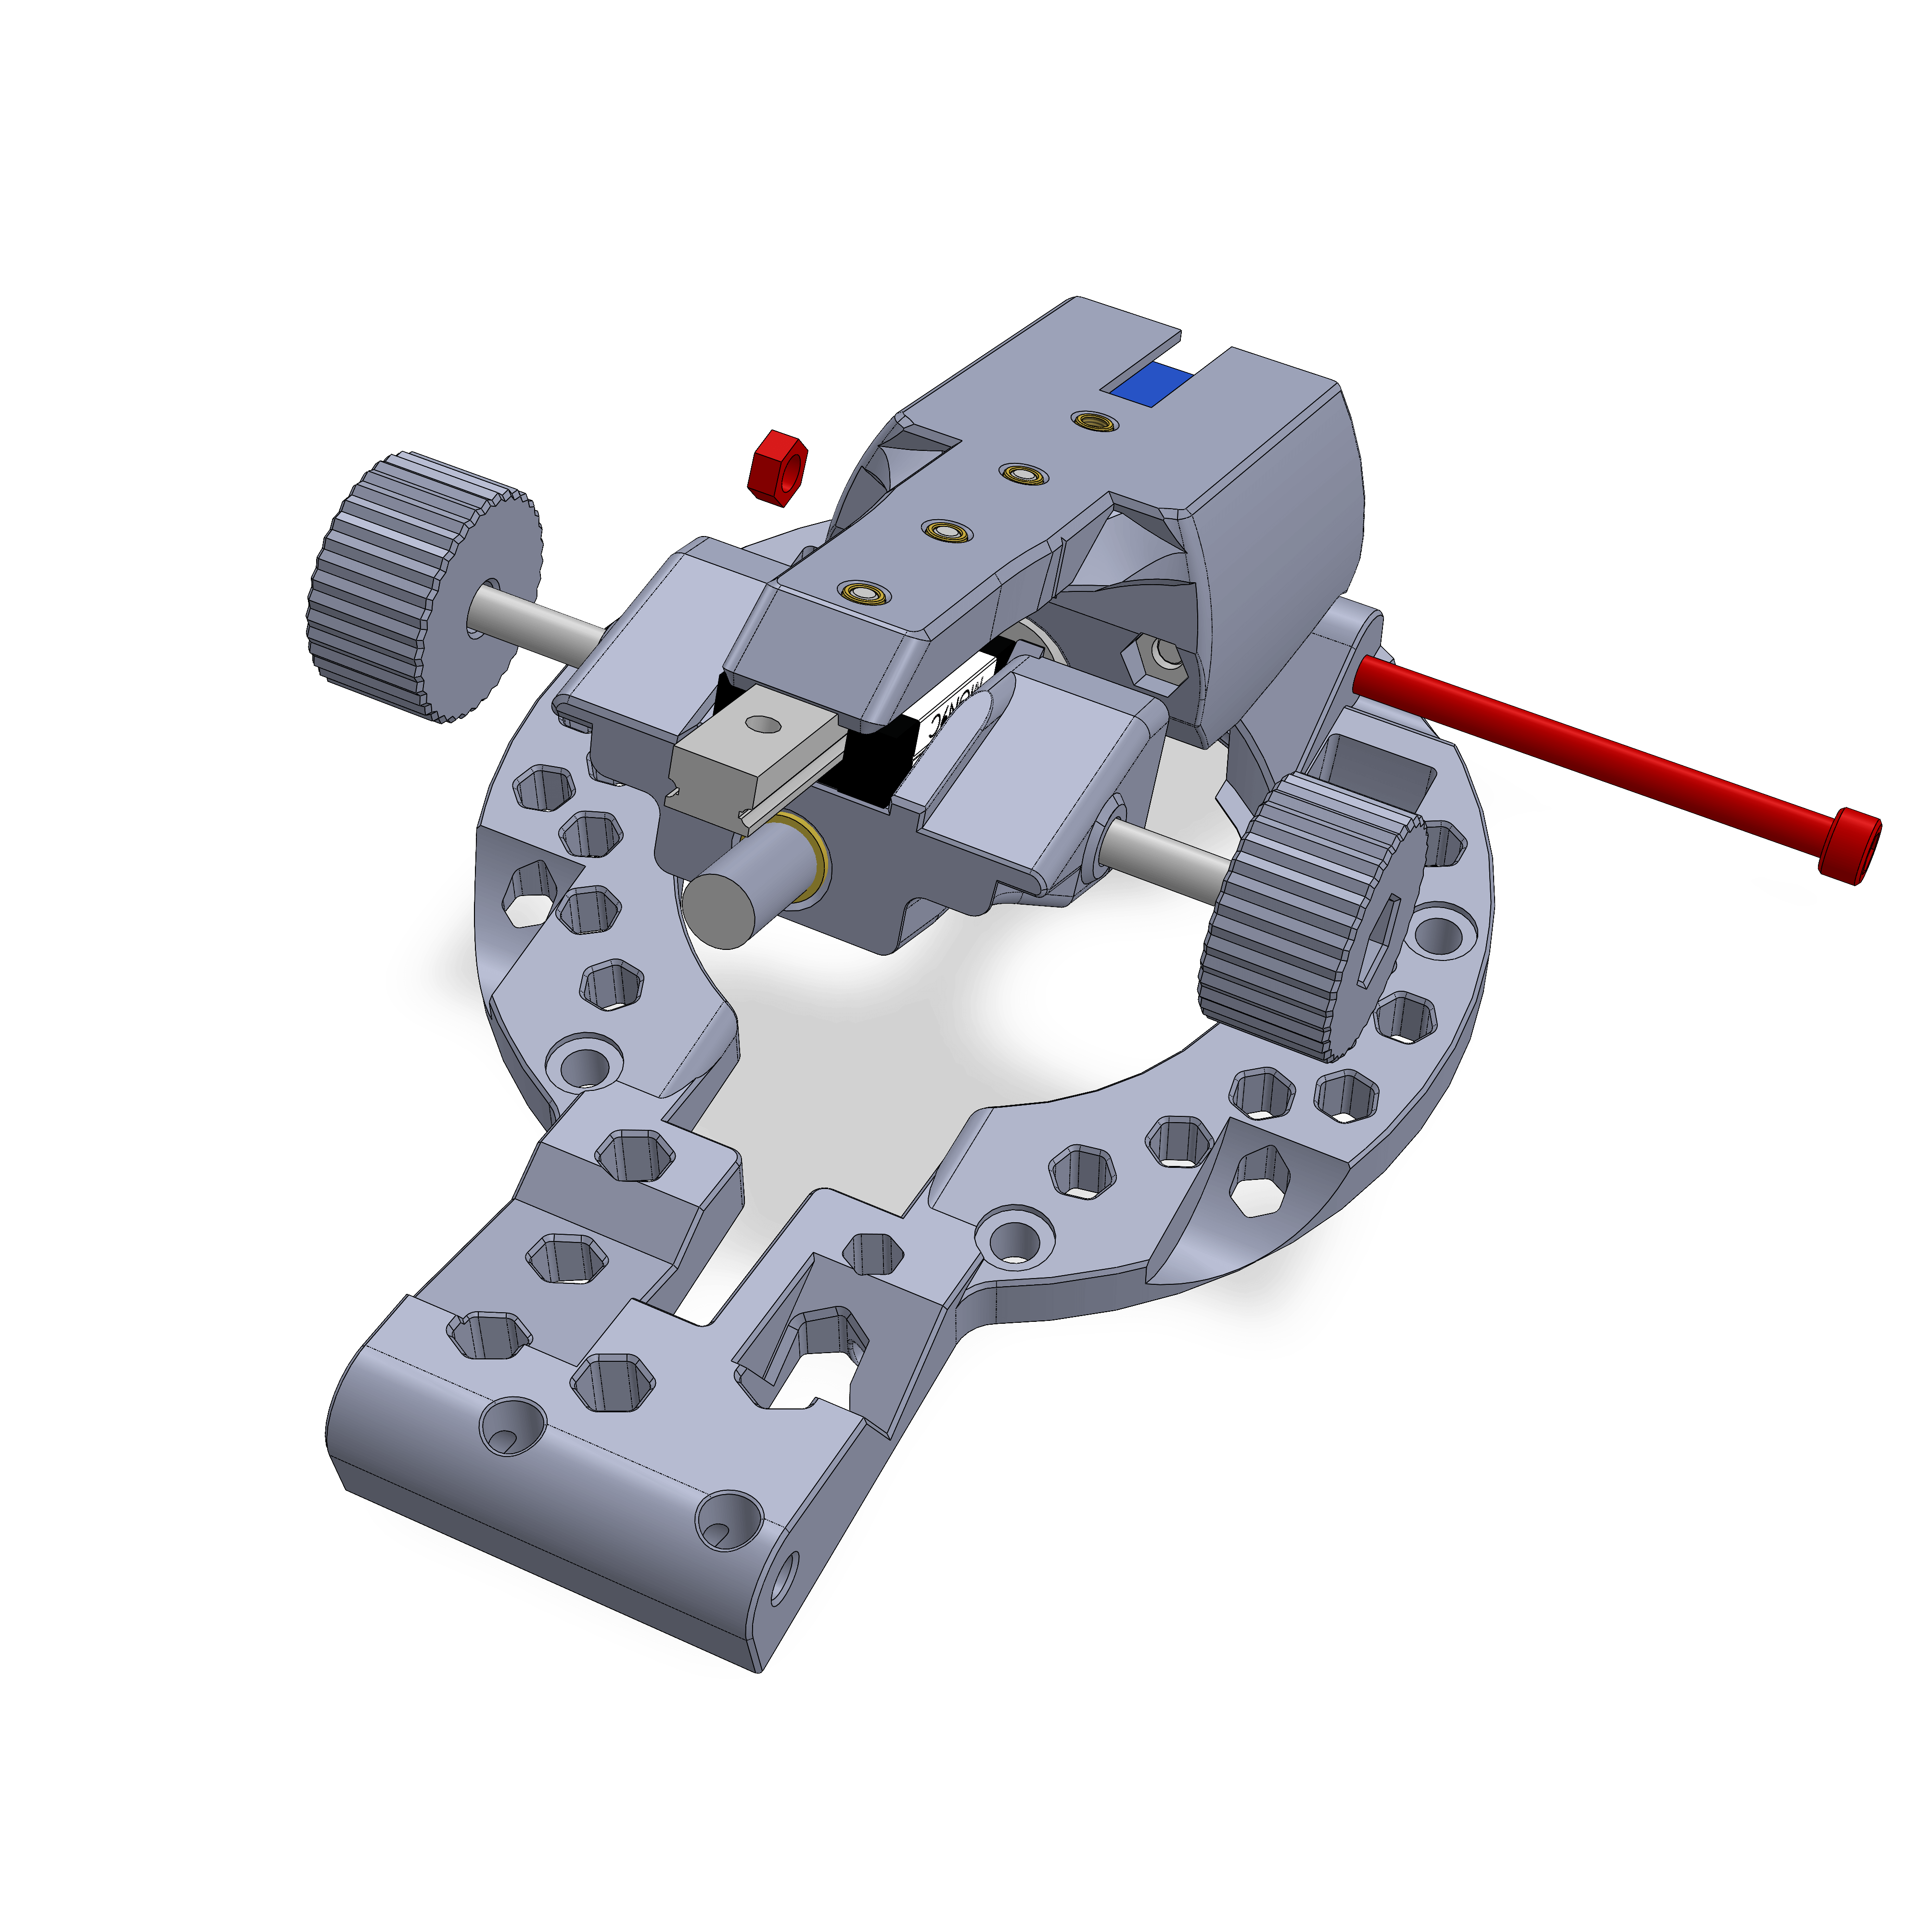
- Insert the ALT assembly into bottom part as shown.
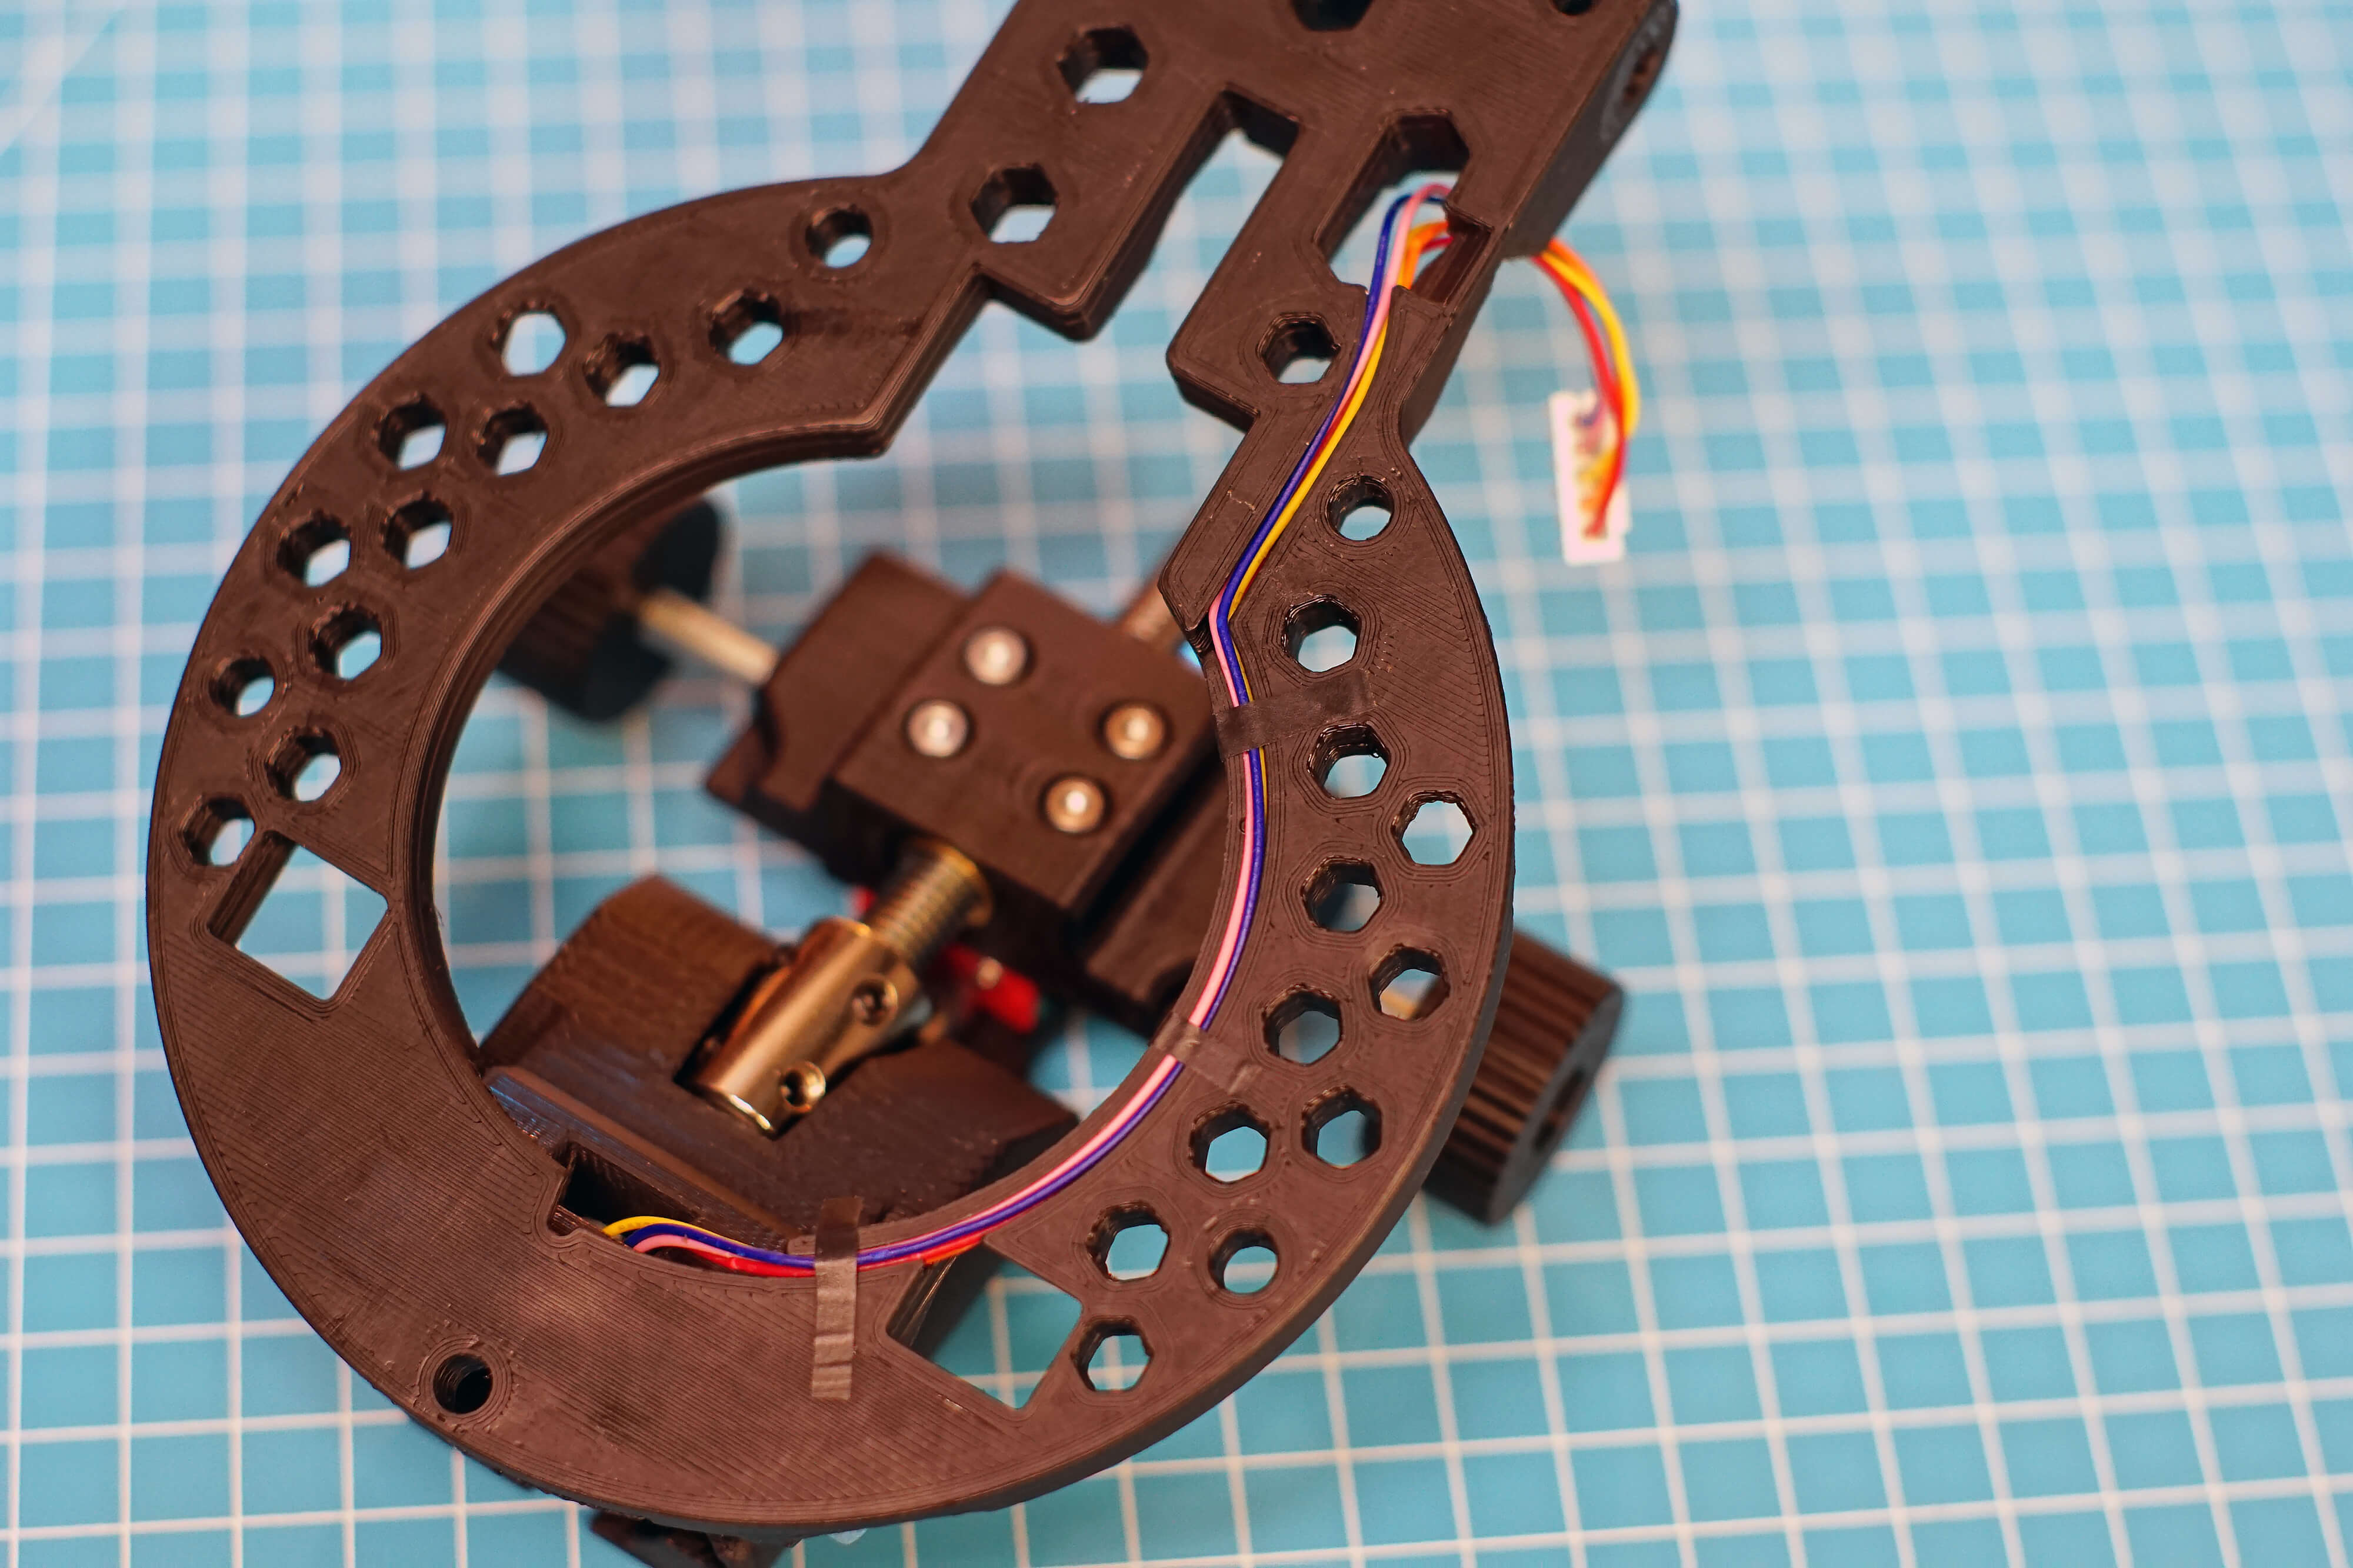
This step is very fiddly. Route the ALT stepper wires through the small channel in the bottom part. Make sure that no wires cross, otherwise they don't fit. I find it easiest to insert the wires one after another. You can take some small pieces of tape to hold the wires in place.
¶ Step 56
Remove the M5x80 screws from the base if you still had them in there.
Route the DEC stepper wire through the larger section of the cable channel as shown.
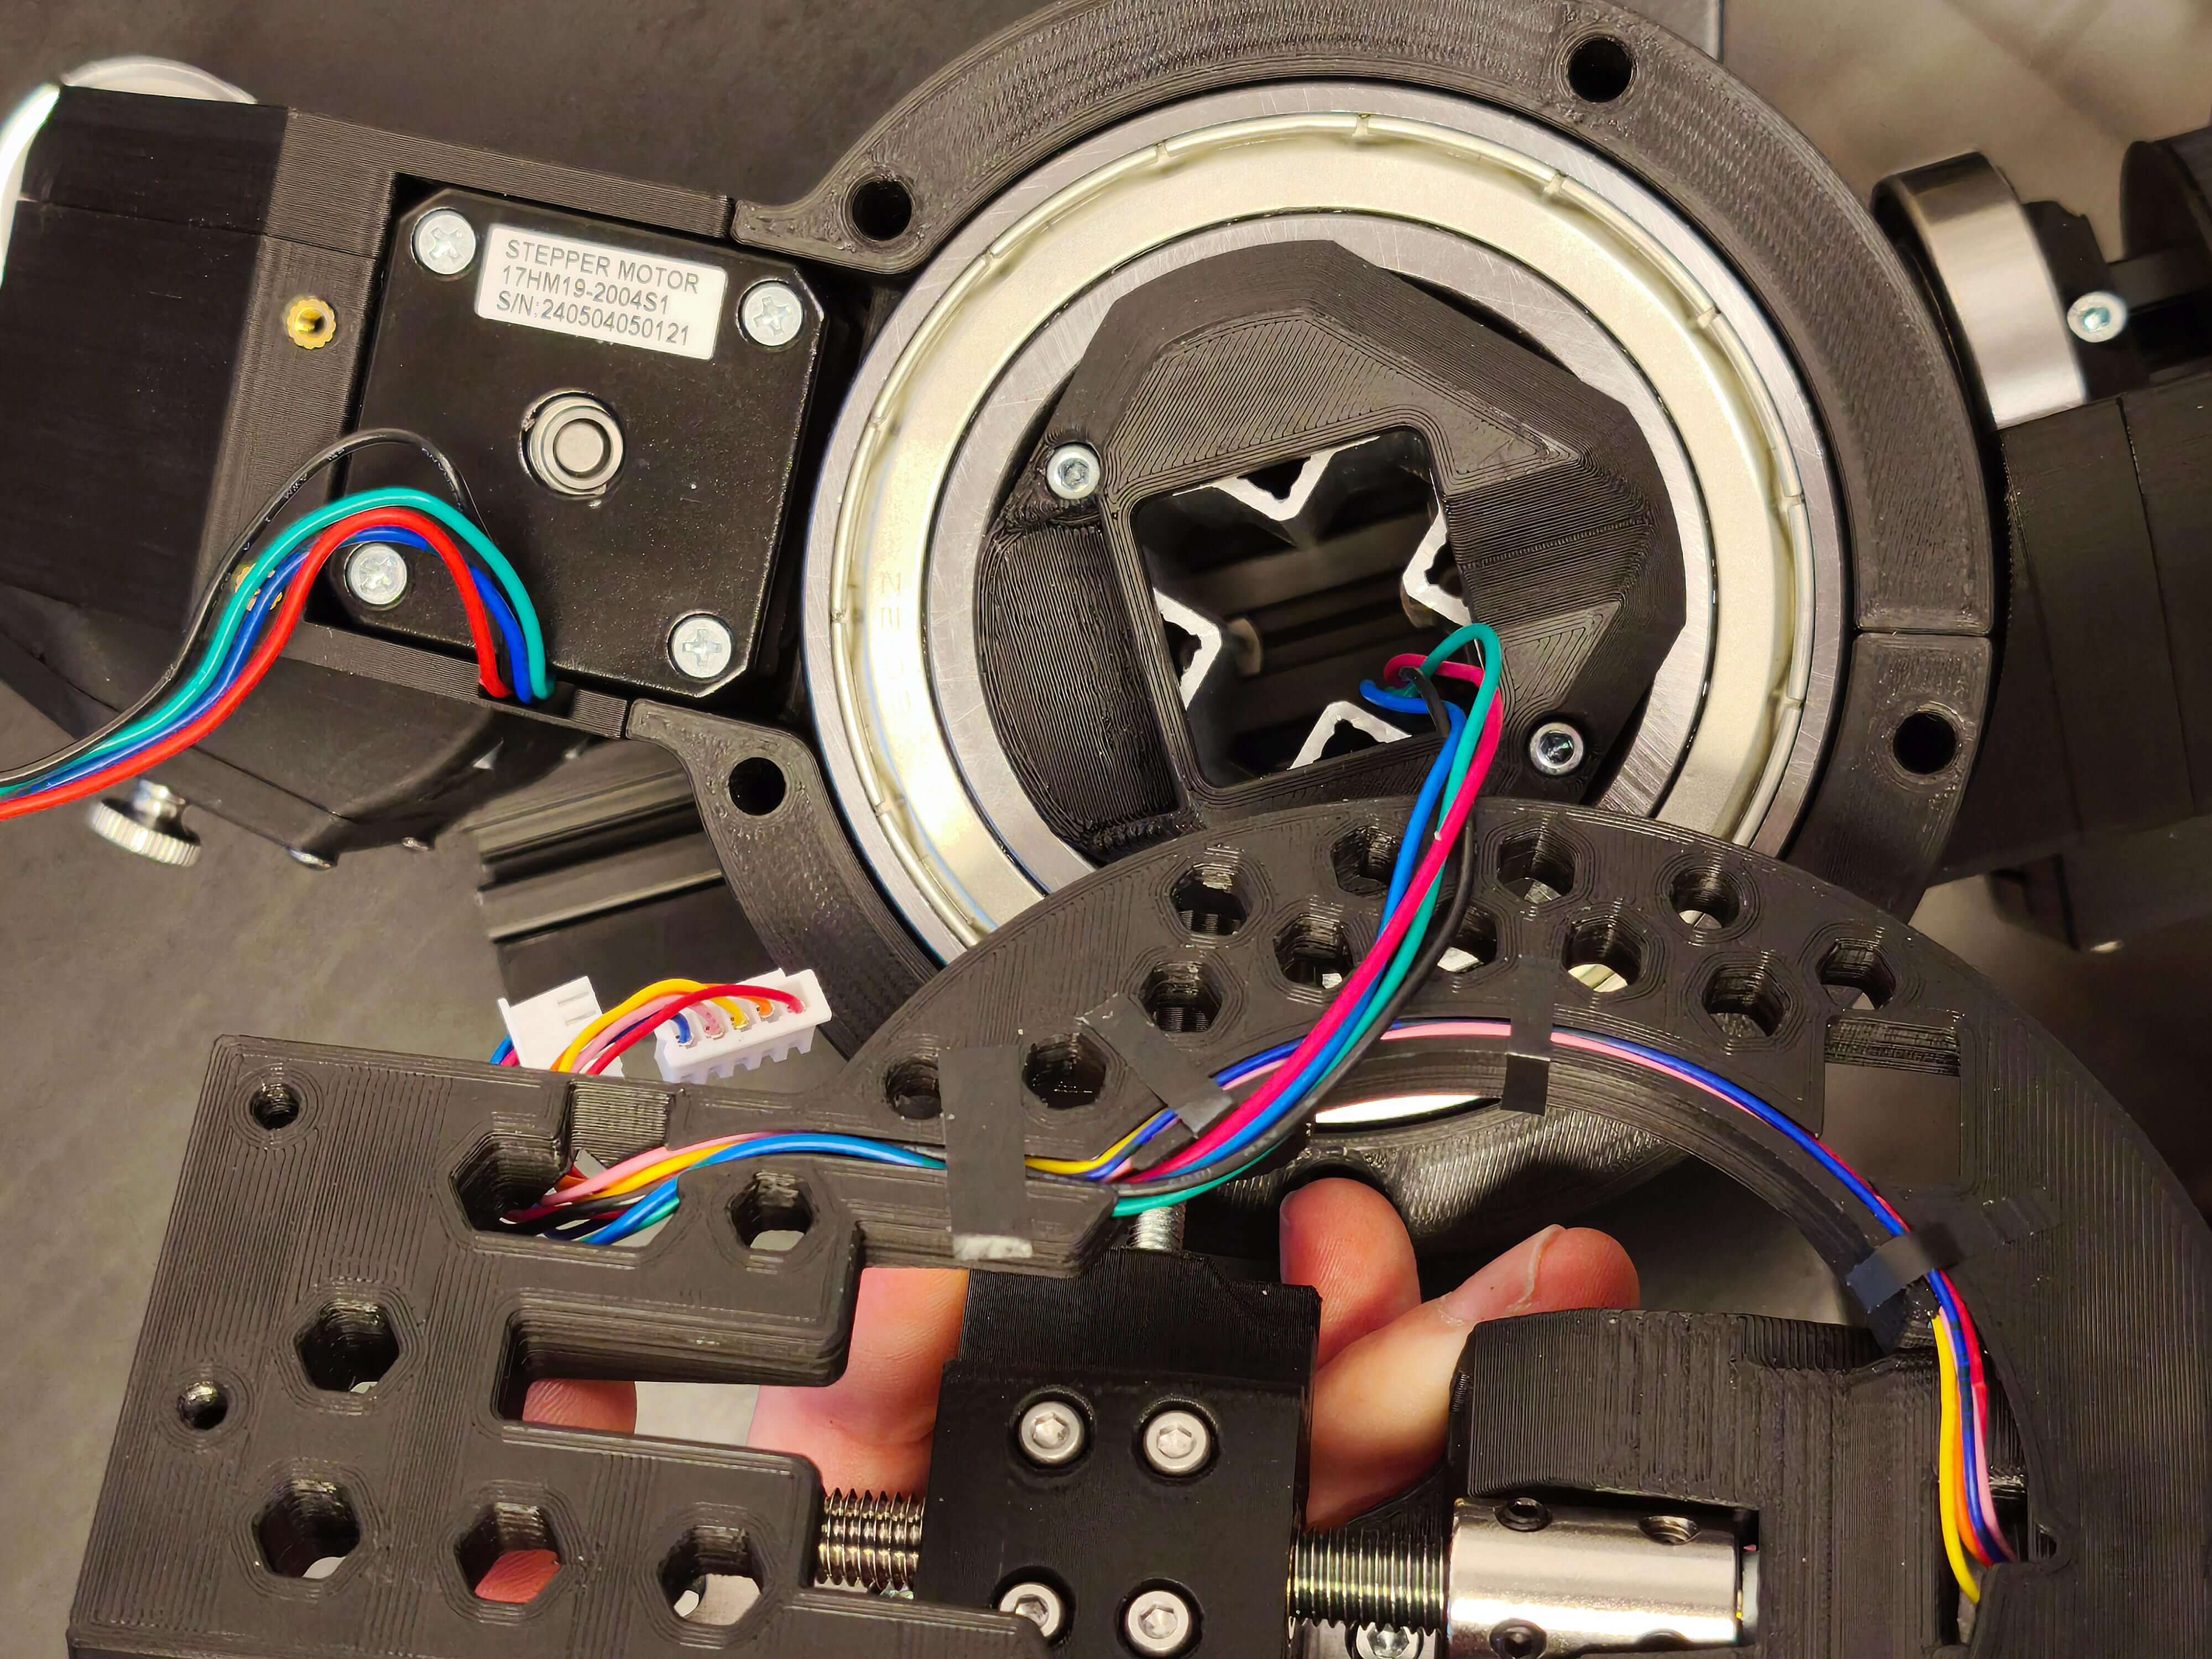
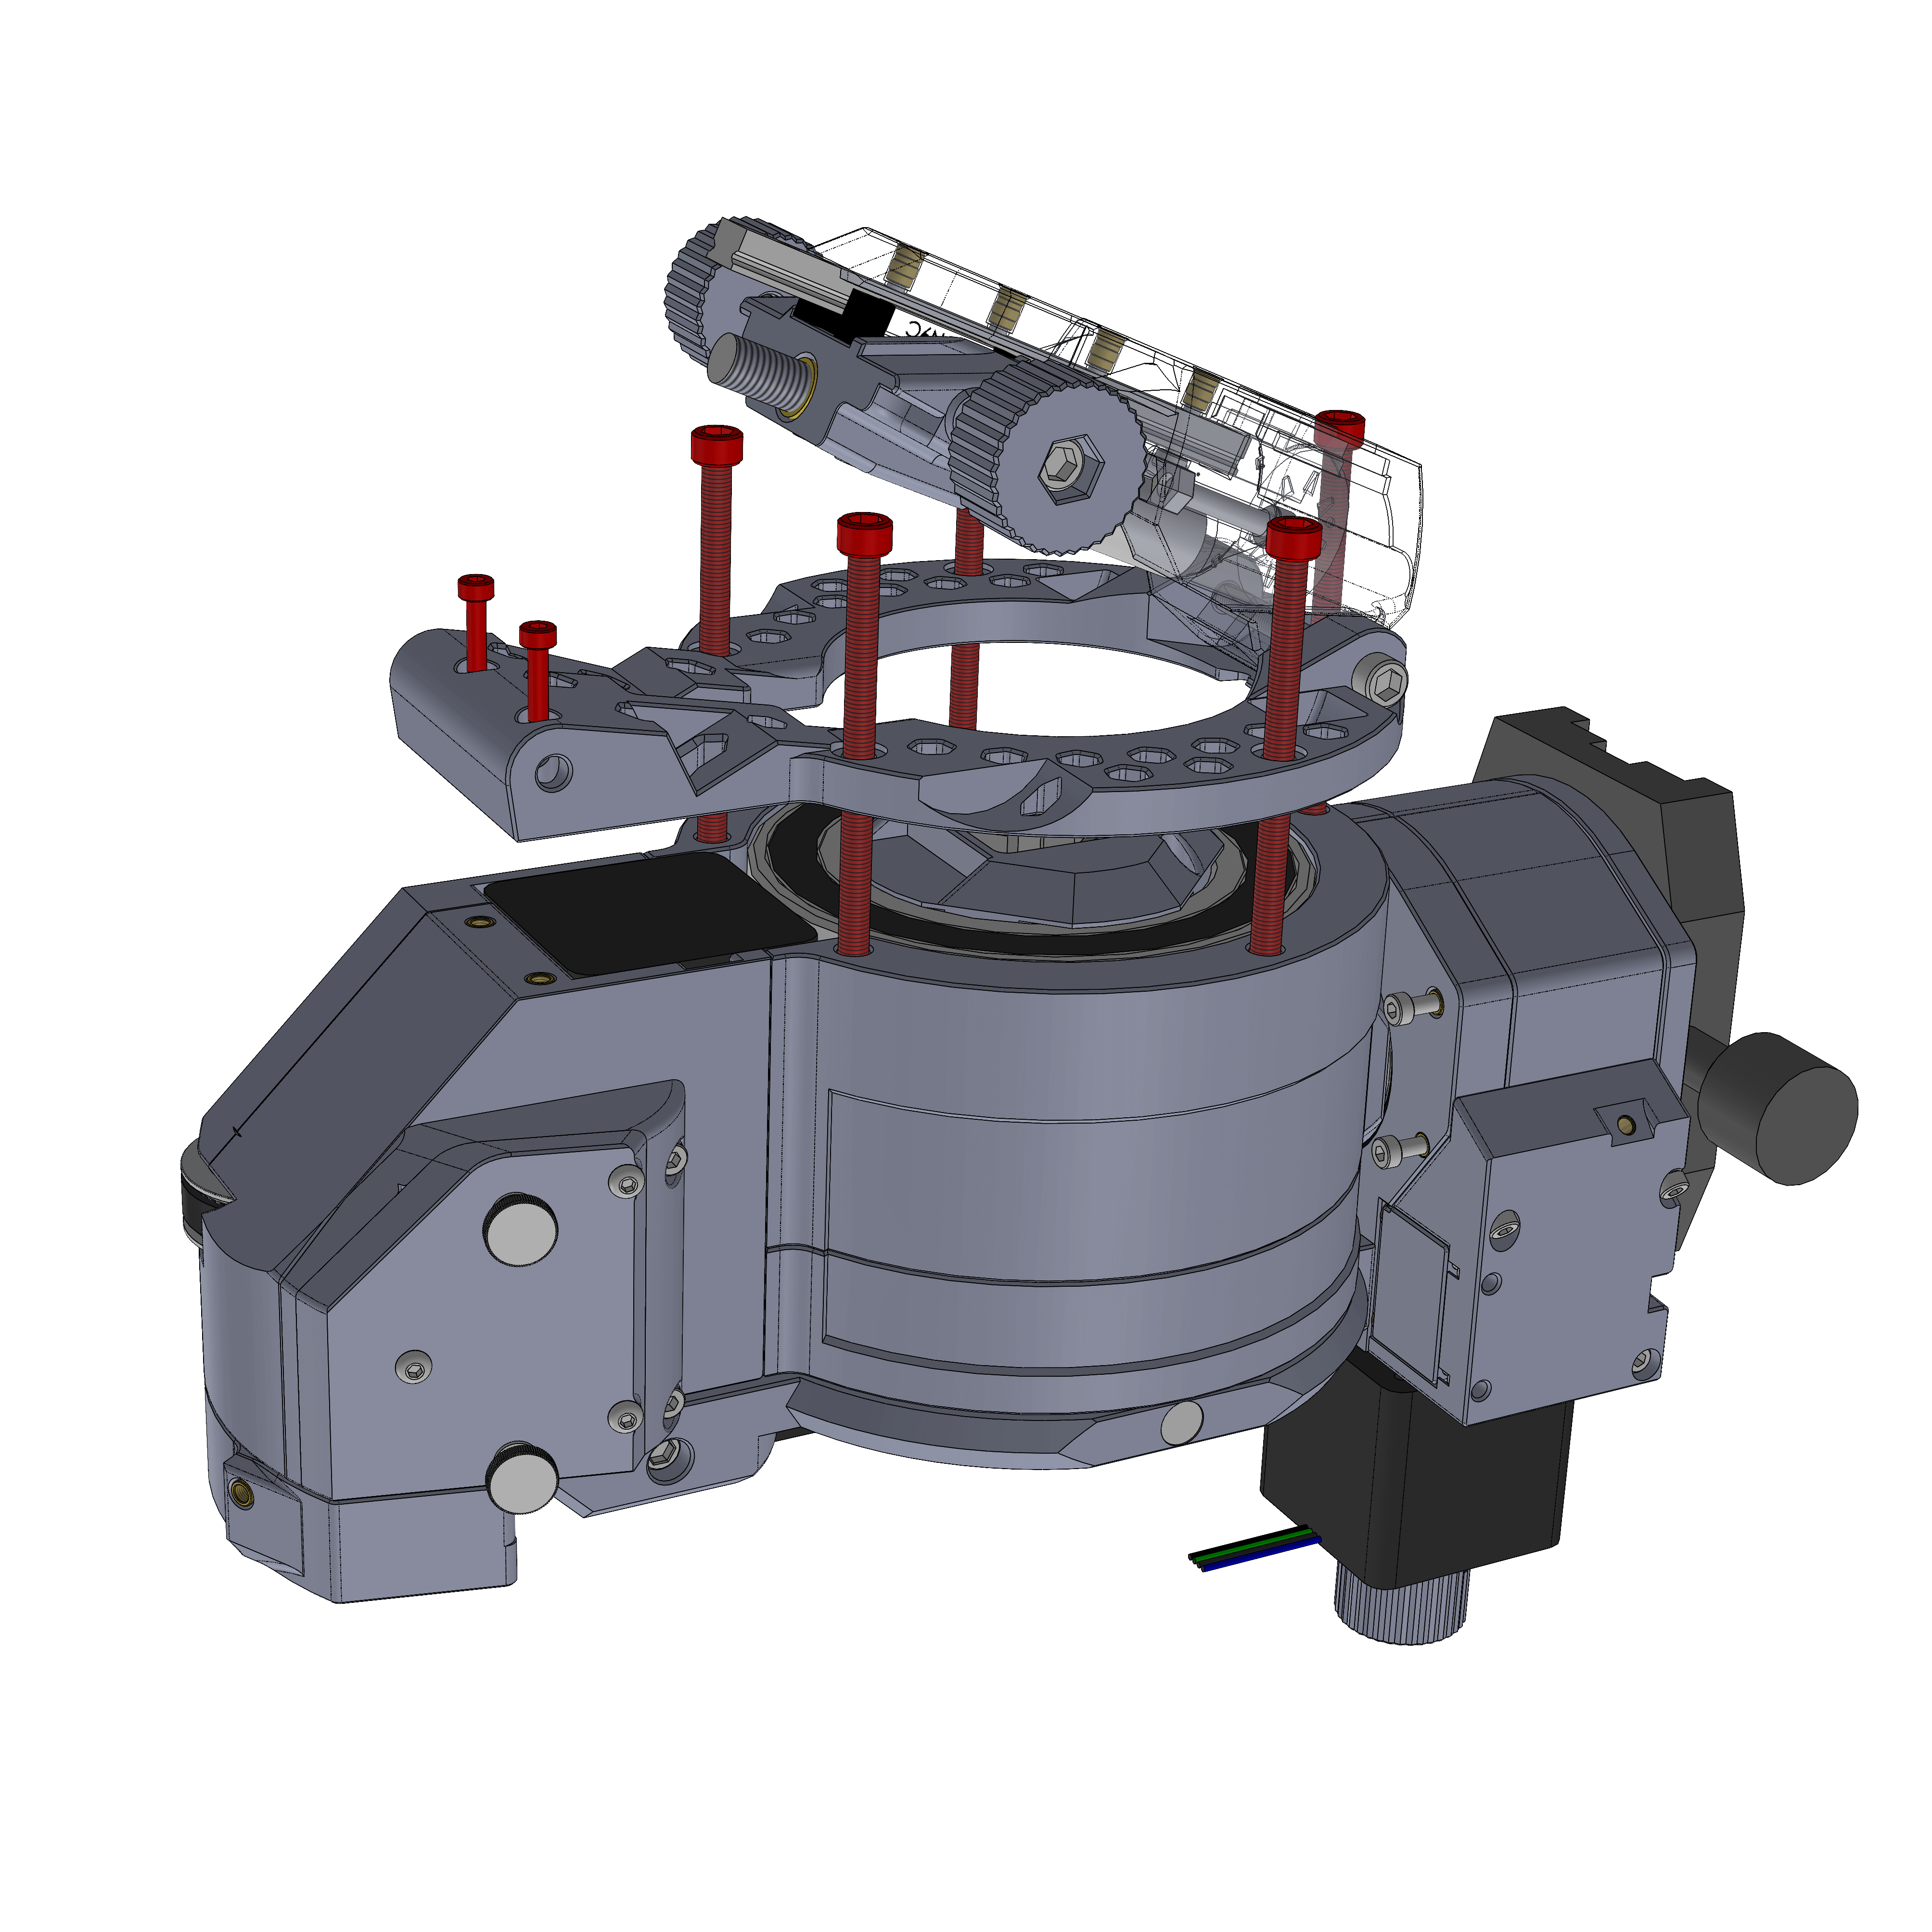
- Assembly
- Parts
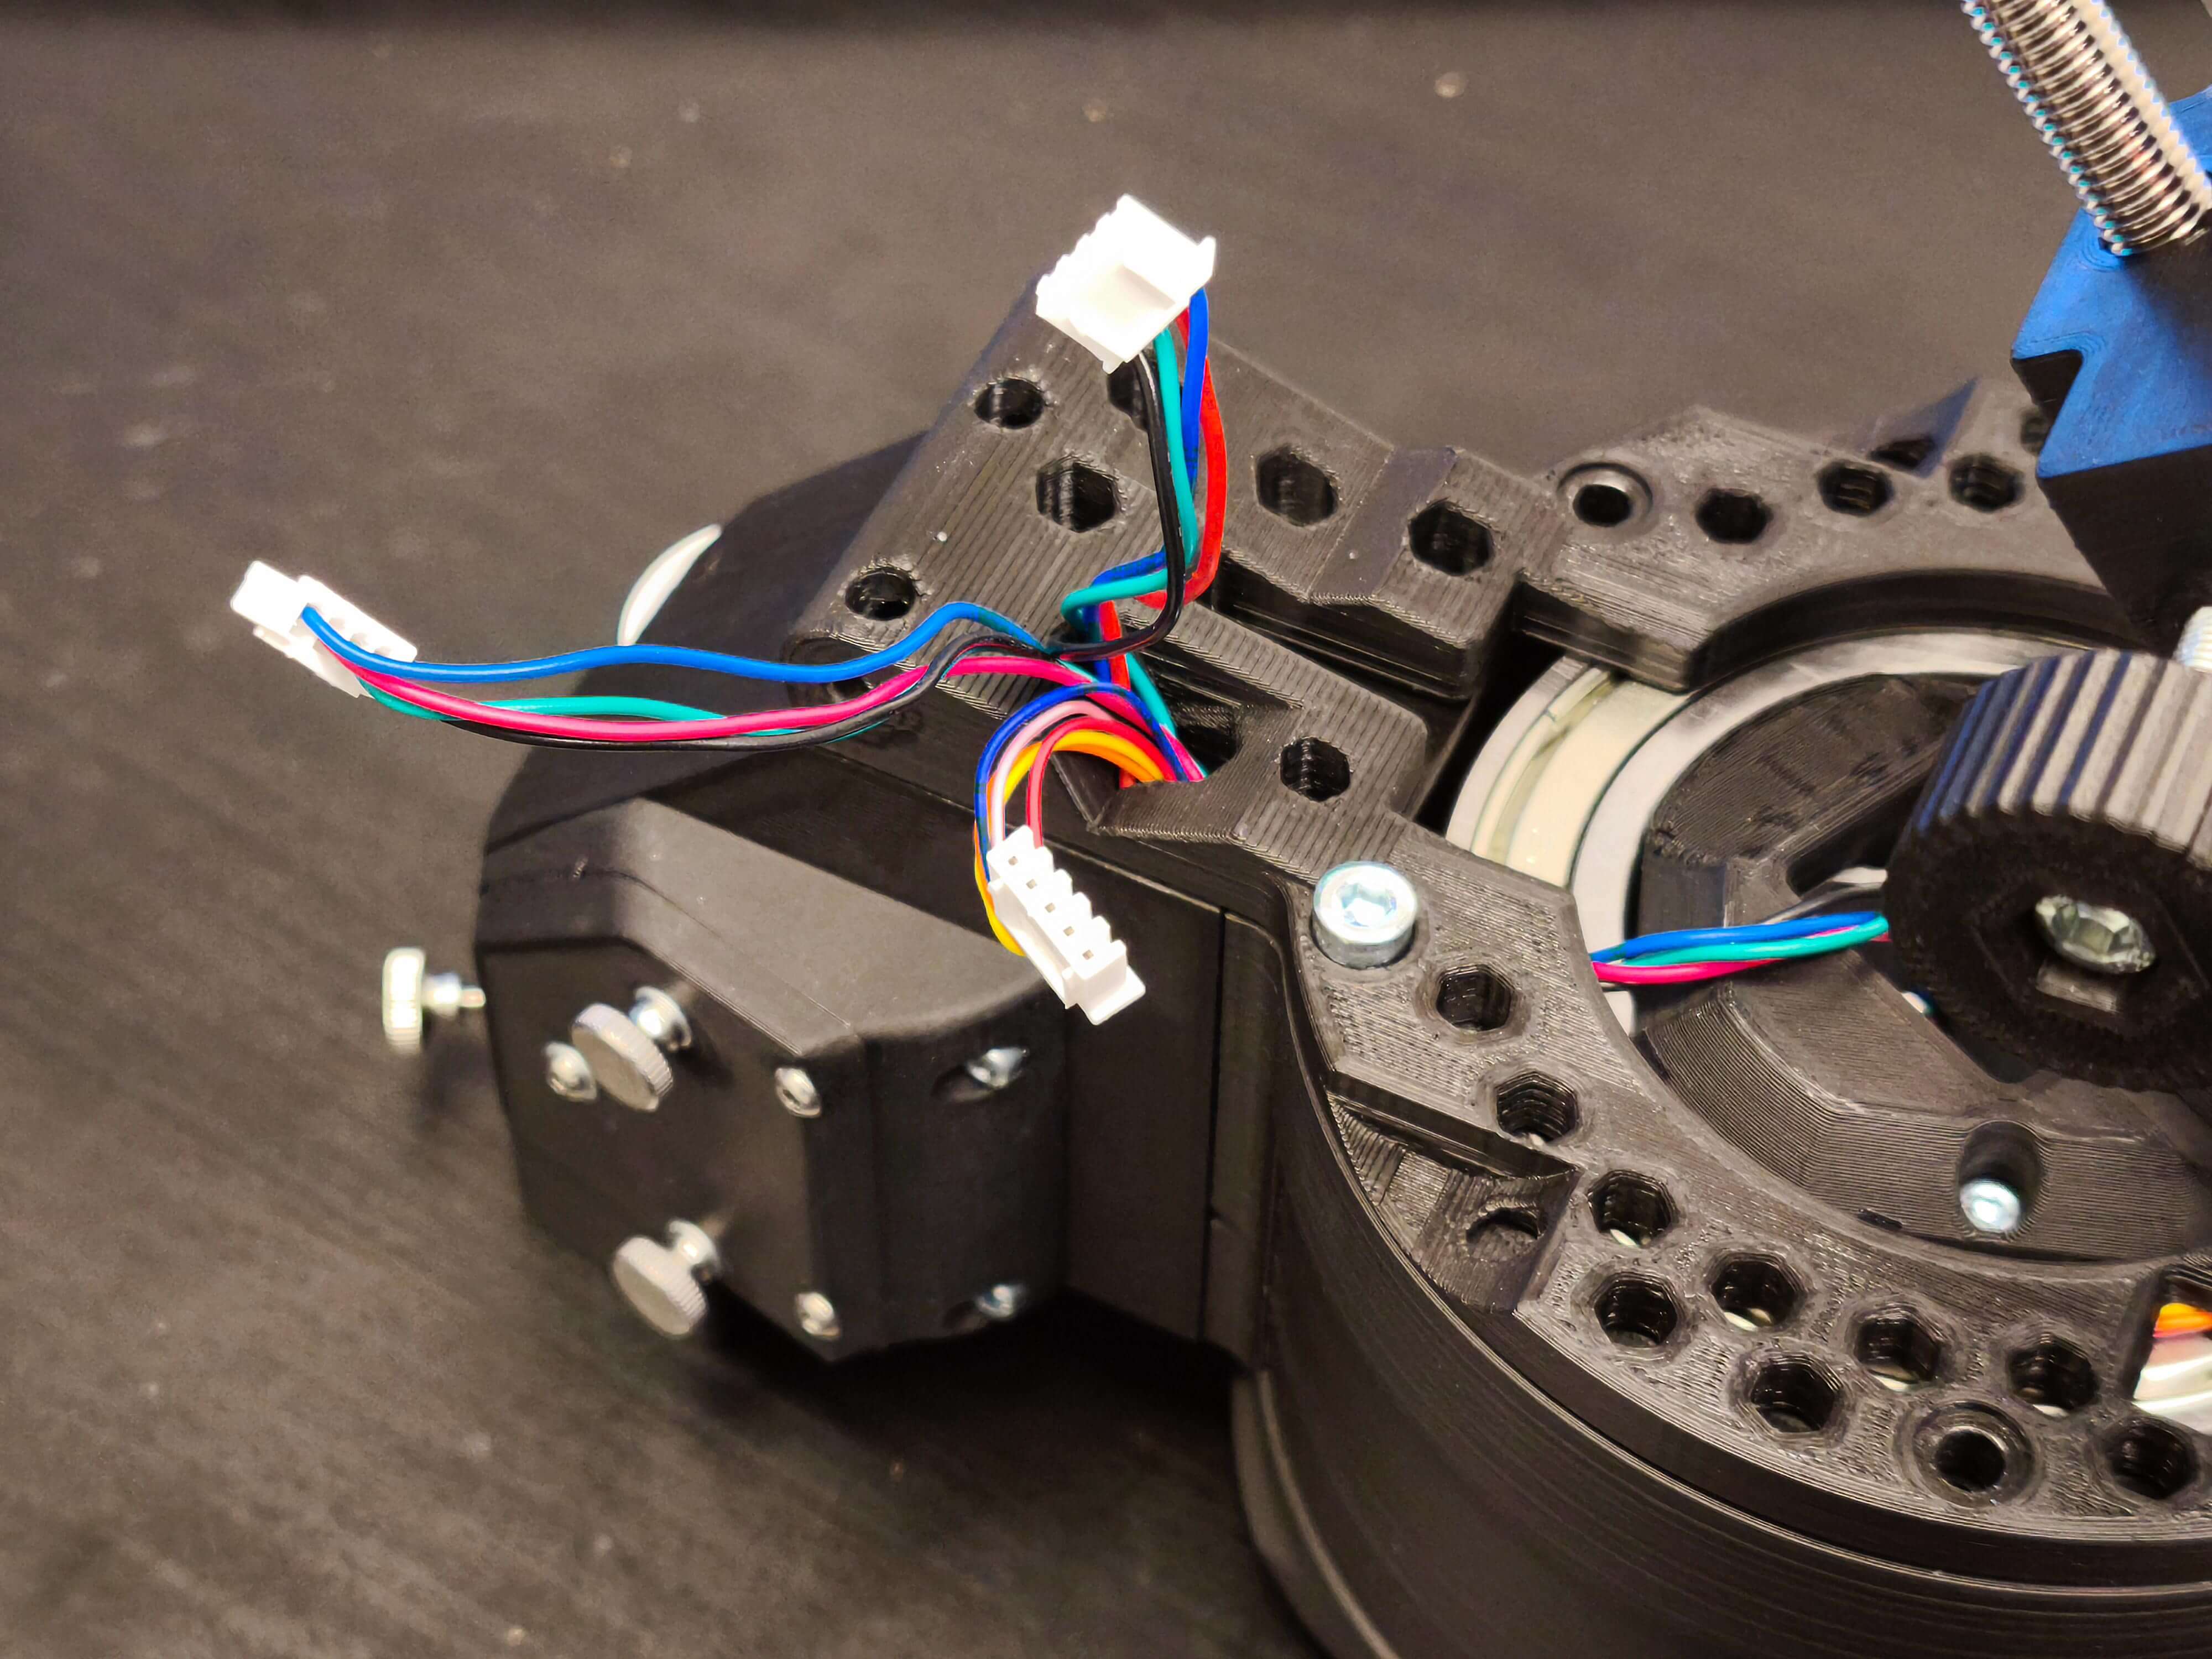
- Route the RA stepper wires through the cutout in the bottom part. (See picture below)
- Attach the bottom assembly as shown, tighten the M5 screws in a star pattern, like you would tighten a car tire. Make sure the bottom stays flush with the base and no cable is getting pinched.
- Also add the two M3x12 screws.
¶ Hardware
- 2x M3x12
This is how it should look like now.
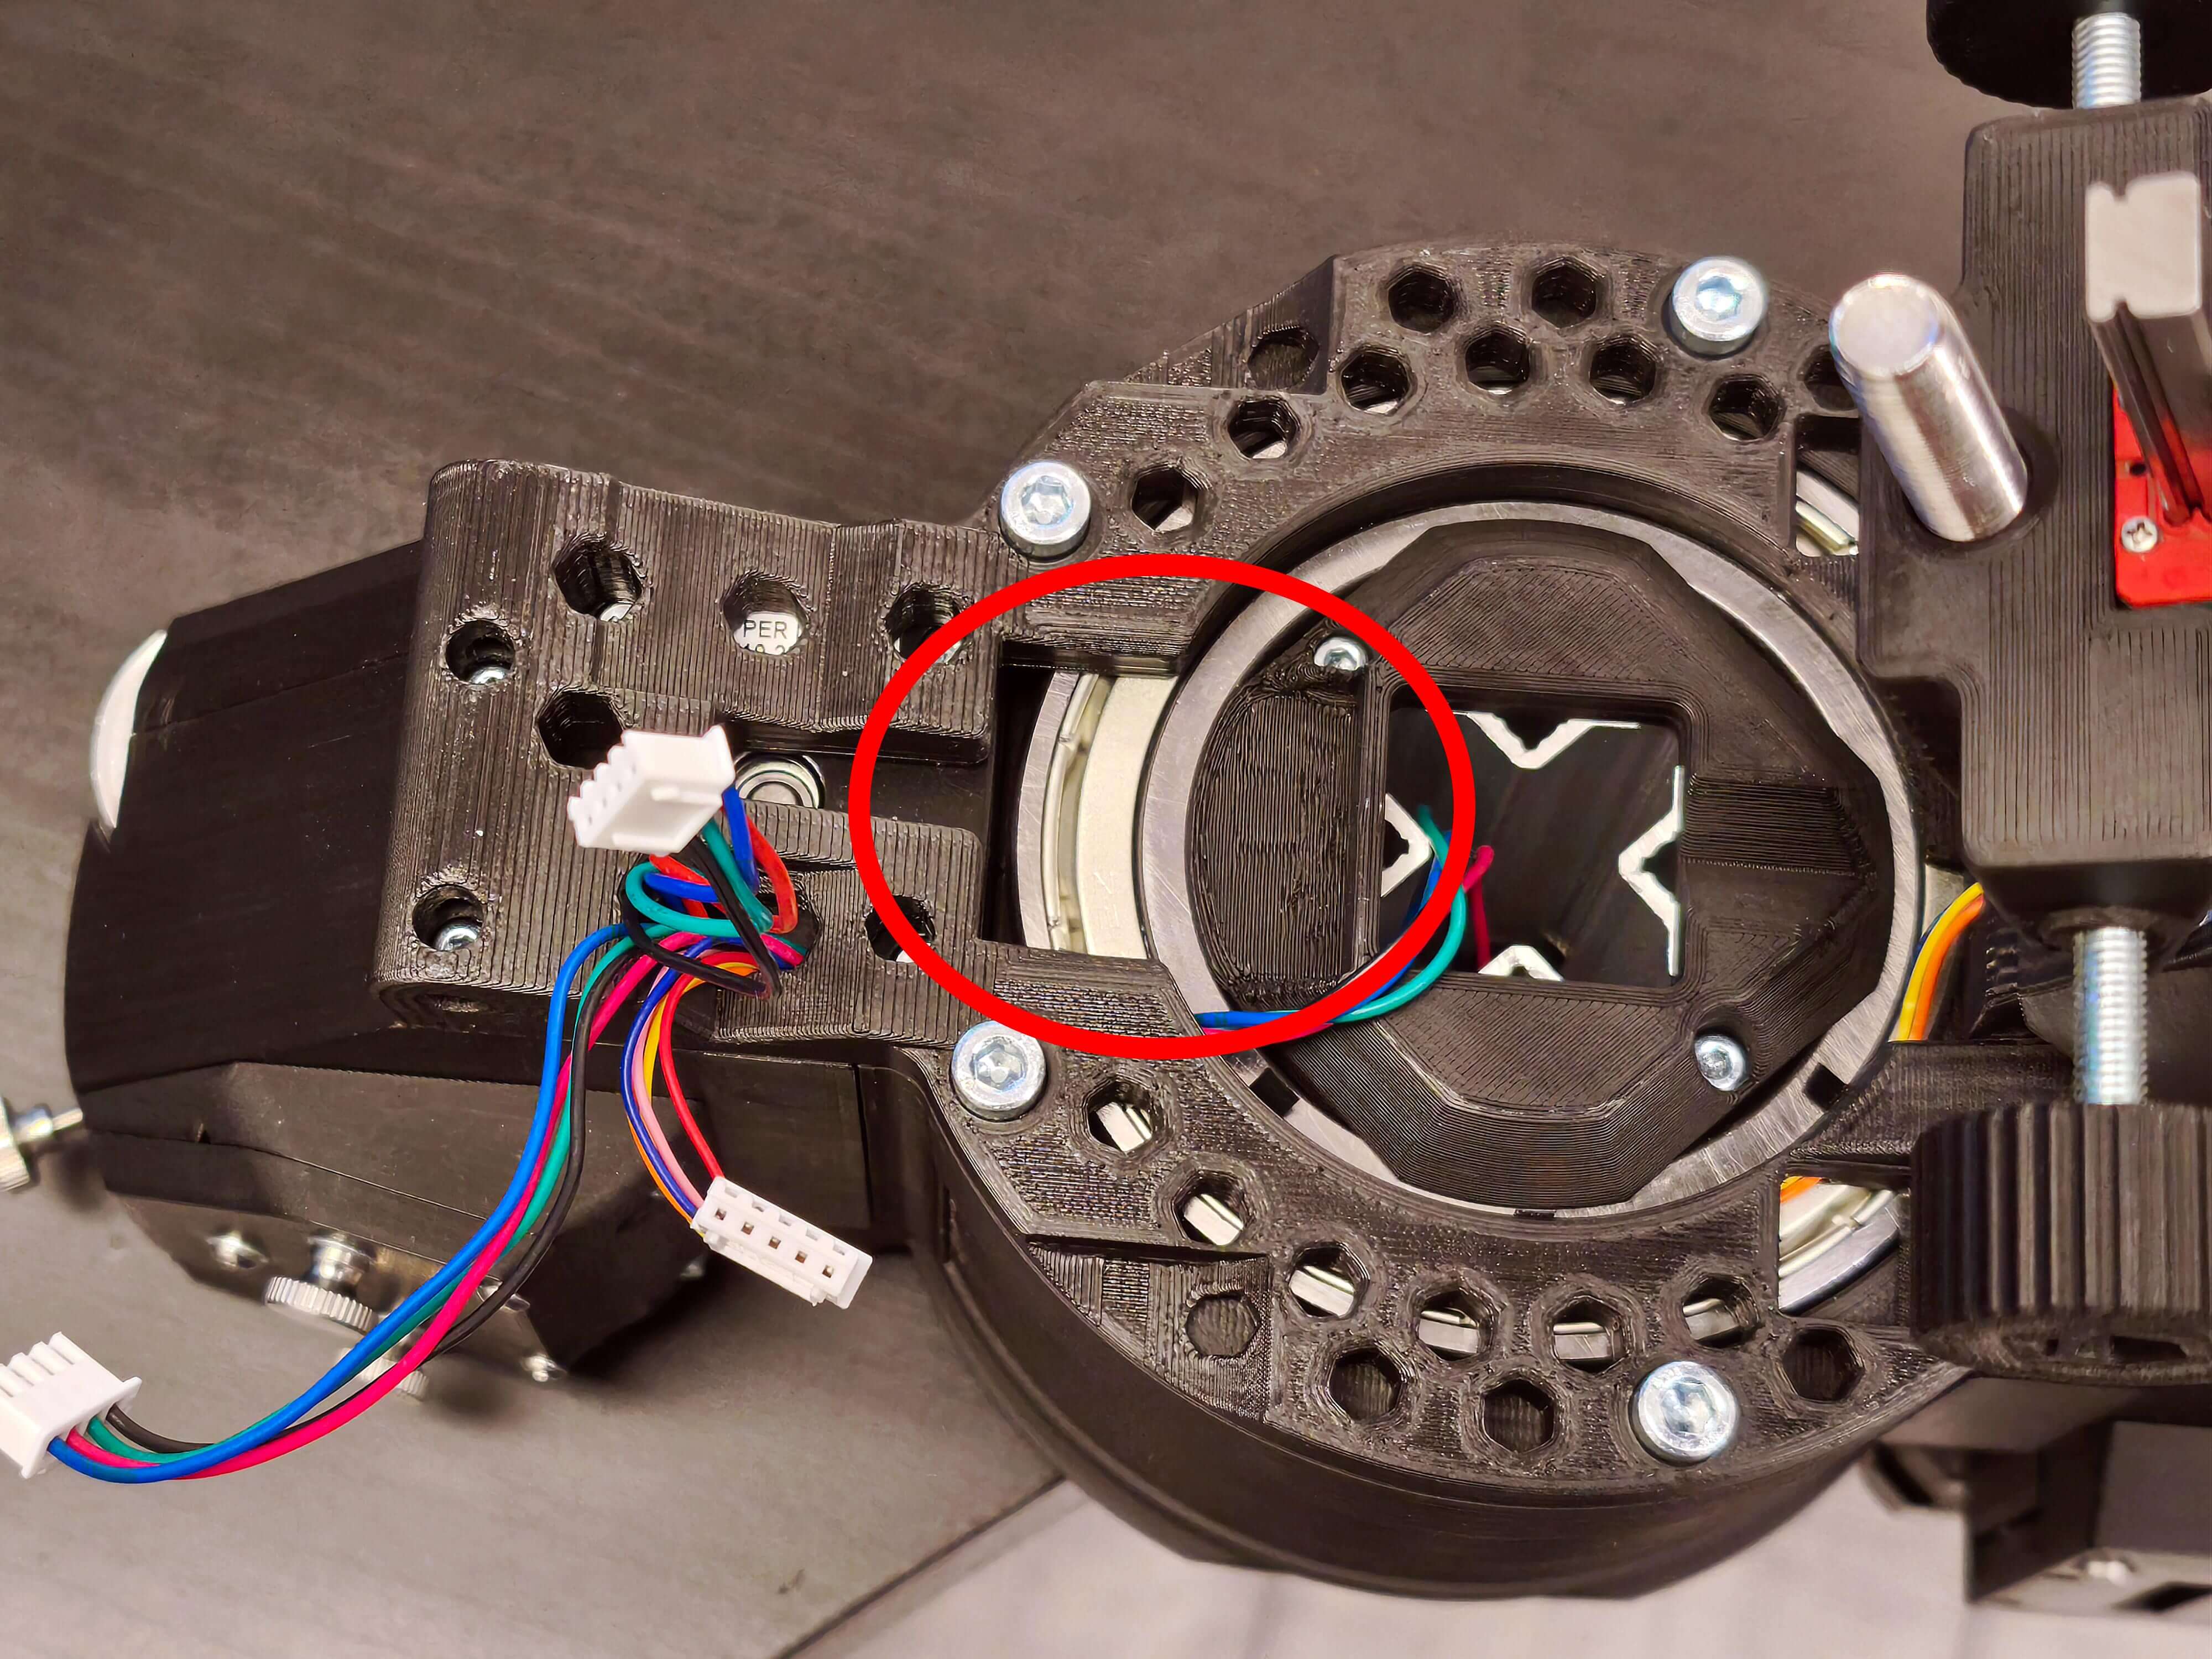
Make sure the DEC wires don't run through this area.
¶ Step 57
- Assembly
- Parts
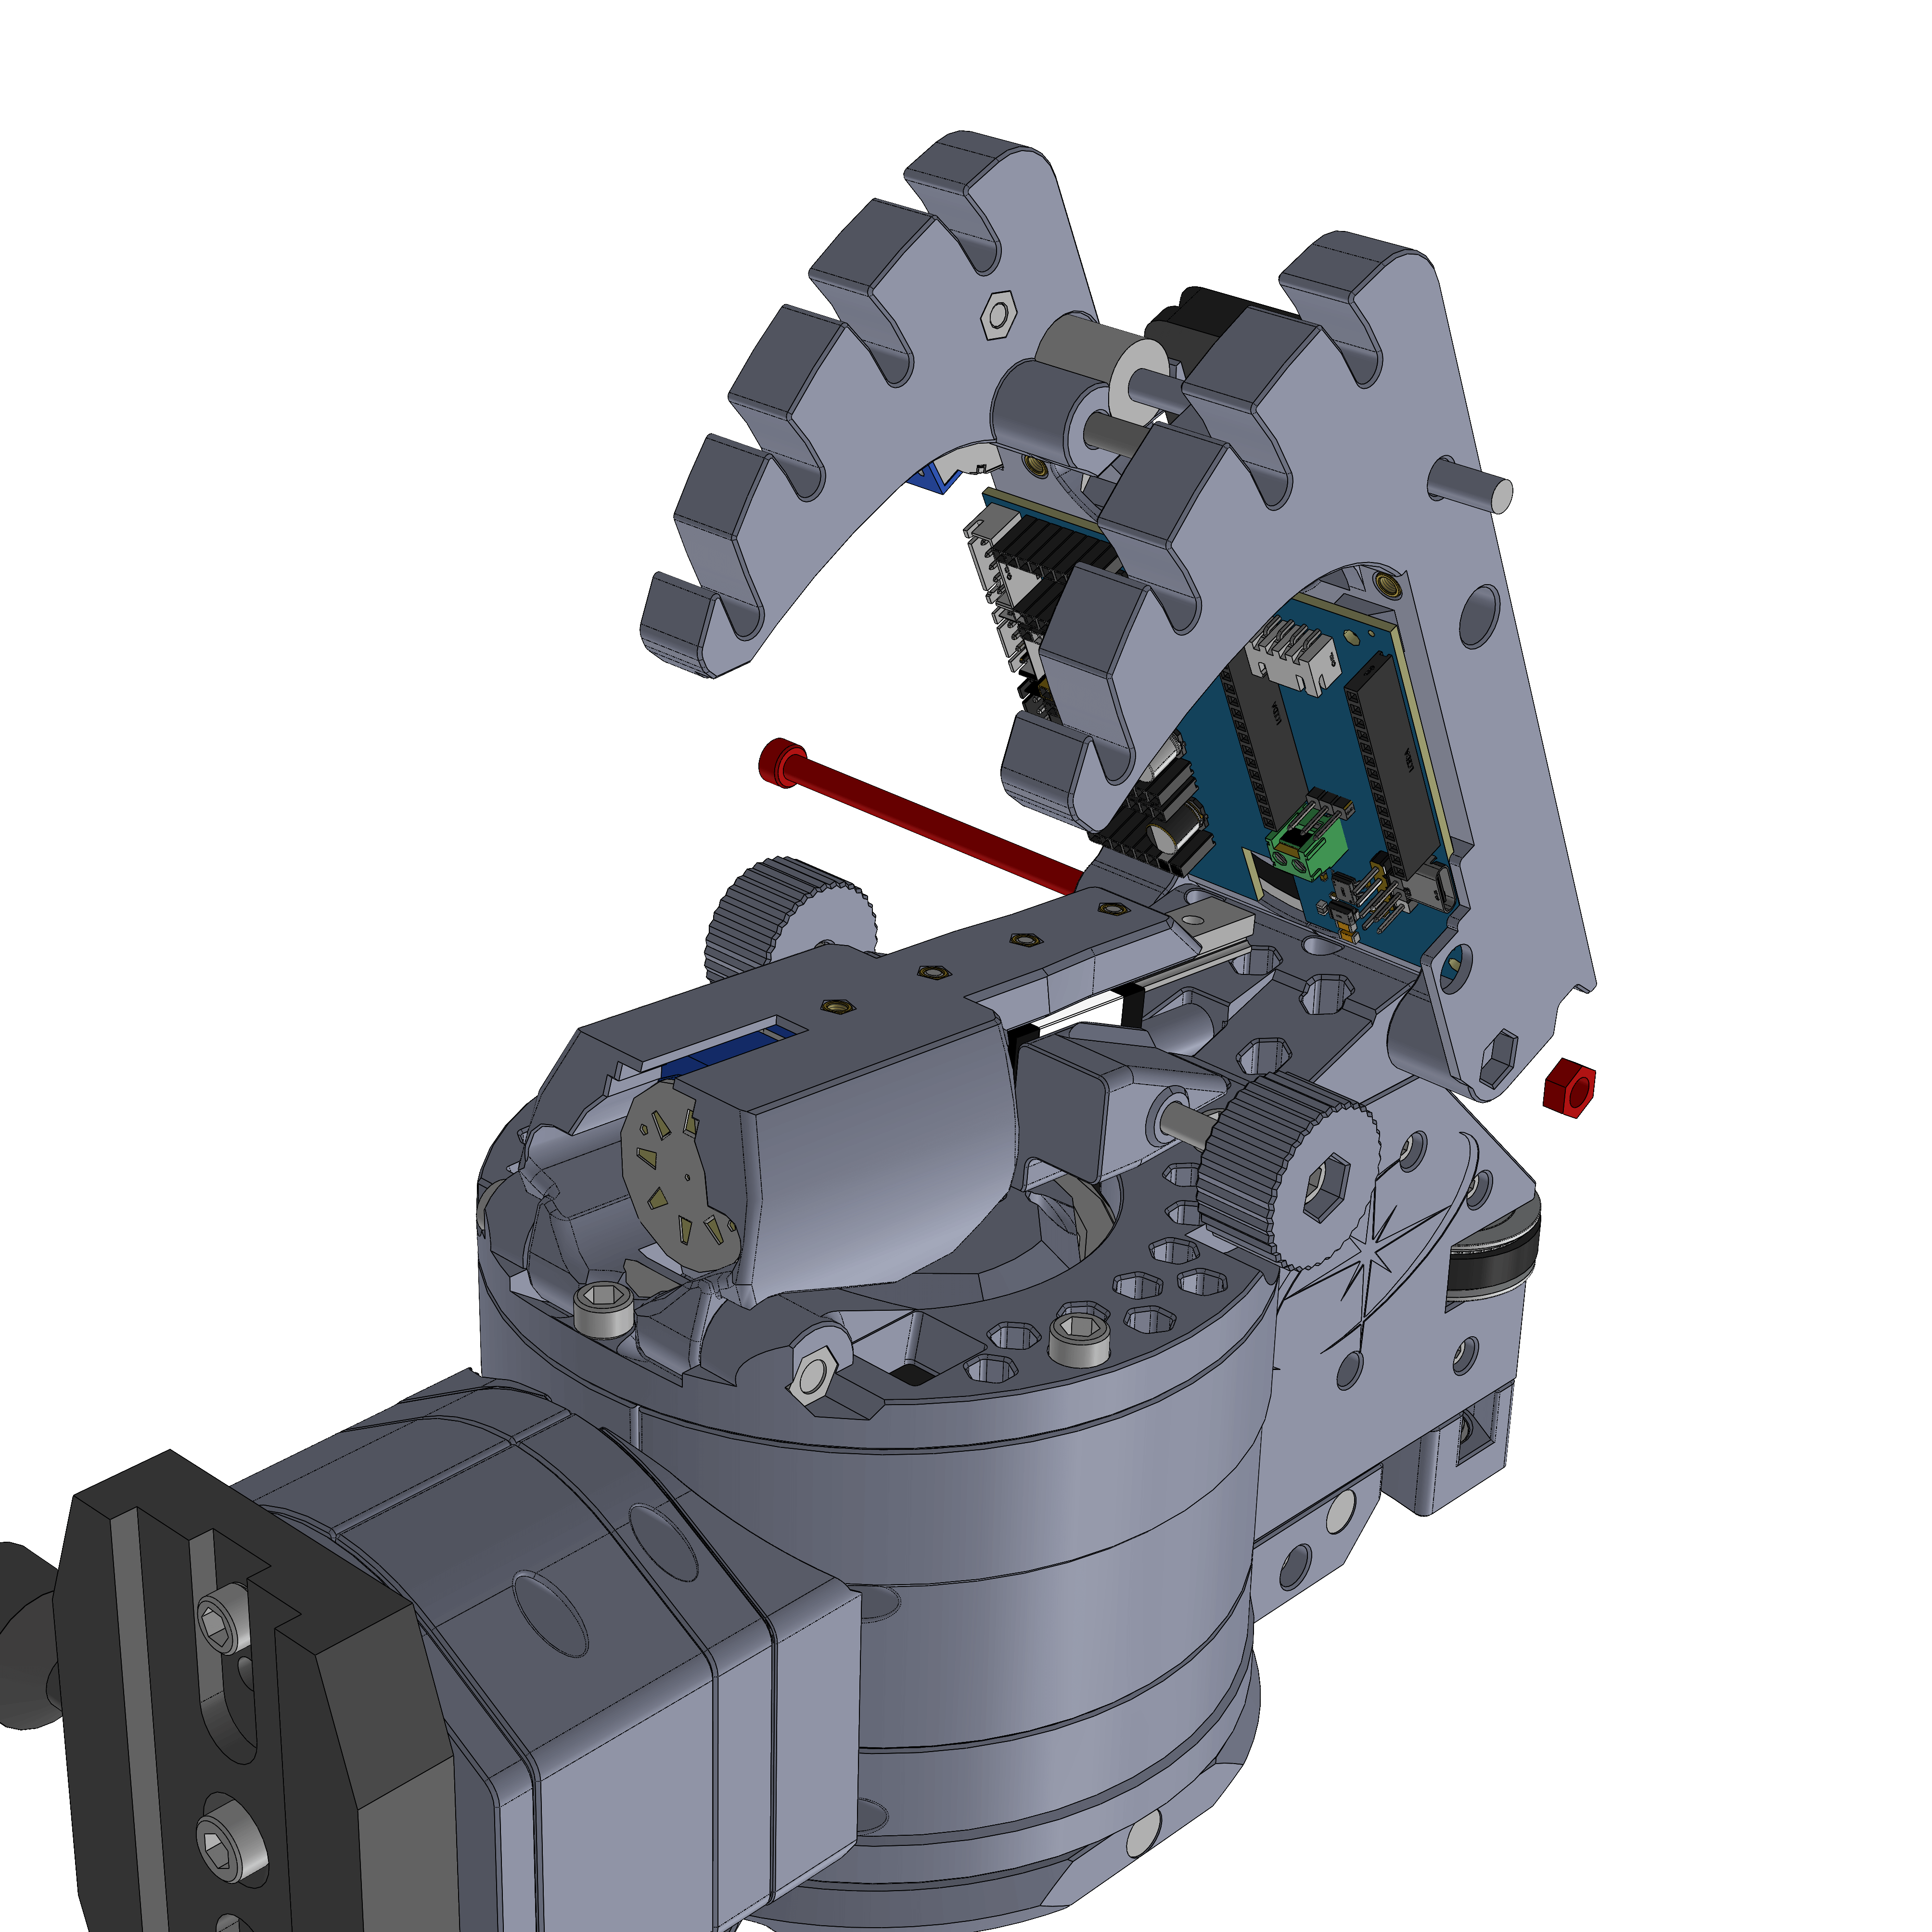
- Attach the AZ assembly with a M5x80 and M5 Nut. The whole part should be able to tilt around the M5x80 with moderate force. If too tight, loosen the M5 screw and vice versa.
¶ Hardware
- M5x80
- M5 Nut
¶ Step 58
- Assembly
- Parts
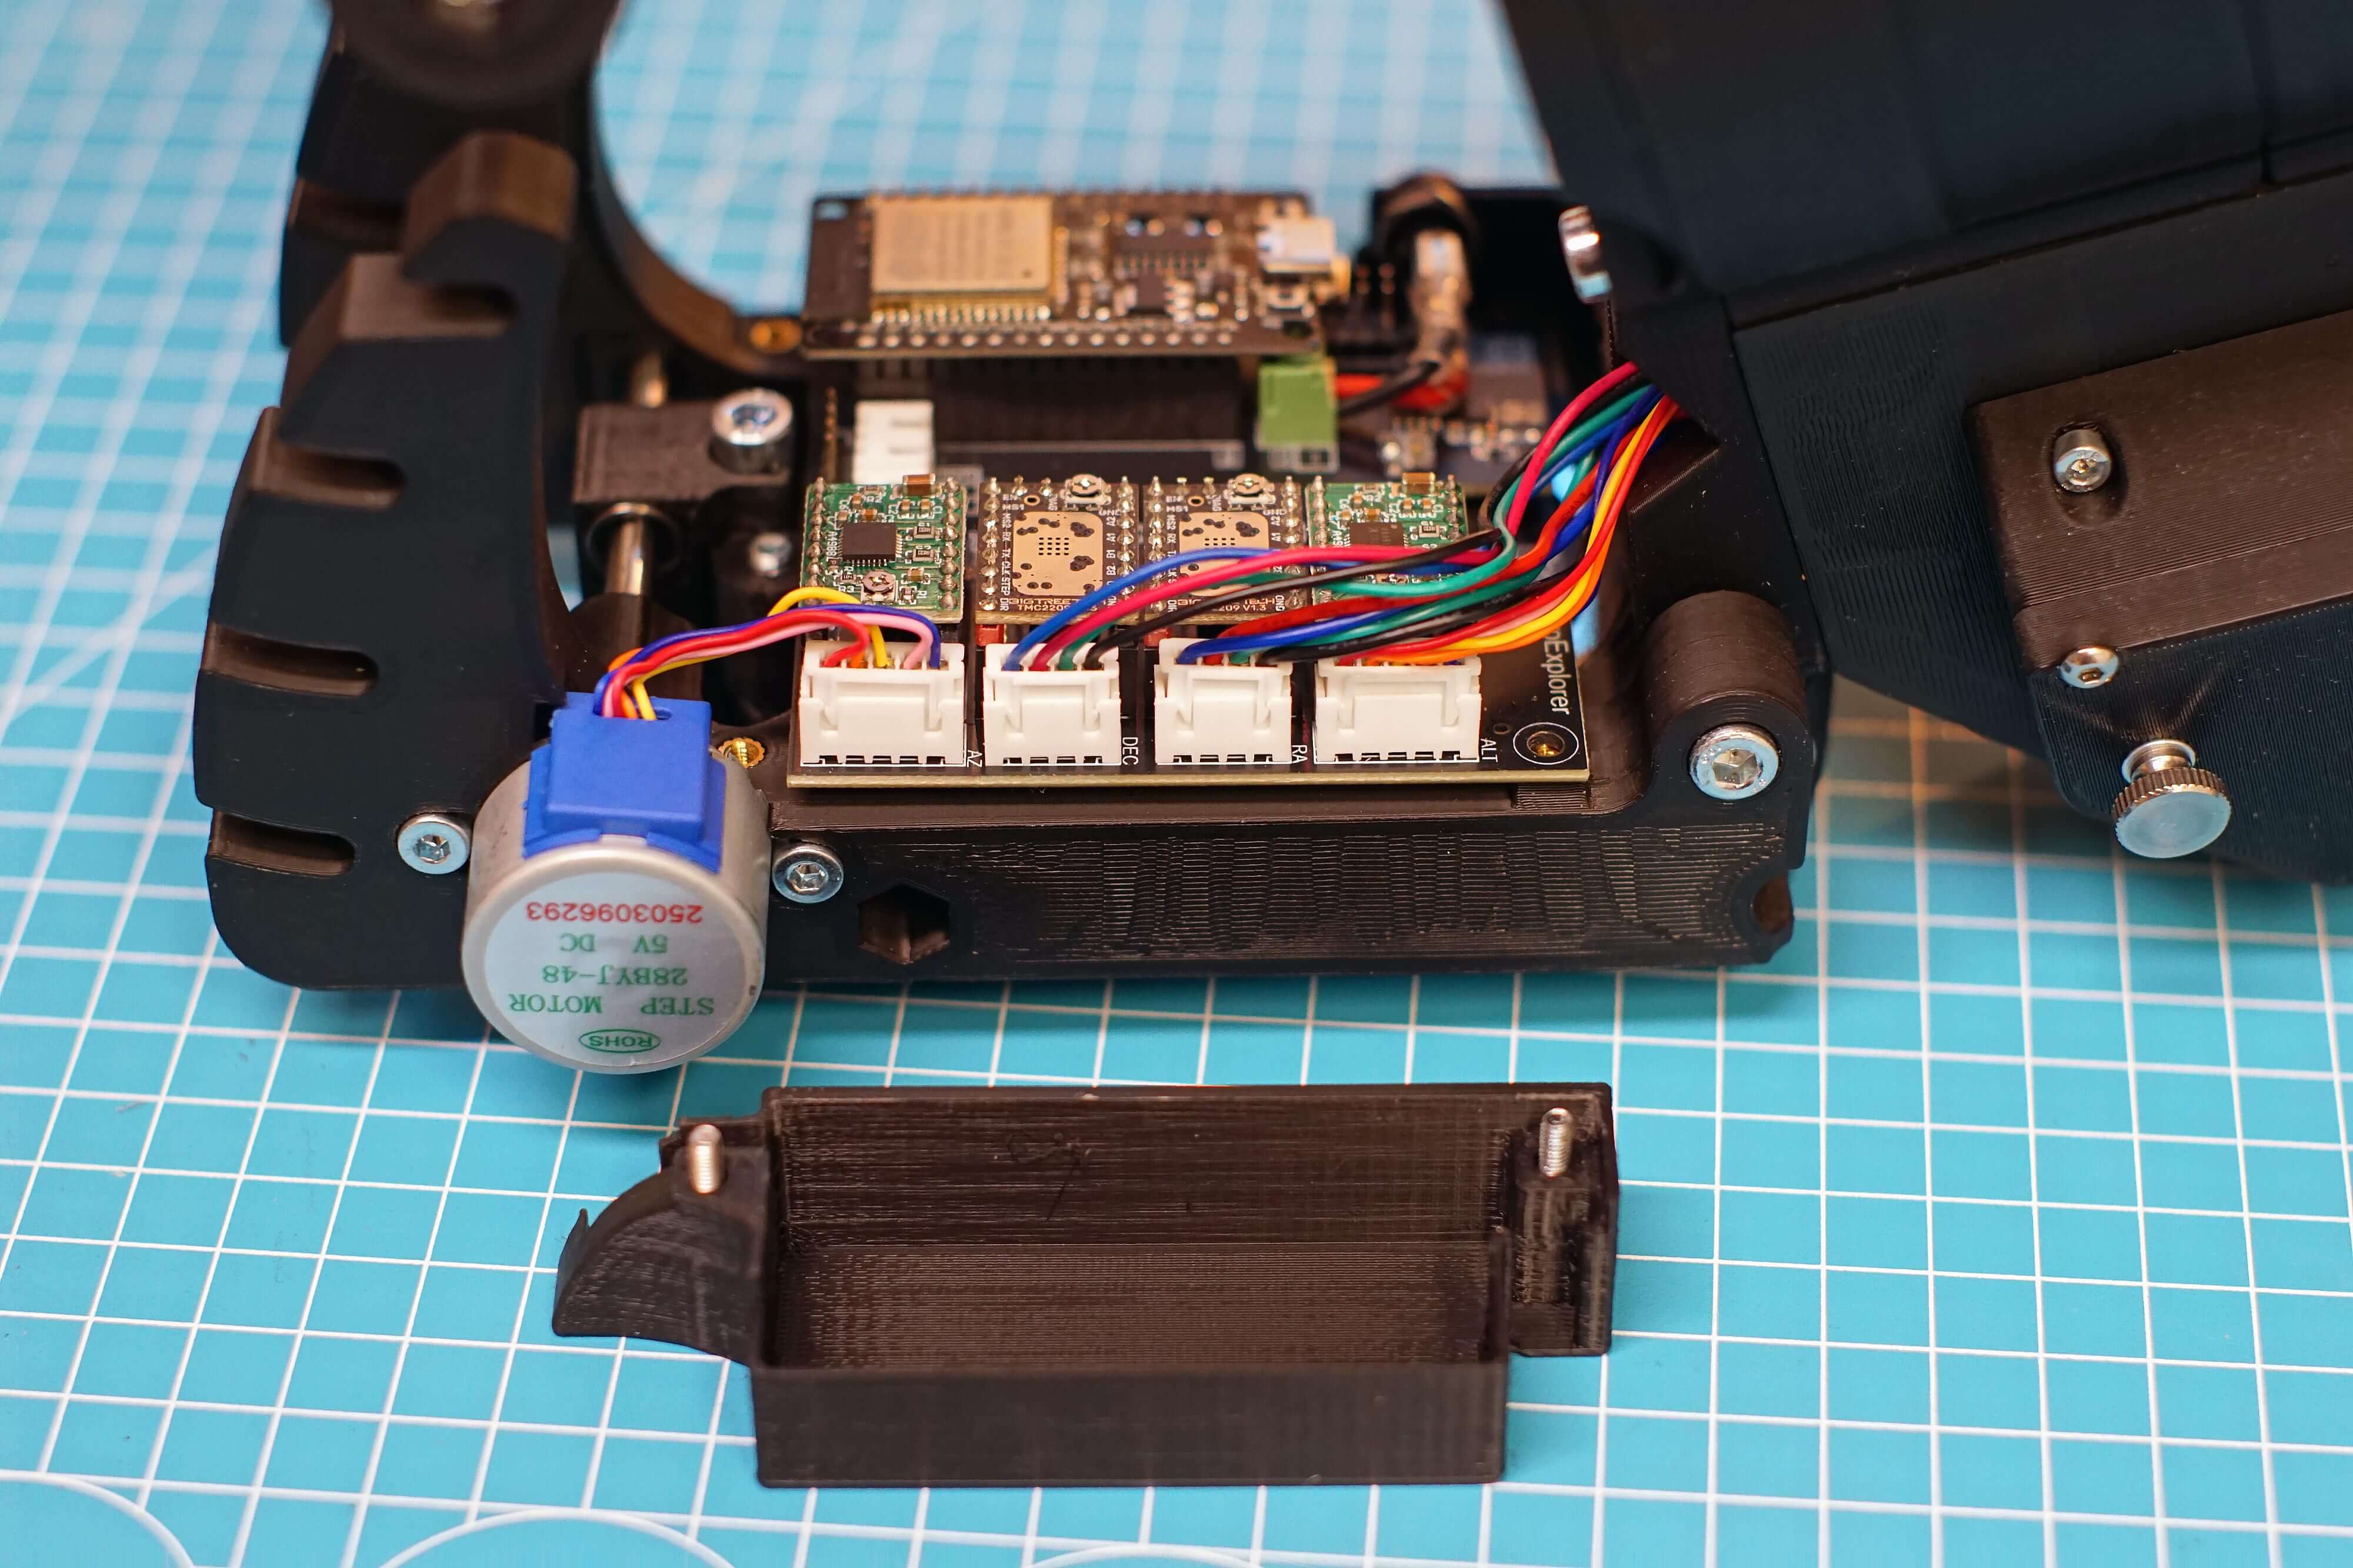
- Plug in the cables as shown. The order in this image is: AZ, DEC, RA, ALT.
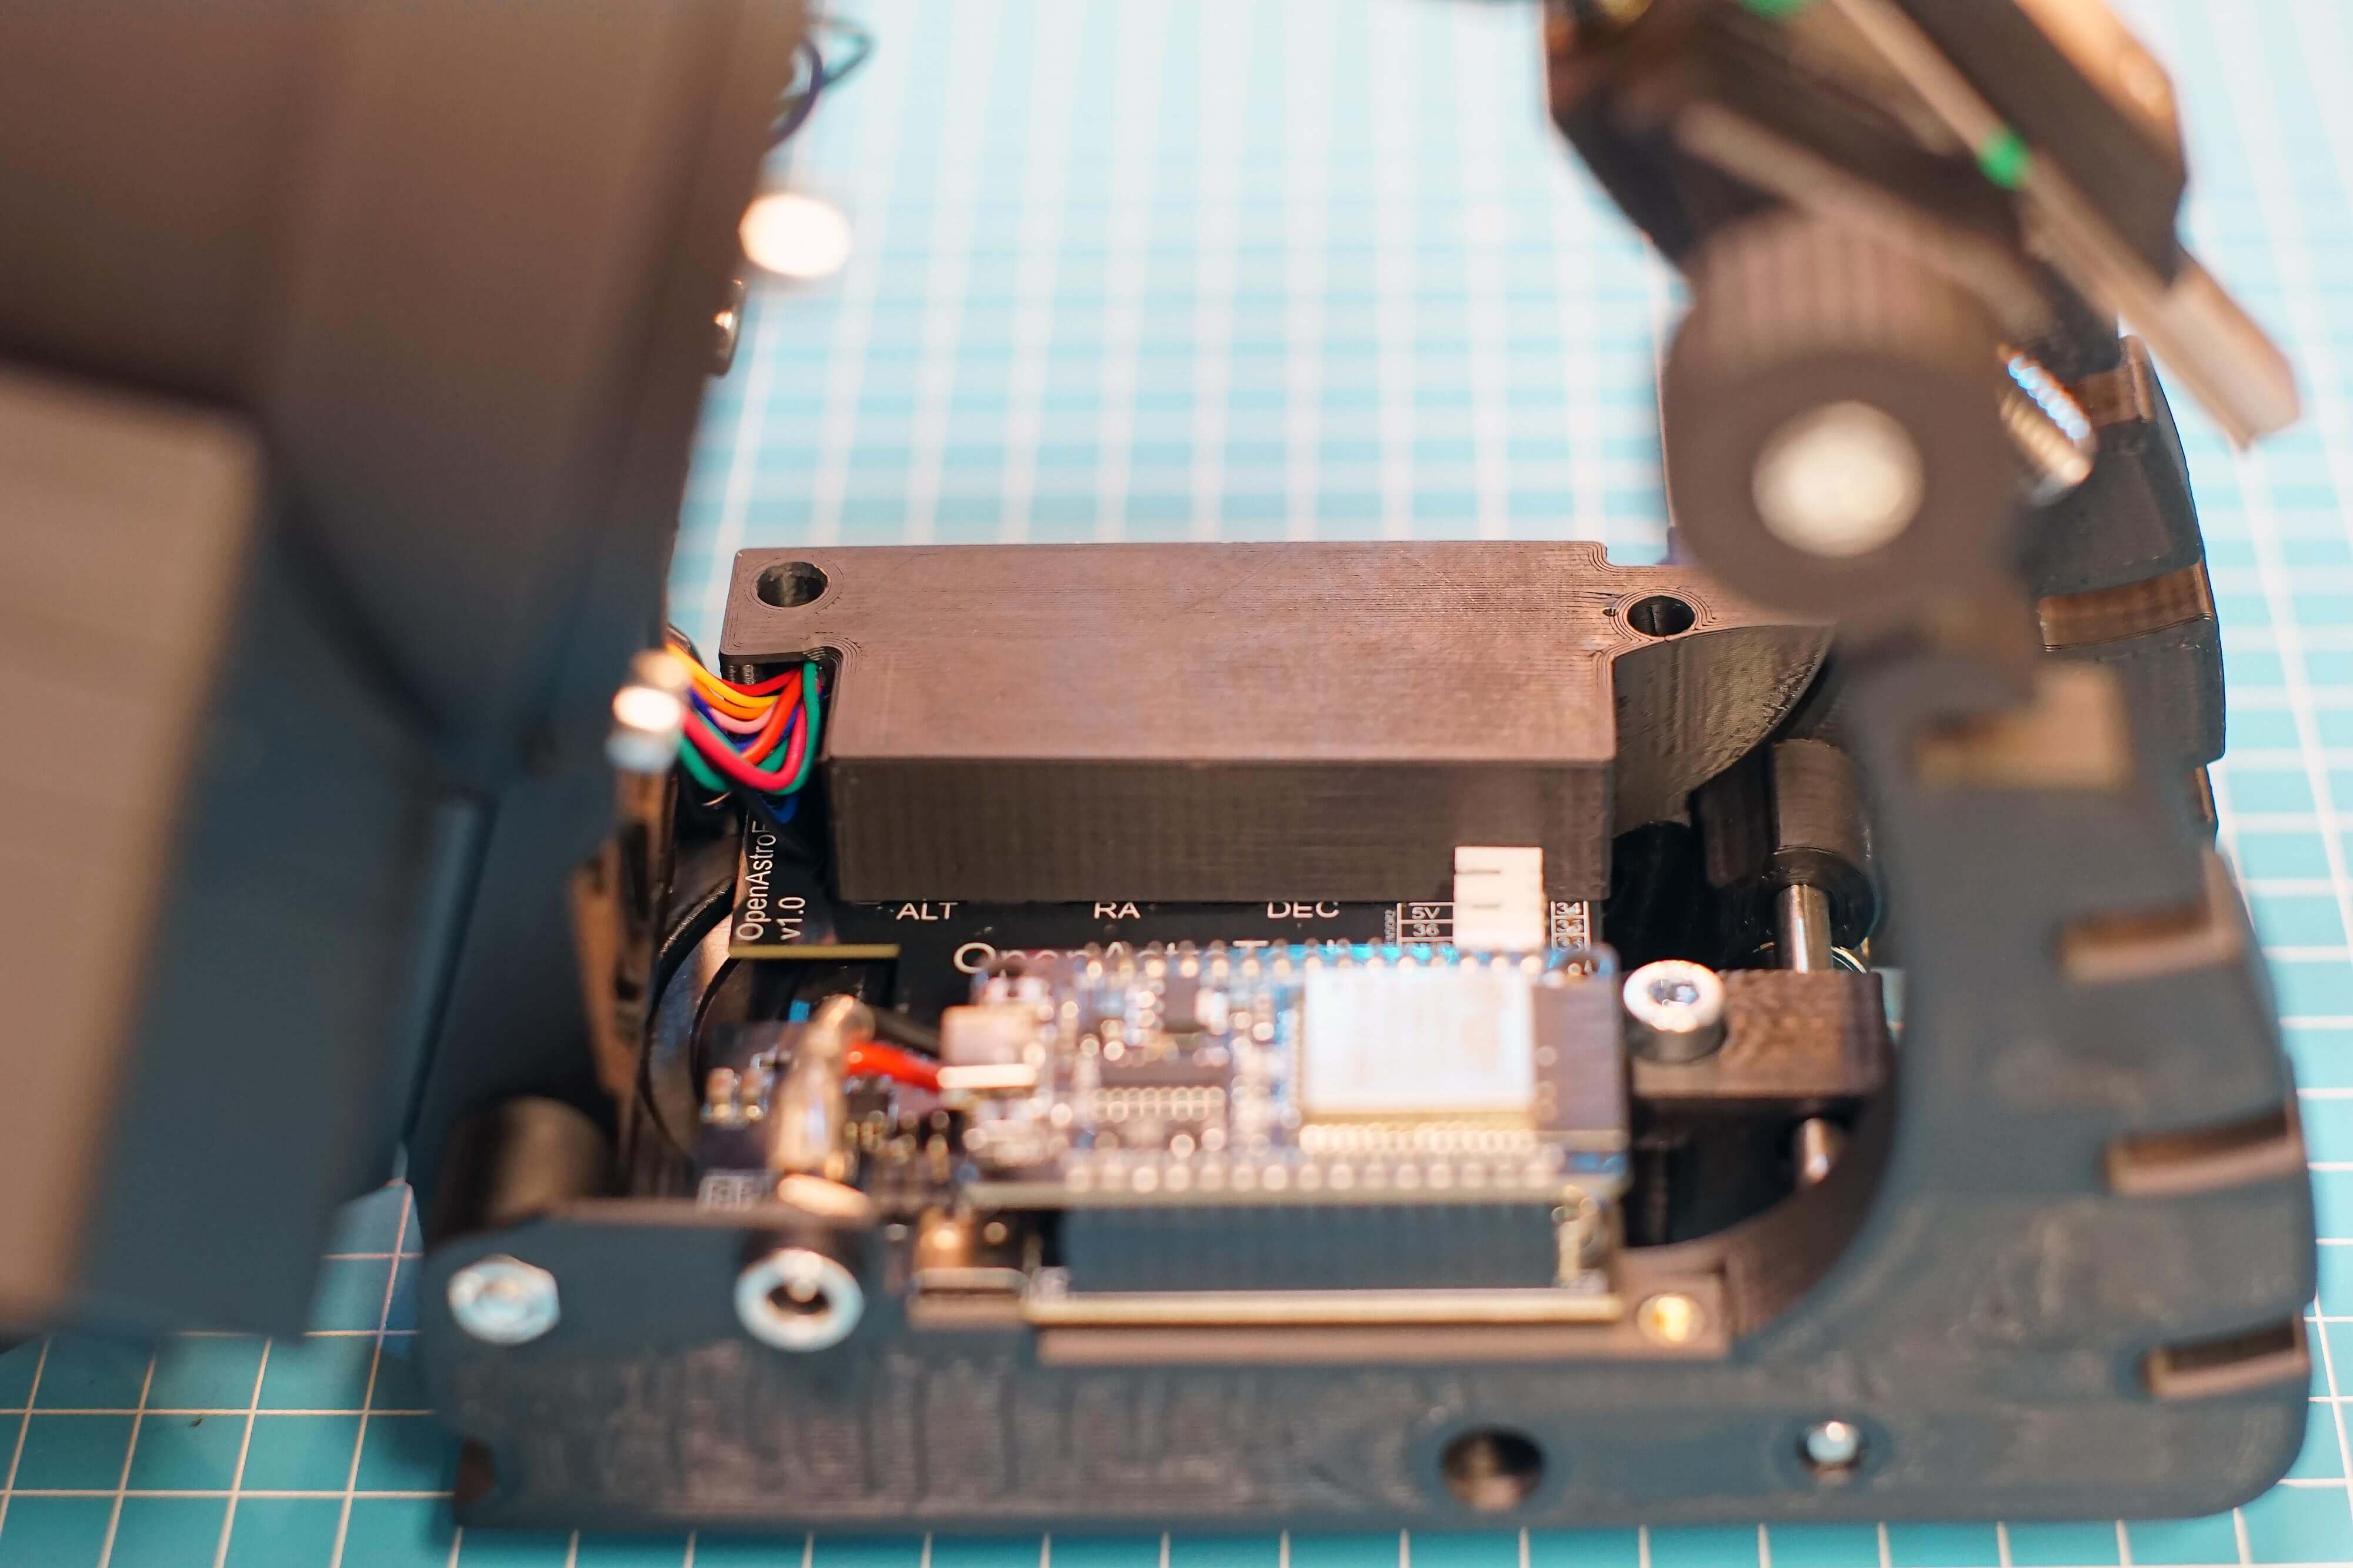
Take 2 M3x12 screws and insert them into thedriver_lid
¶ Step 59
- Assembly
- Parts
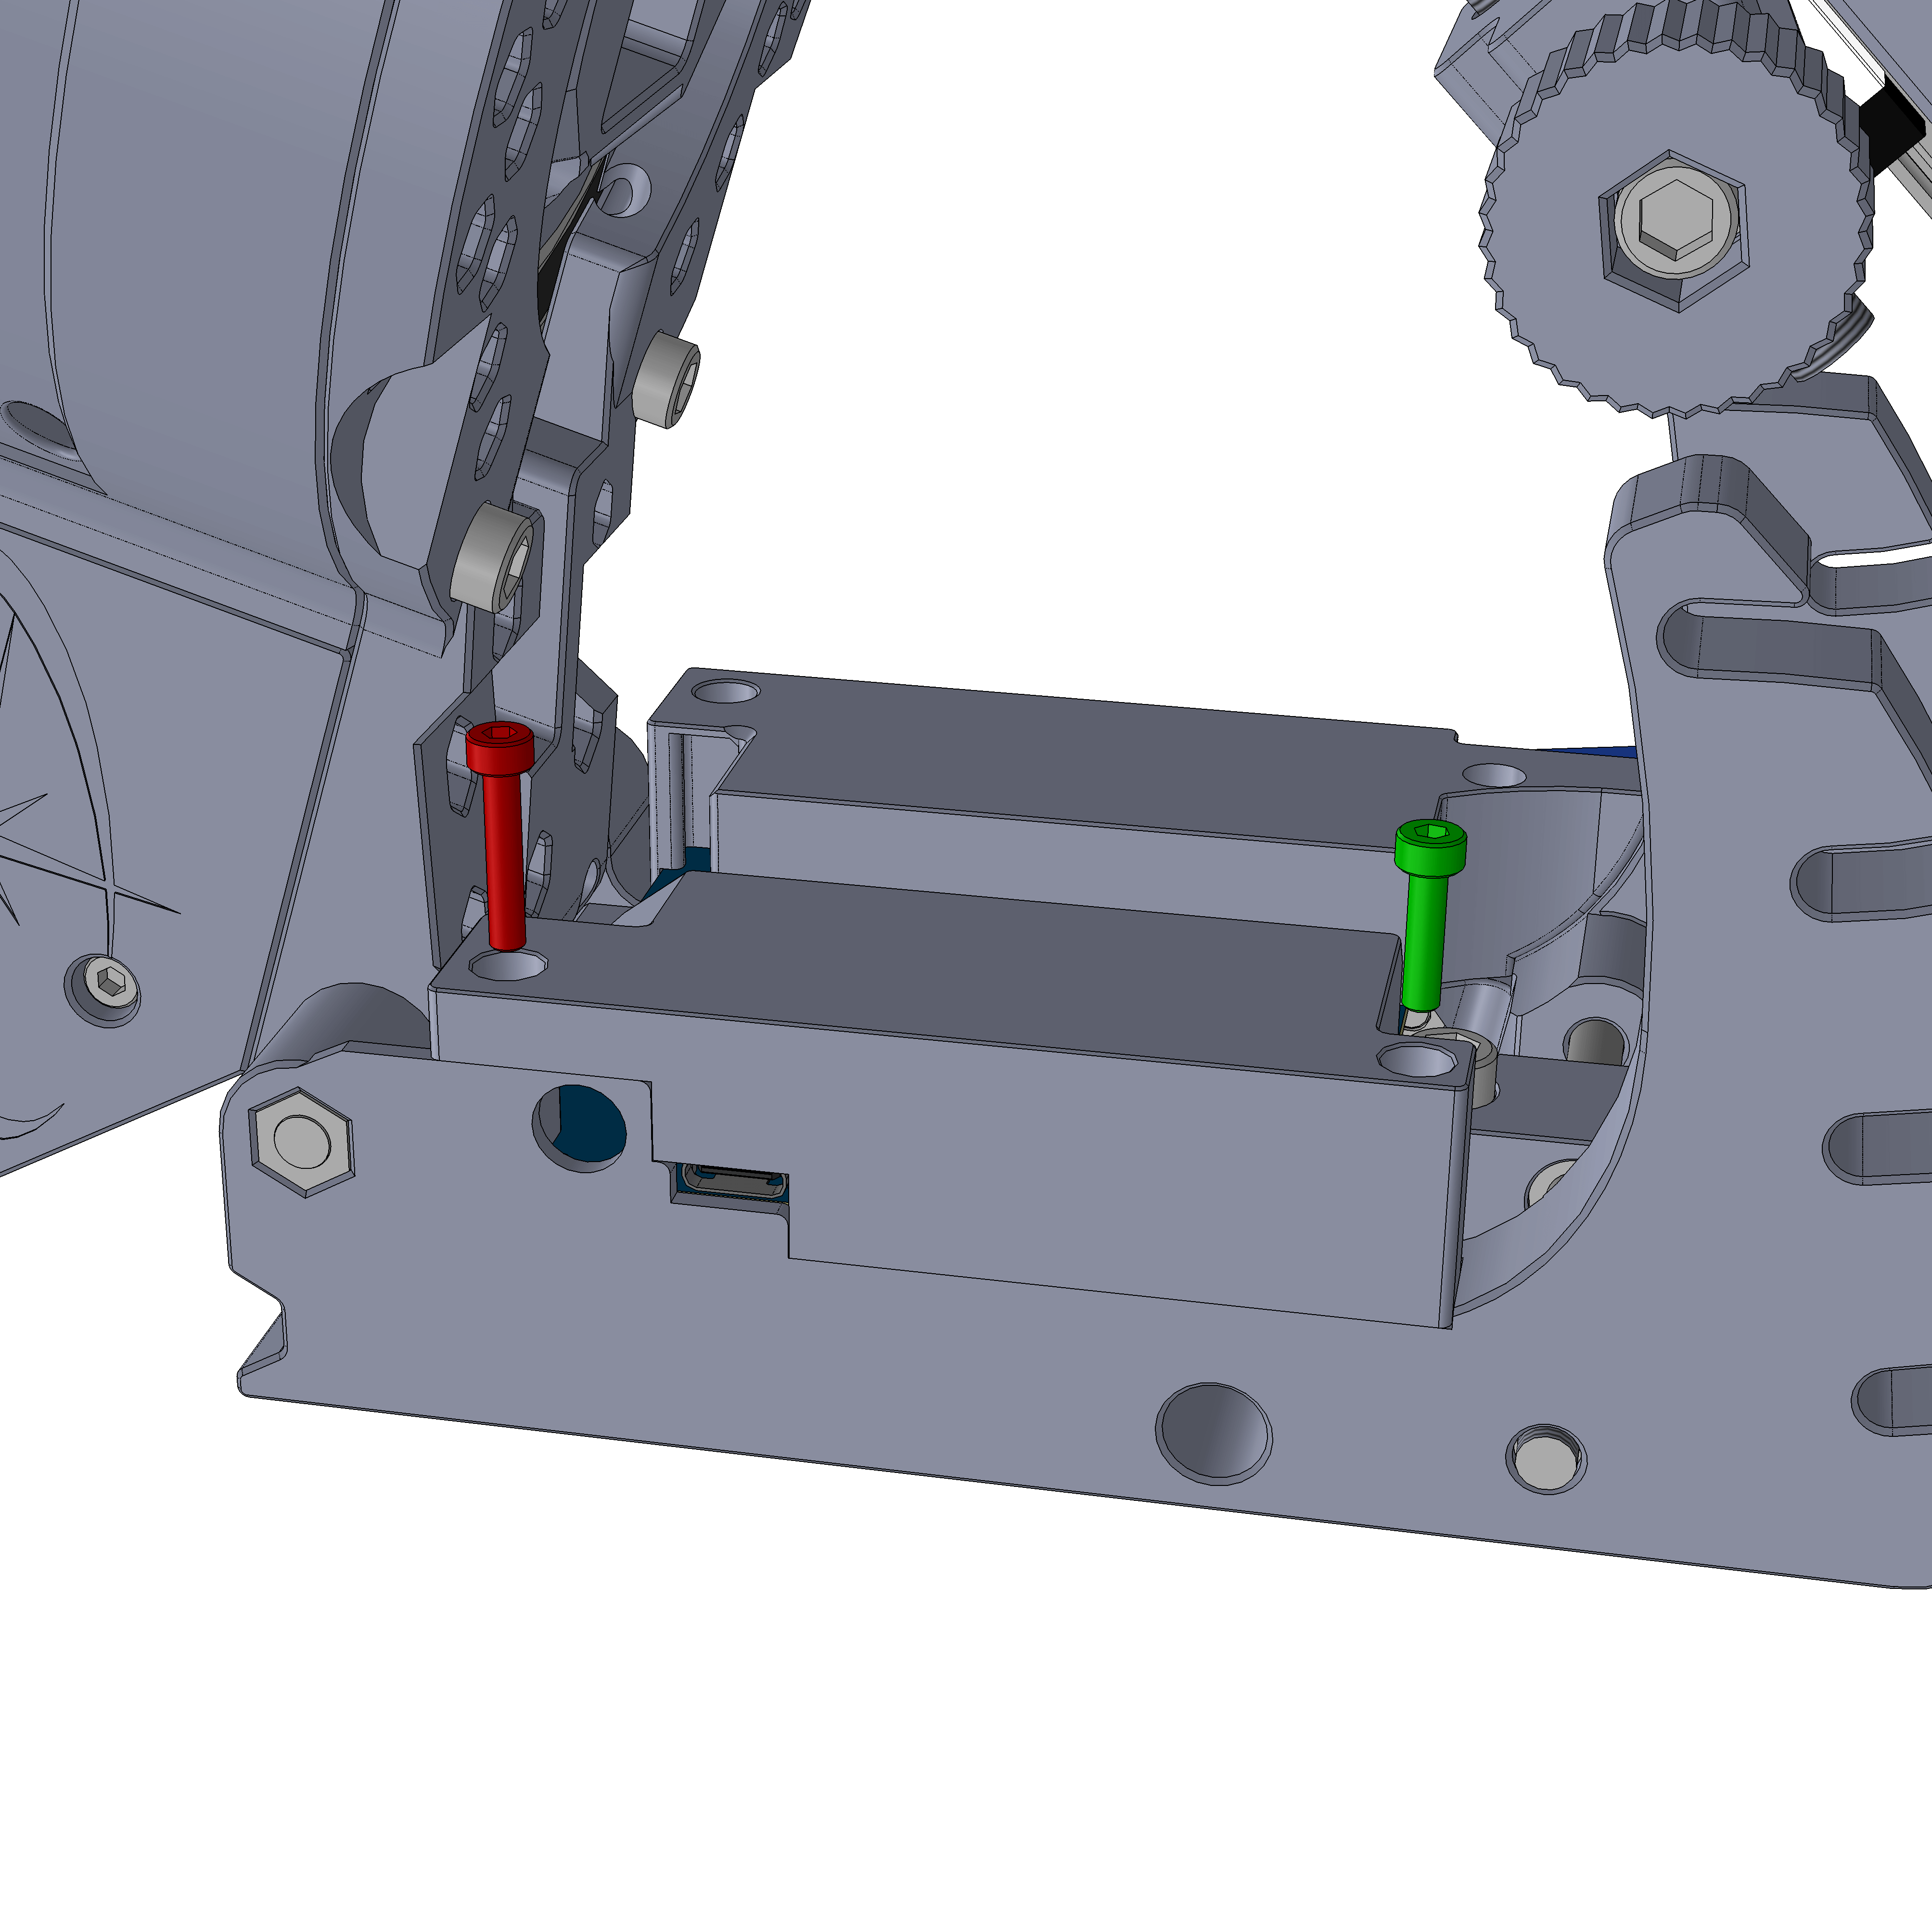
- Do this step at any later stage if you haven't verified that your firmware is working. The ESP32 can only be programmed through its on-board USB plug, so this cover needs to be removed.
¶ Step 60
- Assembly
- Parts
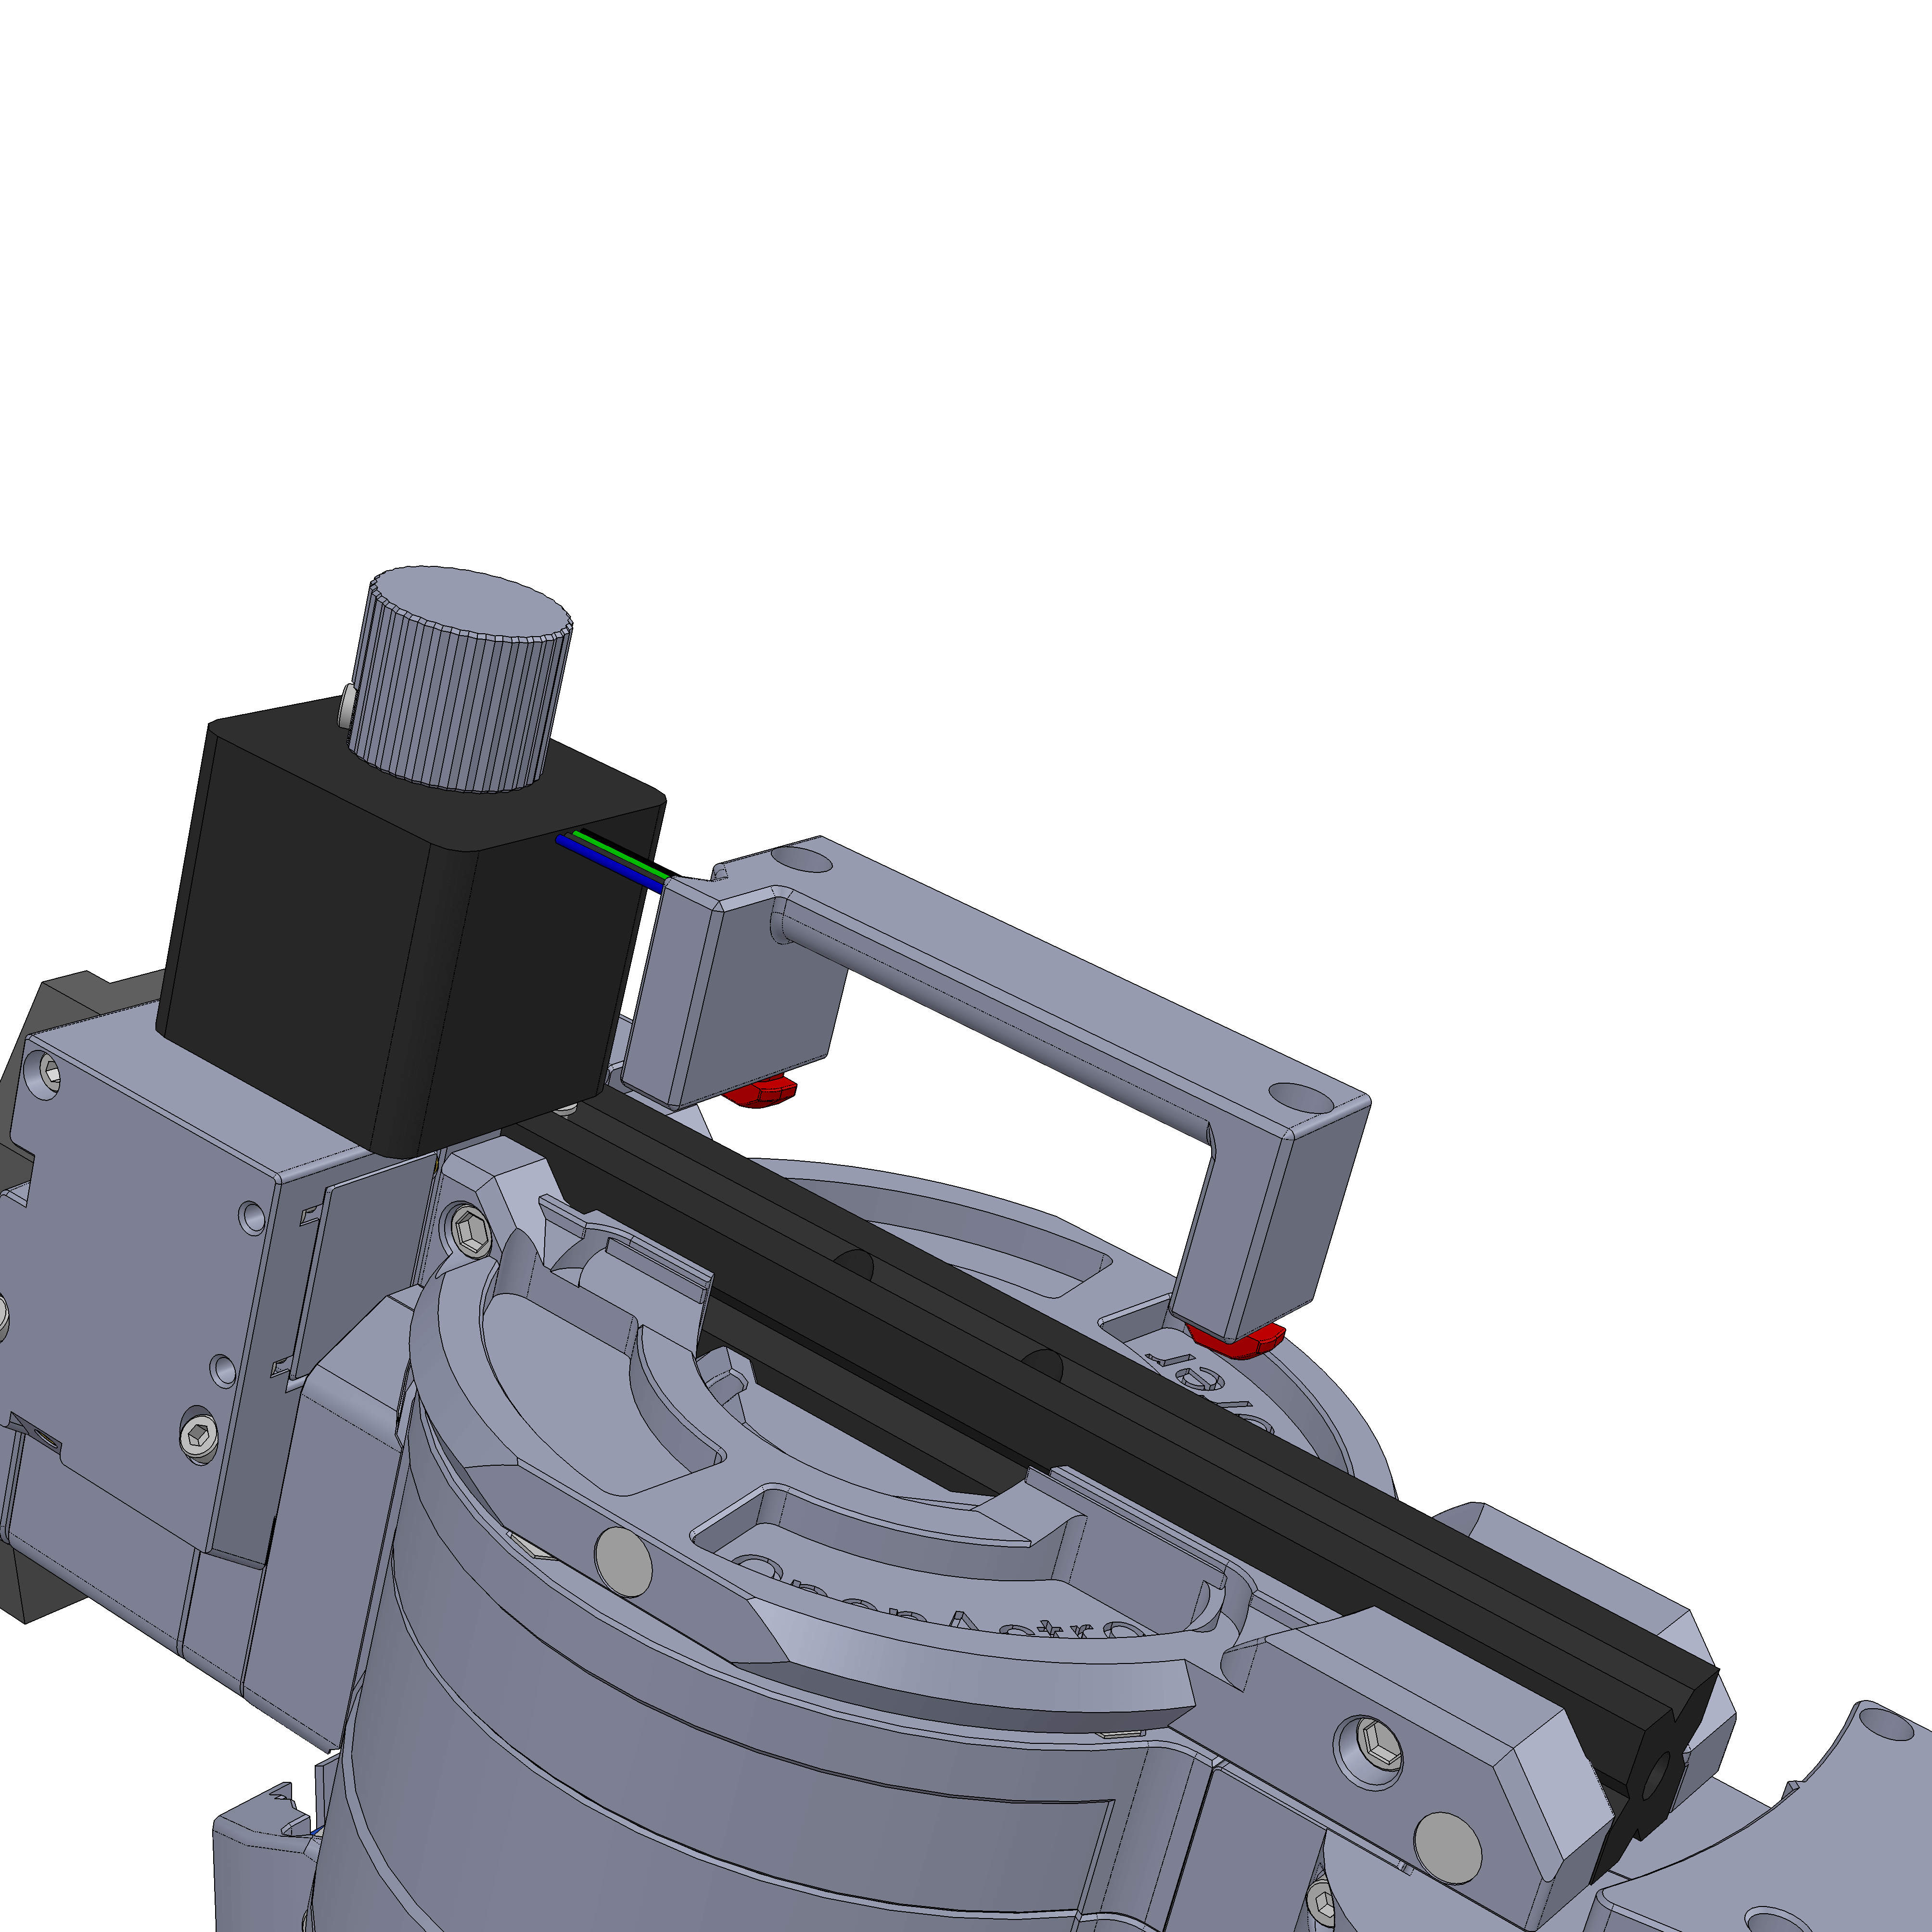
- Use two M4x12 and TNuts to attach the handle as shown.
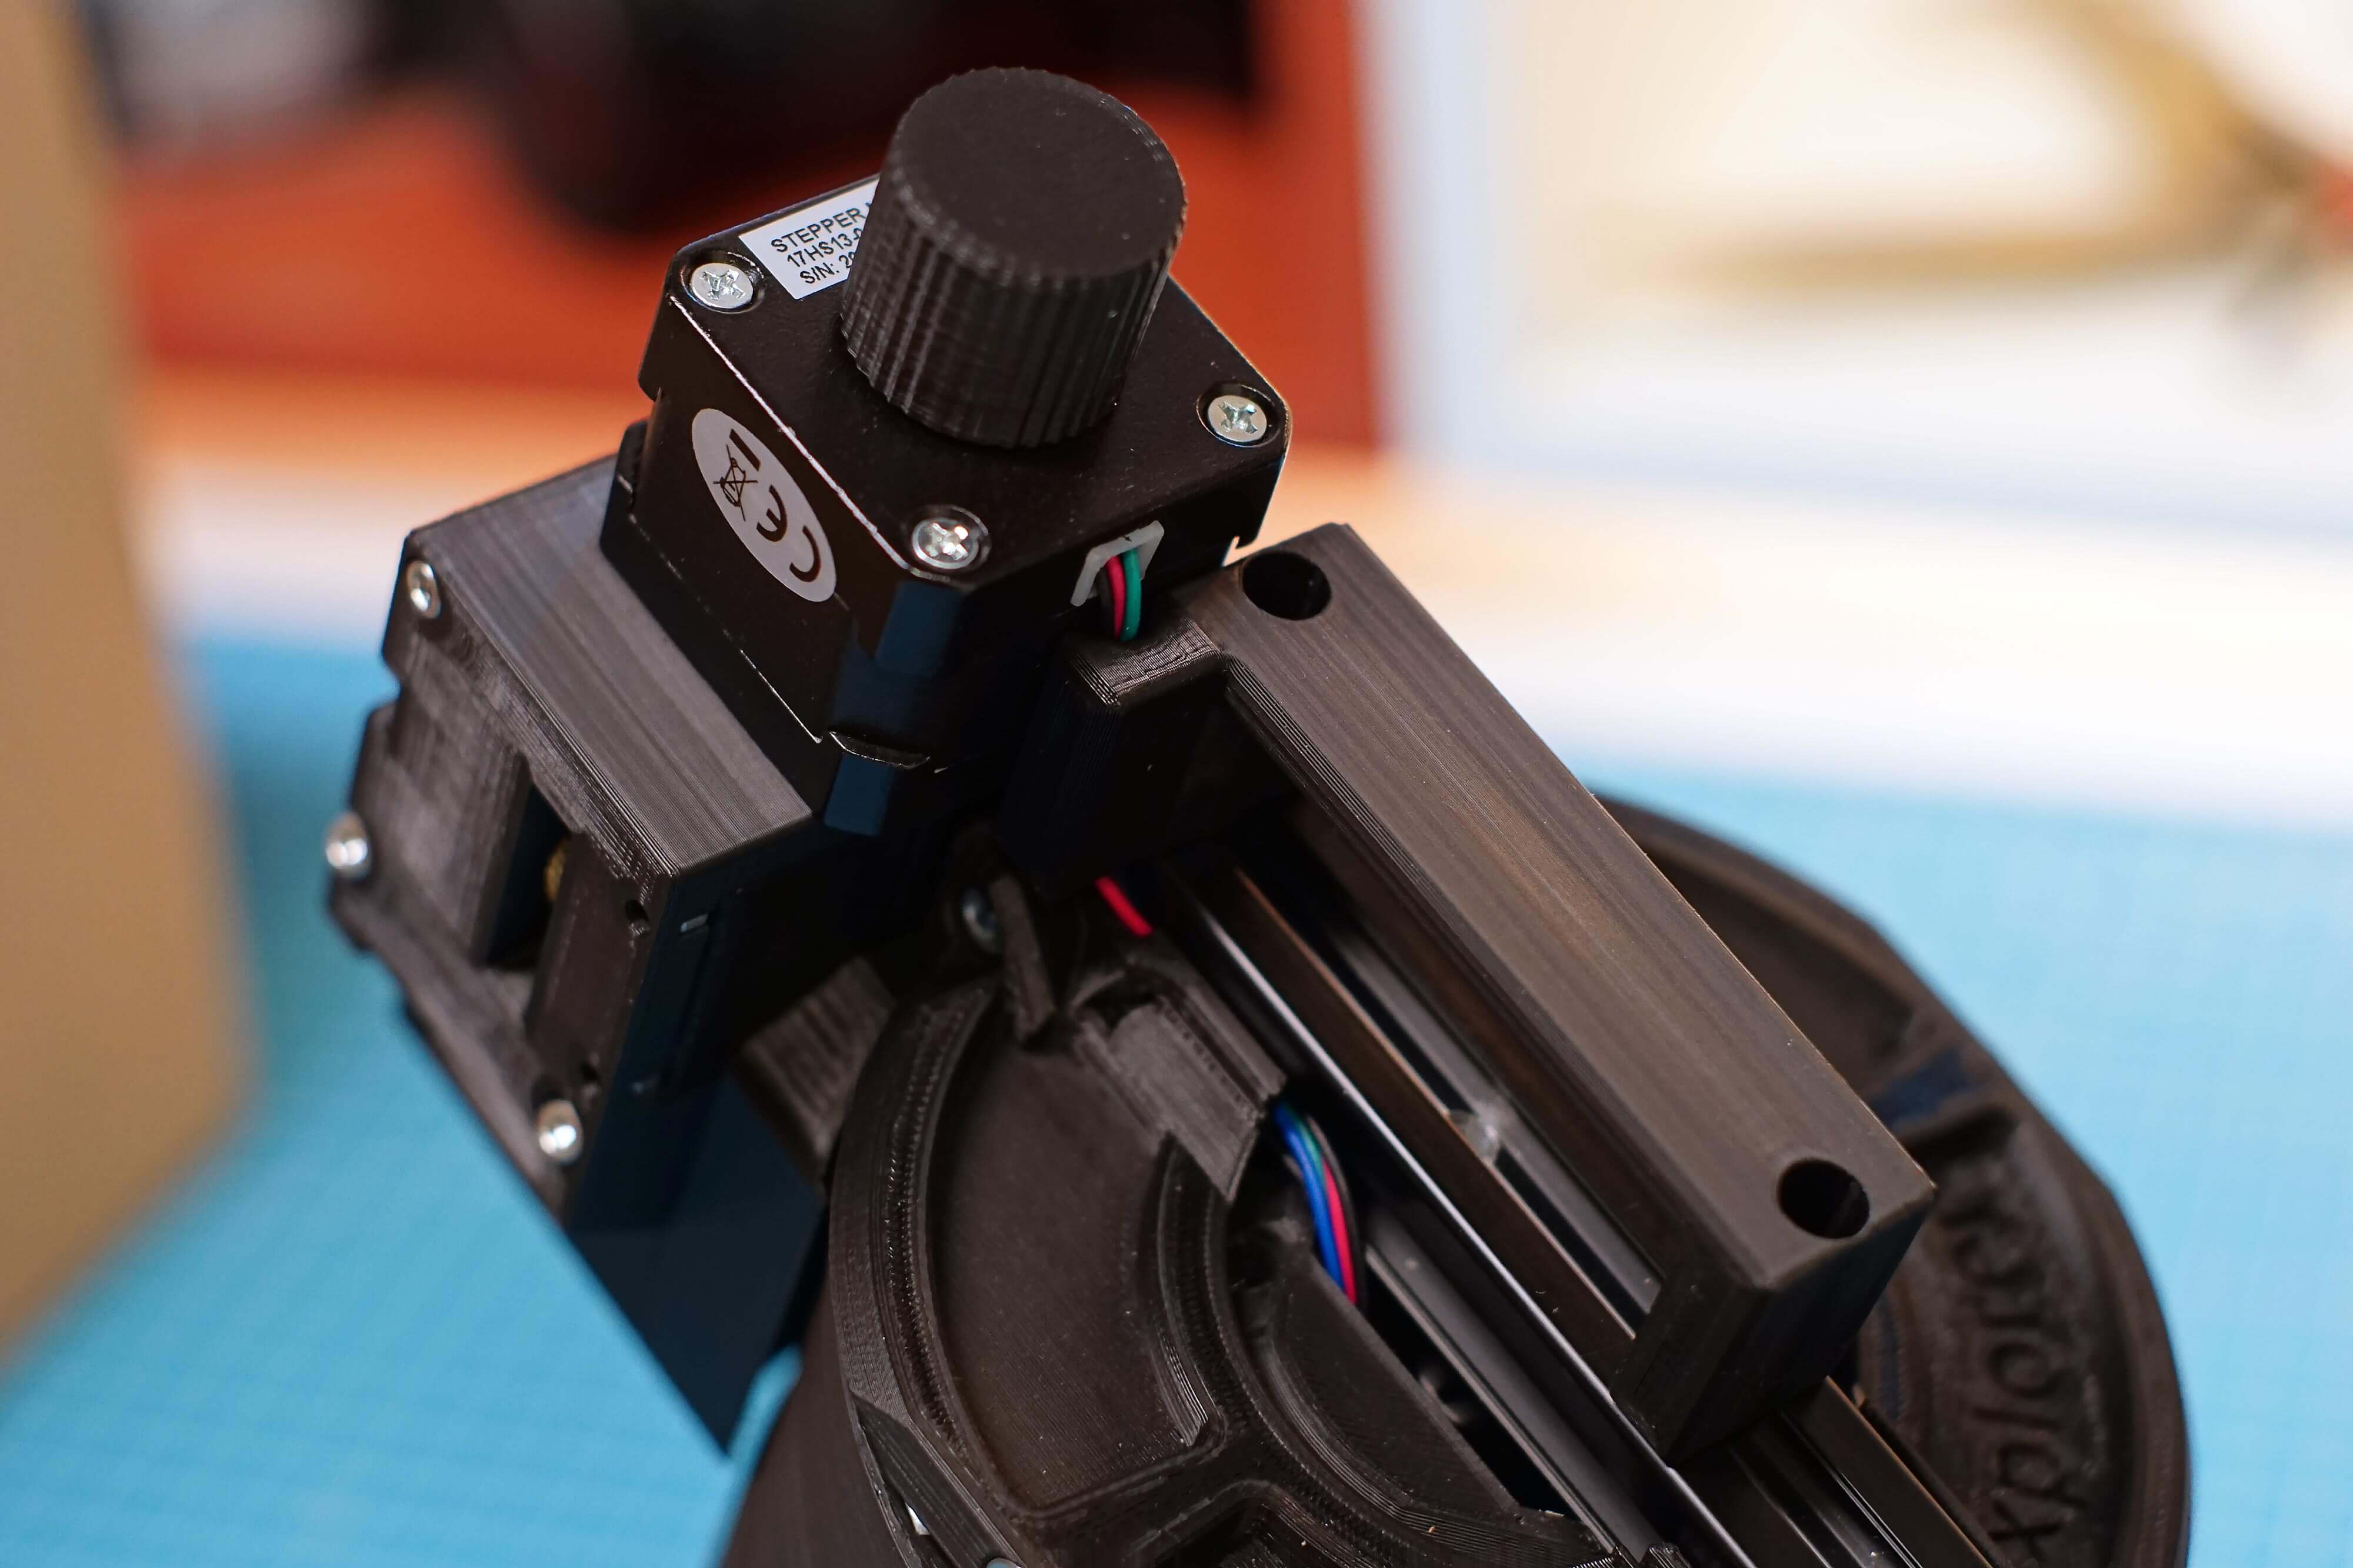
- Route the cables as shown below.
¶ Step 61
- Assembly
- Parts
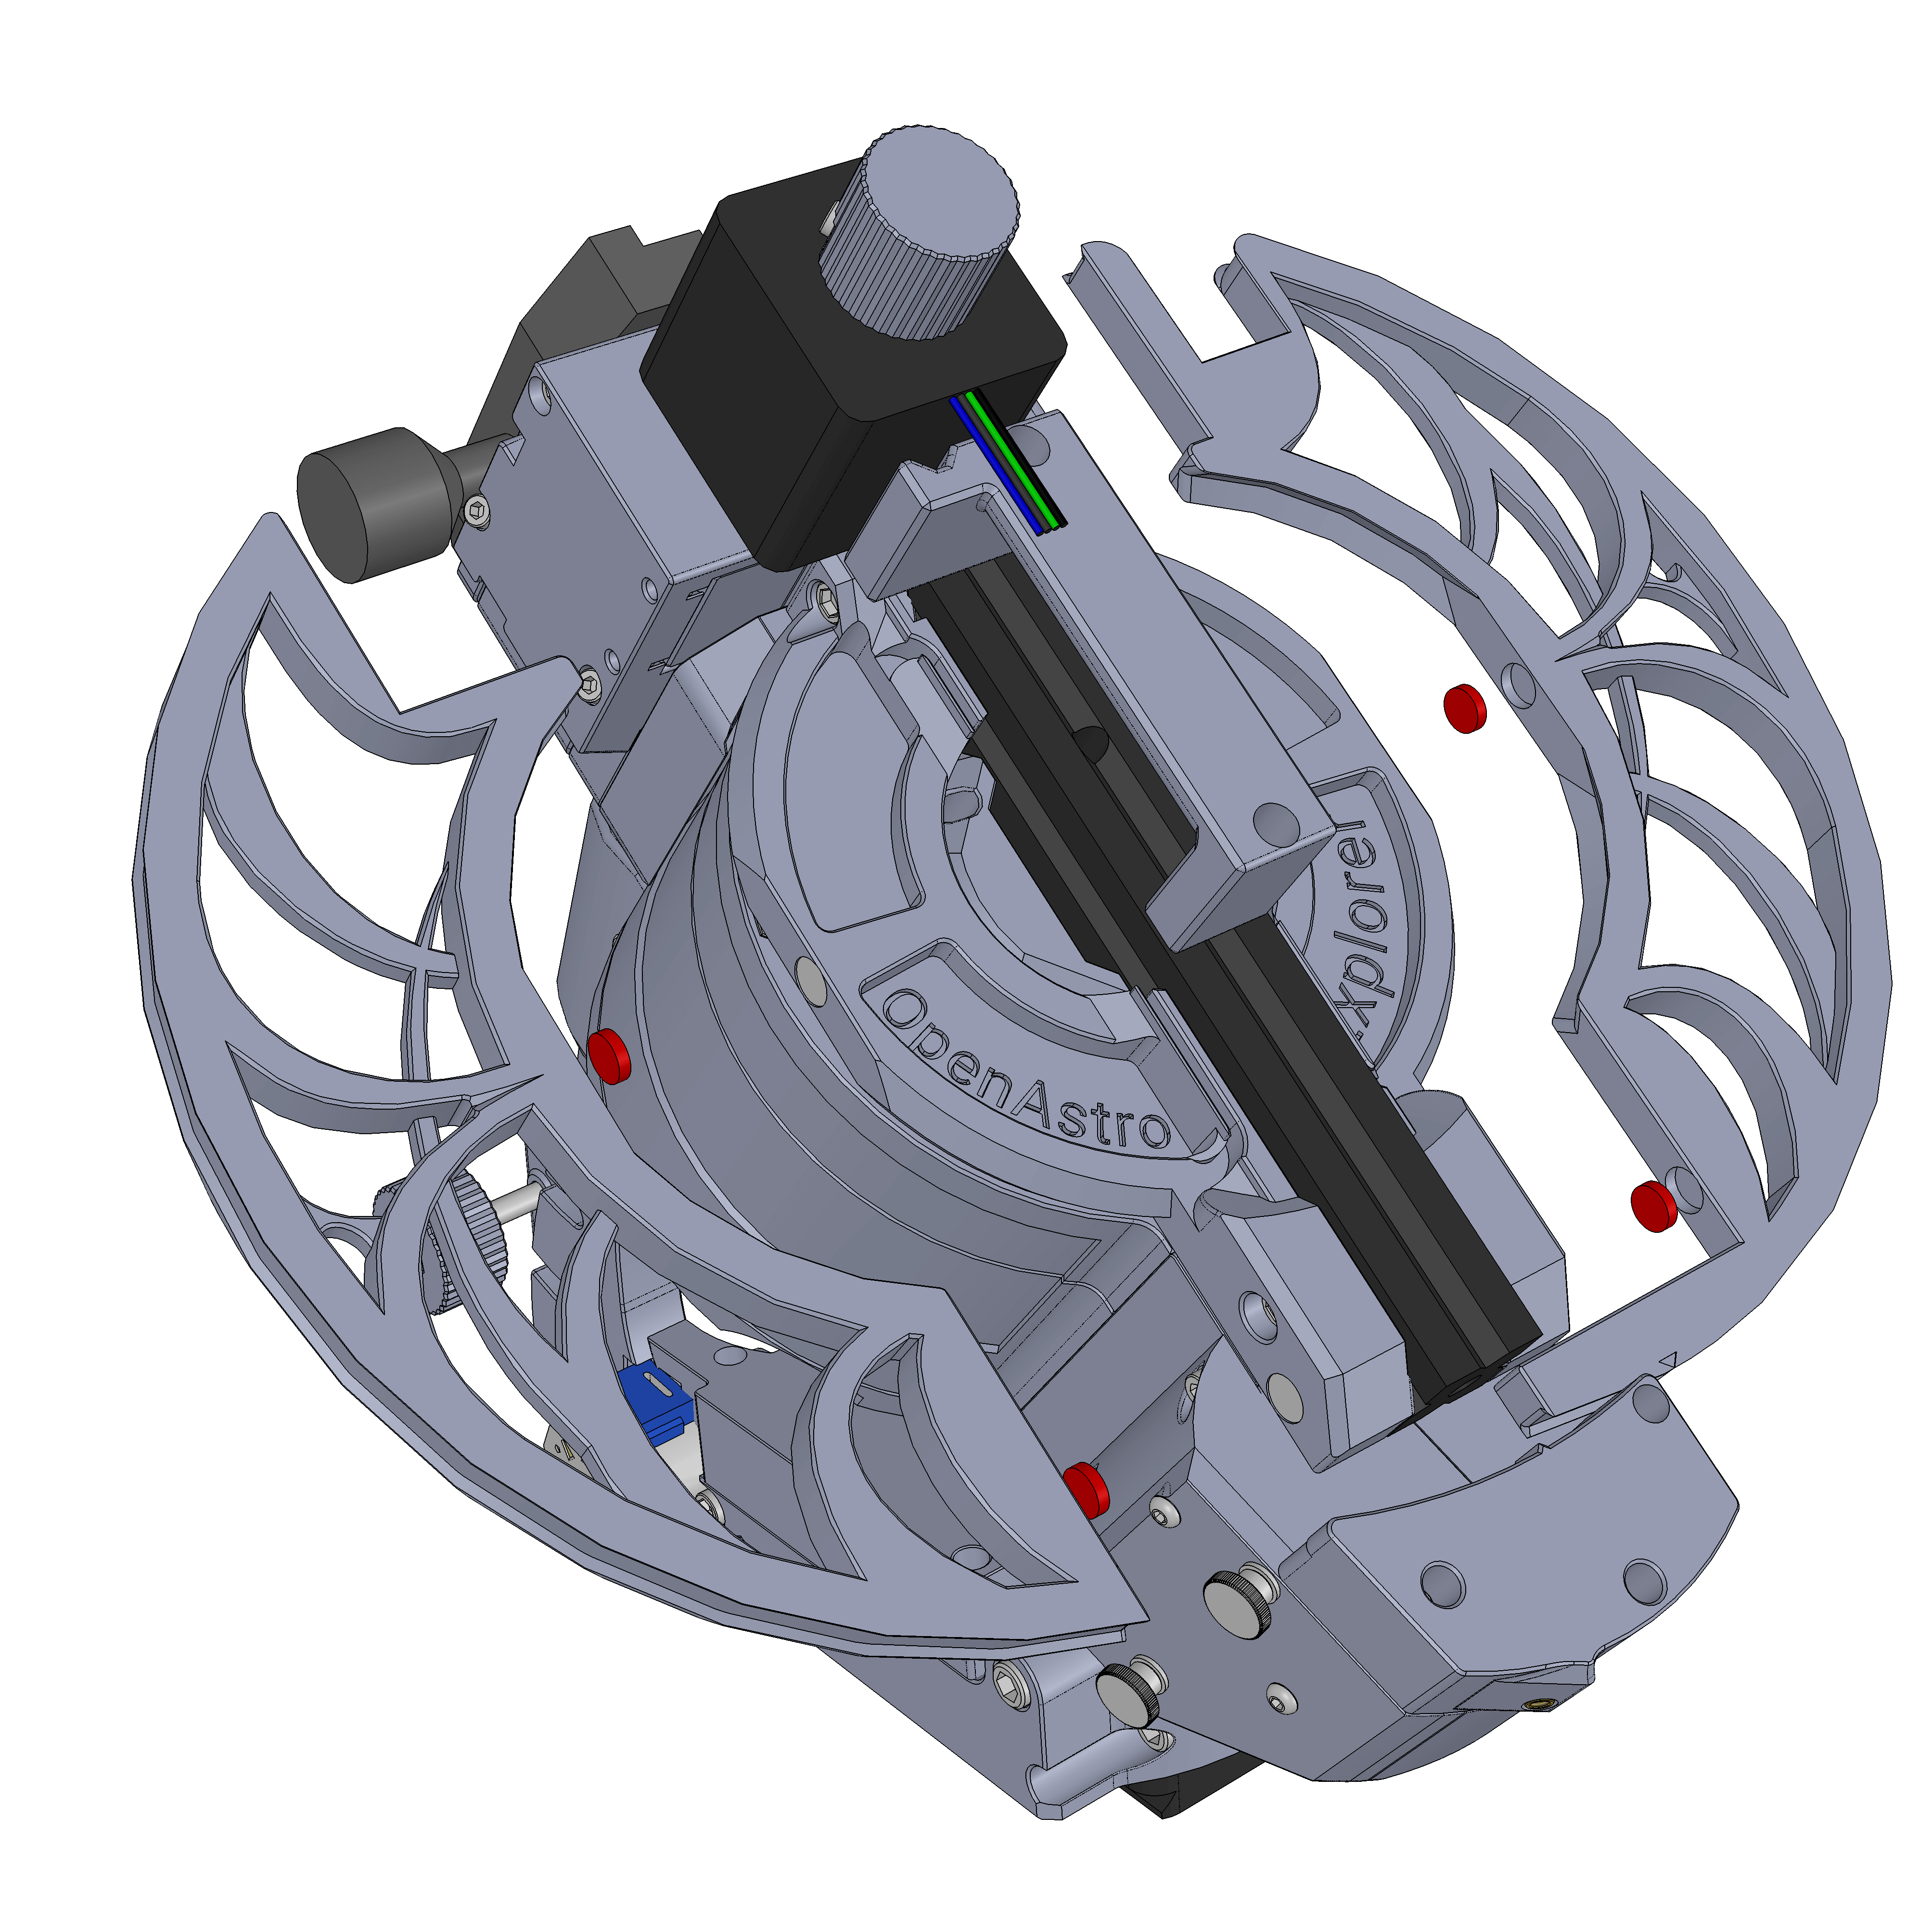
- Before inserting the magnets into the outer RA Ring pieces, check the polarity of the magnets with the ones that are on the inner RA Ring. Then insert them in the correct orientation.
¶ Step 62
- Assembly
- Parts
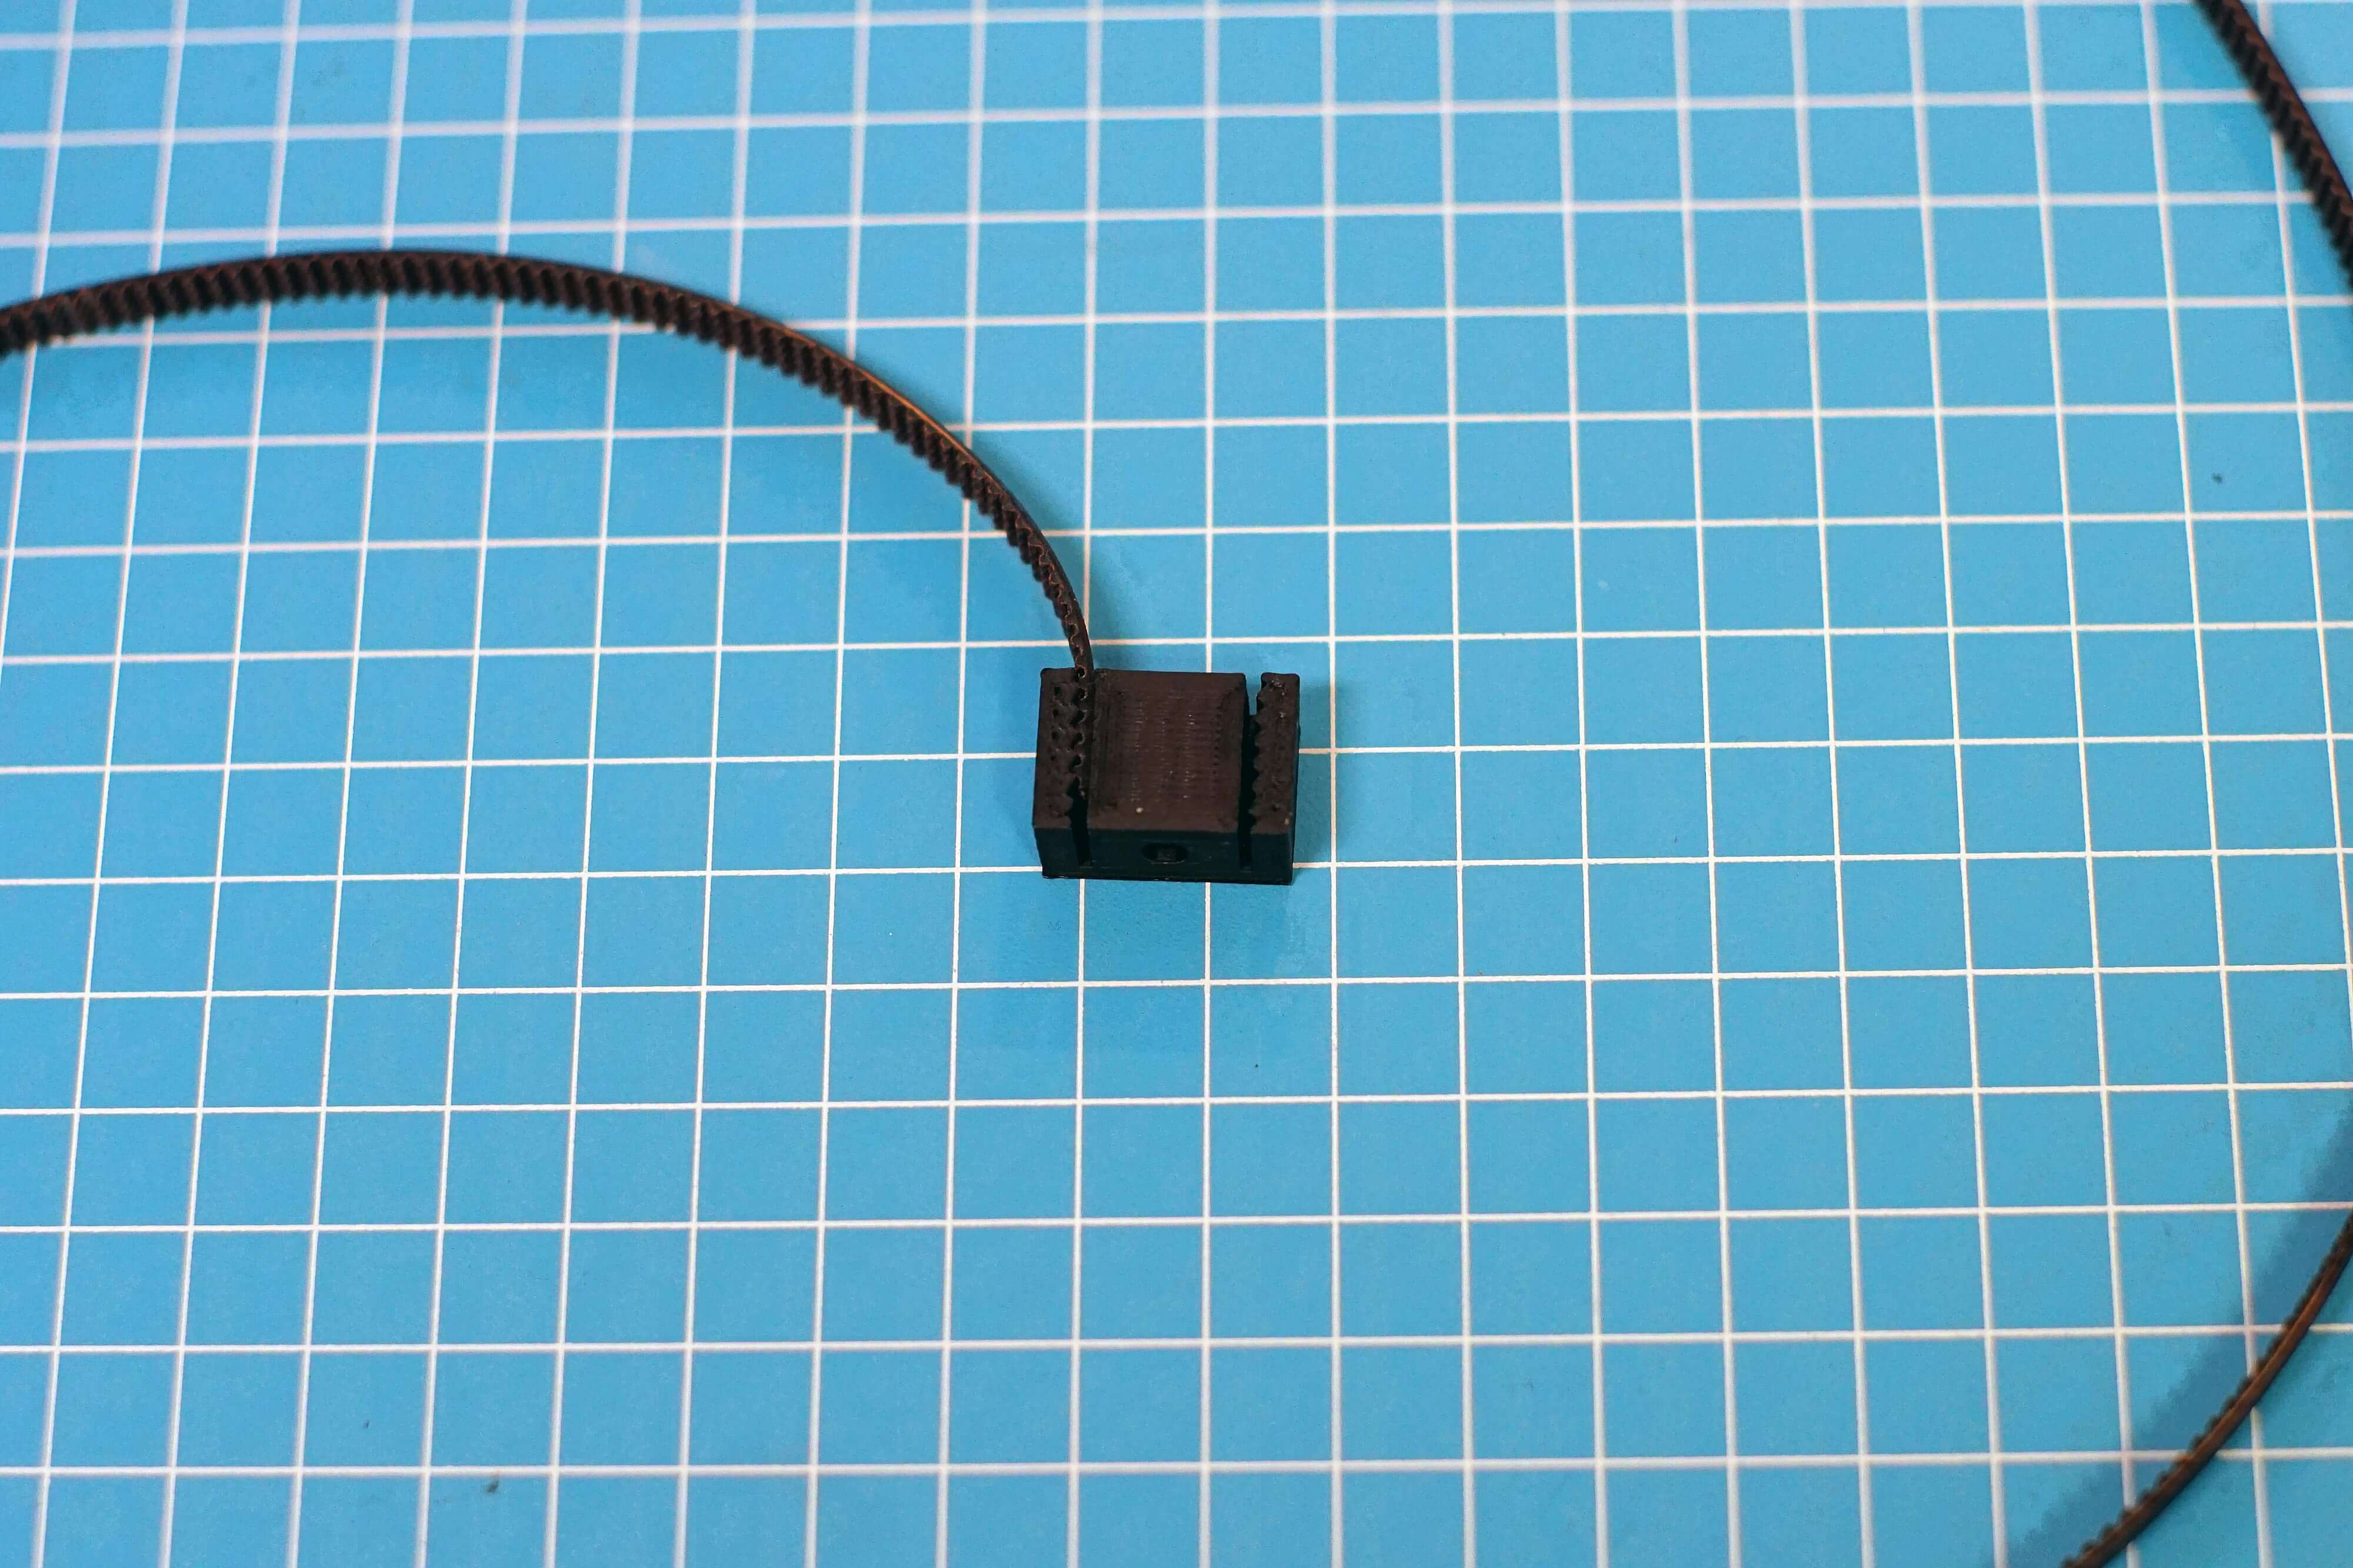
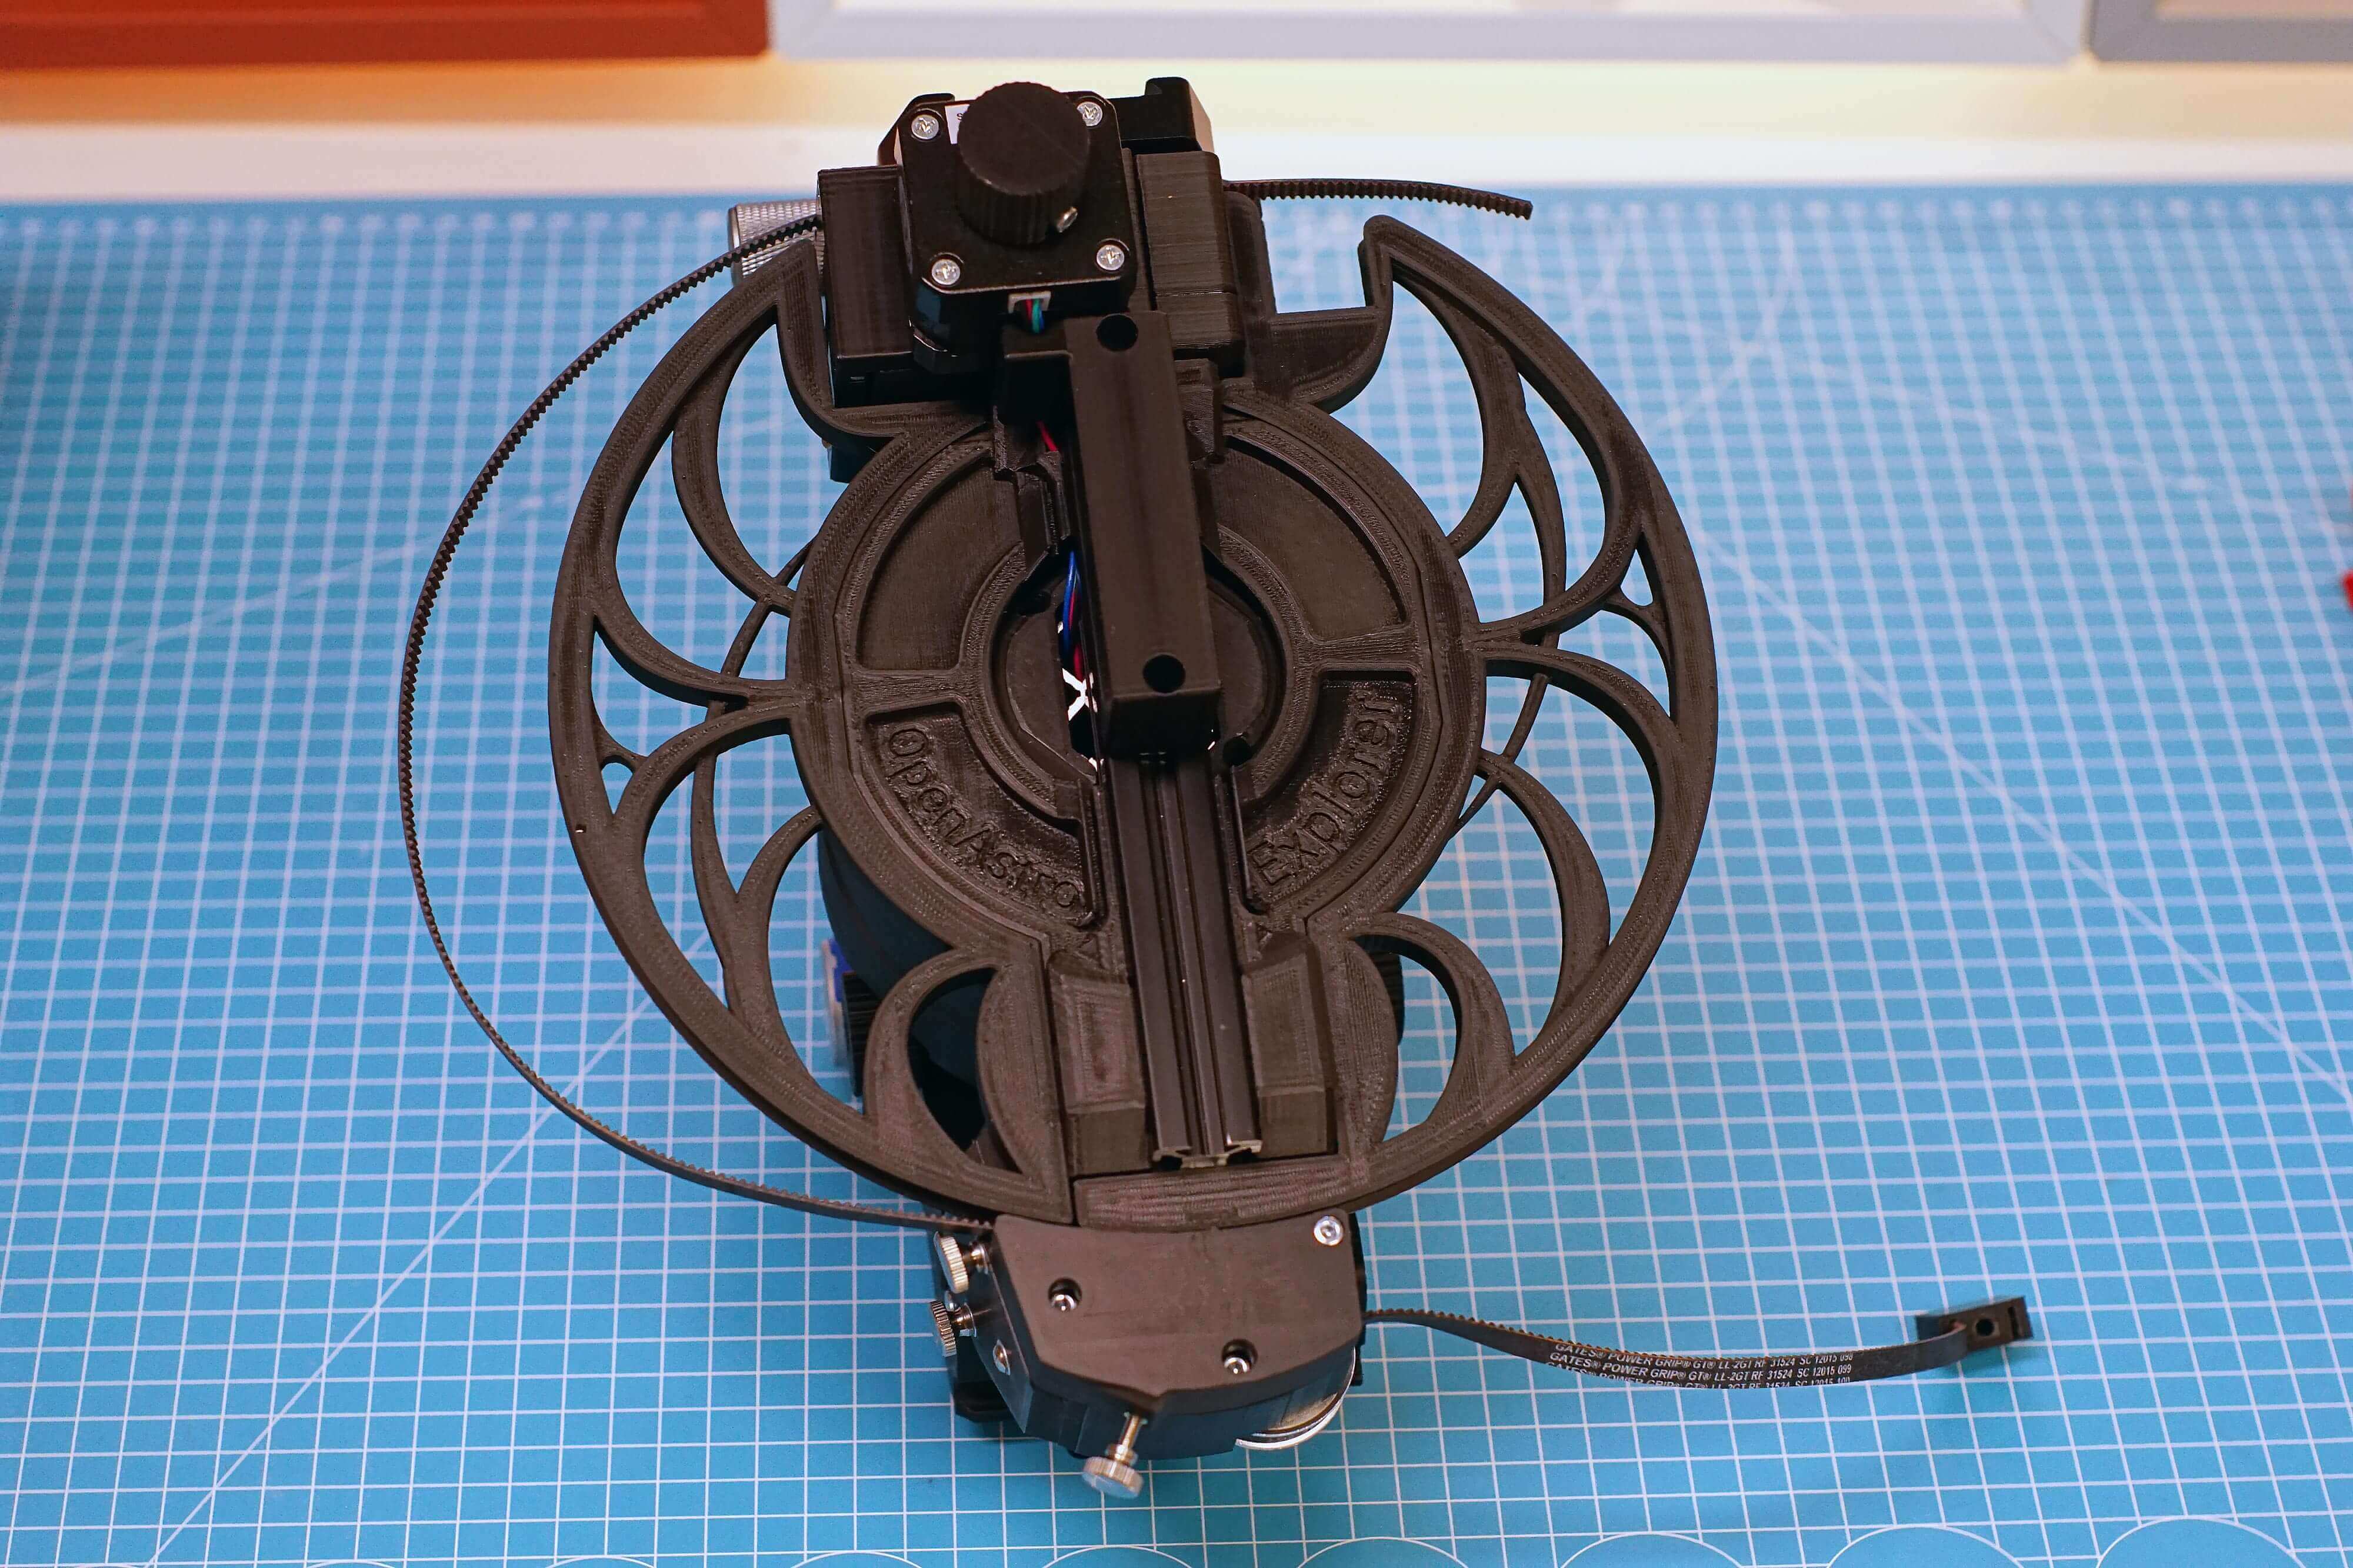
- Attach the belt to the belt holder as shown. It can help to insert a small screwdriver or similar to widen the gap by a tiny amount.
Push the other end of the belt from the right through the RA gearbox, under the pulley and over the idler.
Then push it through the small channel at the DEC axis.
¶ Step 63
- Assembly
- Parts
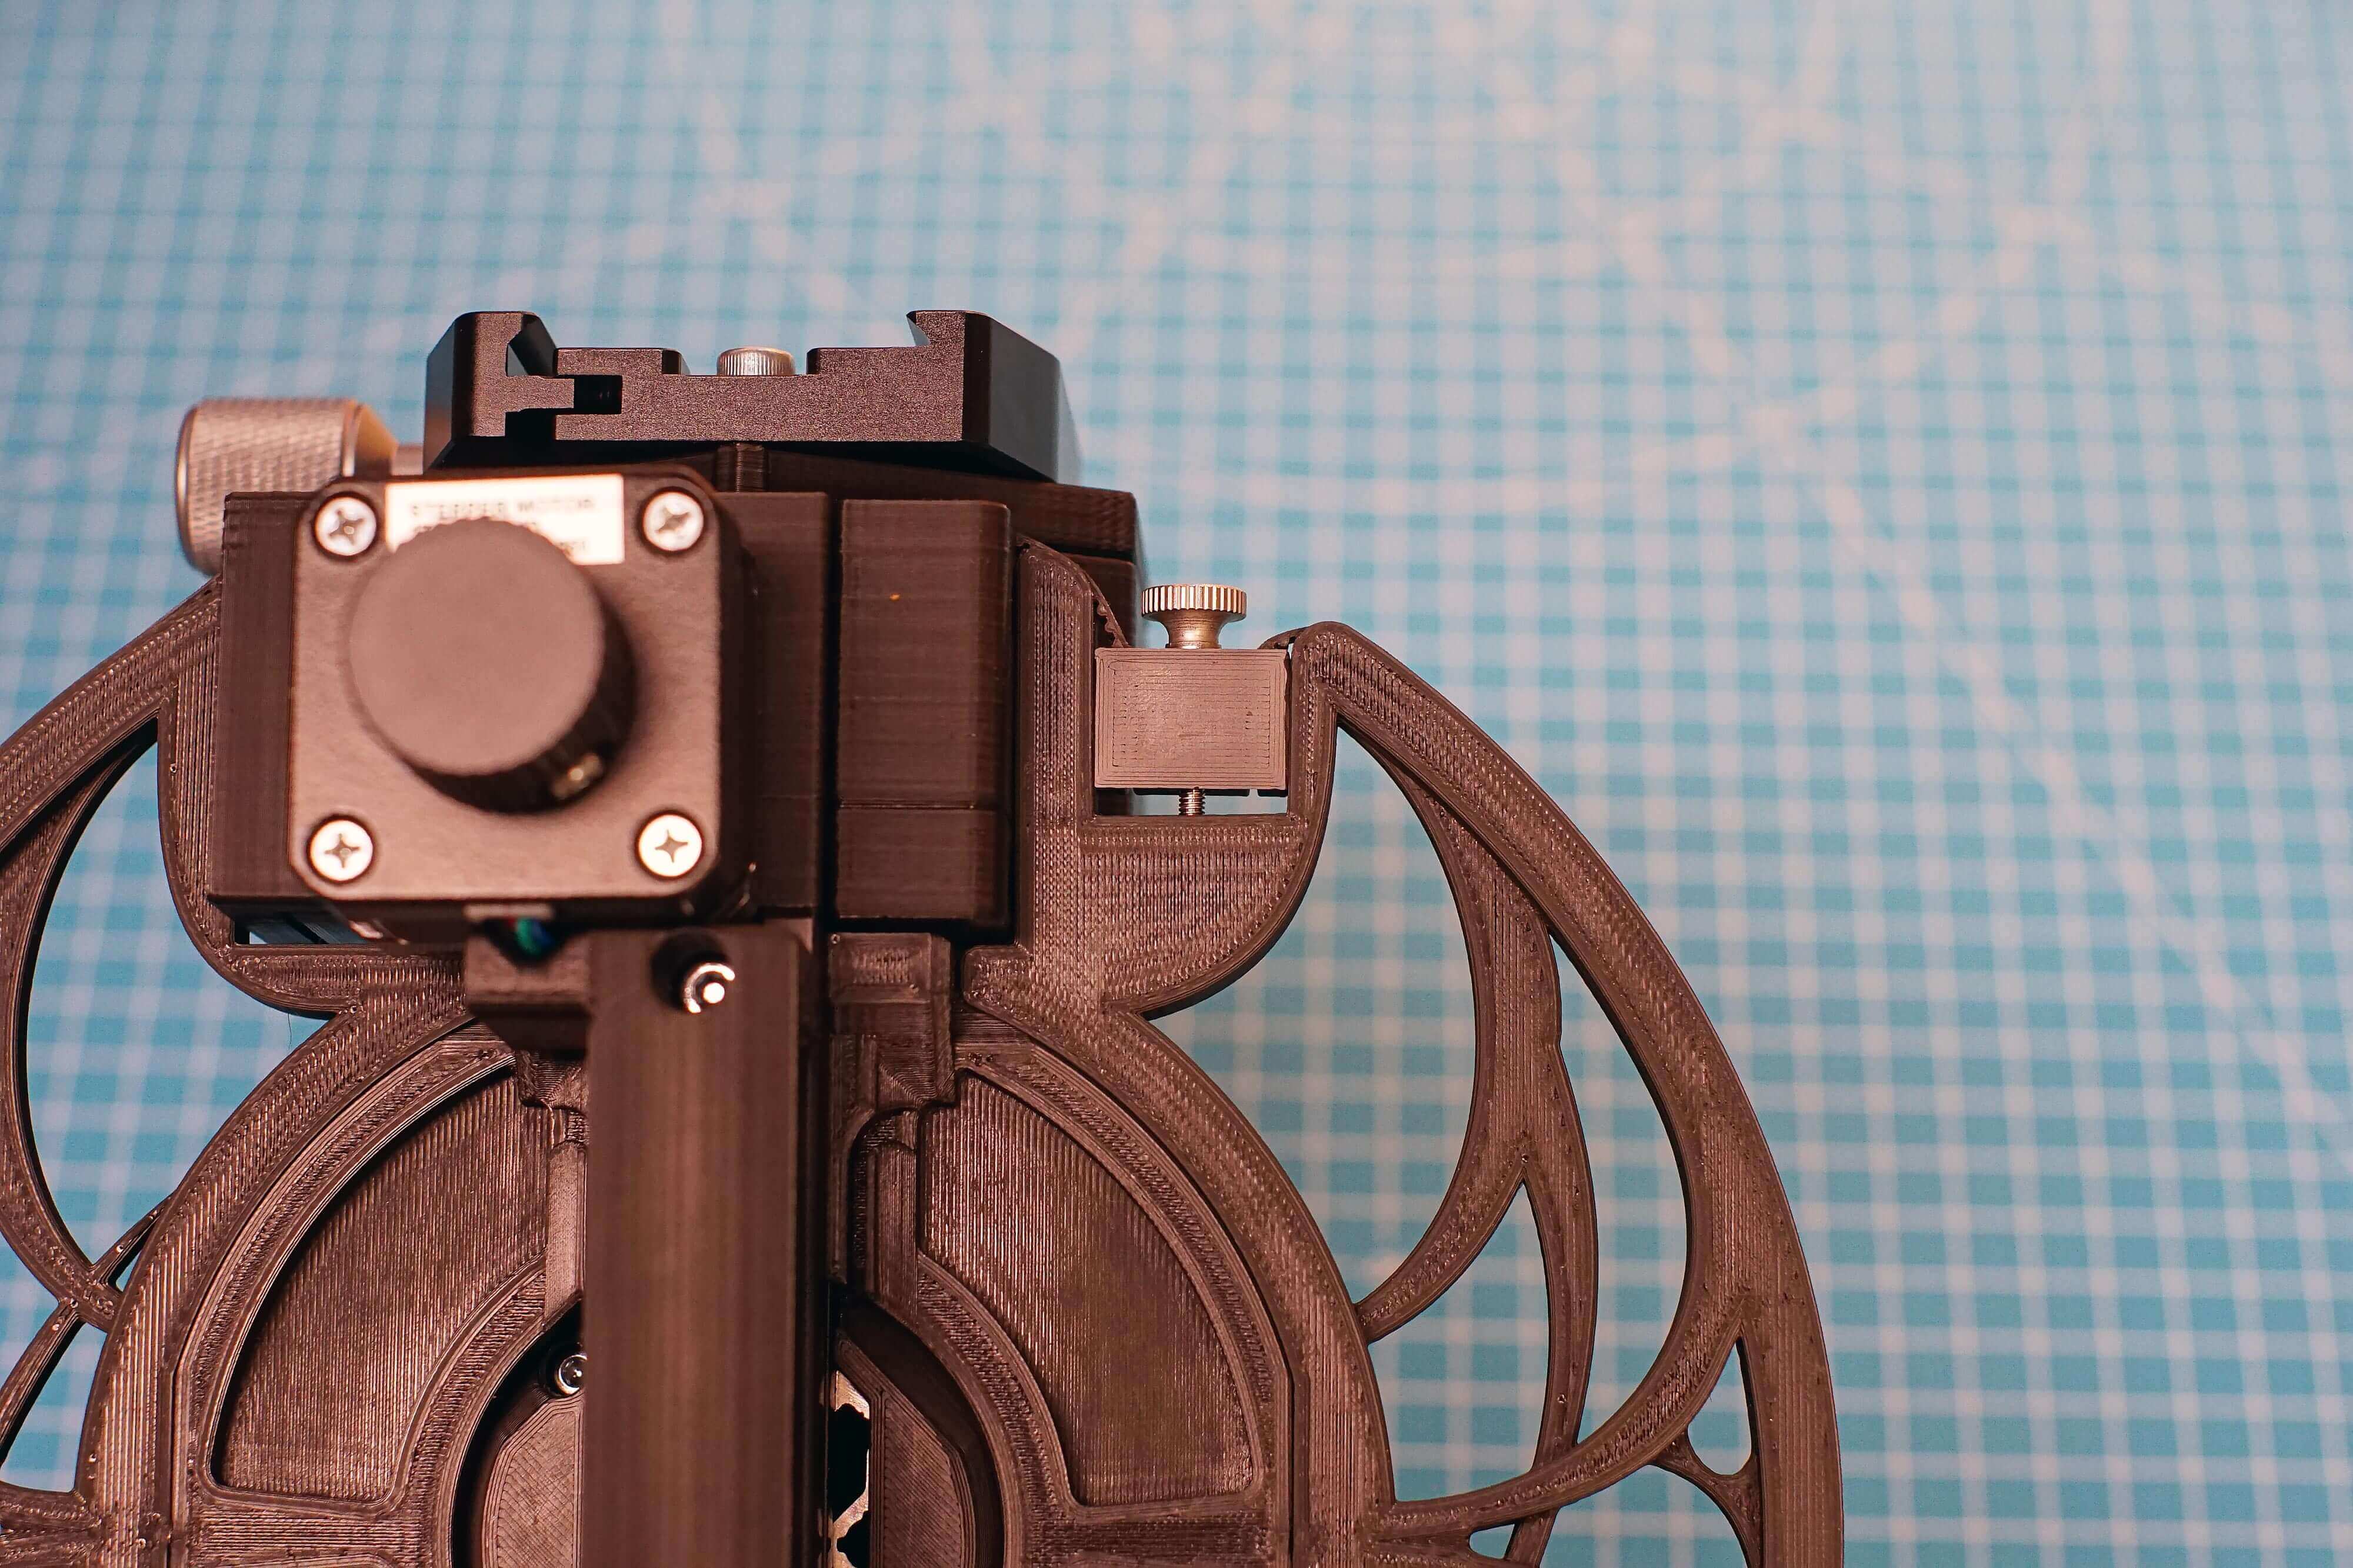
- Insert the open end of the belt into the belt holder.
- Route the belt around the RA ring and attach the belt holder with the M3x20 Thumbscrew as shown.
- If this is very hard or impossible, move the belt out of the belt holder by one tooth. Vice versa if too loose.
- The belt should have a good tension with the belt holder in the position shown, it shouldn't be too tight yet. There is annother belt tensioner in the RA gearbox.
¶ Step 64
- Assembly
- Parts
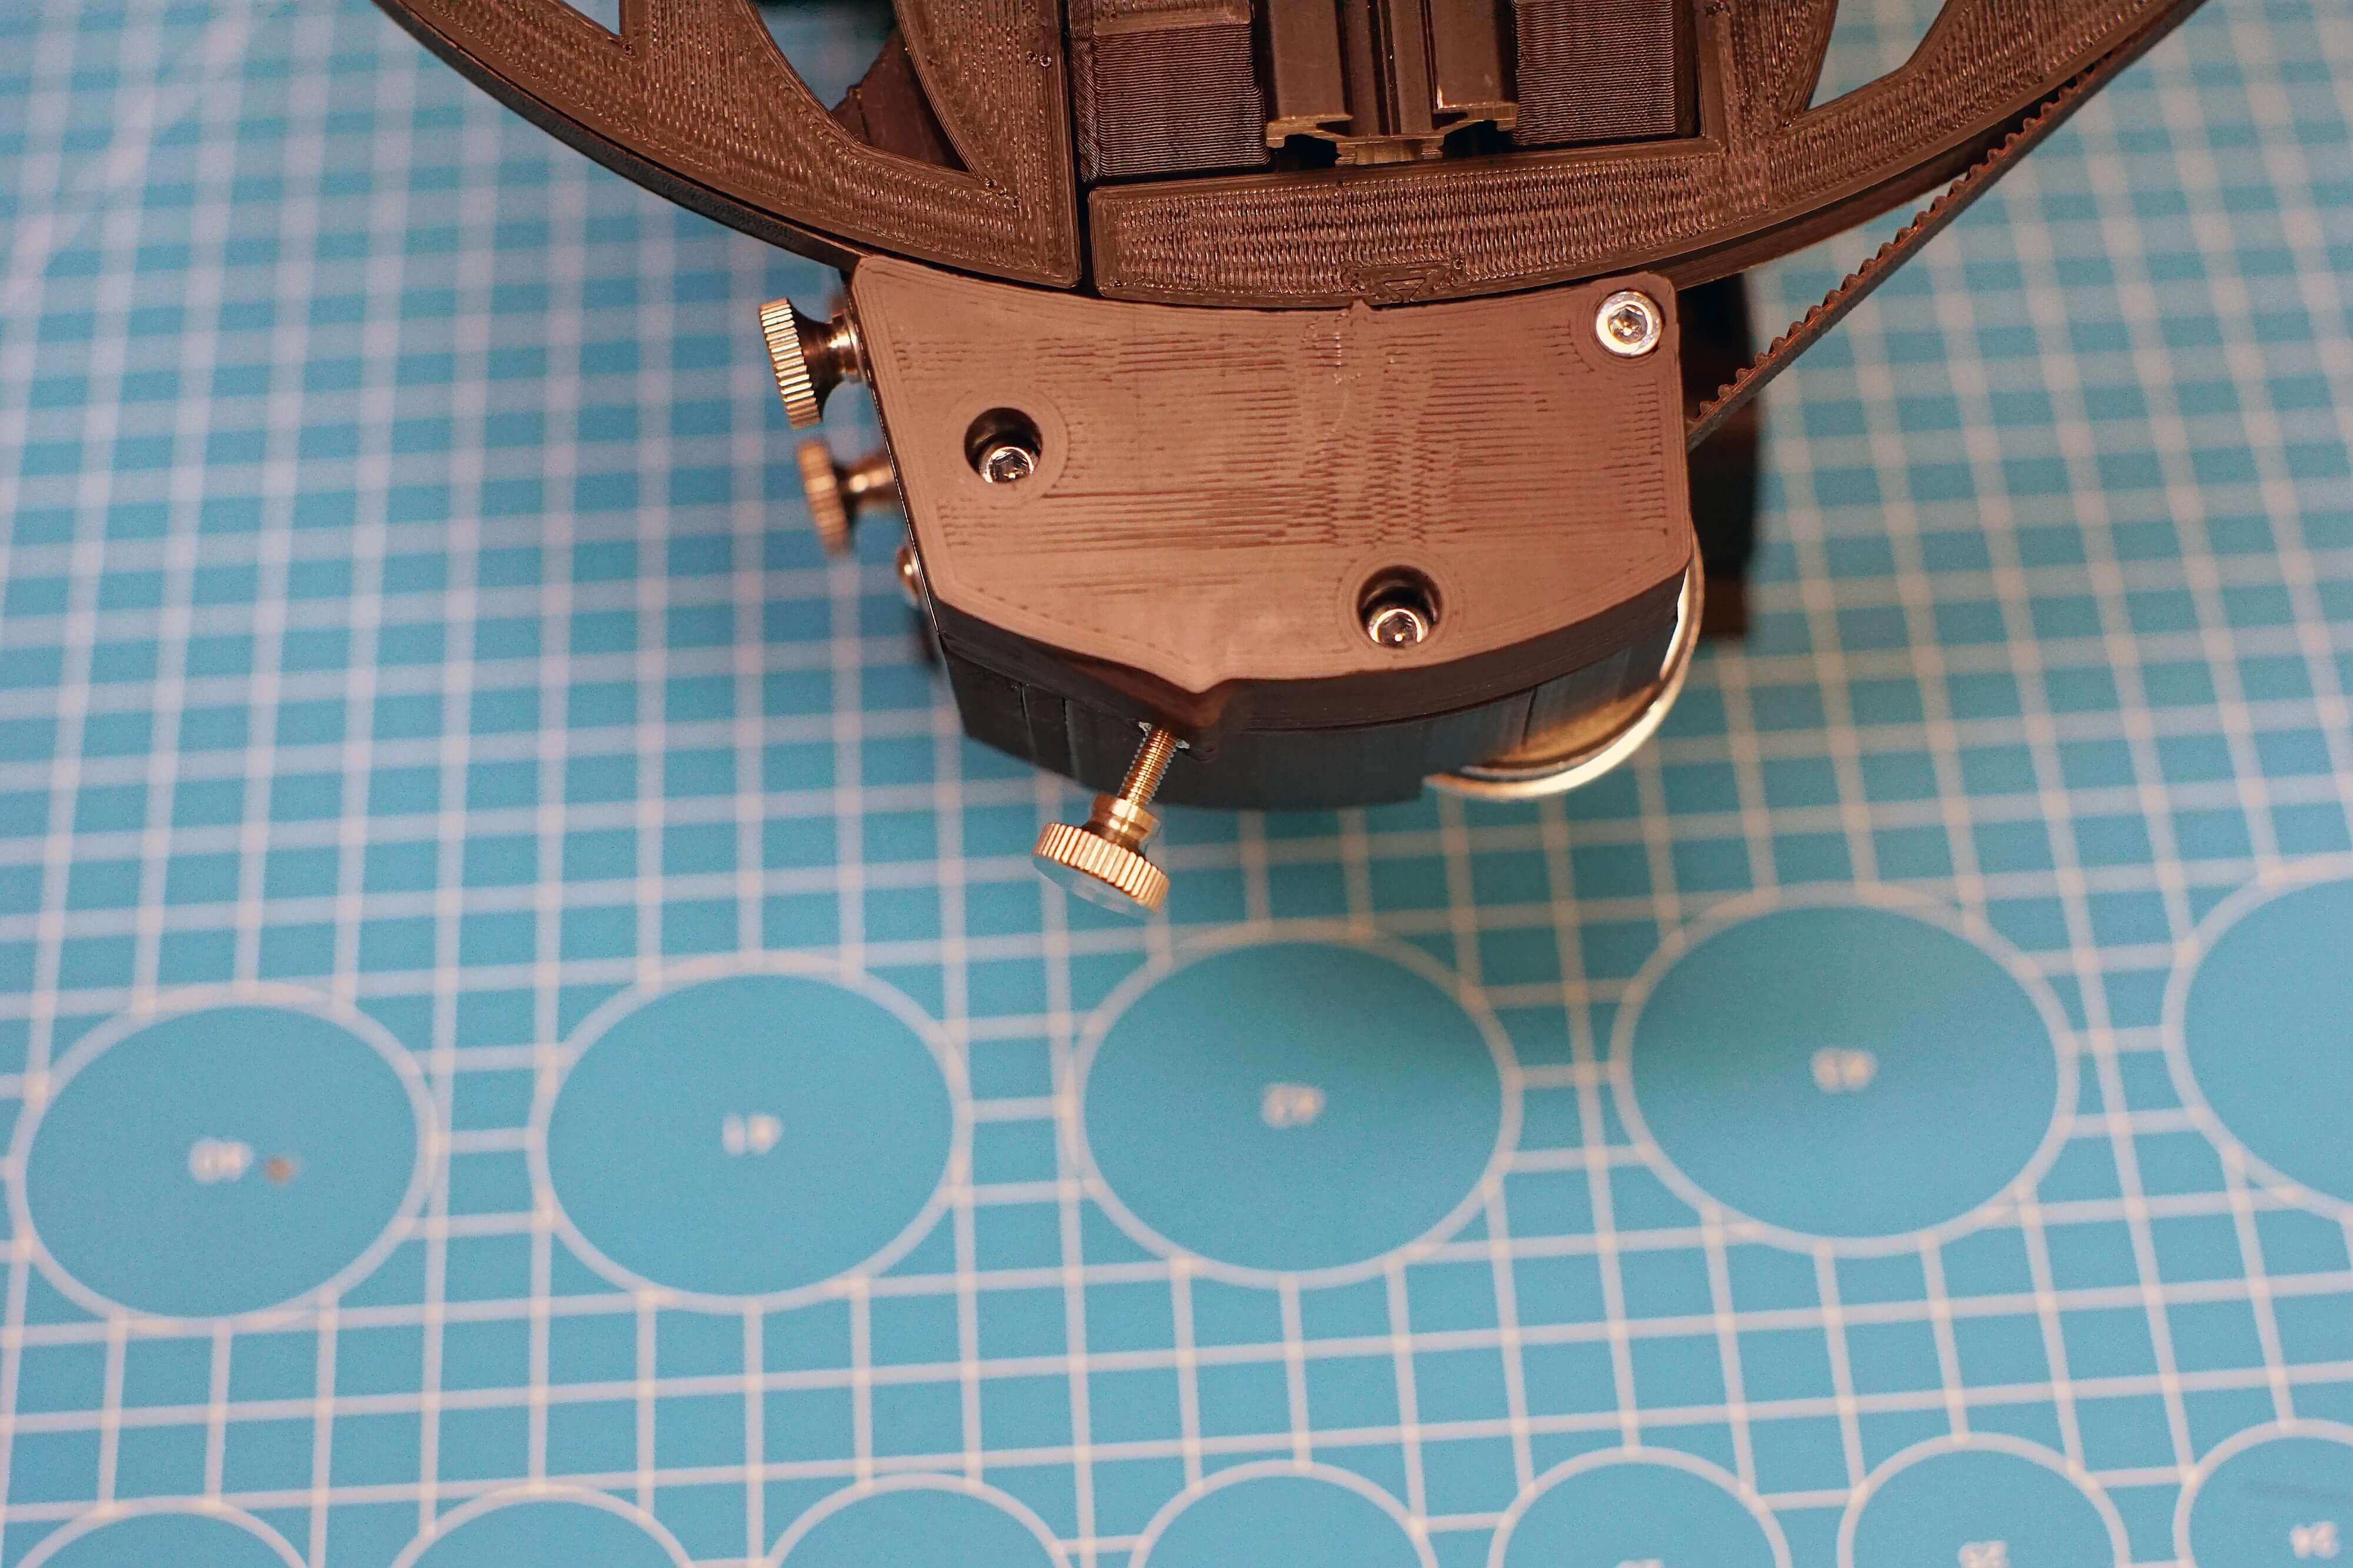
- Insert a M3x16 thumbscrew as shown.
- This is a fine adjustment for the RA belt tension.
- You can check belt tension by the exposed part of the belt on the right.
- When storing the mount, at least this screw should be loosened. Ideally the entire belt should be removed by removing the belt holder.
¶ Hardware
- M3x16 Thumbscrew
¶ Step 65
- Assembly
- Parts
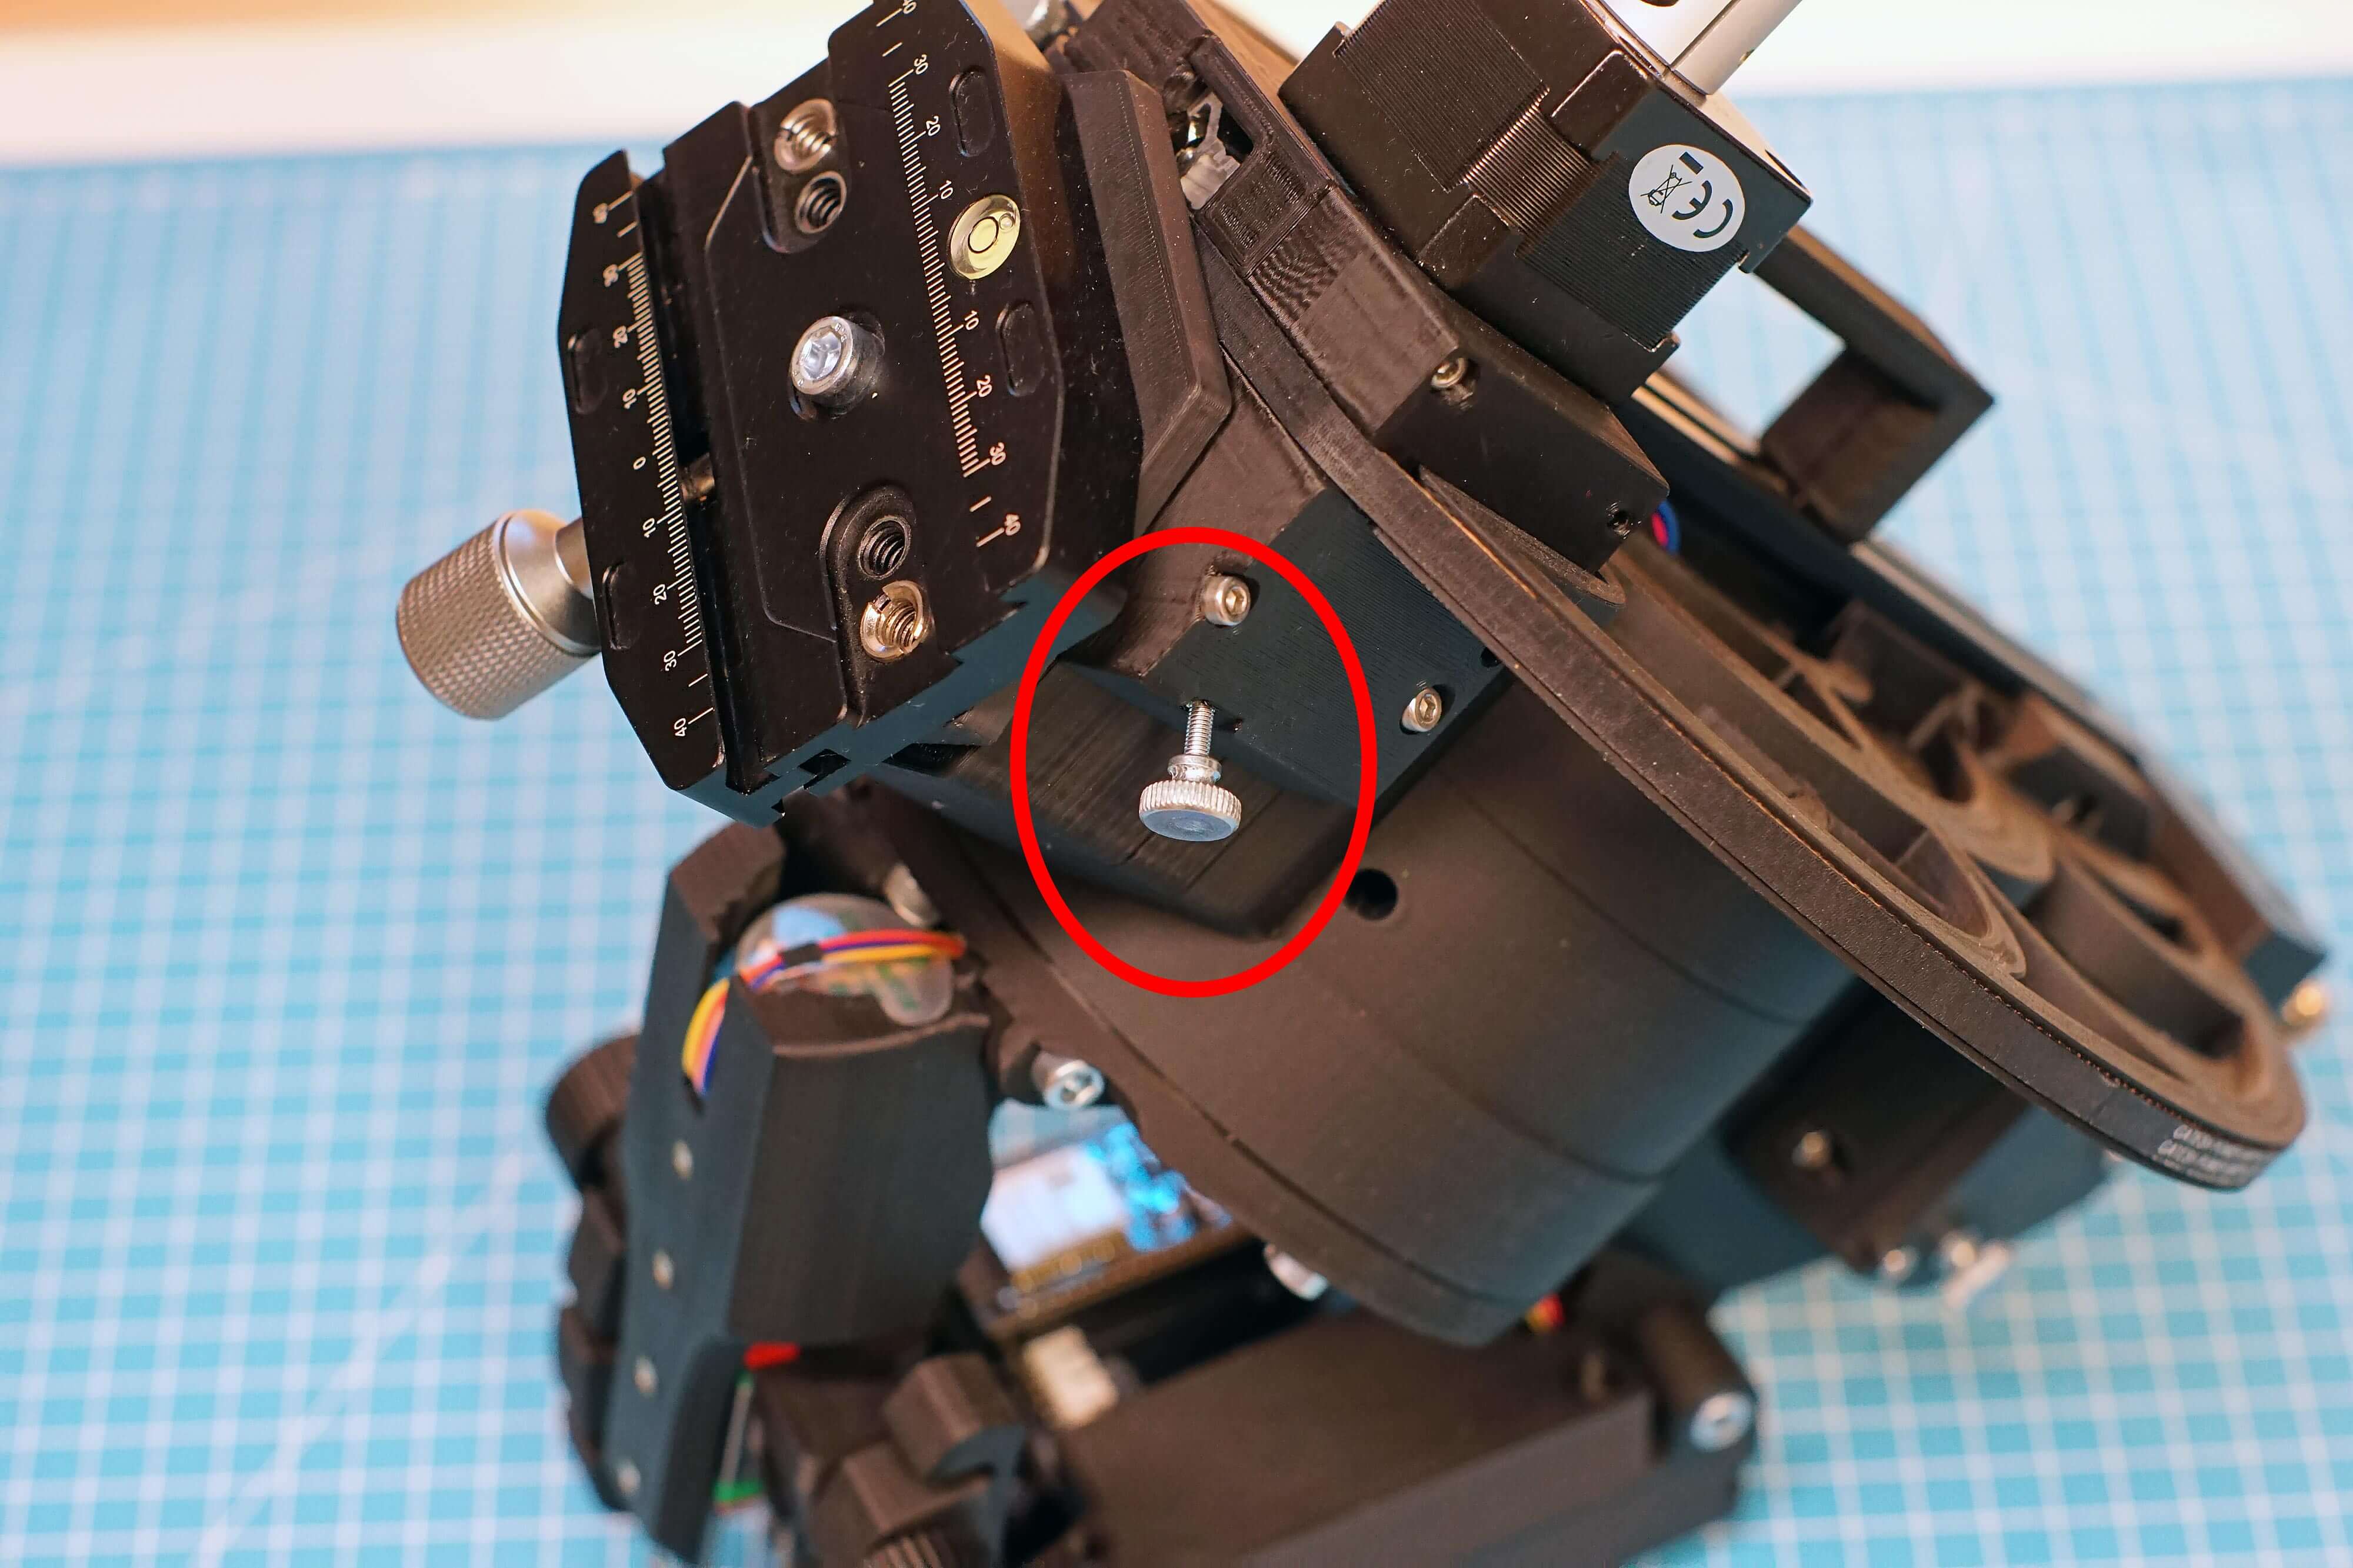
- Add a M3x12 Thumbsrew as shown
- This tensions the belt inside the DEC gearbox.
- This should not be screwed in fully, good tension is usually achieved with it turned in halfway.
- When storing the mount, this screw should be loosened.
¶ Hardware
- M3x12 Thumbscrew
Congratulations! You have finished your OpenAstroExplorer!
To learn how to use it, check the Firmware and usage page

OAE Assembly Part 1: RA Gearbox
OAE Assembly Part 2: Base
OAE Assembly Part 3: DEC
OAE Assembly Part 4: AZ Base
OAE Assembly Part 5: ALT and Final Assembly
OAE Additional Assembly