¶ First of all
¶ What lens and camera should I use?
While there isnt a general answer ala "Buy X, get pretty space pictures", the next best answer is: The best gear is the one you already have. Pretty much every DSLR made in the last 15 years will suffice. Even a kit lens will be okay for starting out, although a bad lens is much worse than a old camera. If you want to get a new lens, check out used vintage lenses.
¶ Why you should use a Laptop
While OAT can be used standalone, using a laptop with it will significantly improve your experience. For example: A simple "blind" GoTo may not always be accurate, it will get you in the close area of the target but almost never hit it on spot. Too many factors play into it, how precise the time was entered, how level the mount is, how well aligned the camera is to the DEC axis. By using a computer, you can make use of so called "Plate Solving" which will automatically calculate the coordinates from a picture and correct the position.
Another benefit is that it is much more easy to take images through software on a computer rather than a intervalometer, if your camera supports PC control.
¶ Why use Autoguiding?
You probably came across the term "Autoguiding". But what is it and whats the benefits?
An Autoguider is a extra camera and scope with high magnification. It uses a PC to watch the position of a single star and if that star moves slightly it will issue a correction to the mounts motors.
This significantly increases the possible focal length and exposure time that can be achieved with OAT, while also increasing the amount of usable images without star trails.
¶ USAGE
Once you've built your tracker, have calibrated it (not necessary with the OAT Kits), you should verify that it behaves like in this video:
Once you've verified that the directions are correct, you'll want to learn how to set it up and use it.
We highly recommend to set up your stack (Camera + OAT + Laptop + Battery/power) prior to your first session. This will make things a lot easier once under the stars! For a detailed guide, check out the astrophotography setup page.
¶ Session setup
So you're ready to take pictures! This is the way we recommend that you get started. Remember that the most critical thing is for the mount to be polar-aligned. What this means is that the mount should point at the celestial pole when it is in the Home position.
The polar alignment is relatively easy in the northern hemisphere and the mount can guide you through that setup. For the southern hemisphere it is a little harder.
For more information on different PA methods, see the Polar Alignment page.
¶ What you'll need
- The mount outside on a (preferably near level) stable platform
- The camera mounted on it and pointing along the rail as best you can get it
- A laptop
- Software that can display a live view of the camera on your laptop ( BackyardNikon or BackyardEOS are good choices). If you can't get a live view, being able to take pictures will also do, although it will take a lot more time.
- If you have the LCD screen, you're set, otherwise you'll need OATControl running on the same laptop. See the LCDMenu page for an explanation of the LCD Menu.
¶ Northern Hemisphere
Luckily there is a fairly bright star (called Polaris) very close to the celestial north pole. We utilize it to do the alignment.
- Level the mount
The mount should be level in a sideways direction (i.e. roll, such that the extrusion between the roll mounts is level). Do this by using only the two front screws and turning them in directions that make the front extrusion level. Don't worry about front to back "levelness" (i.e. pitch), that will be done in the next steps. - Setting HA
The mount controller requires the current HA of Polaris to function correctly. This is automatically done if you:- connect with OATControl, making sure the Lat/Lng/Alt in the connect dialog is correct.
- have the GPS Add-On and the GPS can find enough satellites.
If you have the LCD only and no laptop or GPS module, you'll need to enter the correct HA manually. You can obtain it from an app like "Simple Astro Tools" or from Stellarium, by clicking on Polaris. Make sure that Stellarium has your correct location and time!
-
Home the mount
Homing means rotating the RA ring to be centered and the DEC ring rotated such that the camera points out of the RA ring at 90 degrees (see figure below). This adjustment does not need the camera, it is purely physical, using the OAT hardware.
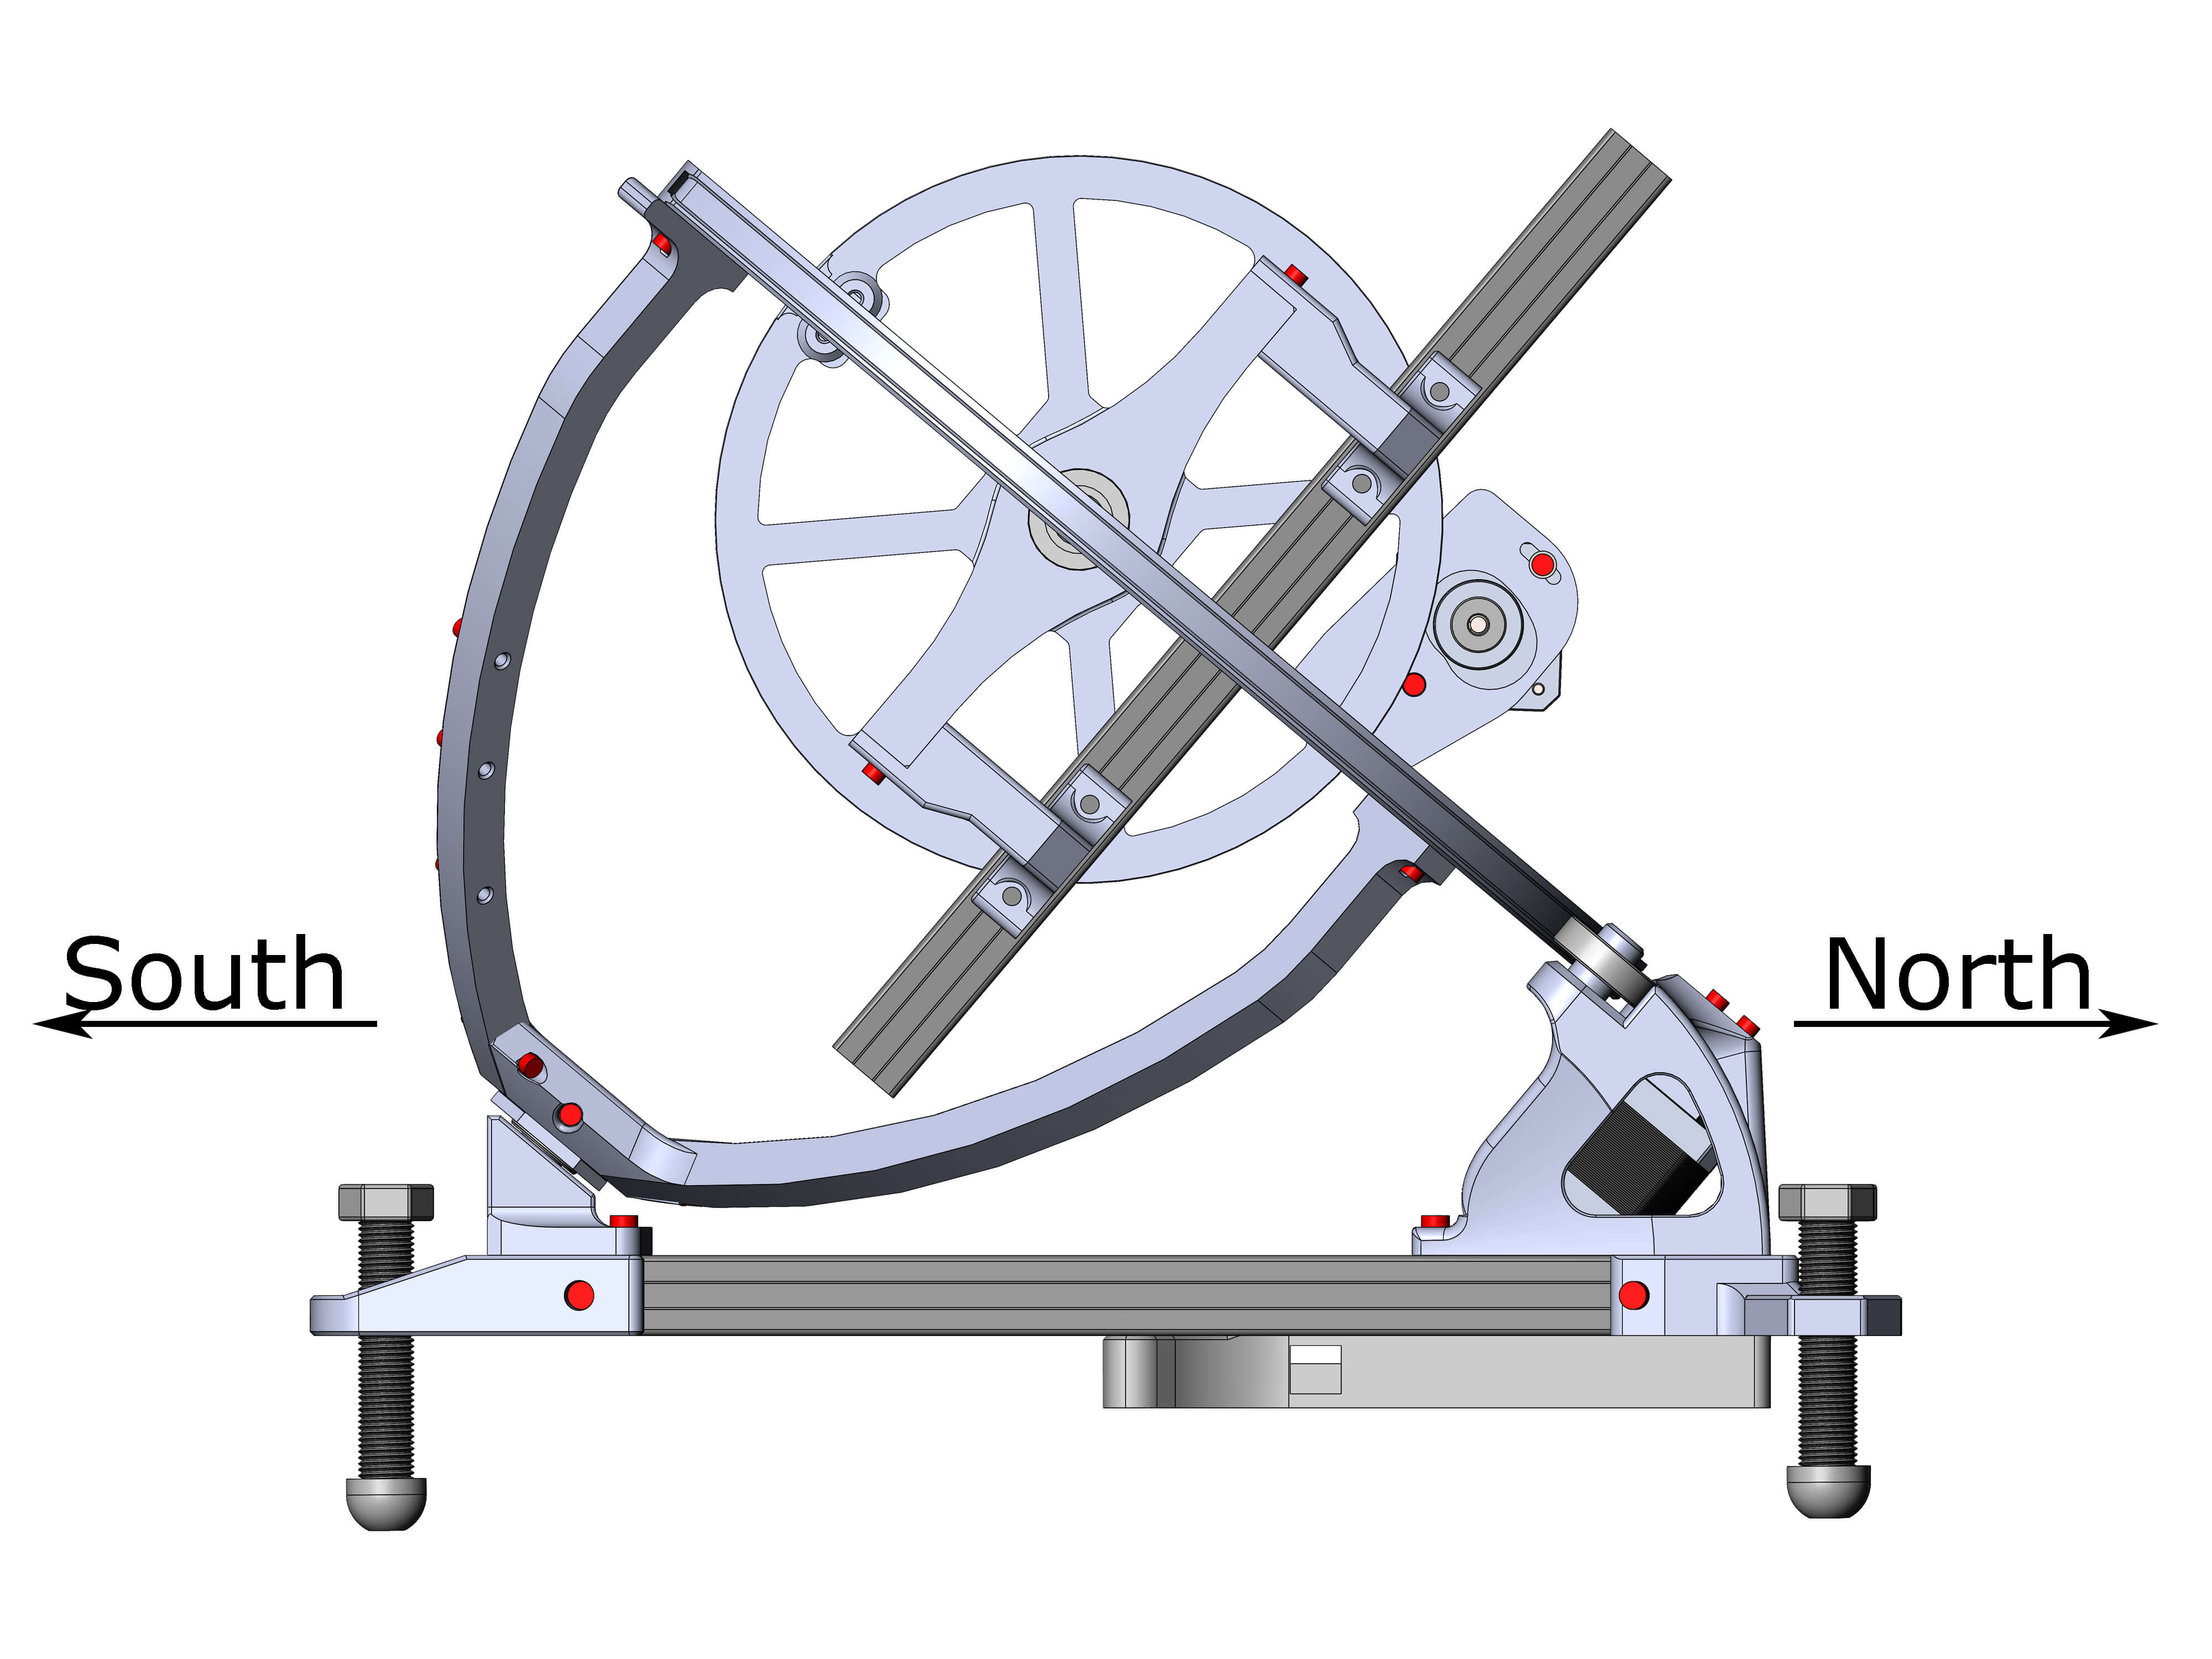
 This is how OAT should be aligned to North and South in the Northern Hemisphere. In the Southern Hemisphere, it is turned around.

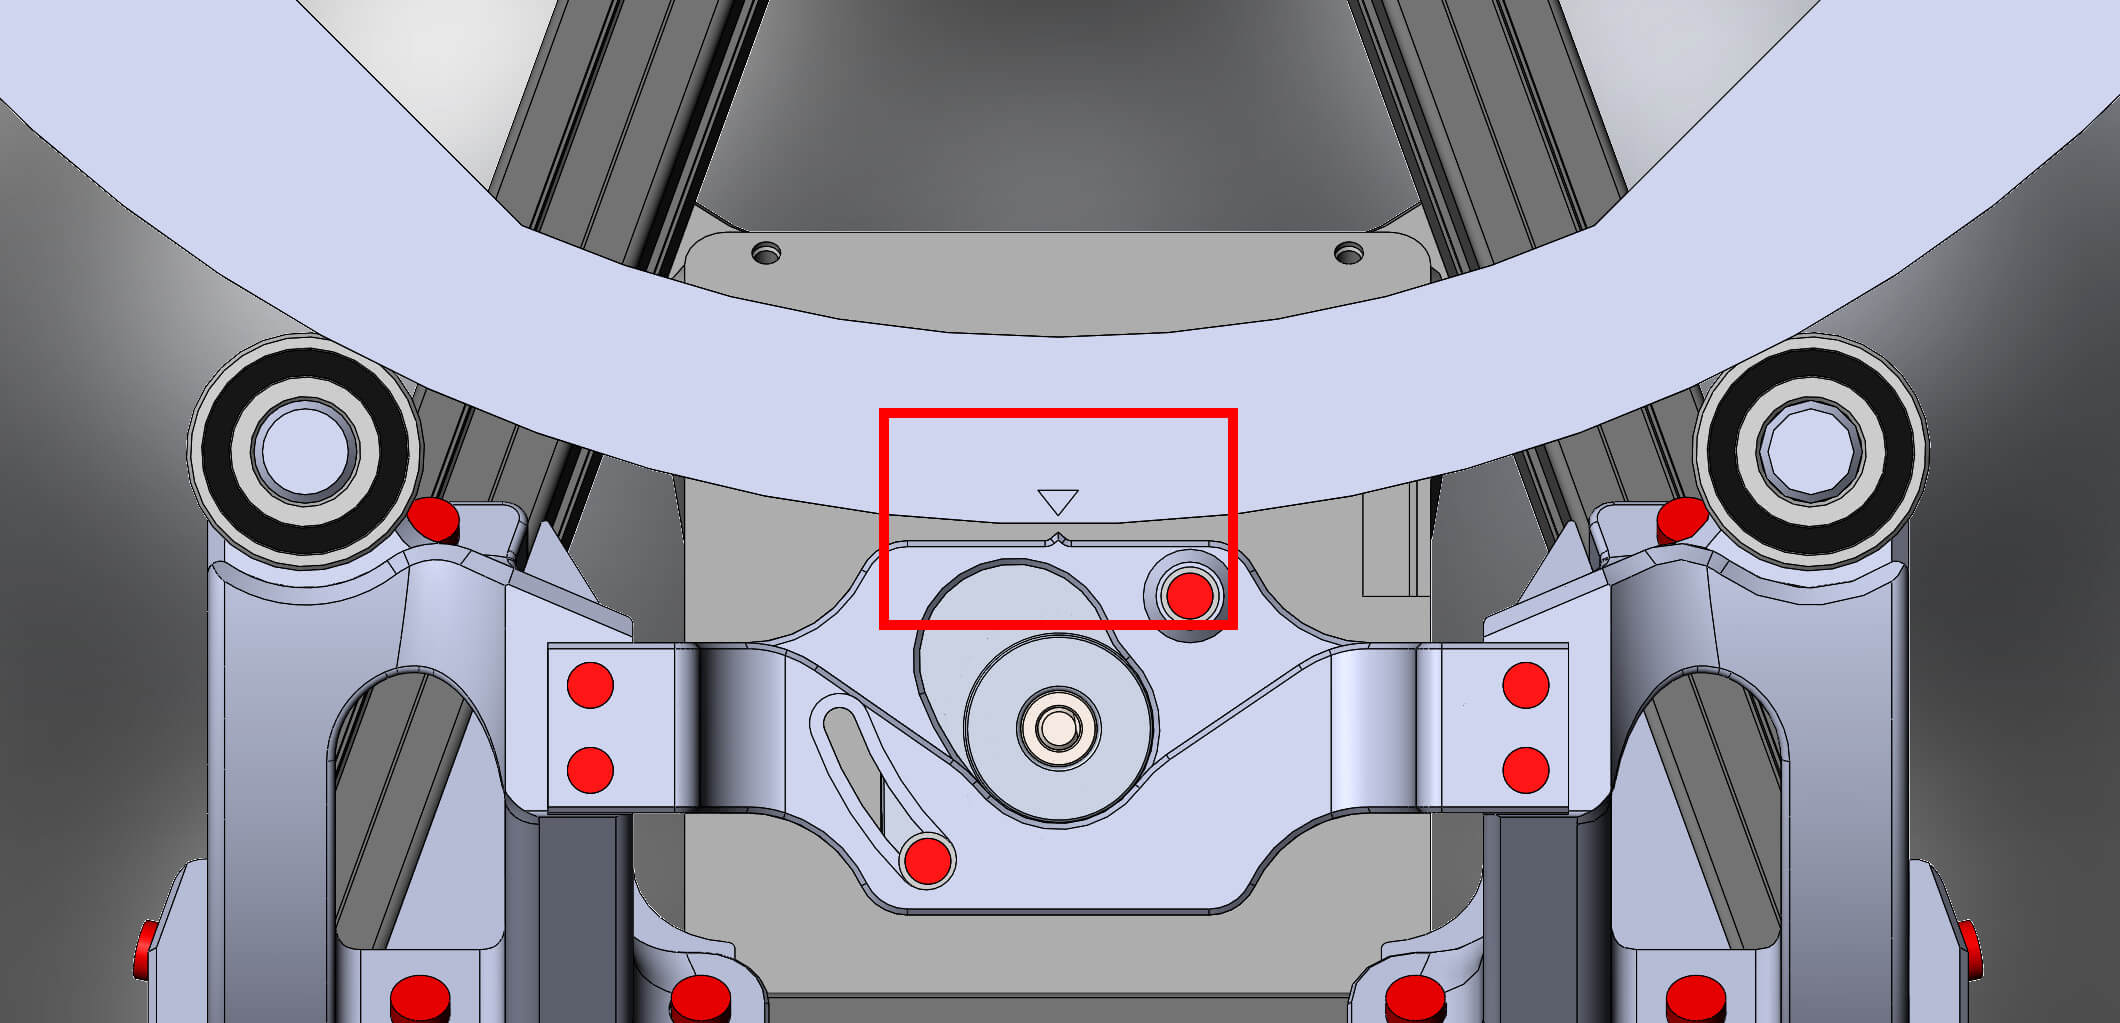
Align the home marker in the middle of the RA ring with the indicator of the RA motor mount.

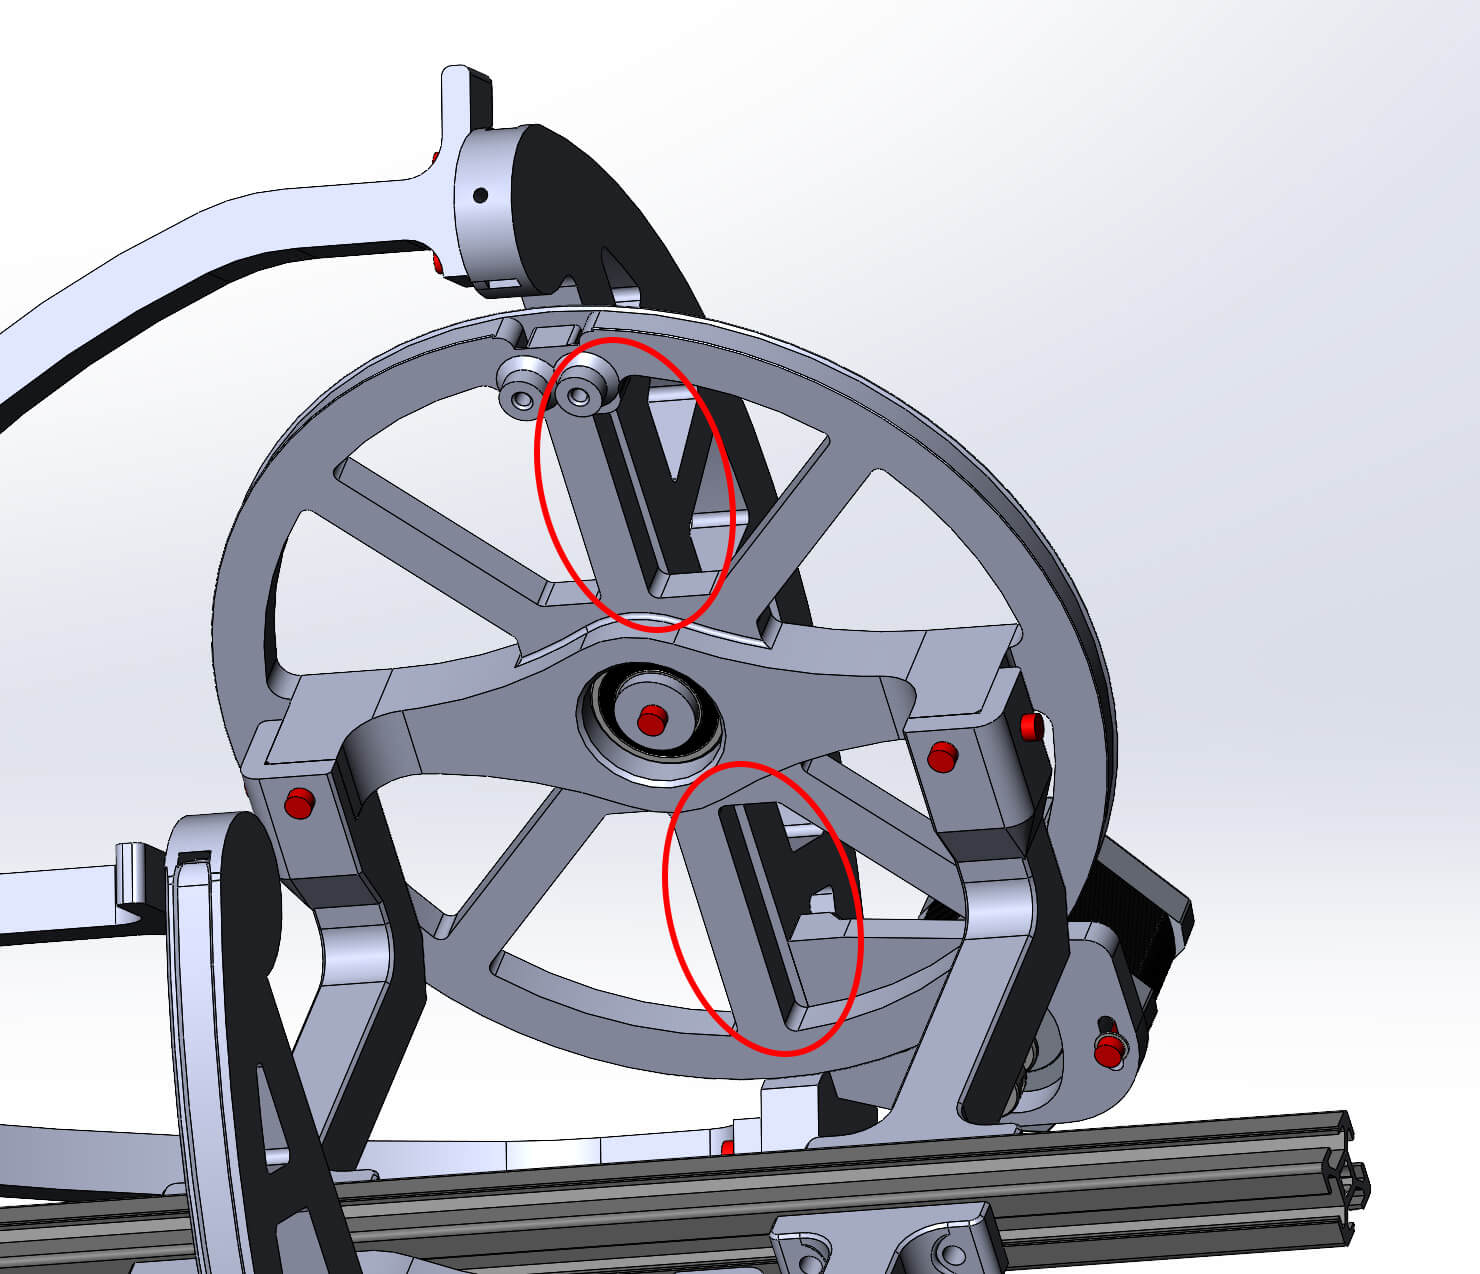
Align the two sprockets of the DEC wheel with the RA Ring, so that the DEC assembly points 90° to the RA Ring. -
Your OAT is now in it's home position. This is the position you will have to bring it in every time you set it up!
If you are using the LCD, use the four arrows to center the RA and DEC ring like shown and pressSELECT, thenYesto confirm.
If you are using OATControl, use the four directions to center the RA and DEC ring like shown, then clickSet Home. -
Next, you will need to Polar Align the mount. See the PolarAlignment page for that.
-
Polar Align the mount
This requires you to use your camera If you are using OATControl click onPolar alignment, if you're using the LCD: selectCAL>Polar Alignment
The mount will move for a bit, mostly around RA. After the slew, physically move the mount (via the single back M14 screw and via rotating the whole mount) such that Polaris is in the dead center of your viewfinder. Make sure the front stays level. If you're taking pictures (as opposed to Live View), move the mount in one direction only between pictures to see where the star goes. Repeat until centered. You may need to mark your laptop screen somehow from pic to pic so you can see how the movement of the mount corresponds to the star movement.
If you are using OATControl, confirm that it is centered by clickingDone, if you're using the LCD pressSELECTto confirm. -
You're now polar-aligned.
¶ Southern Hemisphere
Since there is no bright star near the southern celestial pole, it is recommended to use Drift Alignment e.g. DARV.
¶ Software-Assisted Alignment (Plate Solving)
Some software can automatically and interactively tell you which direction to adjust the mount by taking 2 or 3 reference images. On Windows, you can use NINA Three-Point Polar Alignment (free, open source) or Sharpcap (paid, £10/yr). On Linux, KStars includes an alignment module built in to the Ekos suite (free). Note that these tools work best with a rather long equivalent focal length, e.g. Sharpcap recommends a field of view of 1-2.5 degrees (that's >400mm on APS-C/FF, you will also need to find compatible drivers for a DSLR). An easier option is the OpenAstroGuider, which seems to works well with Sharpcap, and is a useful upgrade too.
¶ Slewing Directions
Since OAT cannot do a full 360 degree rotation on the RA ring, it calculates how to find a target in a way that the RA ring remains on the bearings. If you think of a target that is due west, there are two ways to reach it (this example assumes northern hemisphere):
- OAT rotates 90 degrees CW and DEC rotates 'downwards'
- OAT rotates 90 degrees CCW and DEC rotates 'up'
In both cases OAT will point at the same location. OAT does this calculation every time a slew target is requested. This means that at certain positions of the OAT (close to the limit lines), it can happen that even though the target is just a few degrees further in RA, OAT will completely rotate the RA ring by (almost) 180 degrees and flip DEC across the home position.
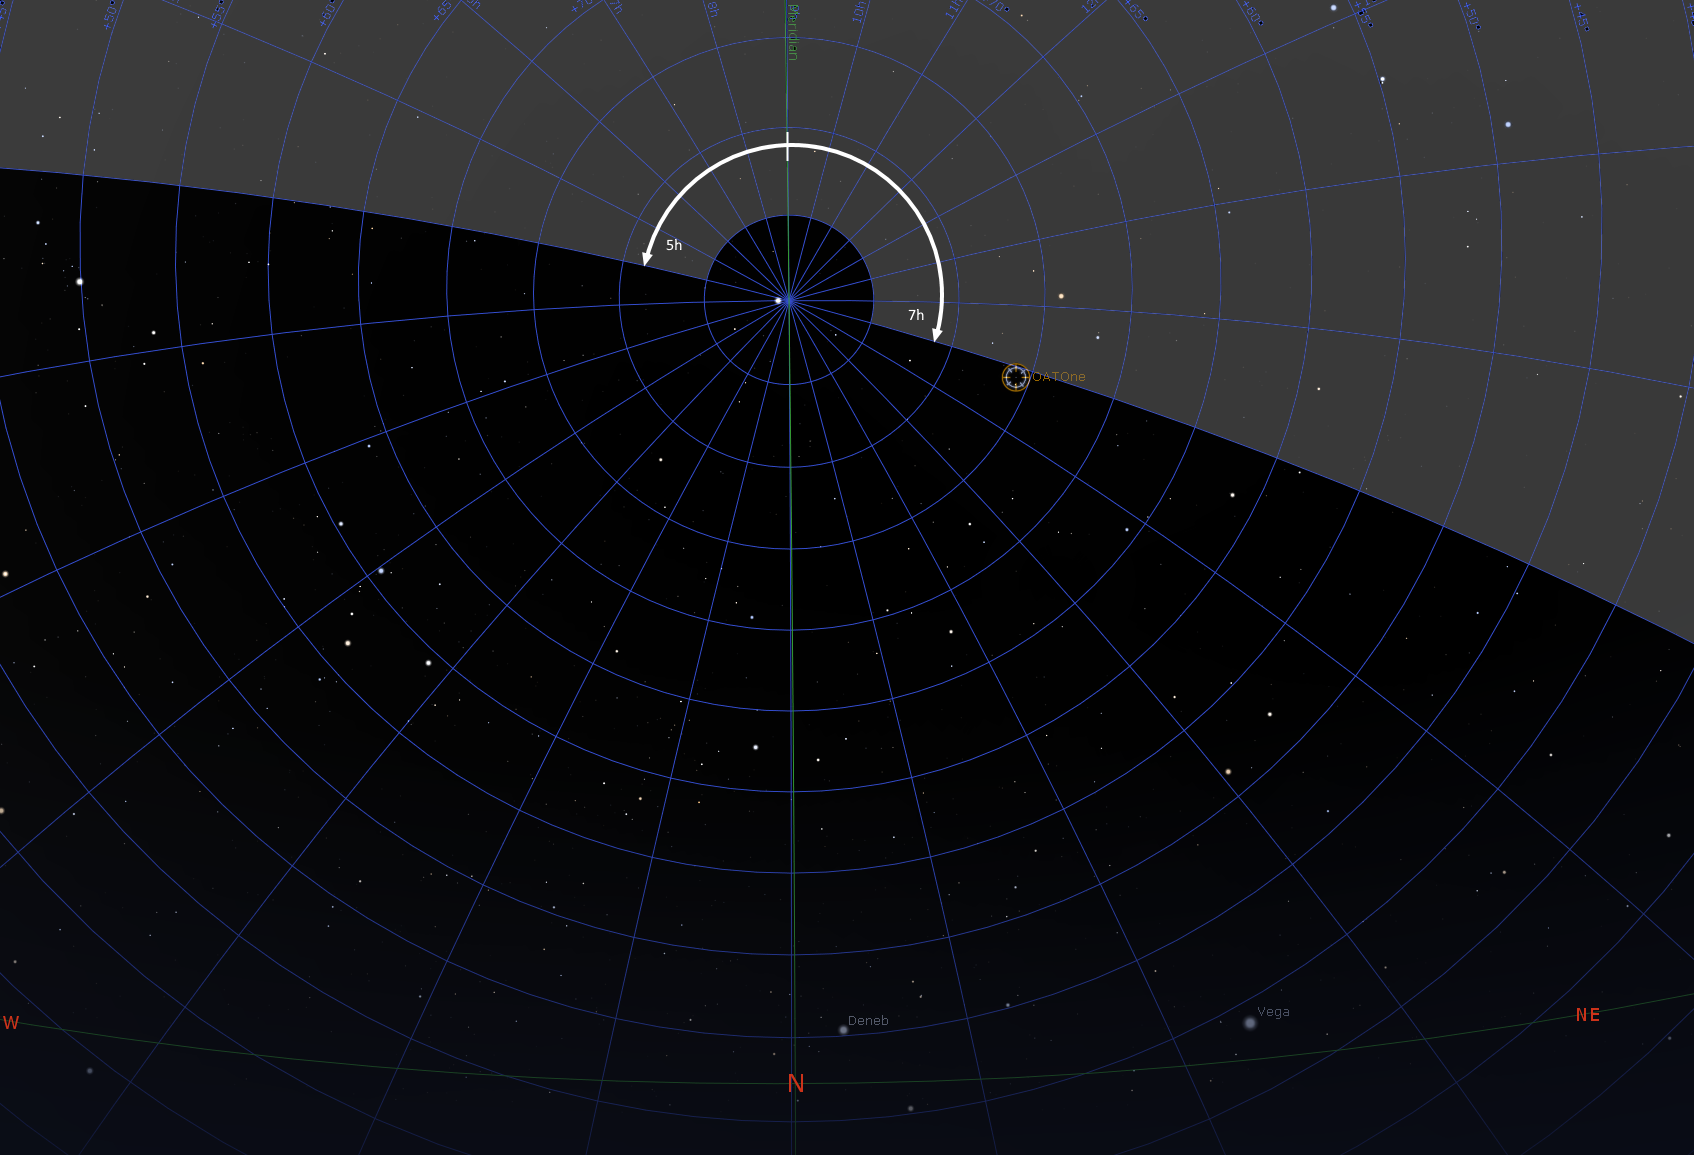
The limits where this happens are 5h and 7h from the meridian as shown below.

Whenever the target lies on the other side of the line dividing the gray from the black area from the current location, OAT will do a RA rotation and flip DEC.