¶ How to use your OAT for astrophotography
Okay so, you've 3d-printed all the parts, bought all the electronics and put your OAT together. Now what? To see the beautiful galaxies, nebulae and star clusters, you need to assemble a few things:
a) Your OAT: the robot that will point your camera to celestial coordinates and cancel out Earth's rotation so you can perform long exposures.
b) Your Scope/Camera: what will capture the light from celestial objects
c) OAT ASCOM driver: the drivers that will enable communication between astronomy software and a telescope mount.
d) An planetarium software: to answer the question: What interesting object can I see tonight? (or anytime in any location)
e) A mount control software: the program running on your laptop that will remote control the OAT
f) A camera control software: the tool so you don't have to physically touch your camera to capture images and change the camera settings. This is important in astrophotography because the tiniest vibrations can spoil your long exposures. Ideally, this program should include a sequencer/intervallometer function so you don't need to trigger a new picture every 2 minutes manually as it can do it automatically for you.
g) A polar alignment/drift alignment tool: the goal is to align the RA axis with Earth's rotation axis. Although polar/drift alignment can be done approximately with the OAT's basic functions, it will be necessary to do it more precisely as you want to take longer exposures. (remember that the North star is not exactly at the celestial pole)
h) An autoguiding software: (for OATs with the guider, or scopes that include one) This processes the guider's video feed, processes it and re-adjusts the OAT's coordinates to follow a given objects.
i) A stacking software: a sort of doped Photoshop that can perform typical astrophotography treatments like stacking, dark/flats substractions etc.
Here is a diagram to visualize it:
Okay, this list can be a bit overwhelming and picking the right tool can be frustrating for beginners. There are many scopes, many cameras, different possible hardware (some have a guider, some don't), different locations, different constraints, so your software "stack" is likely going to be unique to you. Most tools out there try to do a combination of things (d+e, e+f+i, ...) and all have their pros & cons, so you'll need to explore by yourself based on your needs and as you progress in your technique. Luckily, you don't need every functionaly to get started! The most important ones are remote control of your camera and the OAT + polar alignment.
In this guide, you'll only need the OAT and a Camera, and we'll only use 3 pieces of software:
- OAT ASCOM Driver to control the OAT.
- APT (astrophotography tools) to control both the OAT and the camera, and perfom GoTo functions
- SharpCap to perform a fairly precise polar alignment.
It is highly recommended that you do a dry run of this setup before your first session. This should get you in a pretty good shape already, and you'll be able to take quality pictures. We'll decribe possible enhancements at the end of the guide.
¶ Astrophotography software
In this guide, we'll use APT (Astrophotography Tools) because is not only easy to use, and comes with many features, but is also free. Some alternatives are mentioned as well, keep in mind most software is Windows only.
- APT demo download The full version is very affordable as well.
- N.I.N.A (Nightime imagine N astronomy) download
- Sequence generator pro demo download
¶ Polar Alignment (PA) with SharpCap
This step is crucial for long exposures and can allow you to take minutes long exposures, this will not only capture more details but also help to lower the signal to noise ratio.
You can do polar aligment in two ways
- The OAT has a built-in polar aligment (PA) menu (you'll need to have a LCD to use it). More info about this process
- Use 3rd party software, this will require that you have a guiding camera or at the very least, that your main camera is compatible with the software. We are going to focus using Sharpcap.
Sharpcap has one of the easiest to use polar aligment tools, it doesn't need an internet connection to work, just a compatible camera, and your computer. The program has built-in database of stars that are close to the north celestial pole (NCP) and can solve the image that is receiving, once that is done it knows how far or close you are to the NCP and gives you a visual guide to adjust your mount to get it as close as possible to the NCP. Getting the best polar aligment is quite important for long exposures as a bad PA leads to star trails. You'll need to buy a Sharcap license to get access to the PA tool, is affordable, and trust me is totally worth it.
Here is an example alignment procedure
This part assumes that you already have your guide camera setup, have found close focus, and that you are pointing the camera close to Polaris. If you use your main camera to find Polaris, the guide camera is likely not perfectly aligned with it but it should be close to the same field of view, in this scenario, get Polaris centered in your main camera frame.
Ideally, the mount will be on a flat non-skid surface, your computer should not be resting on this surface as any adjustment that you make can introduce error or mess up the pictures. I use a small table and the mount is fixed to the table, for the PA adjusments I rotate the whole table. I understand this is no feasible for everyone, you can fix the rear of the mount to the surface and that will work as pivot point. I glued flat screw caps to the table and the M14 screws go into those.
- Open Sharpcap
- Go to Cameras menu
- Select USB Camera for IMX290 or any compatible camera that you wish to use (some cameras will require you to find the ASCOM drivers for your camera for Sharpcap to recognize it)
- Sharpcap will start looping a video feed from the camera on the main screen.
- On the right hand side you'll see the following controls
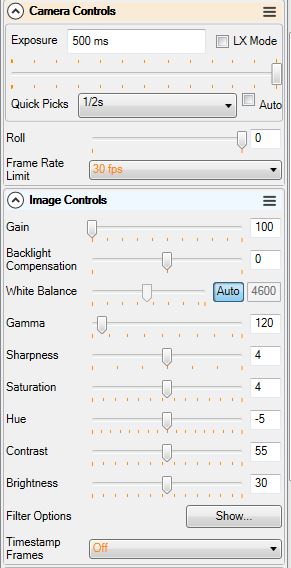
- The most important one is exposure, for IMX290, the mamixum that you can set it too is 500ms or 1/2 second that is shown under quick picks.
- Frame rate you can leave it alone
- Gain, allows you to increase the signal from the camera, if you don't see any starts you can crank it all the way to 100. Sometimes just adjusting gain is enough to see stars
- Contrast and brightness can also help if stars are faint
- Go to File menu and select Sharpcap settings. Click on the Polar Aligment tool, enter your location or use geolocate (Internet is required for geolocate).
- Go to tools and select Polar Aligment (that menu is greyed out if you don't have a license)
- You should see the following
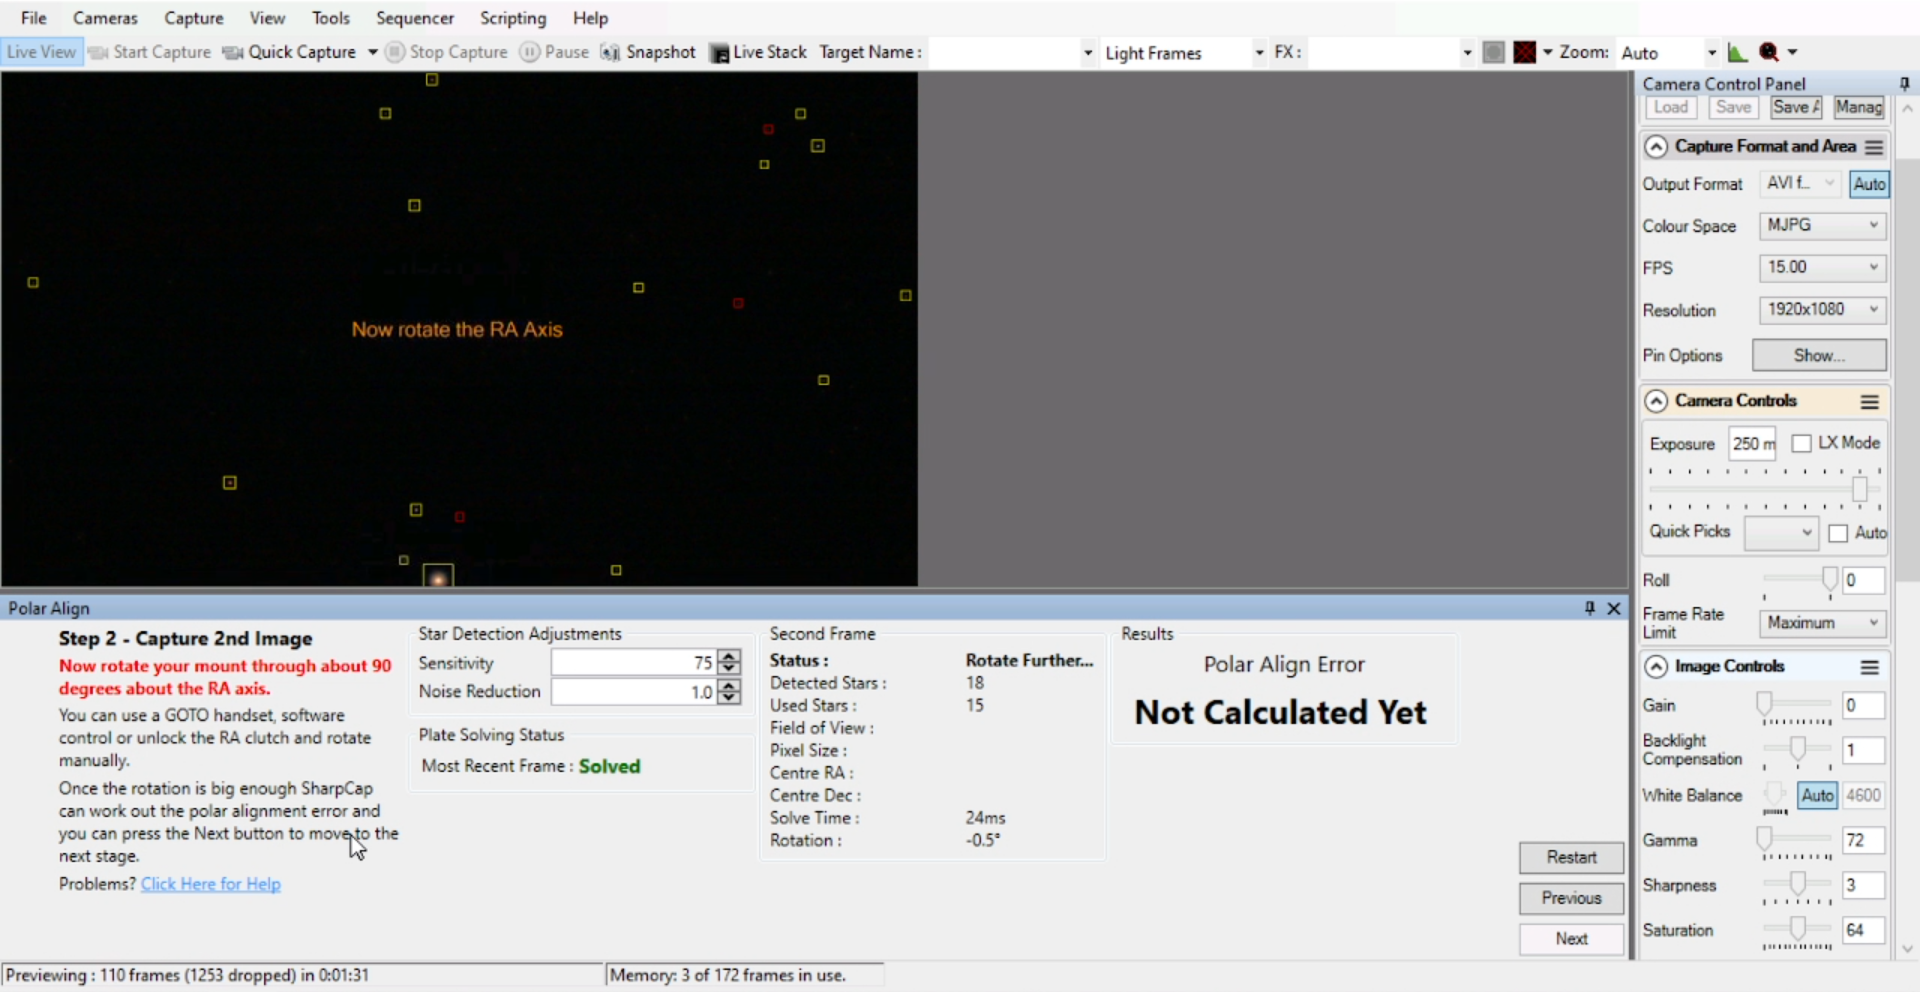
- Under Star detection, for IMX290, you can try the following values and also play around with the camera control values we discused in 5. You should be able to see stars in the preview window. If the star shape doesn't look right try adjusting focus, ideally, the stars will look perfectly round but even if they don't Sharcap should be able to detect them.
- Under First frame, you'll see those values change with the adjustments that you make, ideally, the number of detected start will be greater than 15 as that is the minimum Sharcap needs to solve the image.
- Don't rush trought this process, take your time to fine tune everything. Sharcap will remember most settings between sessions, sometimes it can solve an image withing seconds after you start, it's definitely time well invested.
- Once the image is solved, the red message "Could not solve" will turn to green "Solved", click on Next. Sometimes, the message will constantly switch between could not solve and solved, that is still not good, it has to stay solved all the time, if you proceed like this you'll get stuck in the next step. If you can't never get to solve the image or to stay in solved, check the following: make sure you are pointing as close to Polaris as possible, check there are no high clouds blocking the stars and making them too dim, play with the focus of the guide camera, adjust the camera controls. Click Next when ready.
- At this stage rotate the OAT 90 degrees West, you can do that with the OAT Control software or with the mount itself manually.
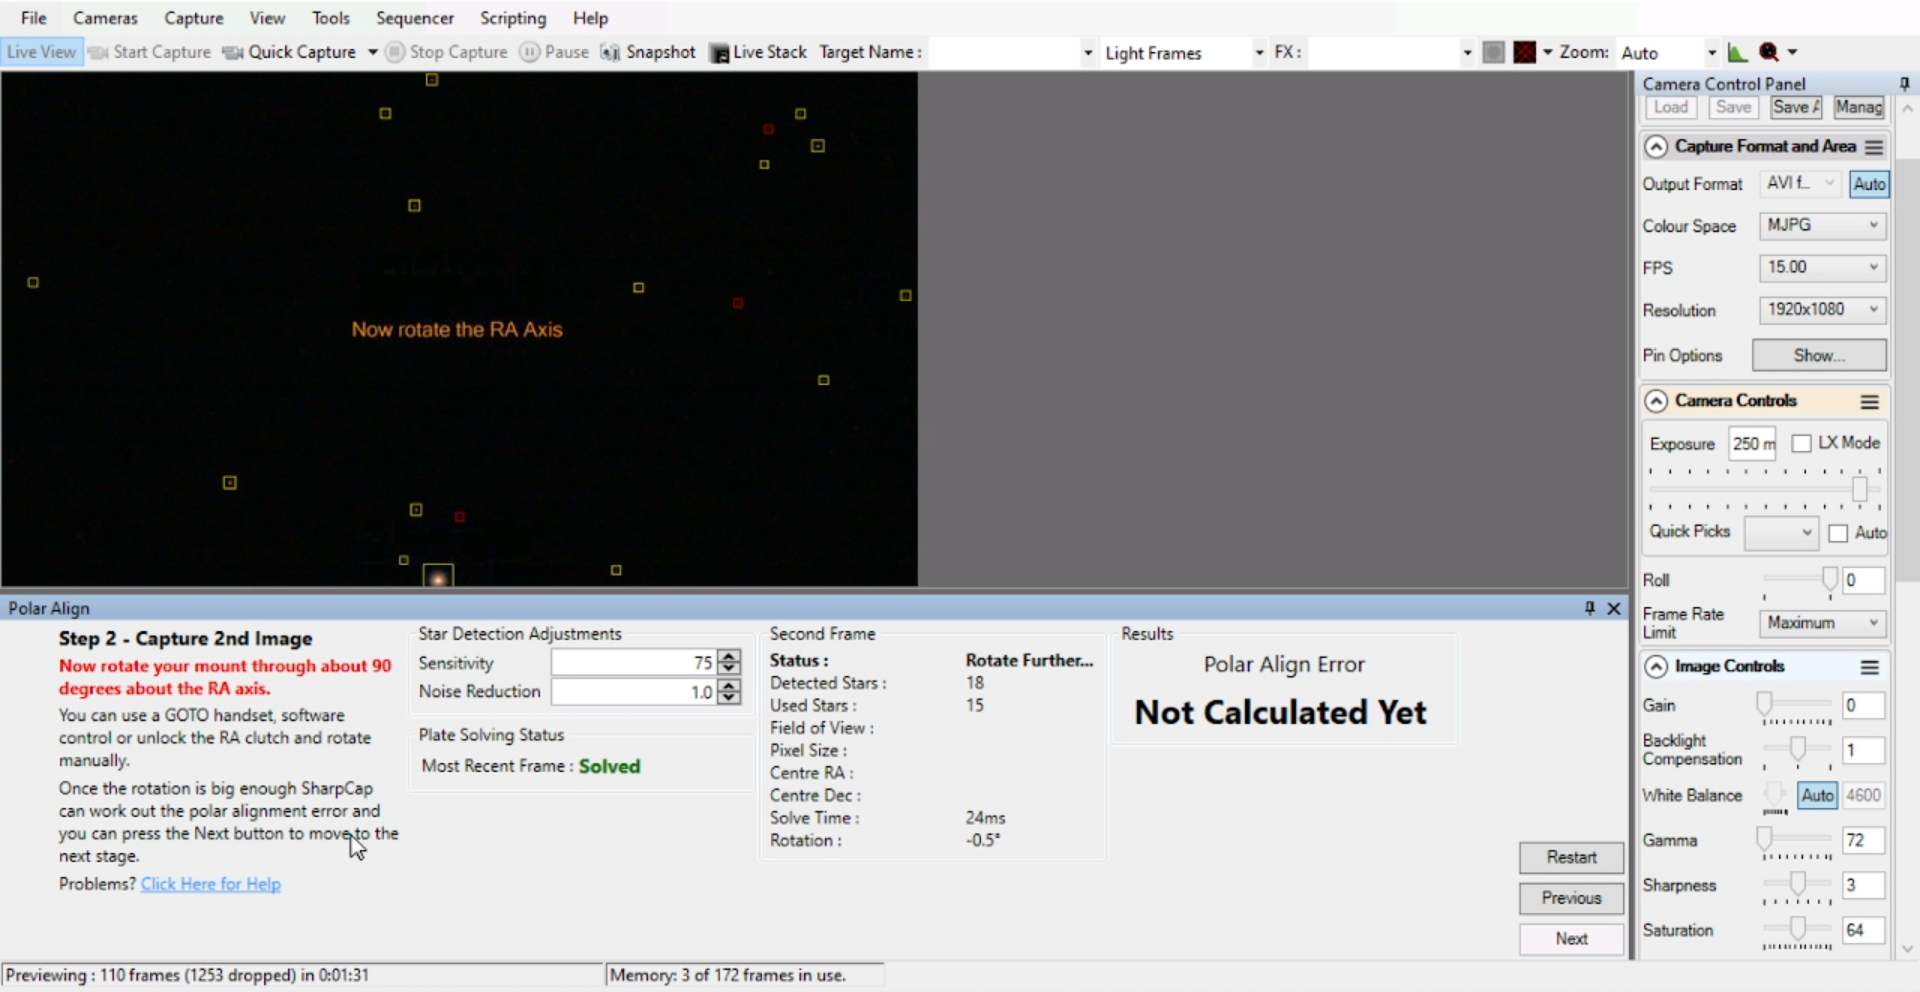
- When the rotation finishes Sharcap will solve the next image and will give you an idea of what the PA error is. Just click on Next afterwards. Just like before, click only in next if the image can be solved, if not, start from the previous step.
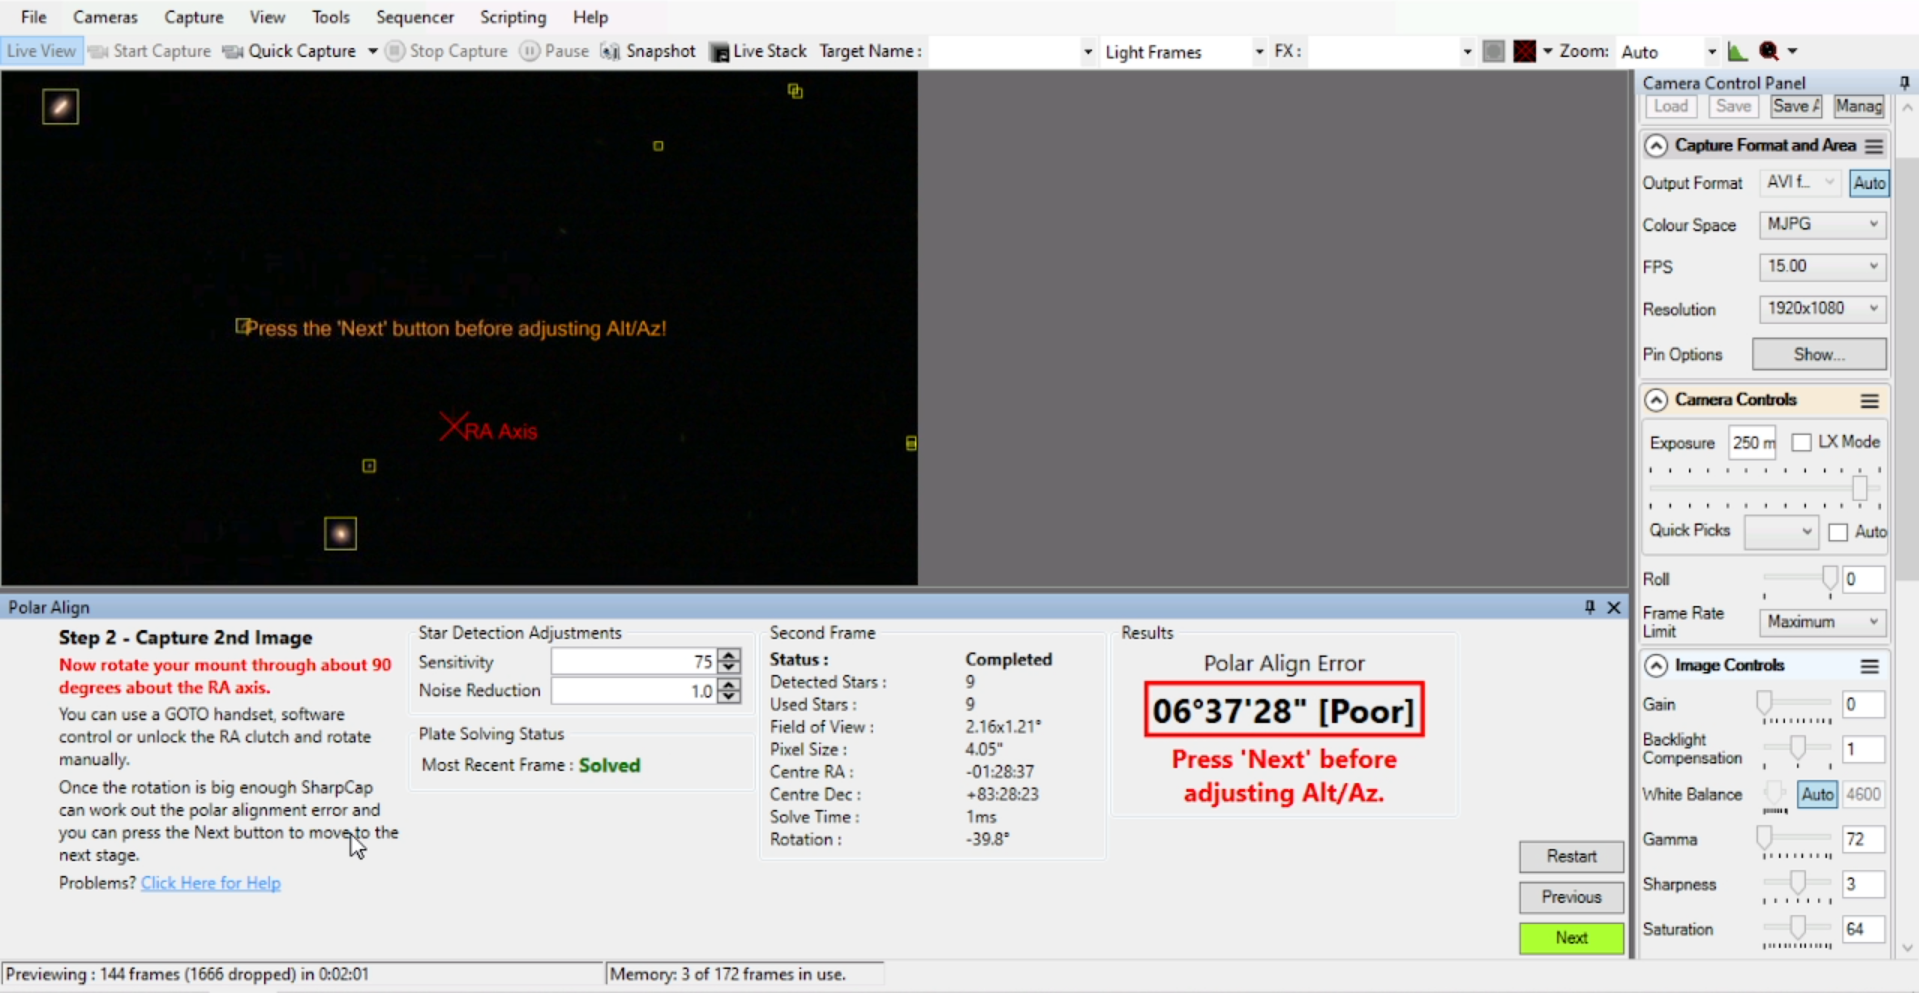
- In this final step Sharpcap will pick a star automatically, and will display yellow arrows telling you where you need to adjust the mount, it's assuming you are looking at the mount from behind and the RA disc facing away from you. If you don't have the auto PA addon, you'll need to manually roate the front of the mount and/or adjust the altitude screw at the back. These adjustments are very small and subtle, take your time witht these. If you have the AutoPA addon, you'll need to use the mini control option in the OAT control software. We are aiming for excellent polar aligment, with all these tools don't settle for anything else.
- Look at the star at the bottom left of the main screen in this sequence, from fair aligment to excellent.
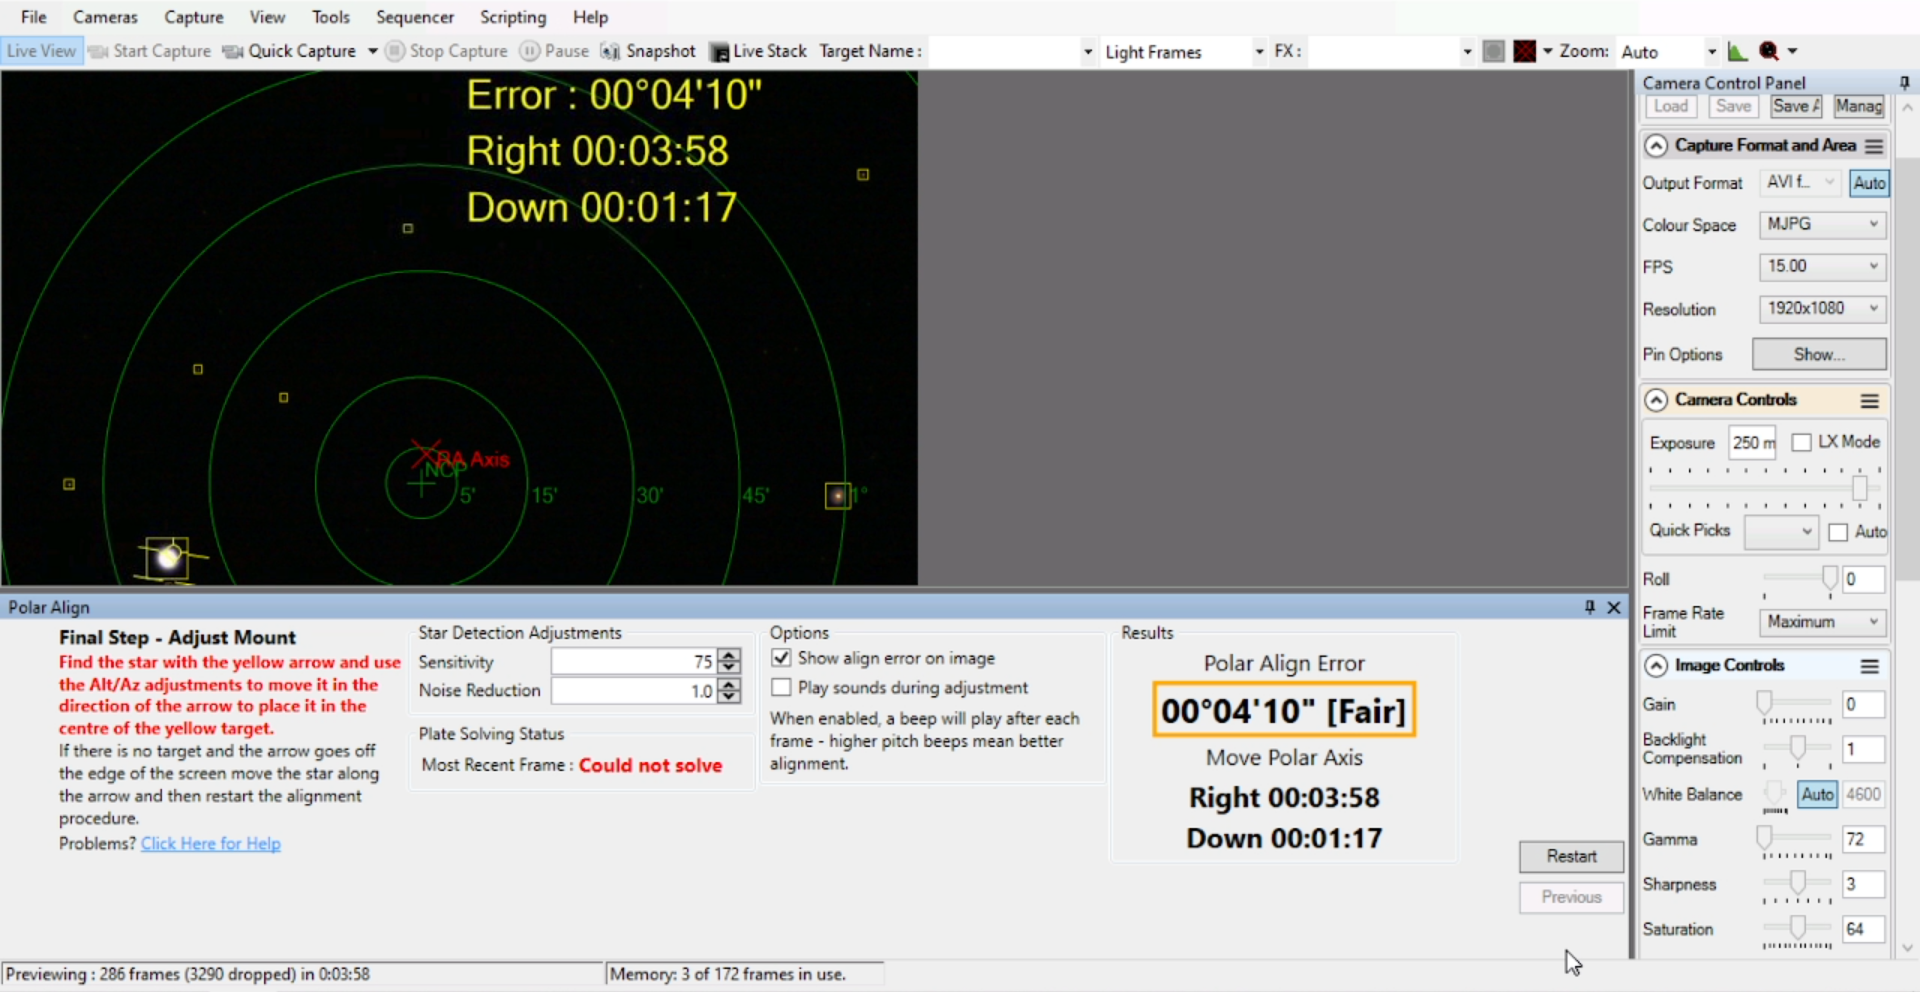
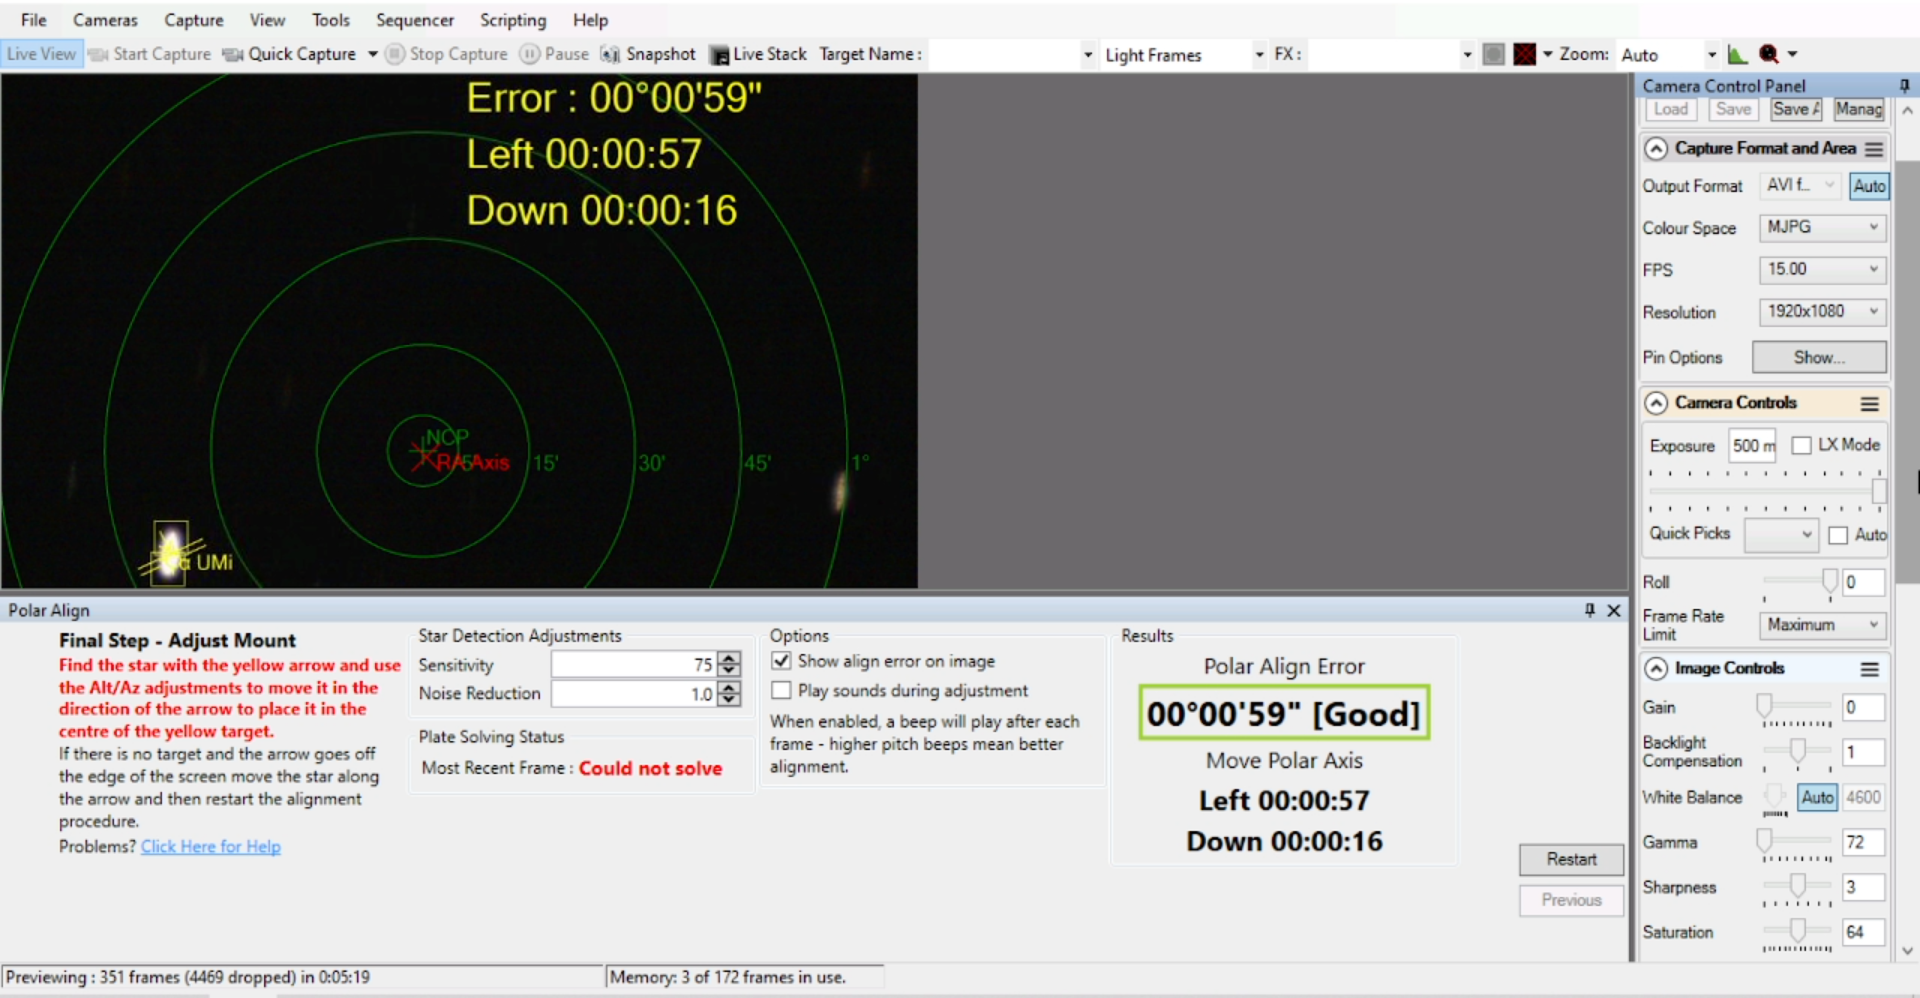
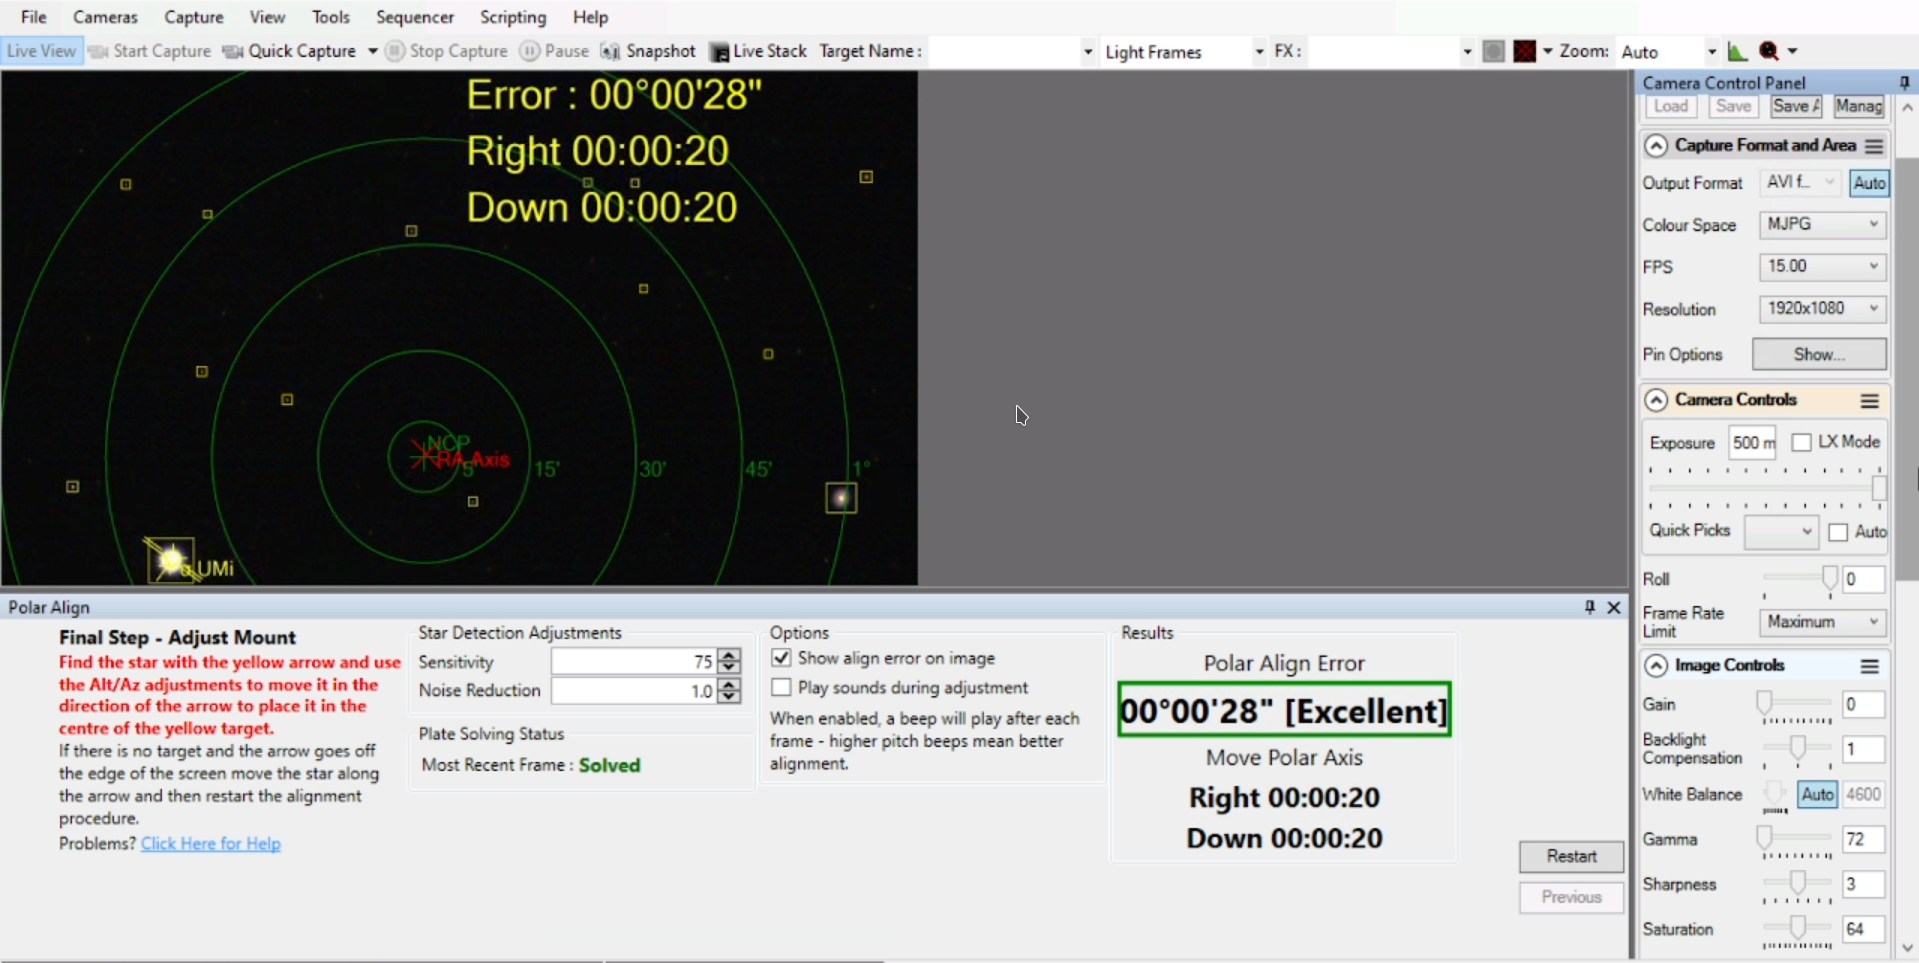
- Once you get an acceptable PA error or lack of
you can simply close PA and get ready for APT.
¶ Control your OAT with APT
In this section, we need to get you to be able to control the OAT from APT.
¶ Connecting your scope
- First, you need to setup the ASCOM drivers. This is the common language spoken both by telescope mounts like the OAT, and astronomy software. Follow the link and look for the ASCOM section: drivers.
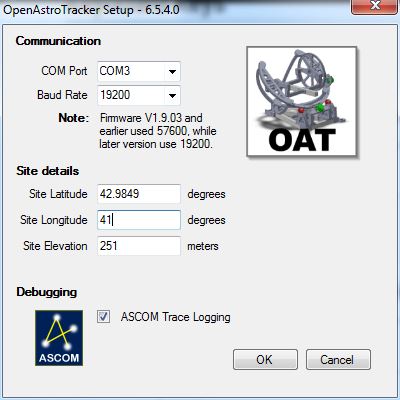
- Open APT and go to the Gear tab, click Connect Telescope. If this is the first time that you use the OAT with any imaging software, you will be asked to configure it with the ASCOM Telescope Chooser under properties, you'll need to set the COM port, baud rate (19200), and location settings.
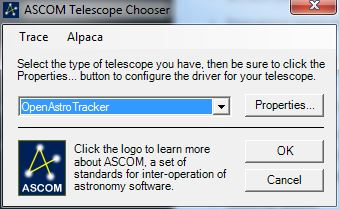
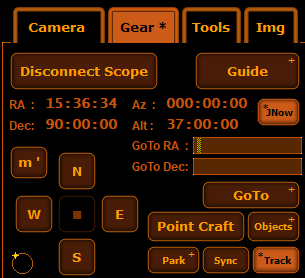
- The mount should show up in APT with the RA and DEC coordinates. Note: if you try to slew using the APT commands, it won't work initially. This is likely a bug from APT that we will address next. At this point, this is what you should see:
¶ Setting up slewing
To fix the slewing bug in APT, we need to setup an actual slewing speed for this scope.
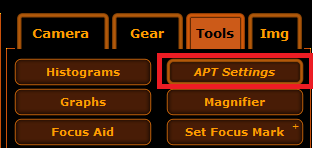
- Head to the tools tab and go to "APT settings":
- Under "scope & focuser", enter
2.0form'(fast)and0.06685fors"(slow)
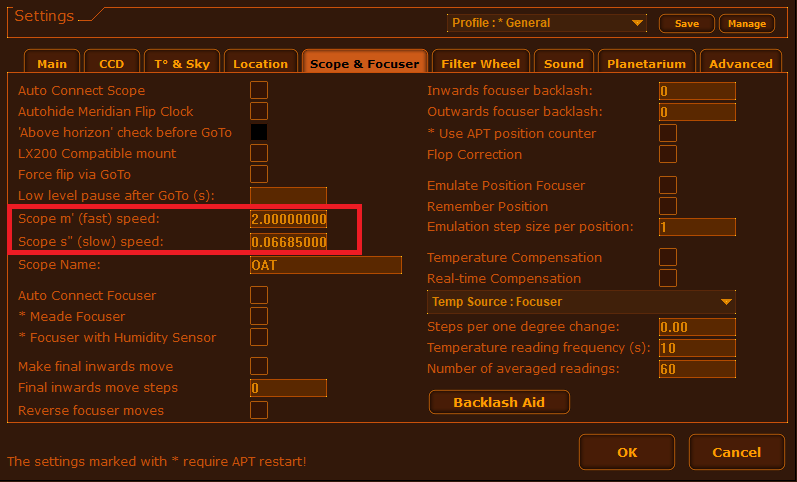
Little explanation: these are two possible slewing speeds that you can switch between when controlling the OAT. It is useful to have a fast and a slow one (no matter their value, although their original intent is to map to a minute and a second angle per second). Feel free tune these to your liking but note that these values can't be greater than 2.0.
Now, if you press the slewing buttons (NESW), you should see the OAT moving! If you're not seing anything move, try switching the slewing speed by pressing the m' or s' button on the upper left corner.

Now let's test it! Click on the objects button, that will open a new window that is divided in Deep Sky, Stars or custom made object, search for the object, select it and then click on Ok. 
The RA and DEC coordinates will be updated, and then hit the GoTo button. Your OAT should automatically move on both axes at the same time to the new coordinates. If you see your OAT moving, you're done with this section!
¶ Configure plate solve
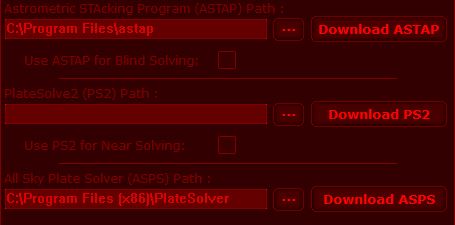
One of the greatest features of APT, it makes dead simple to plate solve and sync your mount to any target in the sky. APT uses 3rd party tools to do plate solving, we'll need to download and install them. If you already have All Sky Plate Solver, ASTAP or PS2 chances are APT already found them and configure them on its own. You can follow this guide to double check.
- Open APT
- Go to the Gear tab and select Point craft, finally click on Settings
- In this Windows you'll need to tell APT where is the main executable file for All Sky Plate Solver, ASTAP or PS2. If the path lines are blank and if you have not donwloaded and installed any of those program, you can click on the download button beside each section. Close APT and go back to this section again, the path line should be autopopulated. If not, click on the three doths and browse in your computer to tell APT where to look for it.
- You can close this window when you finish.
¶ Control your Camera with APT
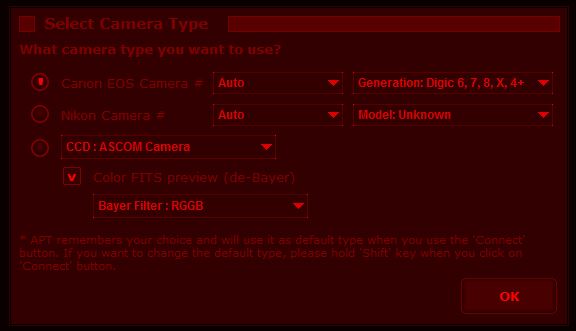
We'll be using the main camera for this process, if you have a Canonhttps://www.astrophotography.app/EOS.php) or Nikonhttps://www.astrophotography.app/nikon.php) compatible camera. CCD cameras are also supported. The very first time that you open APT you'll be welcomed with this. If you don't see it, you'll get it when you go to Camera tab and click on Connect.
- Live view, connectivity, and photo mode
- Connect your camera
- Take the test! Let's take some pictures (darks? flats?)
¶ Session setup workflow (Northern Hemisphere)
- Point your scope to a bright star and adjust the focus to get an approximate focus. With a DSLR, this can be done with the camera in hand. The goal is to get the focus close enough that stars actually appear as dots as opposed to large faint disks that would be difficult to recognize by software.
- Attach your scope to the OAT
- Set your OAT in the home position. Then, orient the OAT in the direction of Polaris without moving the RA/DEC axes.
- Plug in your camera to your laptop and start Sharpcap. We're going to perform the polar alignment. The OAT should be OFF for this step as we don't want it to start tracking.
- Using Sharpcap, perform the polar alignment procedure (adjust the focus if necessary). At the end of this step, the OAT will still be turned off, in its home position, and aligned with the north pole.
- Plug in your OAT's battery (important to do that first, or you can fry your components)
- Follow the startup procedure (Home position, GPS lock in)
- Start ATP on your laptop and plug in your OAT - the nice voice should say "Telescope connected" and "Camera connected"
- Check to see if you can move your OAT back and forth
- Check if you can take a picture with your camera from APT
- Adjust your camera's focus if you haven't done so yet.
- Use APT to navigate to a well visible object in the sky - the direction will be approximative.
- Adjust the centering using APT's slewing controls. The object should fall in the center of your Camera's live view, then press "sync". This will help APT to calibrate the celestial coordinates with your scope unique configuration. From then on, you should be able to send GoTo commands and not fall too far off!
¶ Going further
¶ Use Stellarium to plan your observation nights
Stellarium is a great, free, open source planetarium software. What you can see depends on the date and location, so you can use it to plan your observations ahead of time or duing the session.
¶ Use a guider/autoguider for higher quality tracking
Even the best polar alignments can't be perfect, but an autoguider can really improve the performance of the OAT and your pictures. More details here
¶ Use a sequencer to automatically capture your 30x 2mins exposures (and go get coffee)
Some astrophotography software include a sequencer. If you can learn to use it, you won't need to manually start the capture of your pictures. For example, you can program the sequencer to take 60x 1min exposures, and step away for a whole hour.
¶ Get a higher signal/noise ratio with calibration frames (flat/dark/bias)
needs link
¶ Level-up your post-processing skills (Wavelets and other treatments)
needs link