¶ GPS
The OAT firmware supports the NEO6m GPS Module (e.g. Amazon Link) for determining your current location and time. This information can be useful to automate calculation of HA via LST (Local Sidereal Time). This saves you the trouble of getting this from your phone every imaging session. You can sync the coordinates from OAT to ASCOM programs, such as NINA.
¶ Should I get this Addon?
This addon is really only useful in the following two cases:
- You are using the OAT as a standalone device with the LCD (no laptop/computer attached)
- You use the OAT in multiple locations all the time.
For all other cases specifying your location once is enough, since it is stored on the OAT and HA is set by OATControl or other apps connecting to it. If you use a laptop/computer connected to your OAT, this add-on is not neccessary.
¶ MKS and OAT Kit installation
Unplug the Steppers and remove the electronicsbox from OAT.
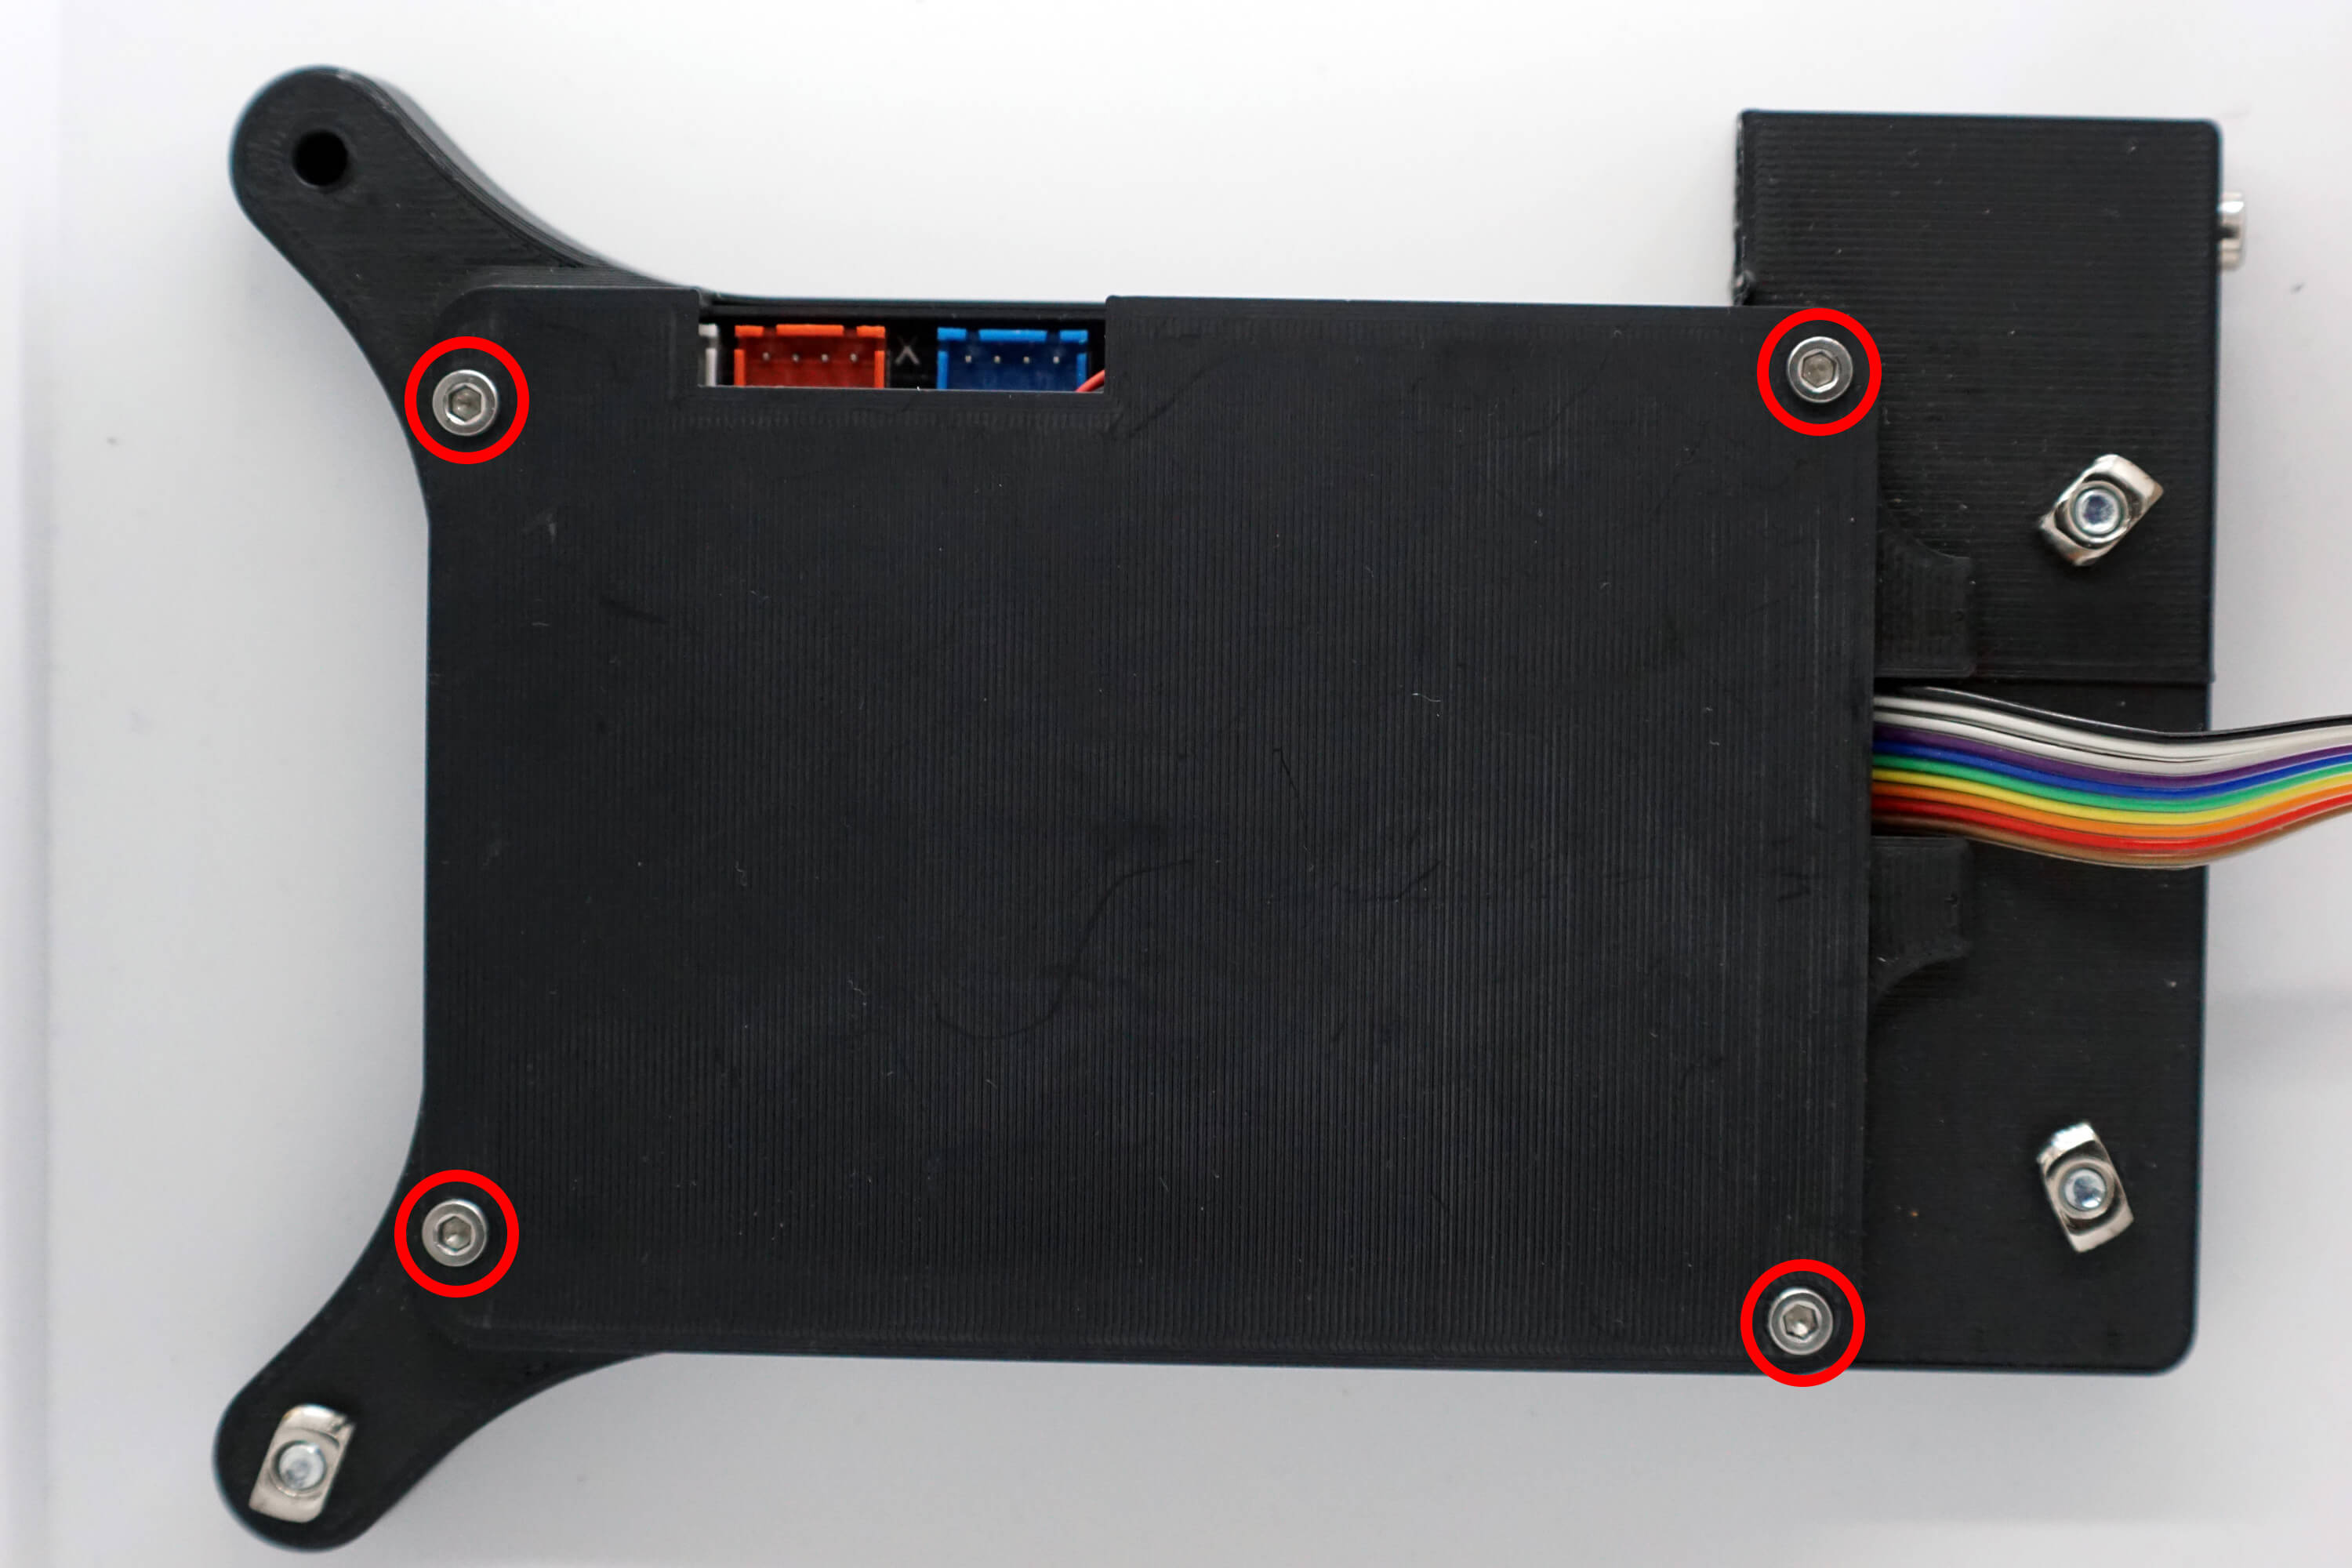
Unscrew the 4 screws that hold the Lid:
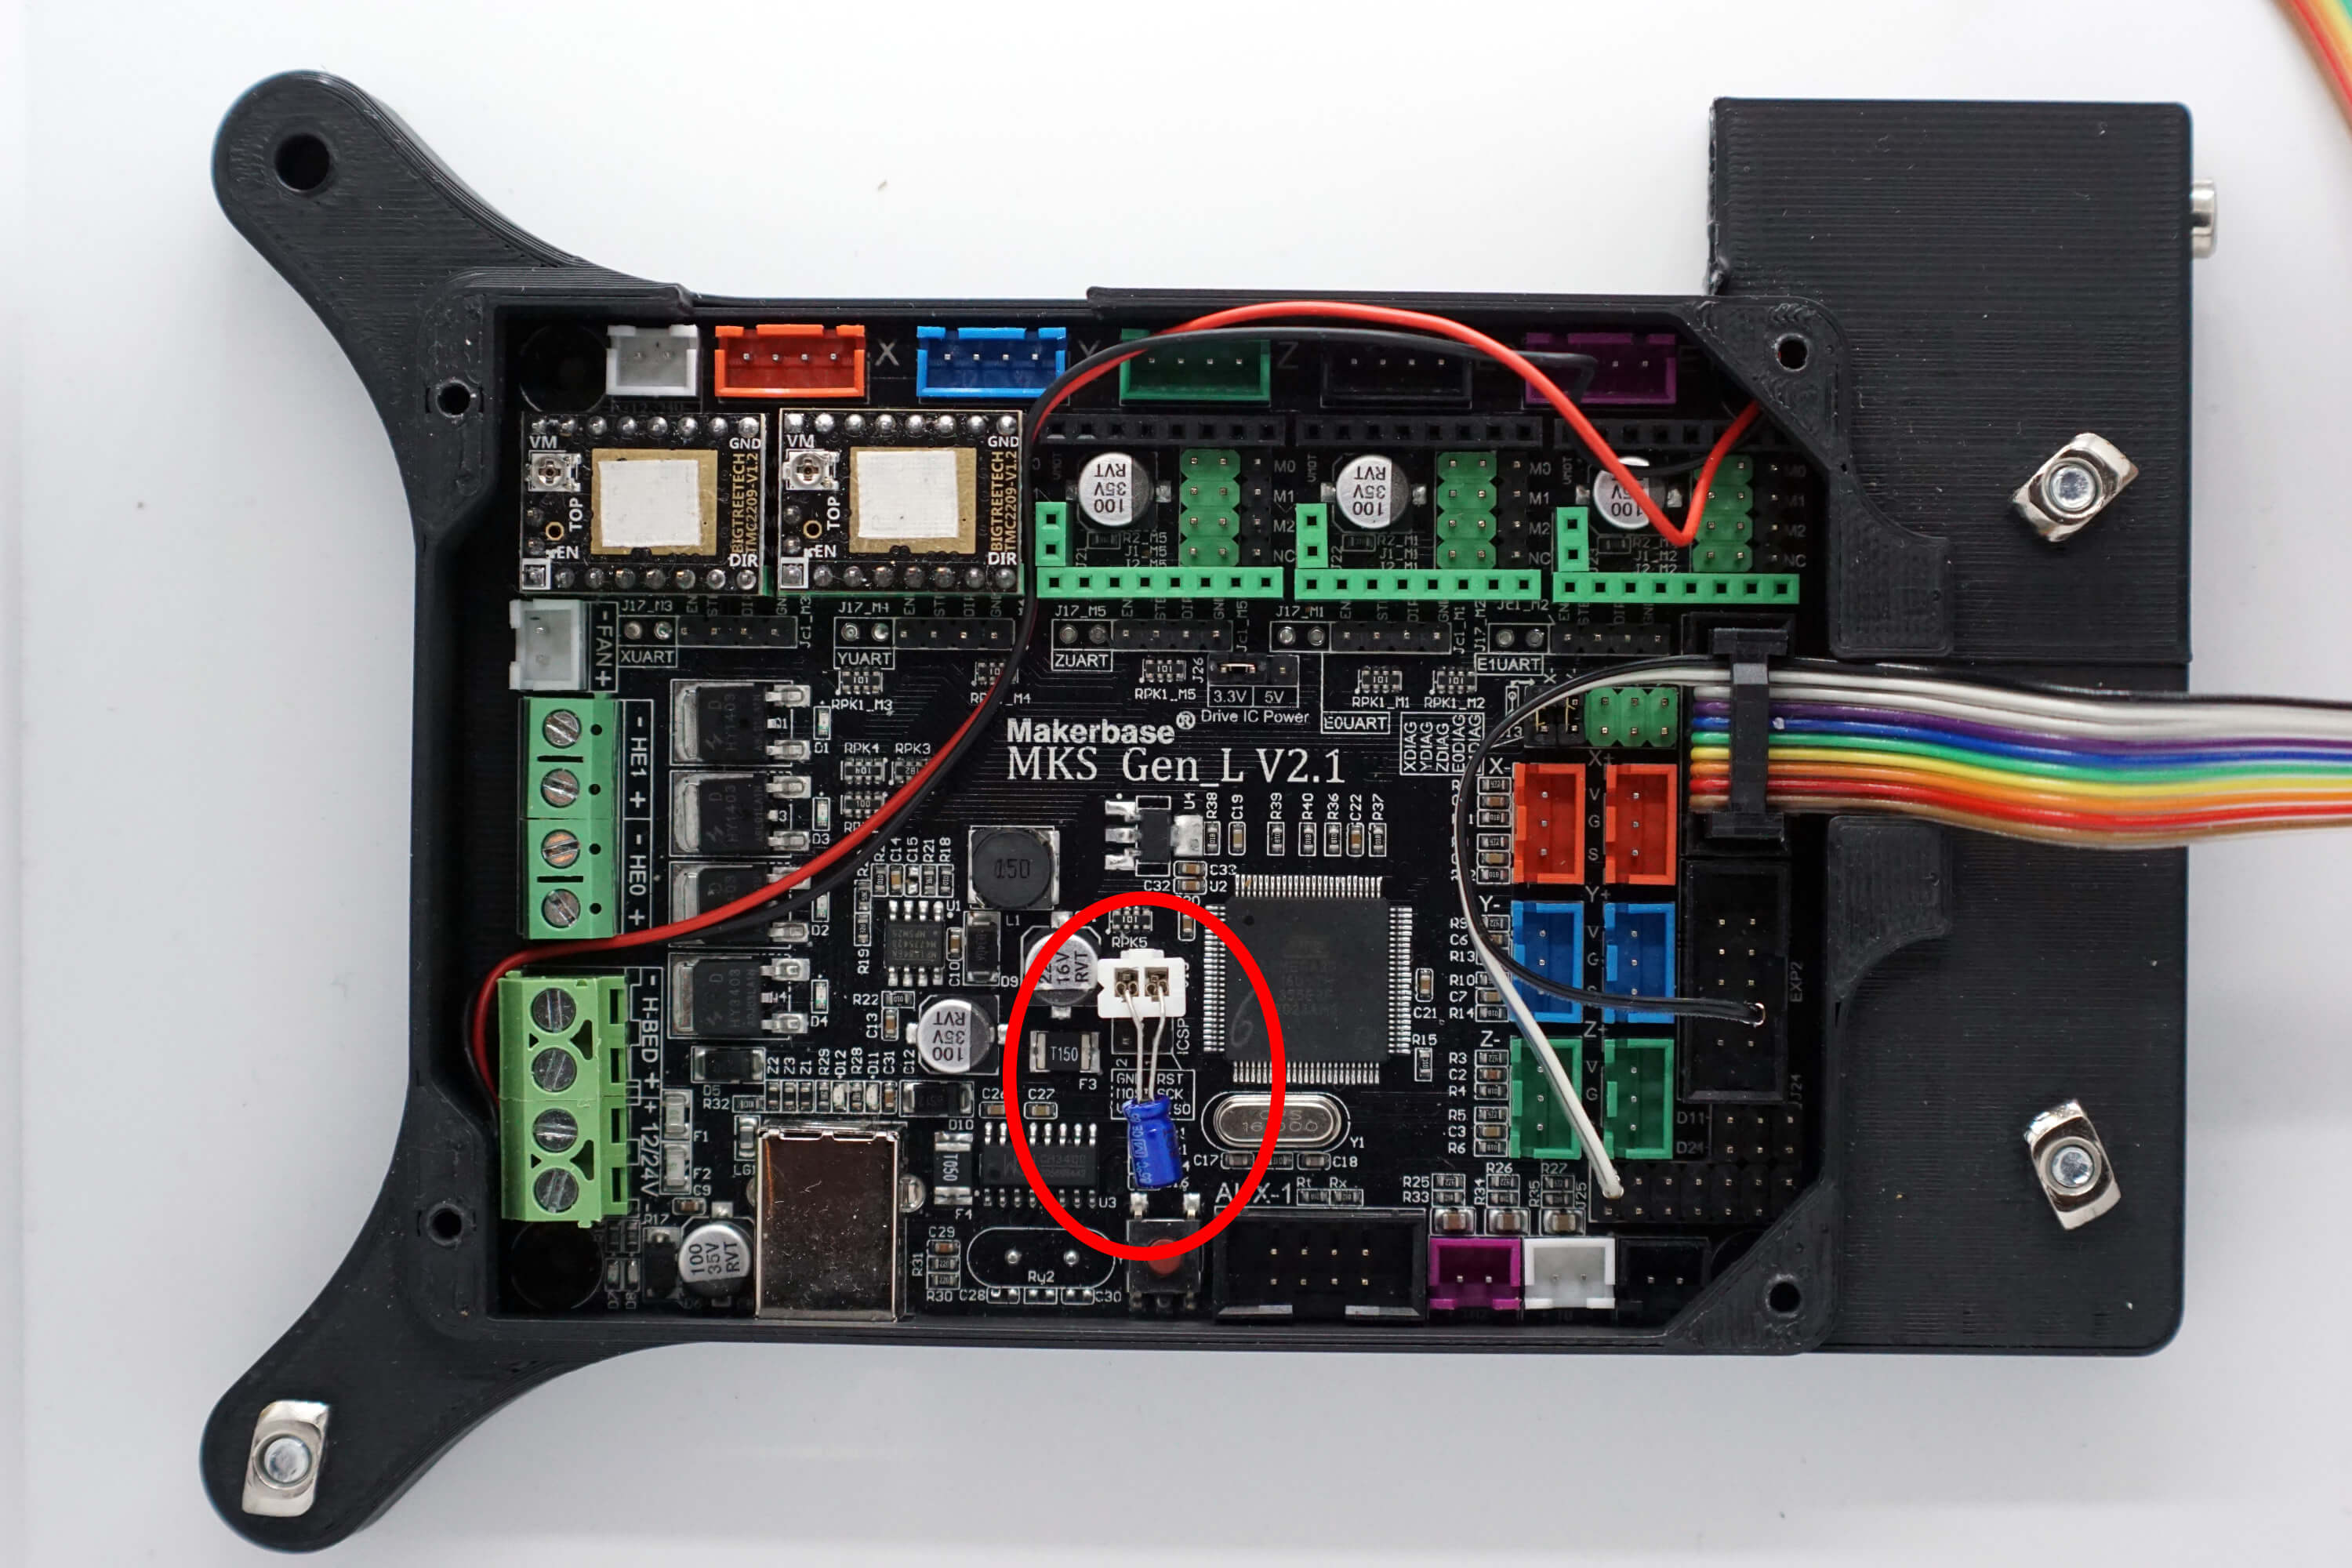
Inside, remove the small capacitor shown (OAT Kits only). Don't worry, this can not hold any charge.
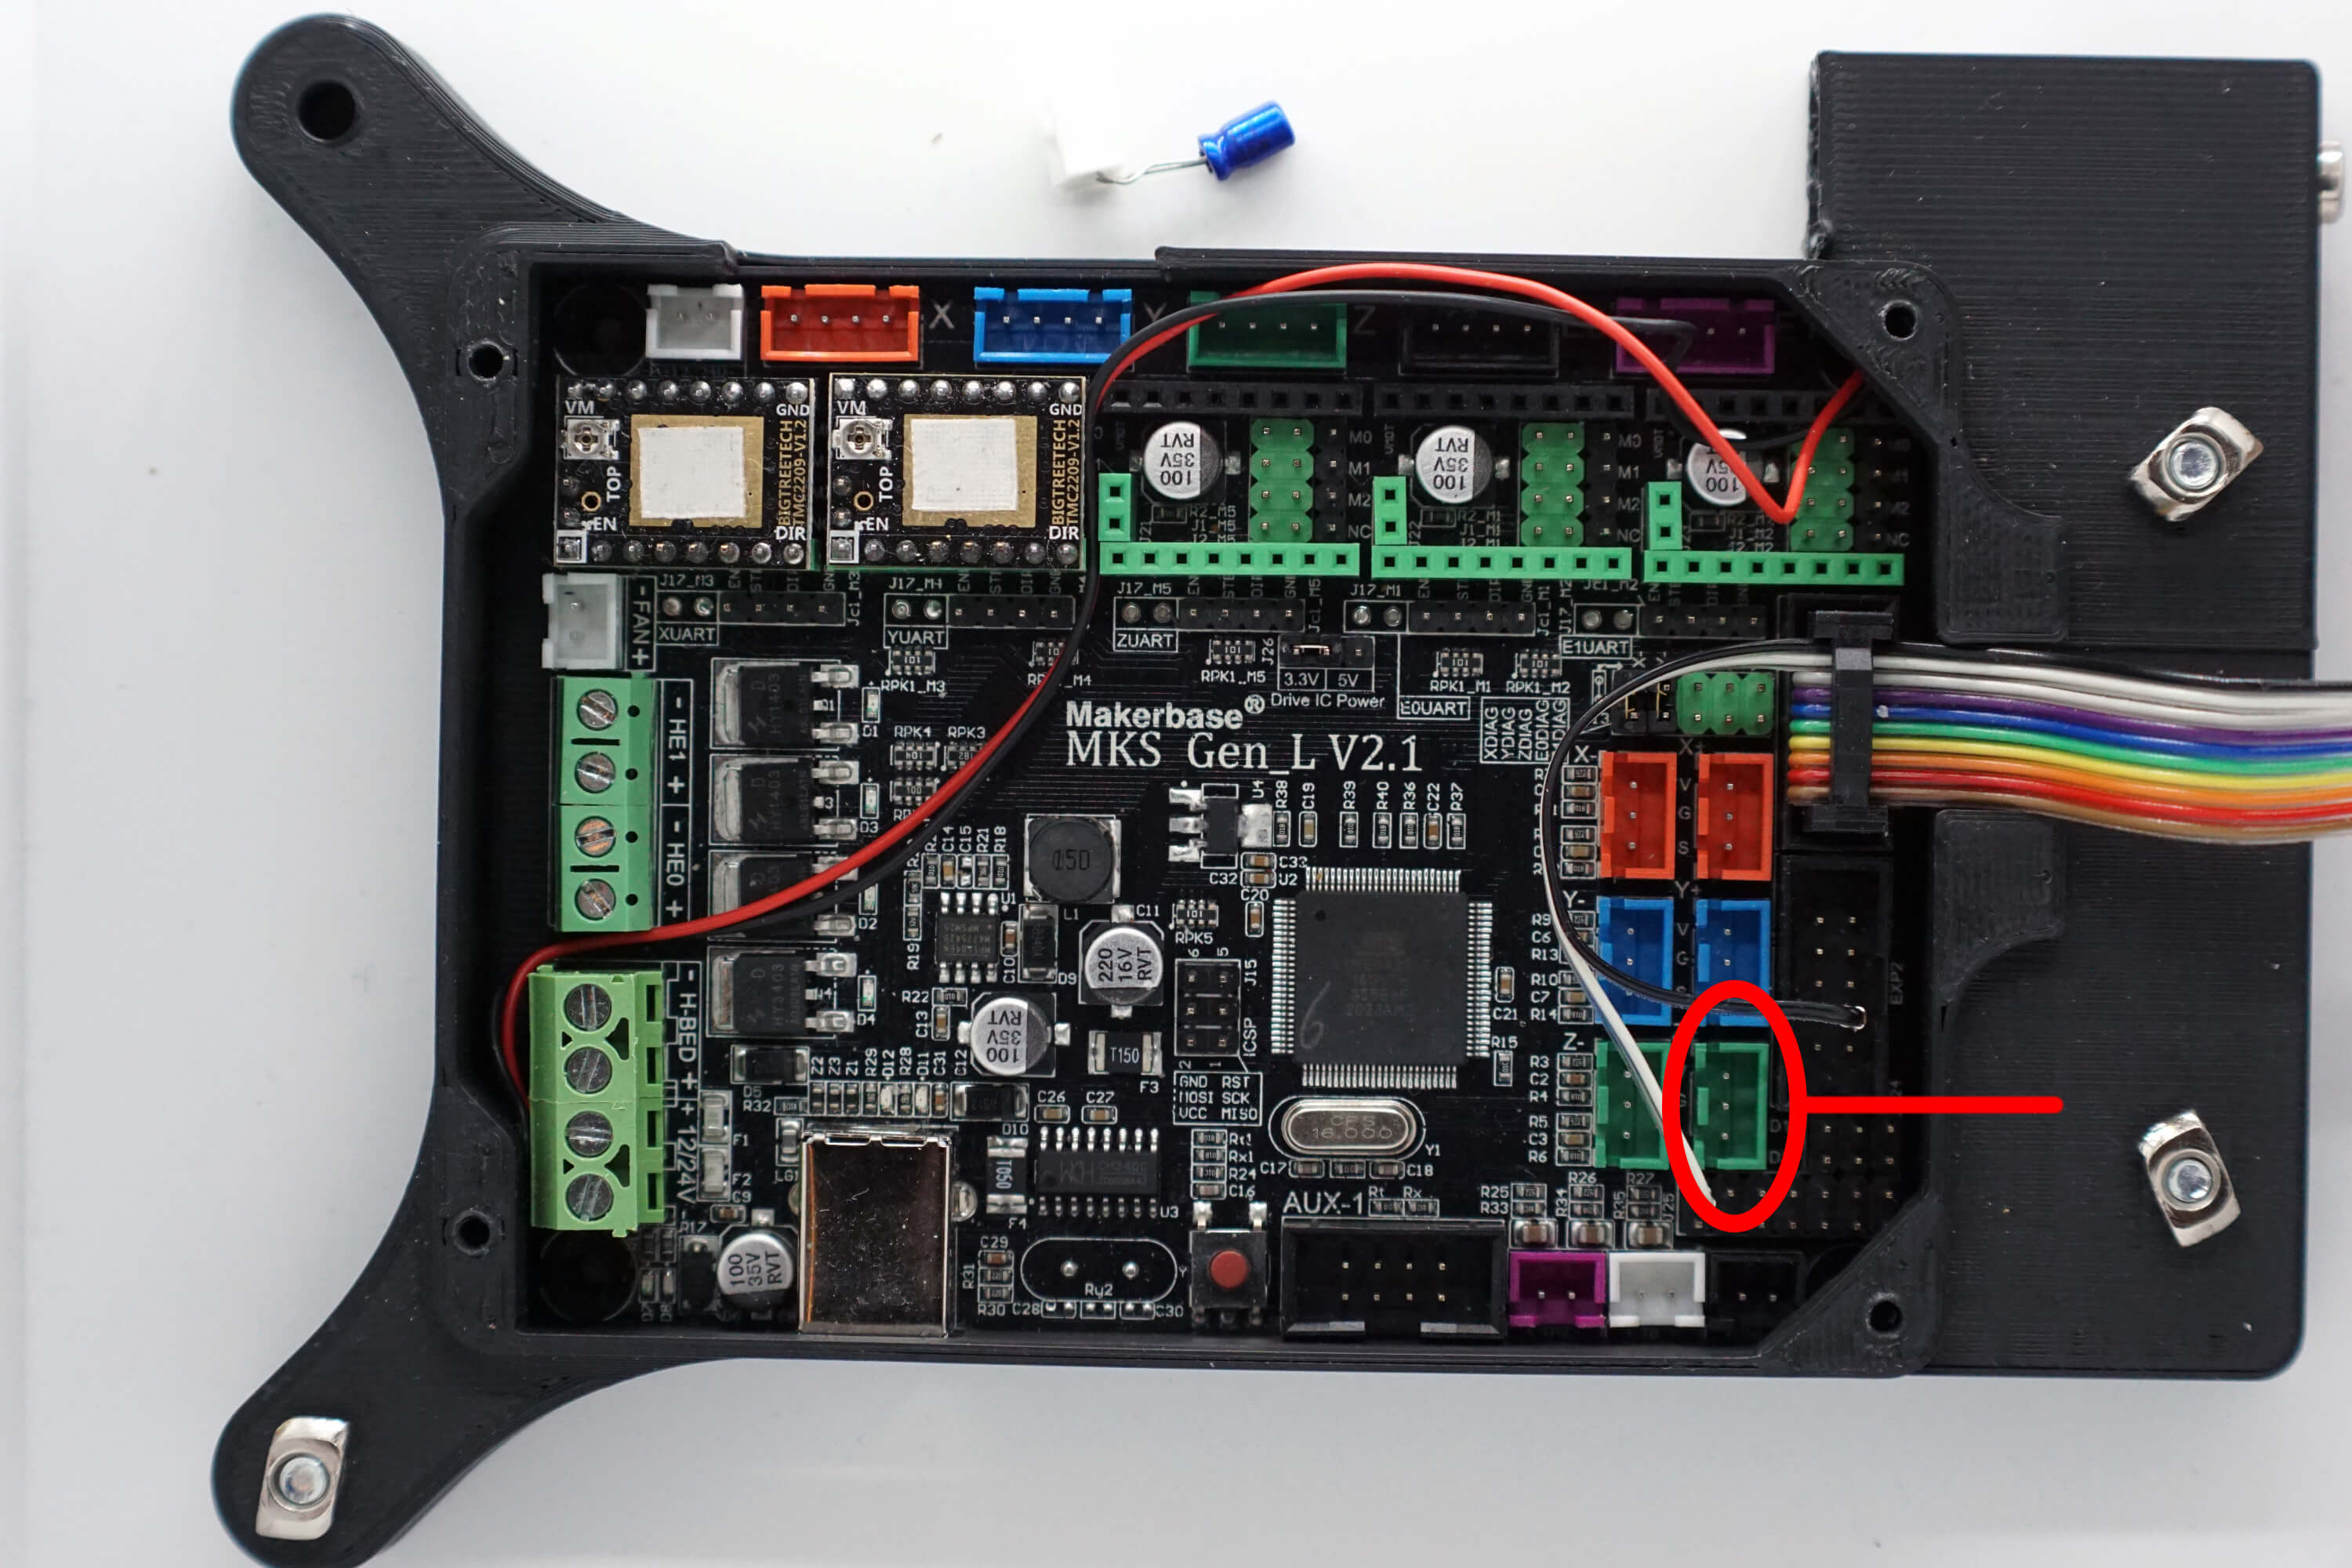
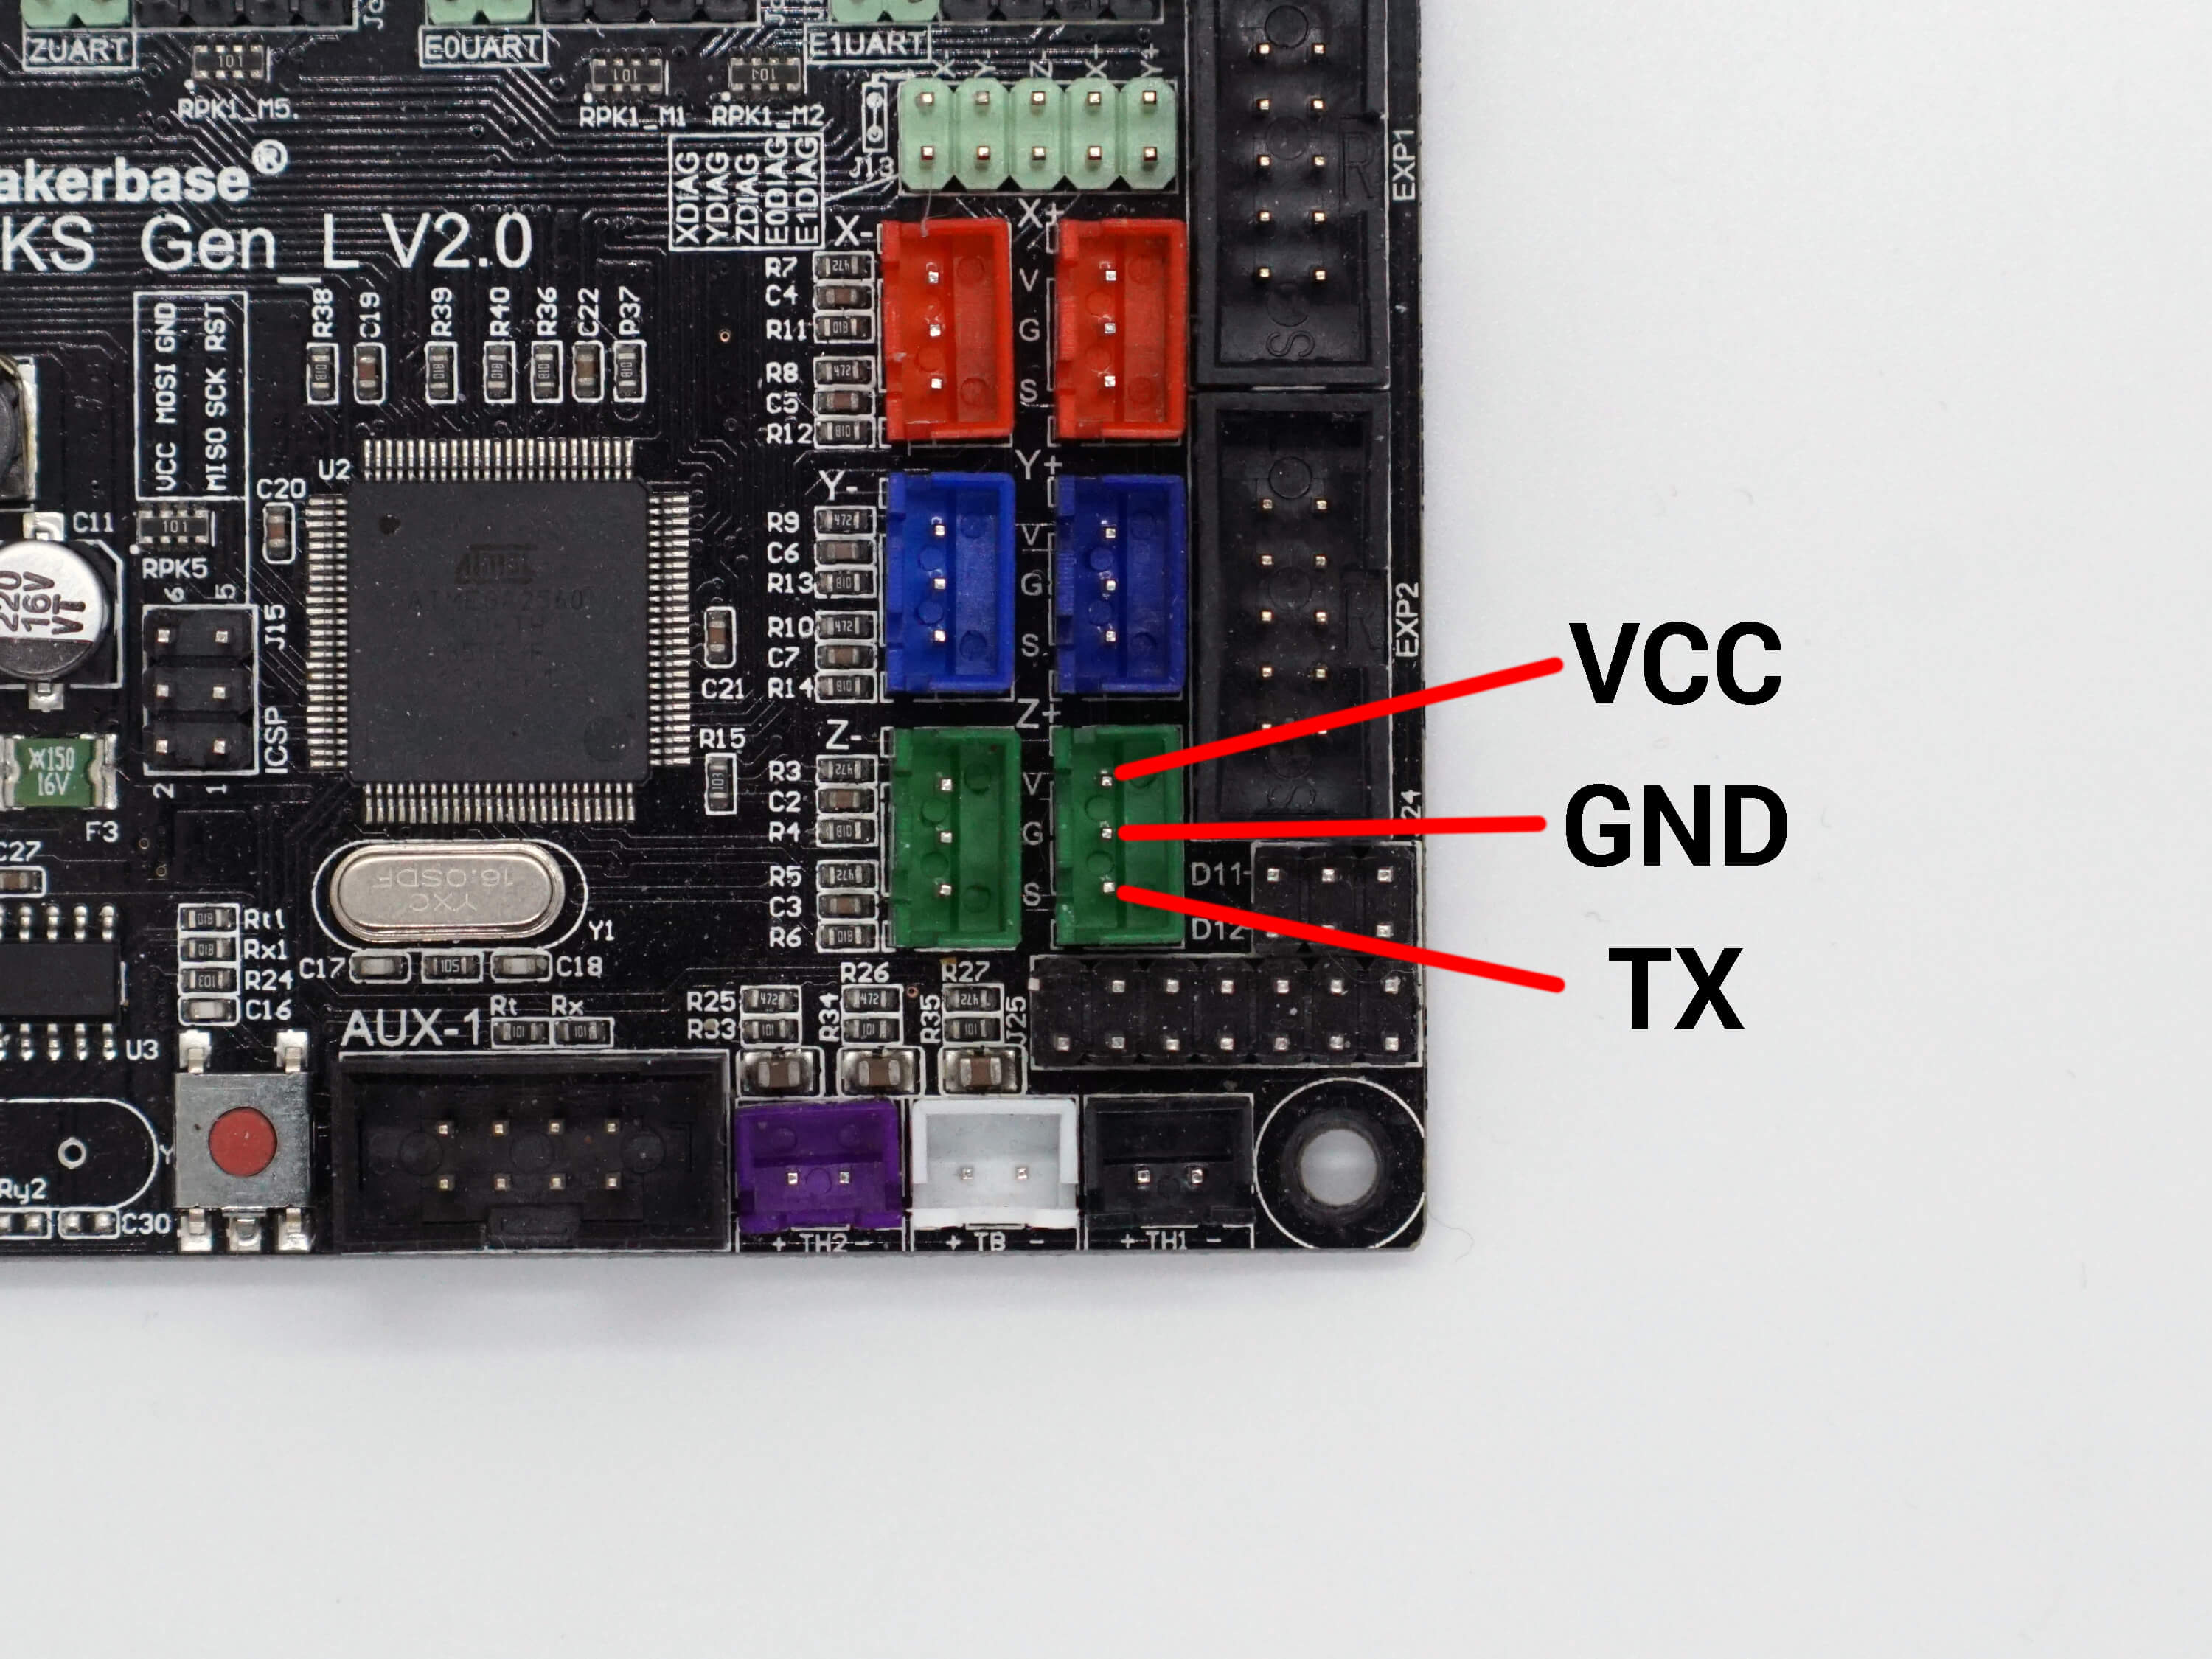
The GPS Module will be attached to the green port shown. If you look closely, its it labeled with "Z+"
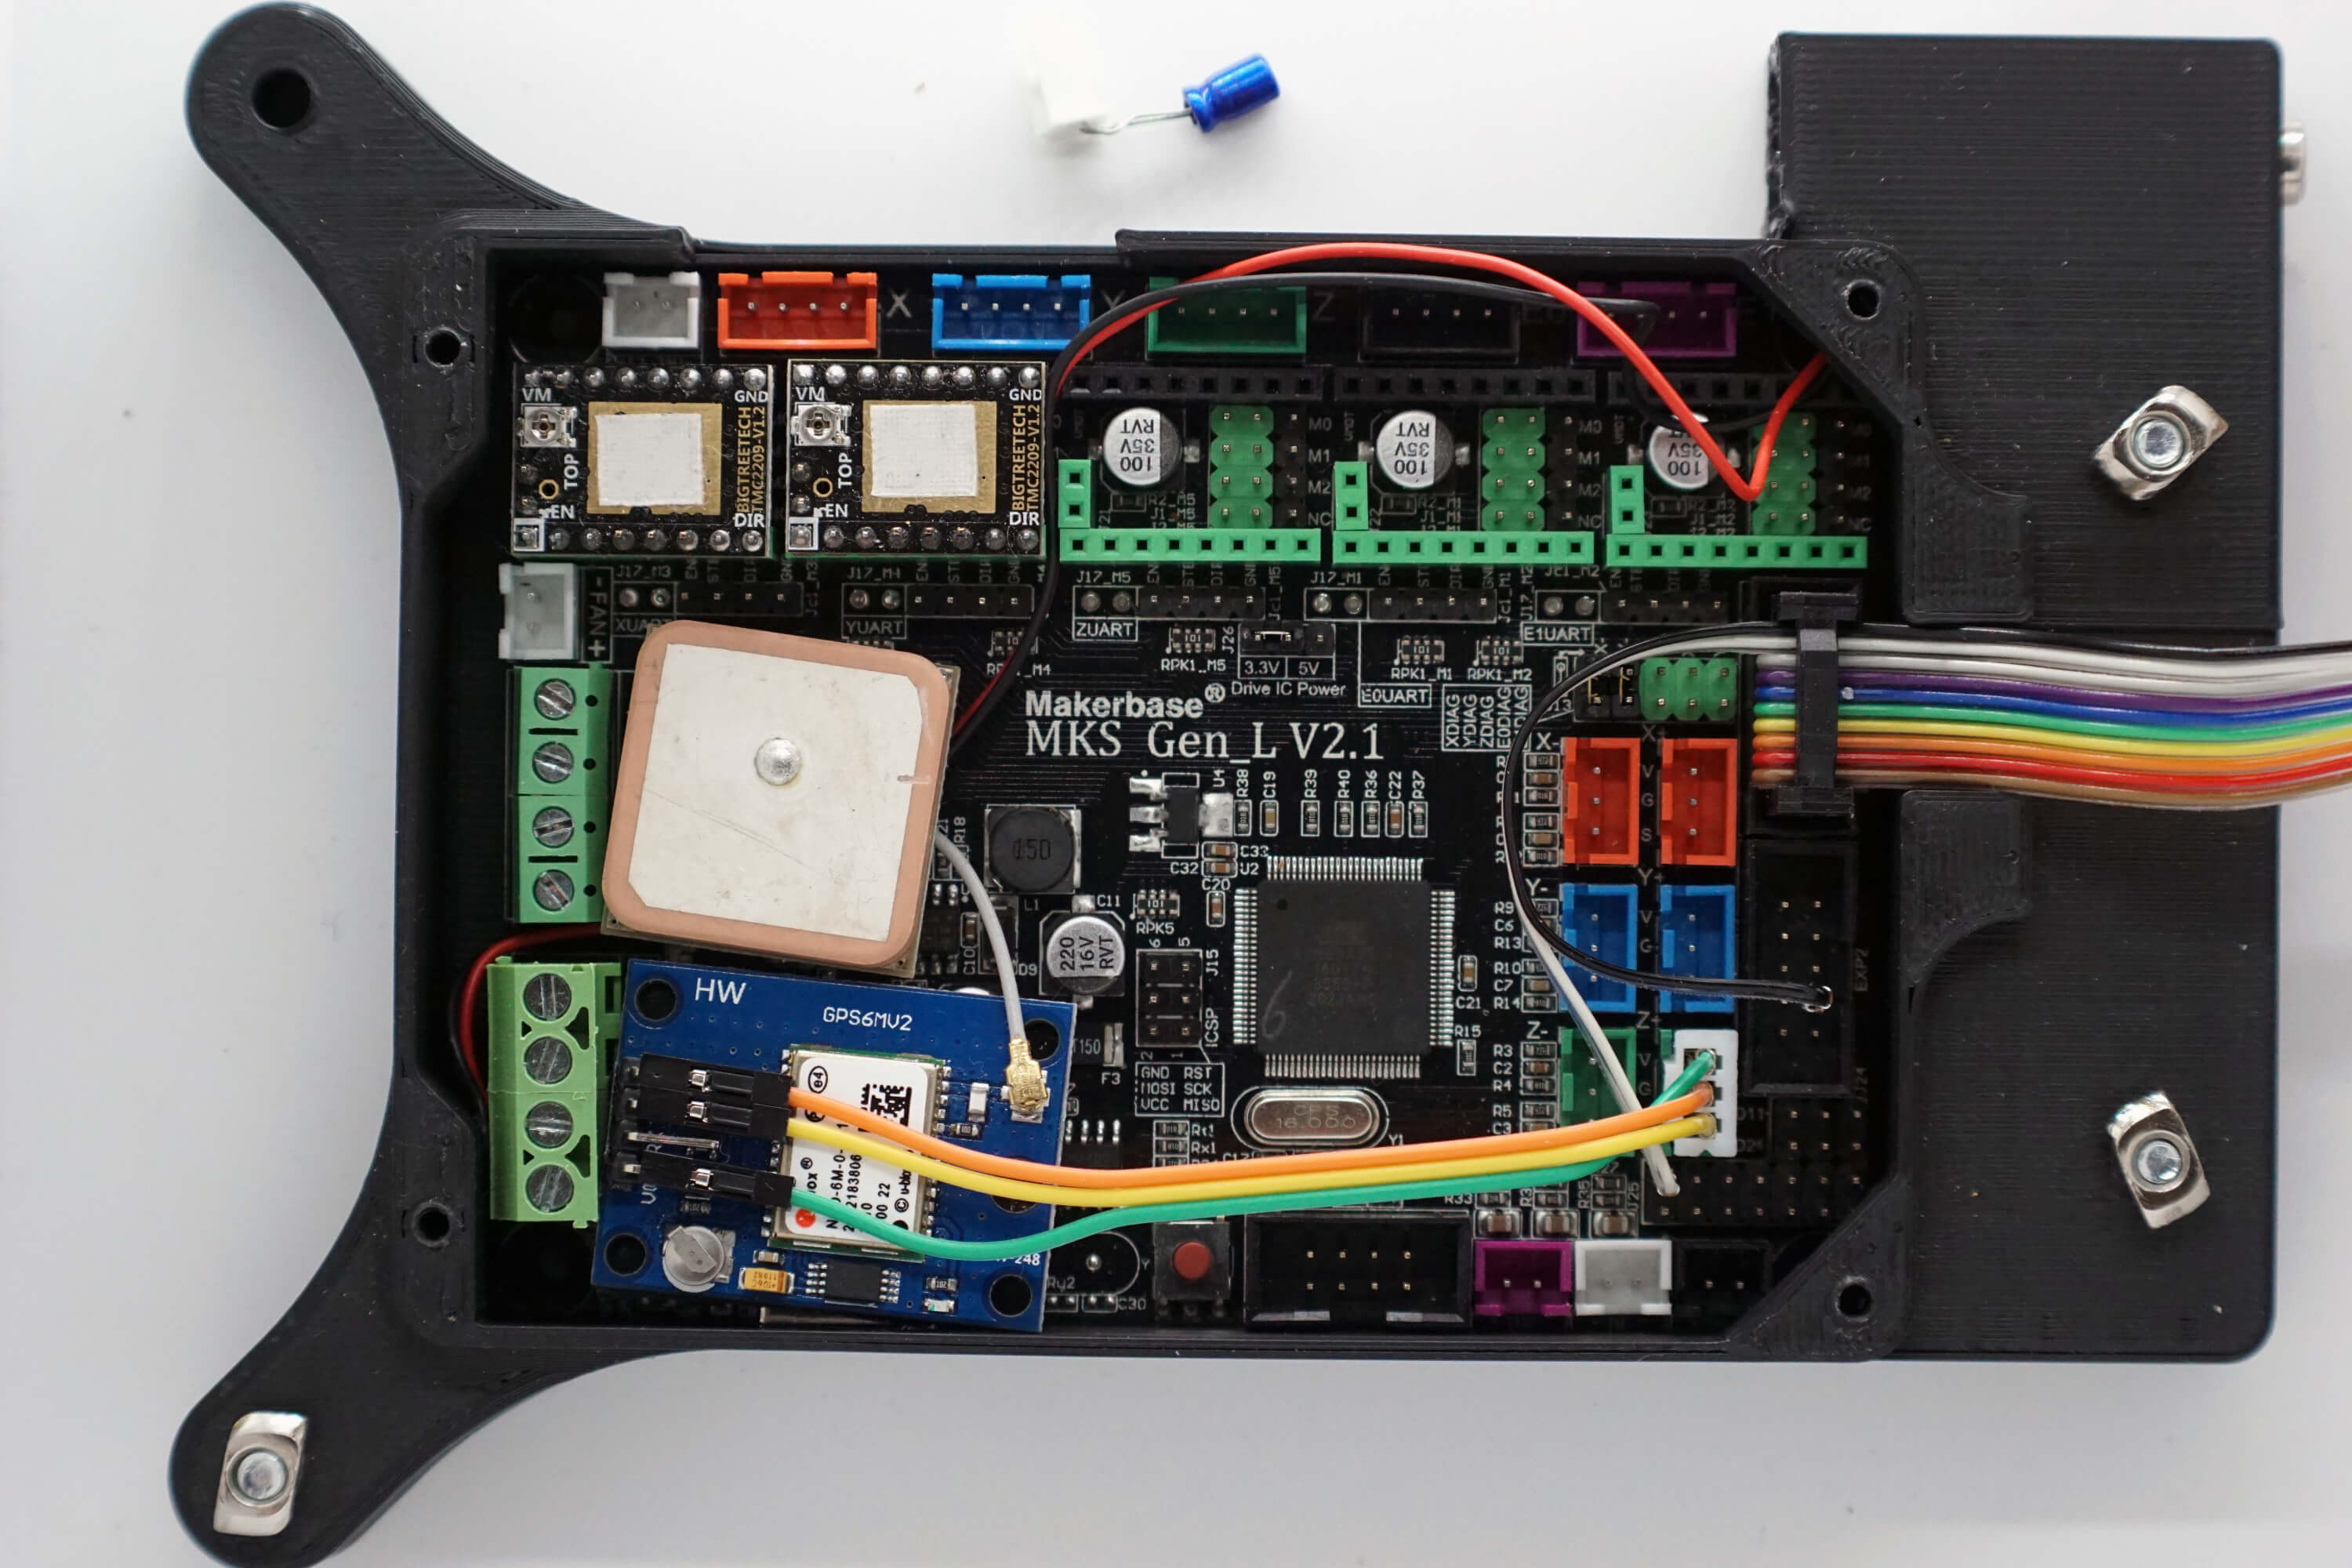
If you have purchased the GPS Module from the OpenAstroTech Shop, you can now simply plug the module in as it comes with the correct connector. If you purchased the Module from somewhere else, see the MKS Wiring section below, then continue from this step.
Now it's time to update the firmware with the necessary changes. If you are using a OAT Kit, simply head to the Kit-Firmware page and download the recent firmware with '_GPS' in the name. Now follow the "Flashing" section of the Kit-update page, then come back here.
If you manually compile your own firmware, enabling GPS is as simple as adding or changing #define USE_GPS 1 in your Configuration_local.hpp.
After successfully updating the firmware, place the capacitor again. It is placed on the two topmost pins of the 6 pins. The orientation doesn't matter.
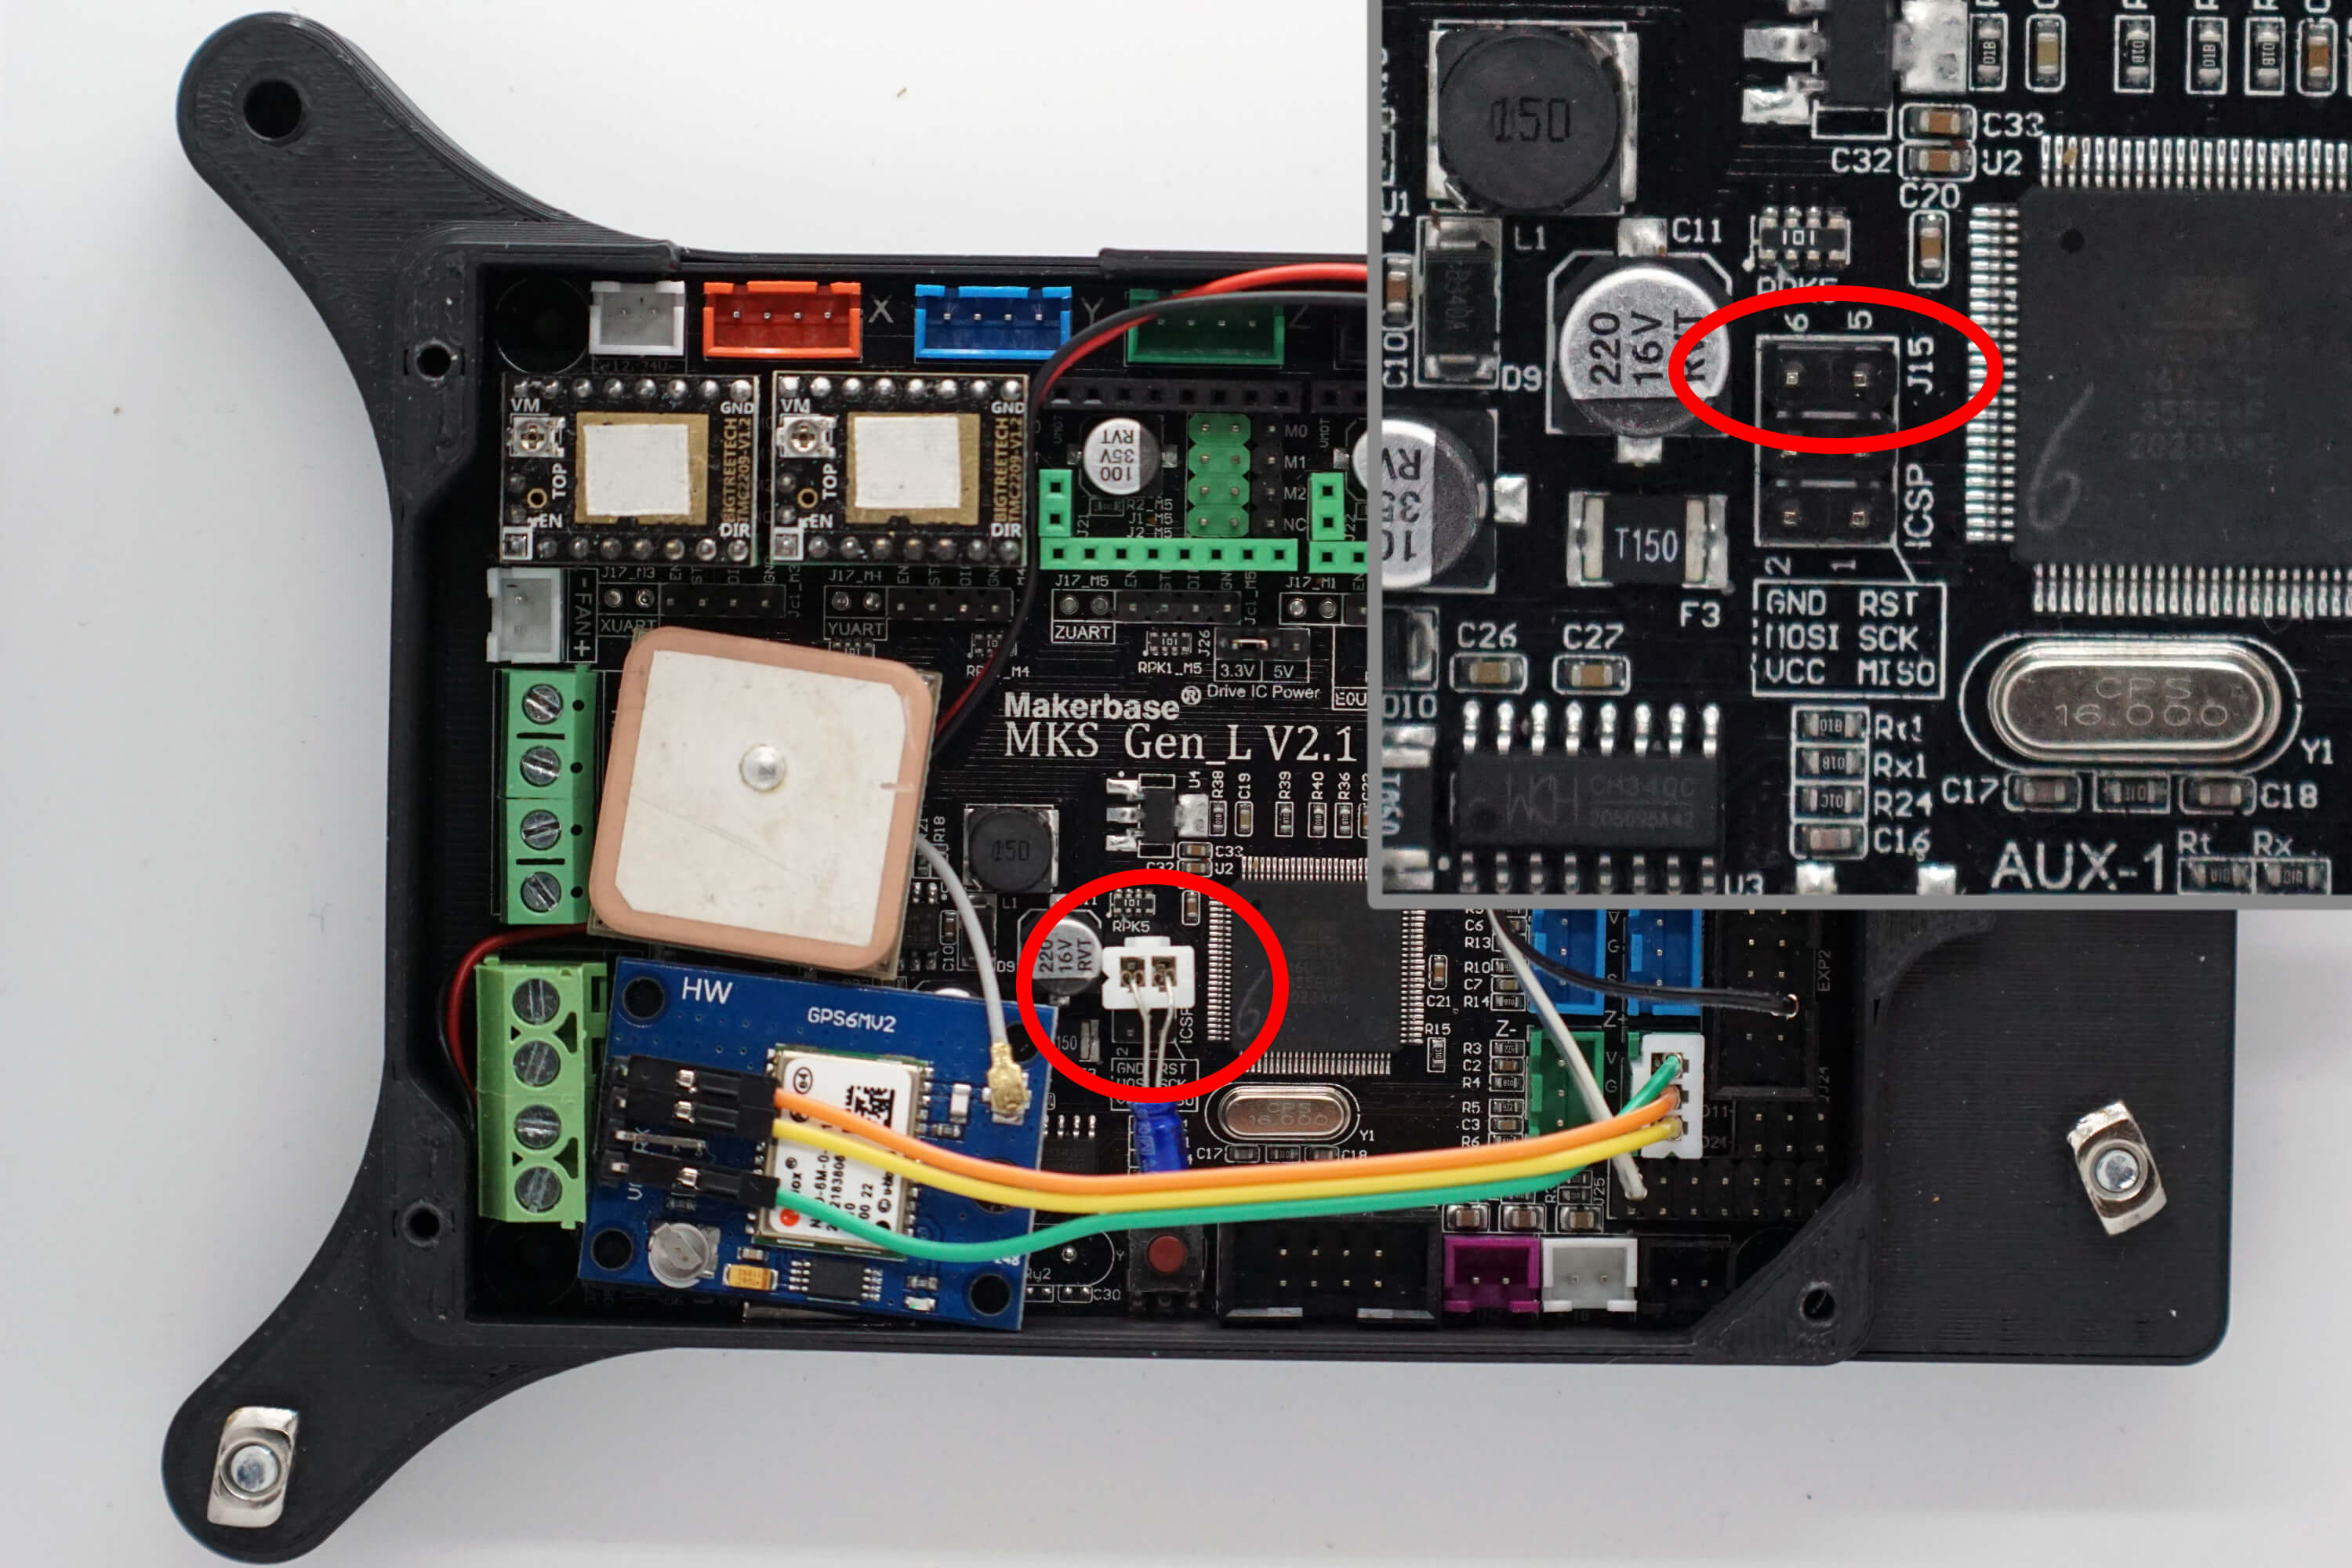
Now you can close the electronicsbox again and youre done. You will notice that the HA menu in the LCD was replaced with a "Finding GPS" Menu. On the left side there will be a small * symbol. If you connected the GPS module correctly, this will slowly blink while searching for sattelites. If the module is not connected properly, the symbol will be solid, or not show up at all.
The first time using the GPS module will likely take several minutes to aquire a signal at all. The Modules internal battery has to charge to a certain level before it can operate normally.
Since the modules antenna is rather weak, you will likely not get a GPS fix while inside a house. After initial installation, place it outside for several minutes to get a fix and verify function.
¶ MKS wiring
If you bought the Neo6m module from a sperate source, you'll need to wire it yourself.
The Modules usually come without the pins soldered. Bend pins like in the following image are recommended, but you can also solder the wires directly.
You will need 3 wires that go to the MKS board. VCC, TX and GND. The RX pin is not needed.
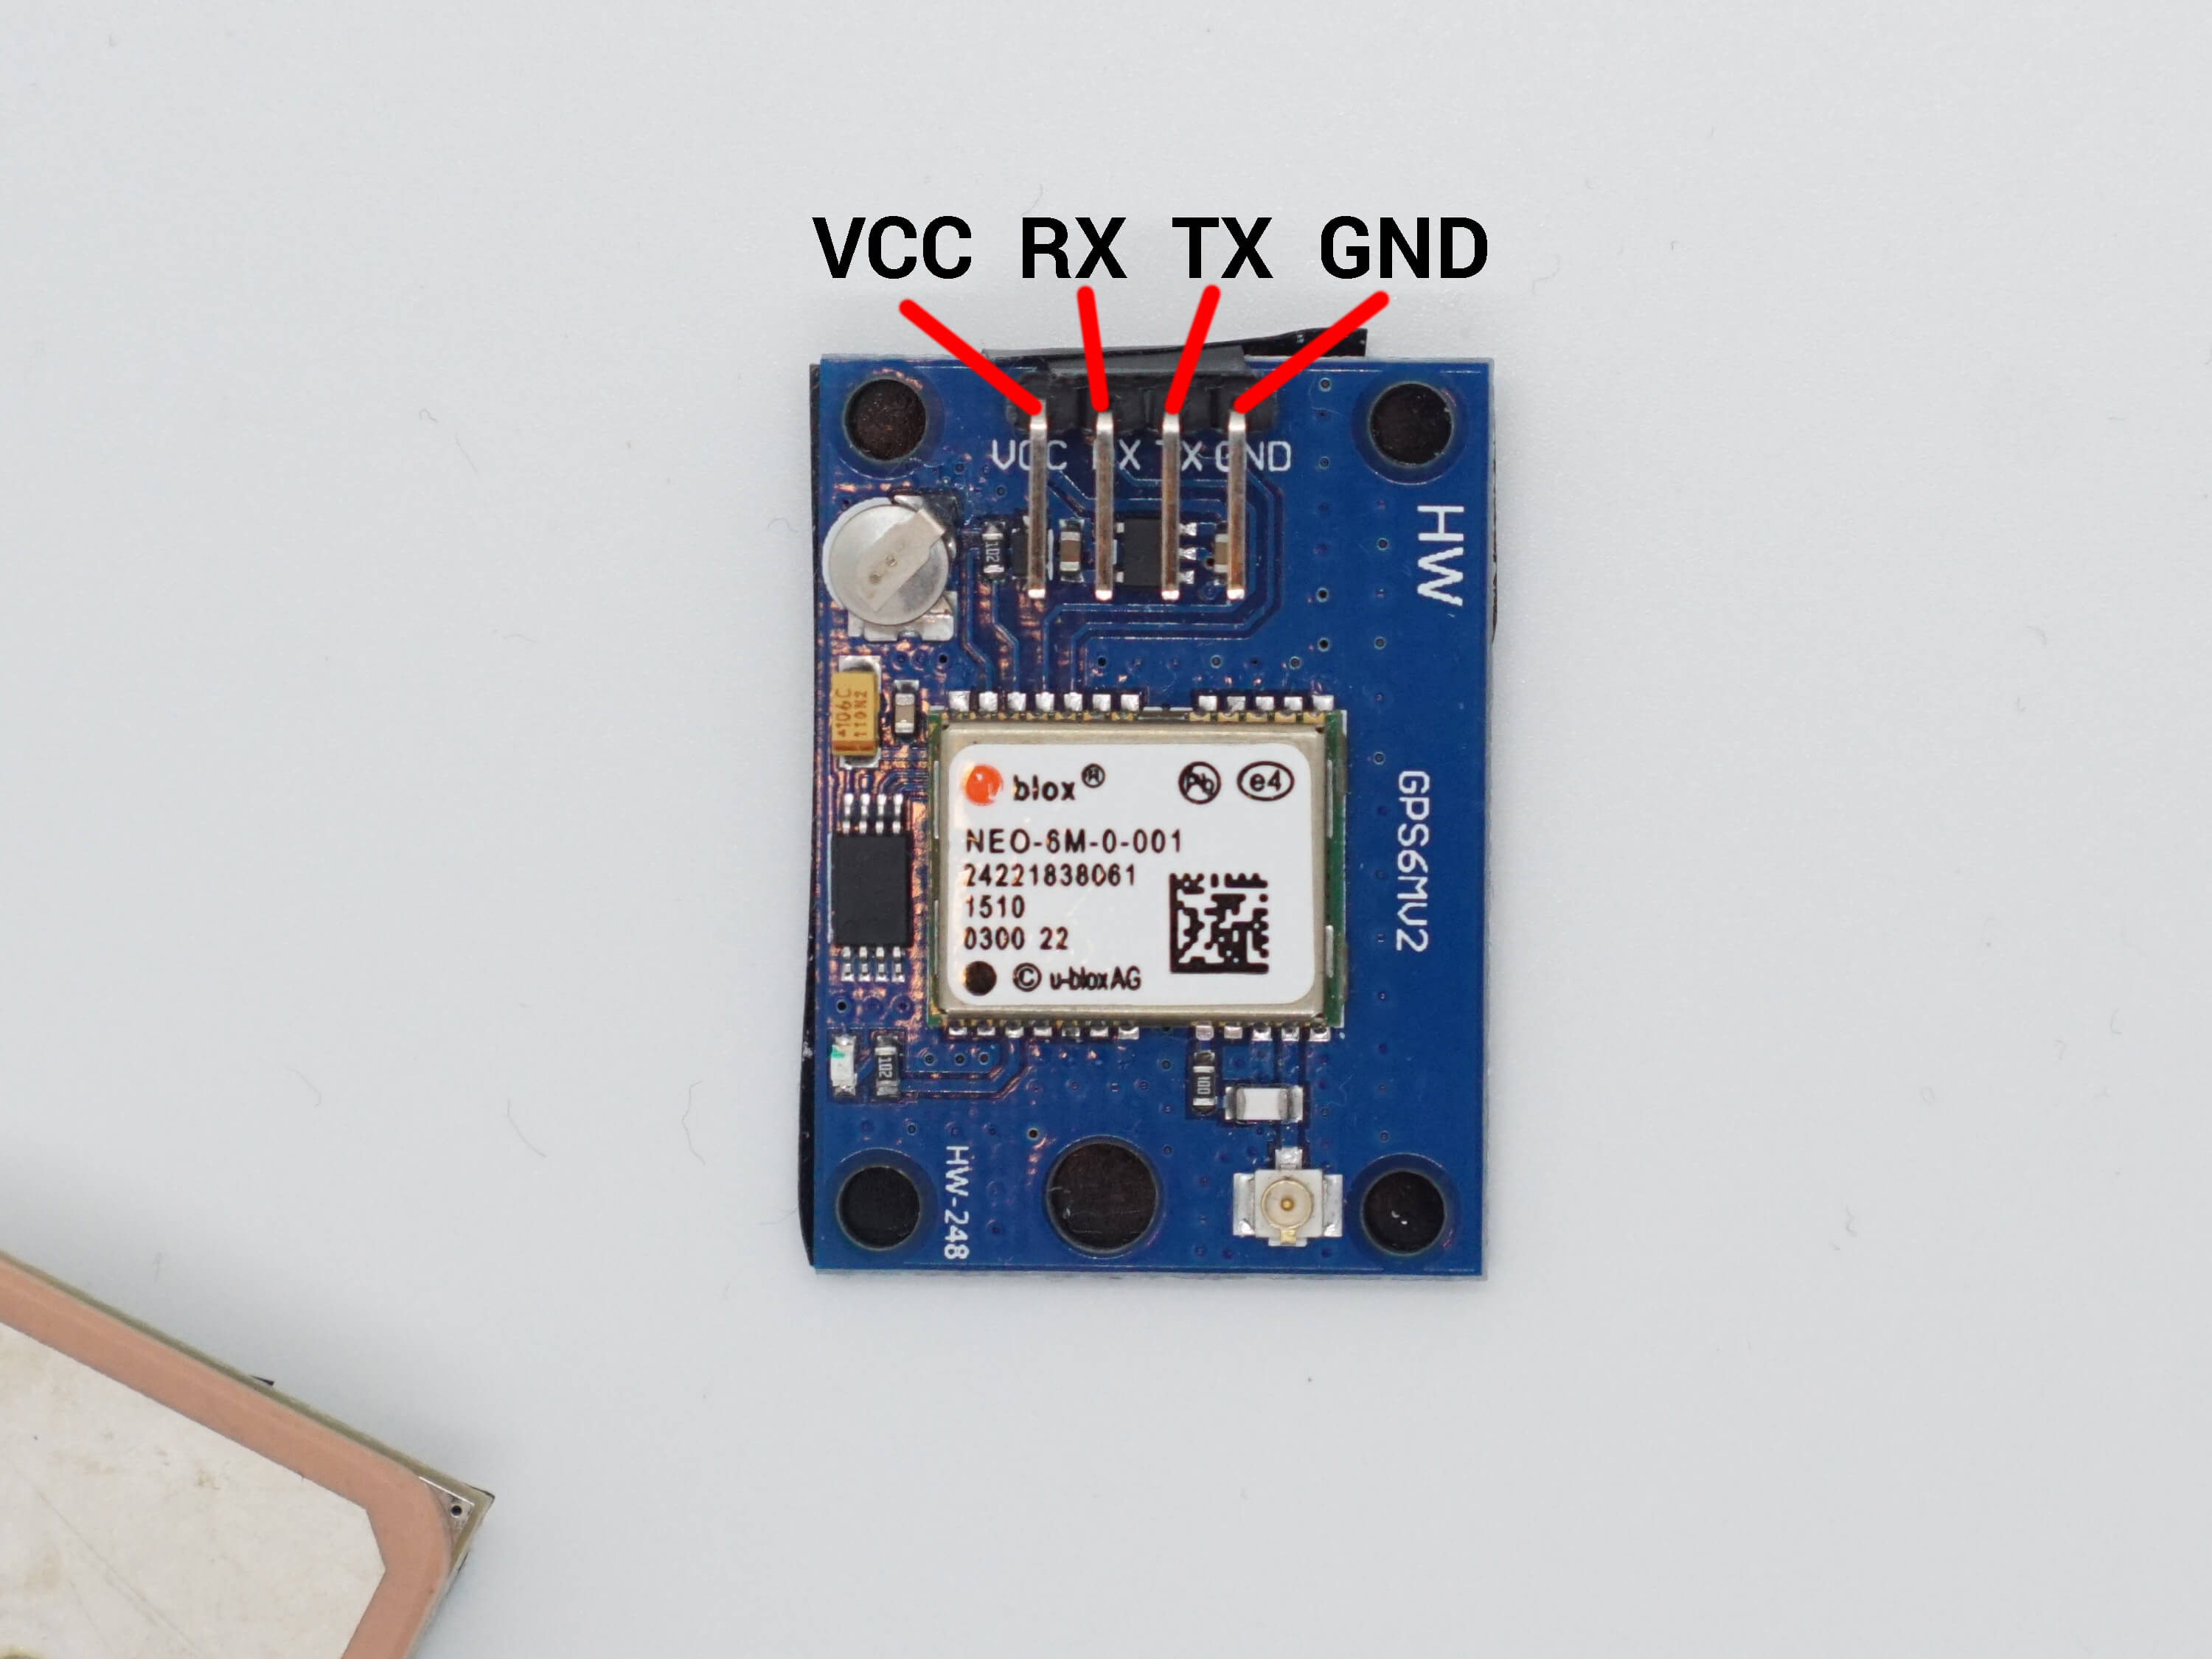
Connect VCC, TX and GND to the corresponding pins on the MKS board. The most elegant solution is to crimp a 3 pin female JST-XH connector, but you can use female Duponts too.
¶ RAMPS Wiring
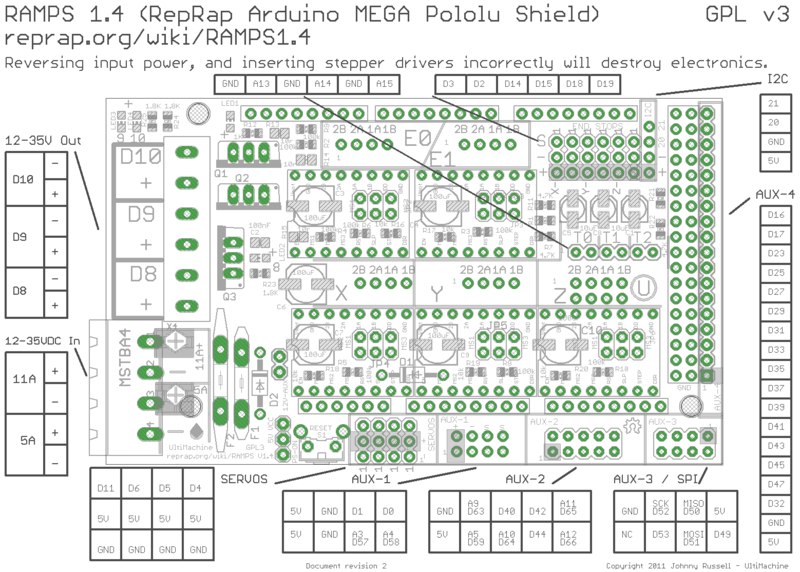
You only need to connect 4 Pins from the GPS module to the RAMPS.
- VCC to 5V+
- GND to Ground
- TXD on pin D17 RX-RAMPS
- RXD to pin D16 TX-RAMPS
The RAMPS pinout is as follows:
There is a combined GPS and Digital Level mounting part that
replaces the bubble level.
¶ Antenna Groundplane
If your GPS module is working unreliable, e.g. sometimes getting a fix is fast, sometimes even no fix after minutes...
Then try to take an area of aluminum foil, place the external antenna on it.
Make sure that the electrical contact on the back of the antanna is electrical connected with the foil.
That way my signal strength was 10db higher and since that its working reliable and fast after start up.
On one hand its shielding the antenna from the other electronics, but also it is an often needed so called "ground plane" for antennas.