It is not recommended to attach a digital level. It uses precious memory and has been known to introduce instability to the firmware. Just use a bubble level instead, or eyeball it. A level mount is only useful for a standalone OAT.
Contributed by Marcel Isler
¶ General
This is a replacement for the bubble level with the aluminium extrusion body. It uses a Gyro/Accelerometer board using the MPU6050 chip (Amazon link). https://www.amazon.com/gp/product/B0151GI5VI/ref=ppx_yo_dt_b_asin_title_o02_s00?ie=UTF8&psc=1
3D files can be found on Github.
¶ Supported Axes
Only two axis are used, roll and pitch.
- Roll is the rotation about the front to back axis of the mount, so it is changed by turning the front two M14s in different directions (tilting the mount sideways).
- Pitch is the rotation that results when you raise or lower the back of the mount.
Pitch is not critical to polar alignment, but roll is (unless you are plate solving and syncing the mount).
¶ Wiring
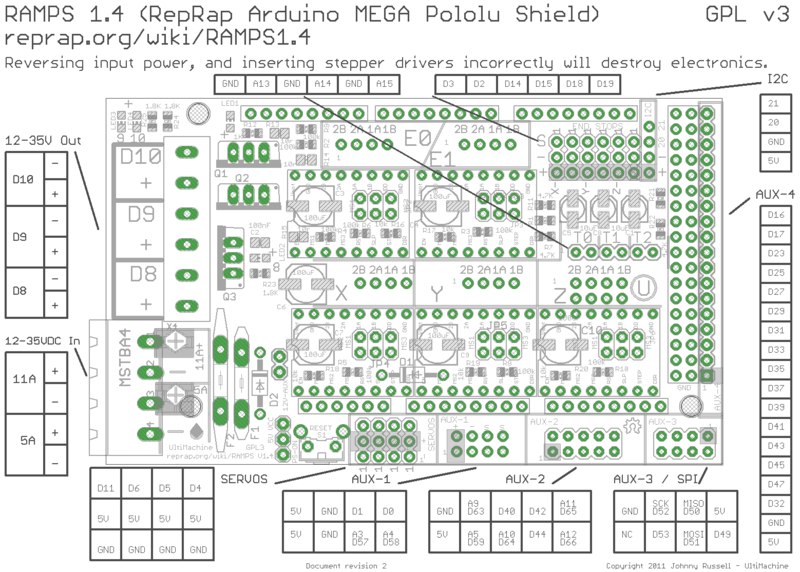
The module is only supported on RAMPS out of the box, but you could probably make it work with the ESP32. Only 4 wires need to be connected: VCC, GND, SCL, and SDA. SCL is connected to pin 21 and SDA is connected to pin 20.
The RAMPS pinout is as follows:

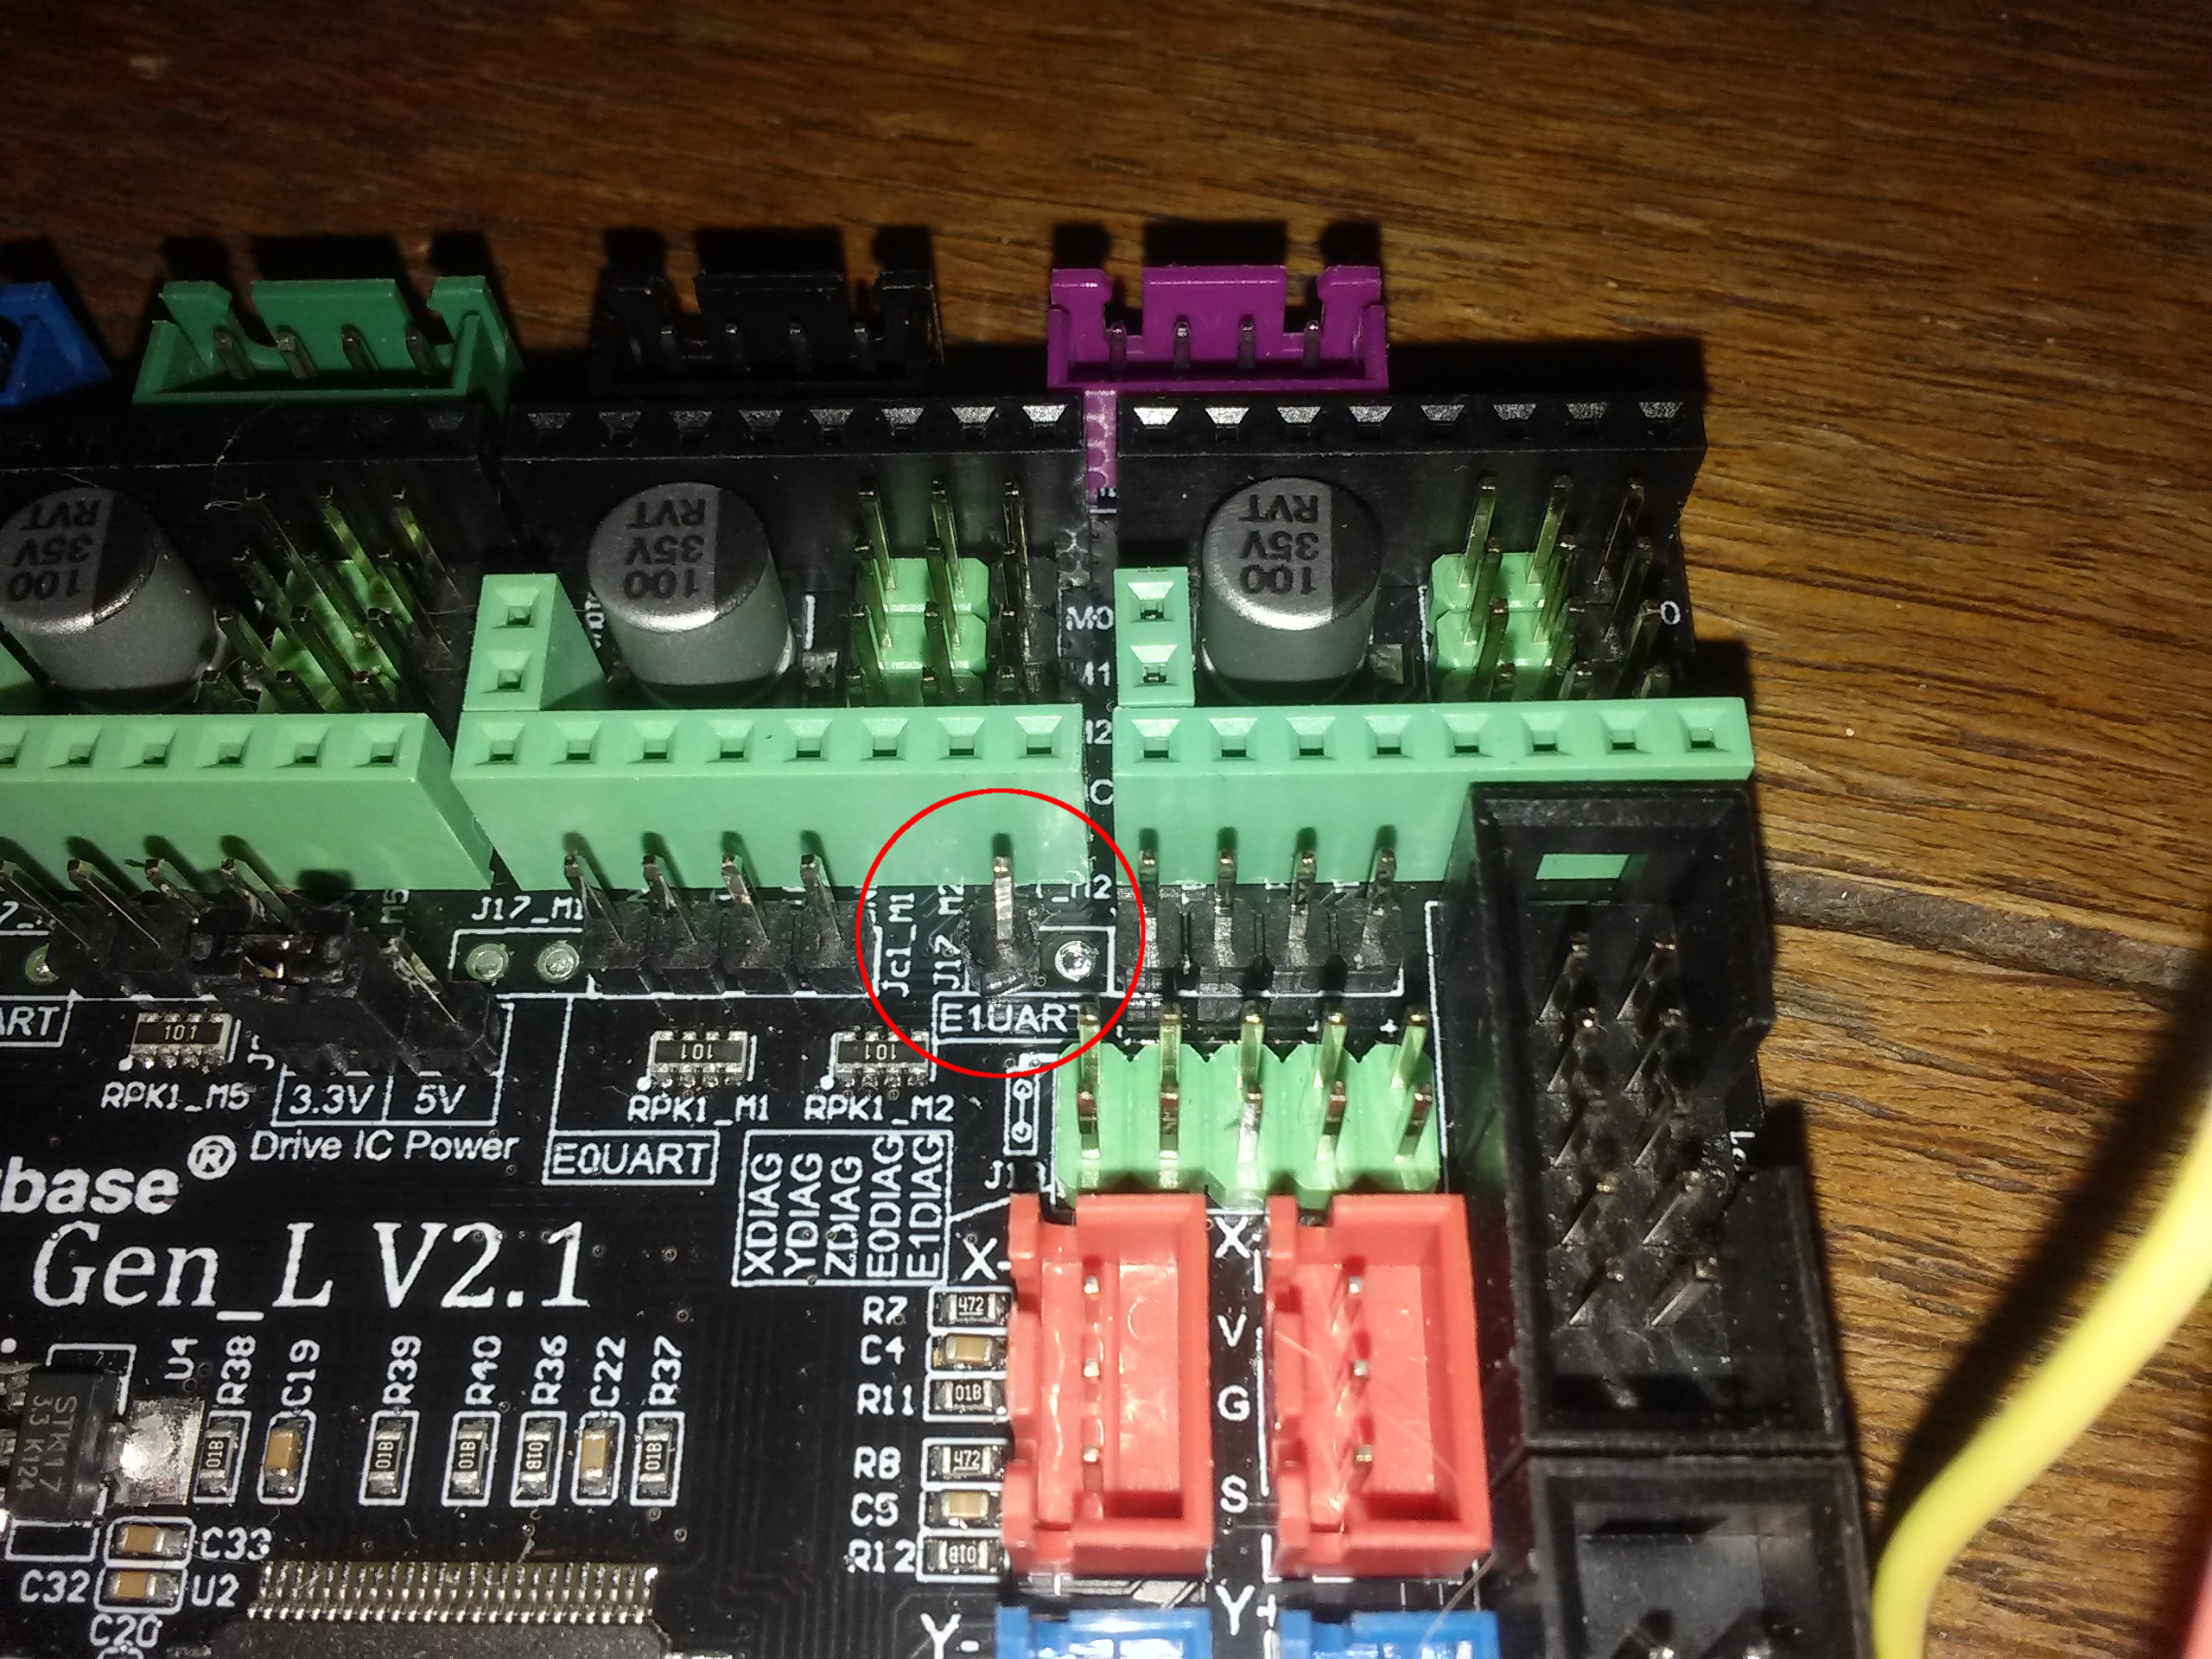
To add this module to the MKS Gen L v2.1 board, you will need to add a single header pin to the board in the left hole at location E1UART (see the marked pin below). The hole will have solder in it which needs removed, then add the new pin to the hole.

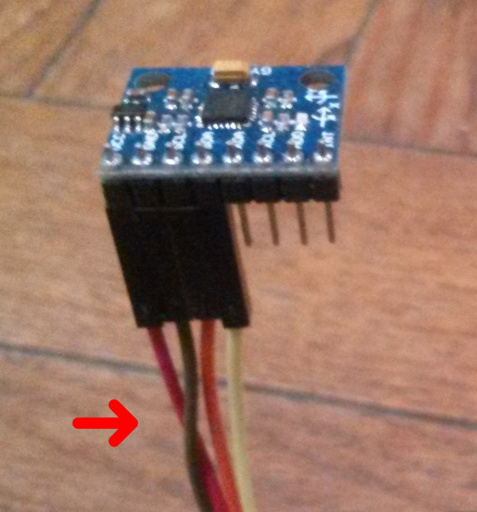
Connect four wires to the MPU6050. Note on the image below that the order of the red and brown wires have been reversed!
In this example:
GND = brown
VCC = red
SCL = orange
SDA = yellow

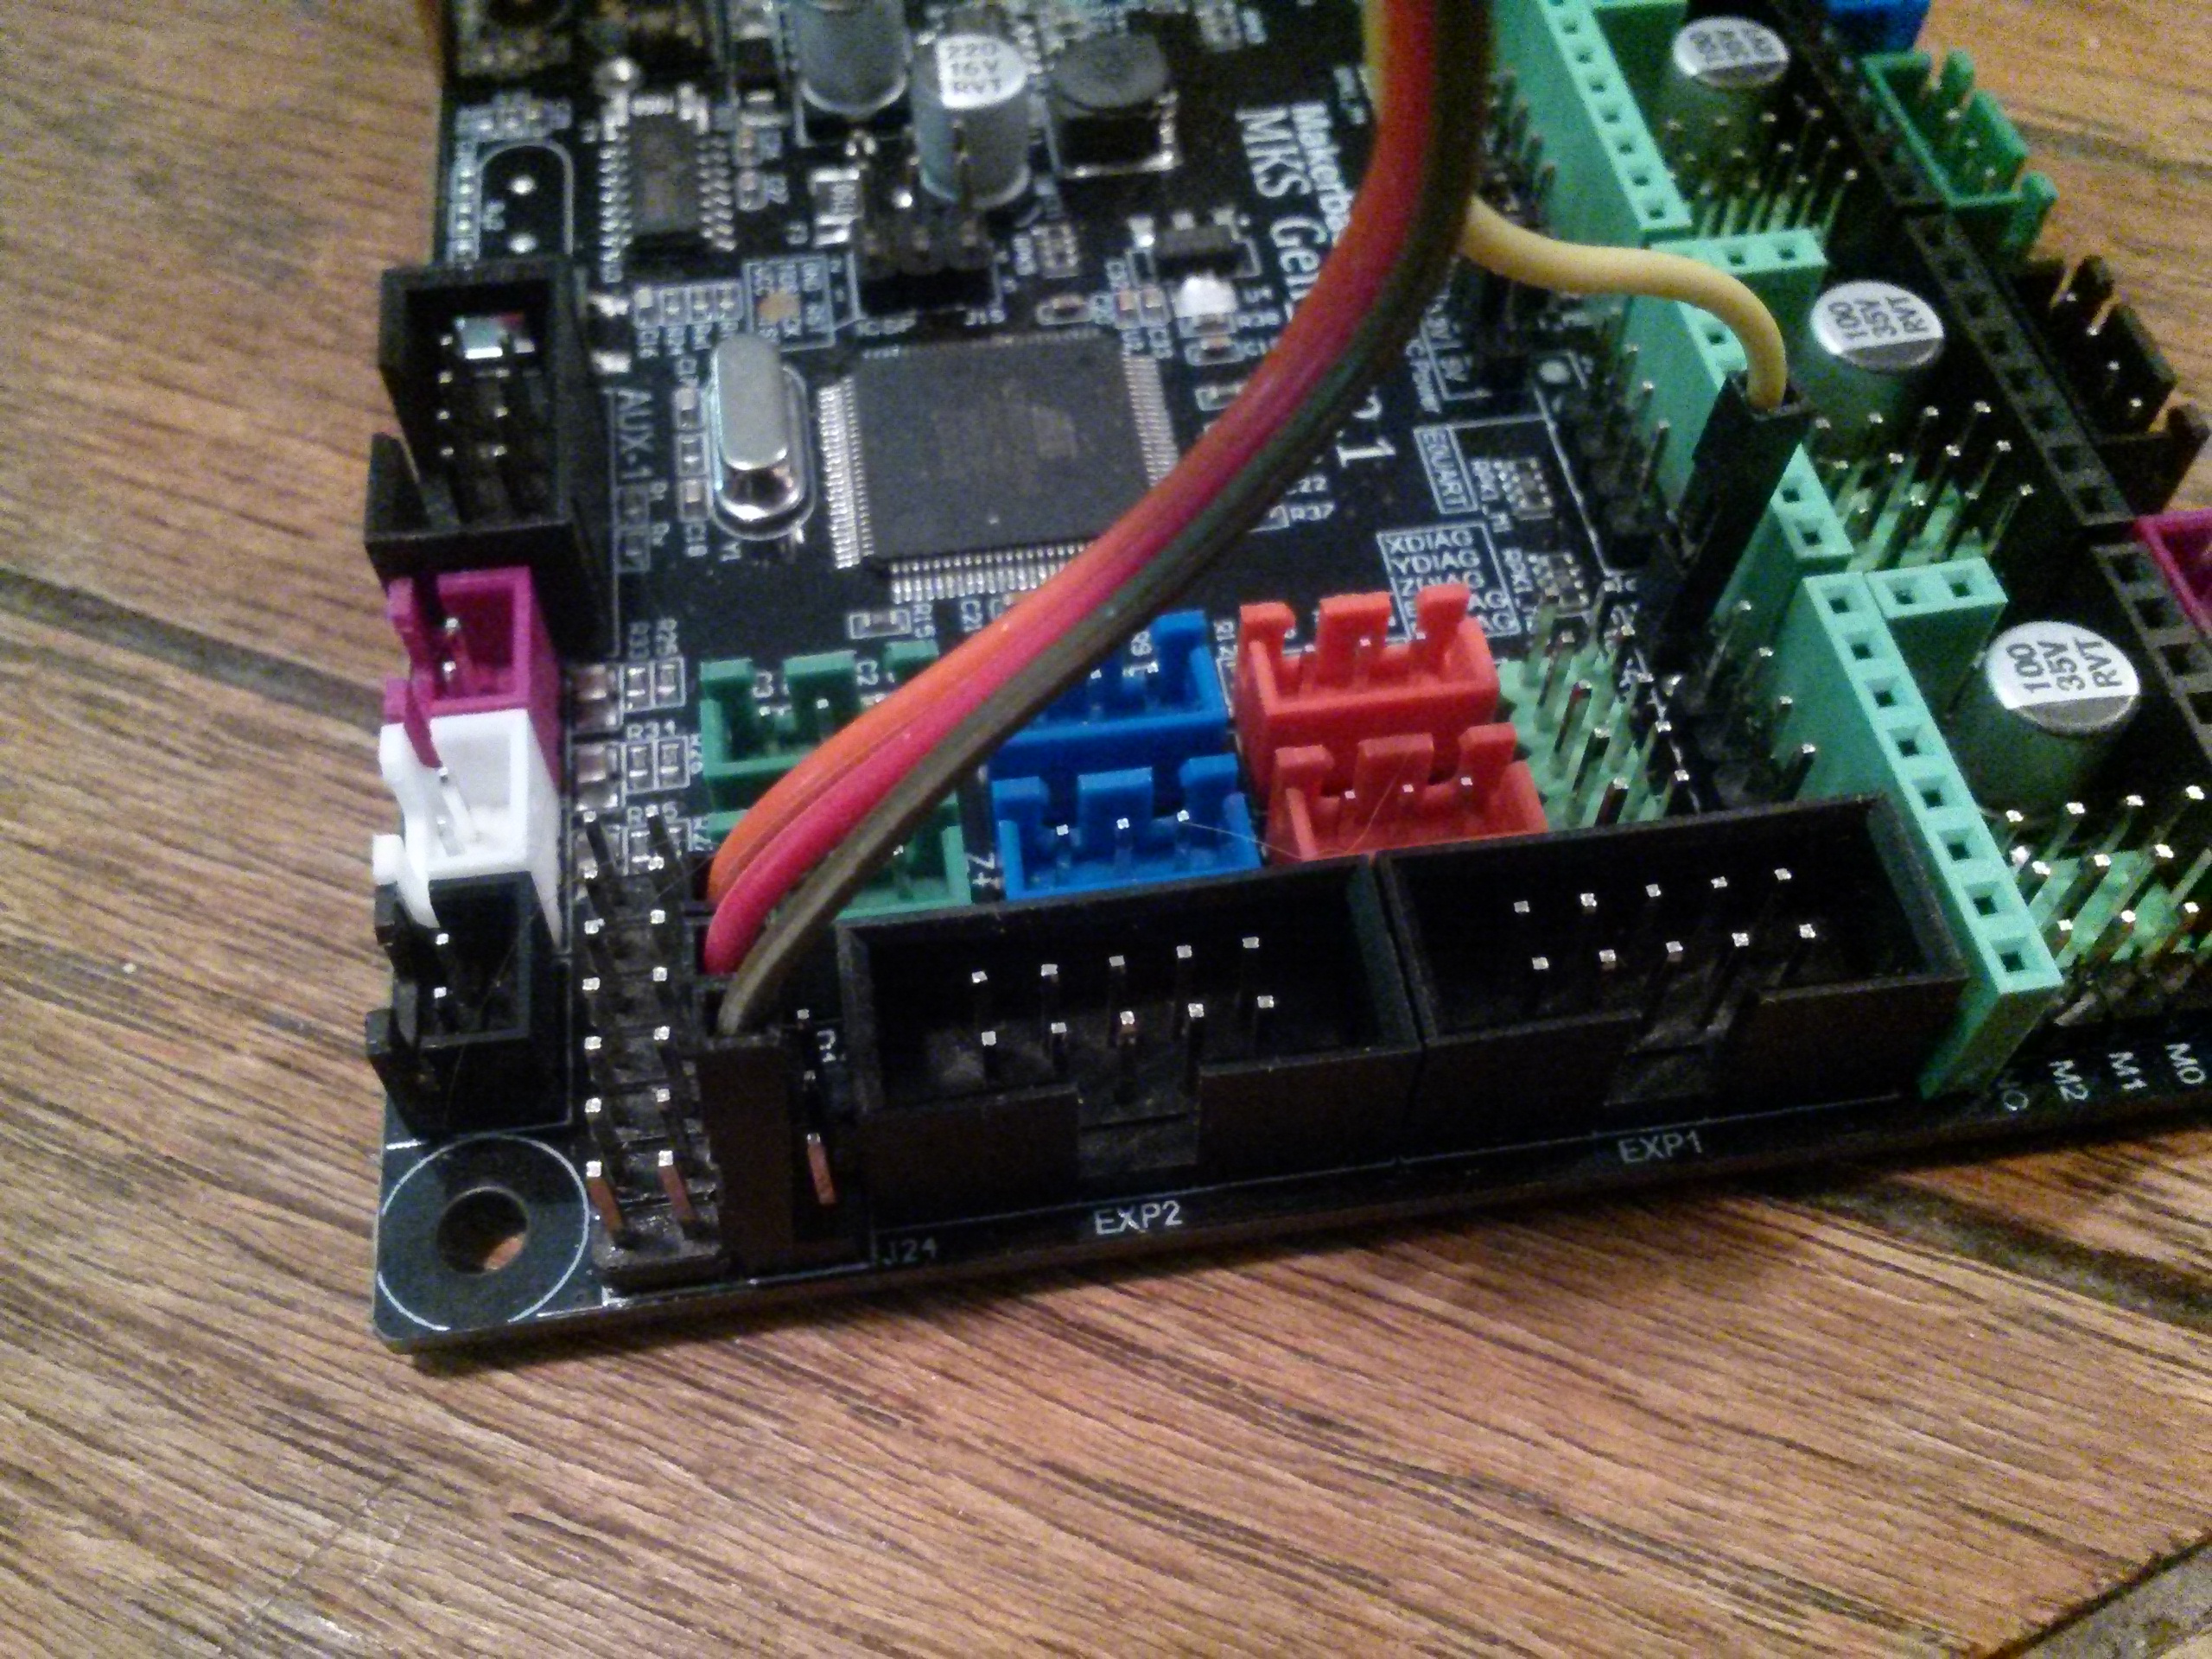
Finally, connect the wires to the MKS board as shown.

¶ Code changes
In order to use the digital level we need to enable it in the code, recompile and deploy. In one of the files Configuration.hpp/Configuration_local.hpp/Configuration_local_<board>.hpp, search for USE_GYRO_LEVEL and set it to 1.
If your level is mounted such that the roll and pitch axis are swapped, set the GYRO_AXIS_SWAP variable to 1.
¶ LCD support
There are two new menu items in the LCD CAL menu, Roll Offset and Pitch Offset.
¶ Calibration
Before using the digital level, we need to tell the mount what horizontal is. To do this, set the mount on a level surface and level the mount with the bubble level or just make sure the screws are all at the same point (fully unscrewed, for example). Then go to the LCD CAL menu and into the Roll Offset and hit SELECT, then confirm that it's level by selecting YES and then SELECT. This stores the current value as level. Do the same for the Pitch Offset.
¶ Usage
When you setup the mount, go to the LCD CAL menu and Roll Offset and use the front M14s to make it level. Press the SELECT button to quit the menu. You will be prompted to save the value, select No. If you want to level in pitch, repeat, but this is not necessary.