¶ How To Use Autoguiding With OpenAstroTech Mounts
¶ Requirements:
-
OAT with OpenAstroGuider (commercial guidescopes and cameras work too)
-
A computer (Windows or Linux) or a Raspi running PHD2
-
Windows: ASCOM installed and connected
-
Linux: INDI running and connected
¶ Before you start
It is recommended to roughly focus your guider during the day on a distant object (ideally a couple kilometers away). This will get your lens in roughly the correct position which you can then fine tune at night on the stars.
Moving the lens closer to the sensor will focus towards infinity.
(and the opposite, moving the lens away from the sensor will focus on objects closer to you)
¶ New PHD2 Profile using the wizard!
When you start PHD2 for the first time, it will guide you through the New Profile Wizard. You can manually access this from "Guide > Connect Equipment > Manage Profiles > New using Wizard". It is wise to set up a completely new Profile if you made major hardware changes (i.e. changed from 28by to NEMA steppers)
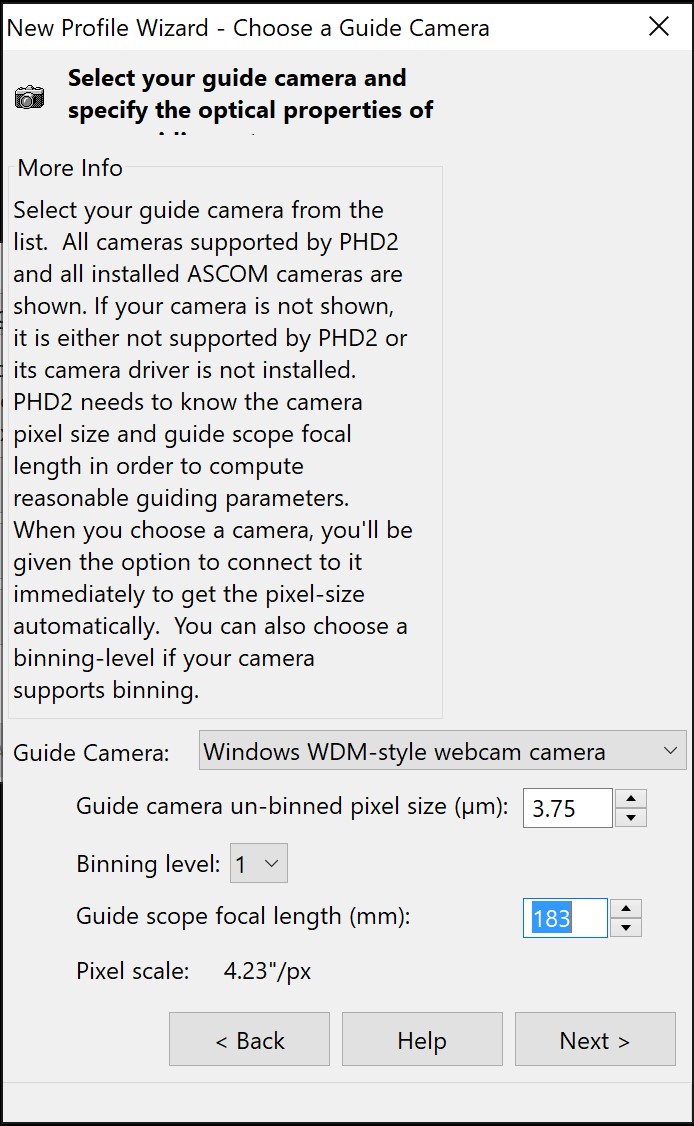
In the first window of the wizard, select "Windows WDM-style webcam" as the guide camera, if you are using USB cameras like the AR0130 or IMX290.
Then enter the pixel size of your guide camera.
Pixel size of the AR0130 is 3.75µm
Pixel size of the IMX290 is 2.9µm
Leave Binning at 1.
OpenAstroGuider's focal length was 183mm, then 163mm, and now it is 182mm. To confirm the focal length take a mono image with sufficient stars and perform plate solving. With astropy, in the logs, you will find confirmation of the focal length.
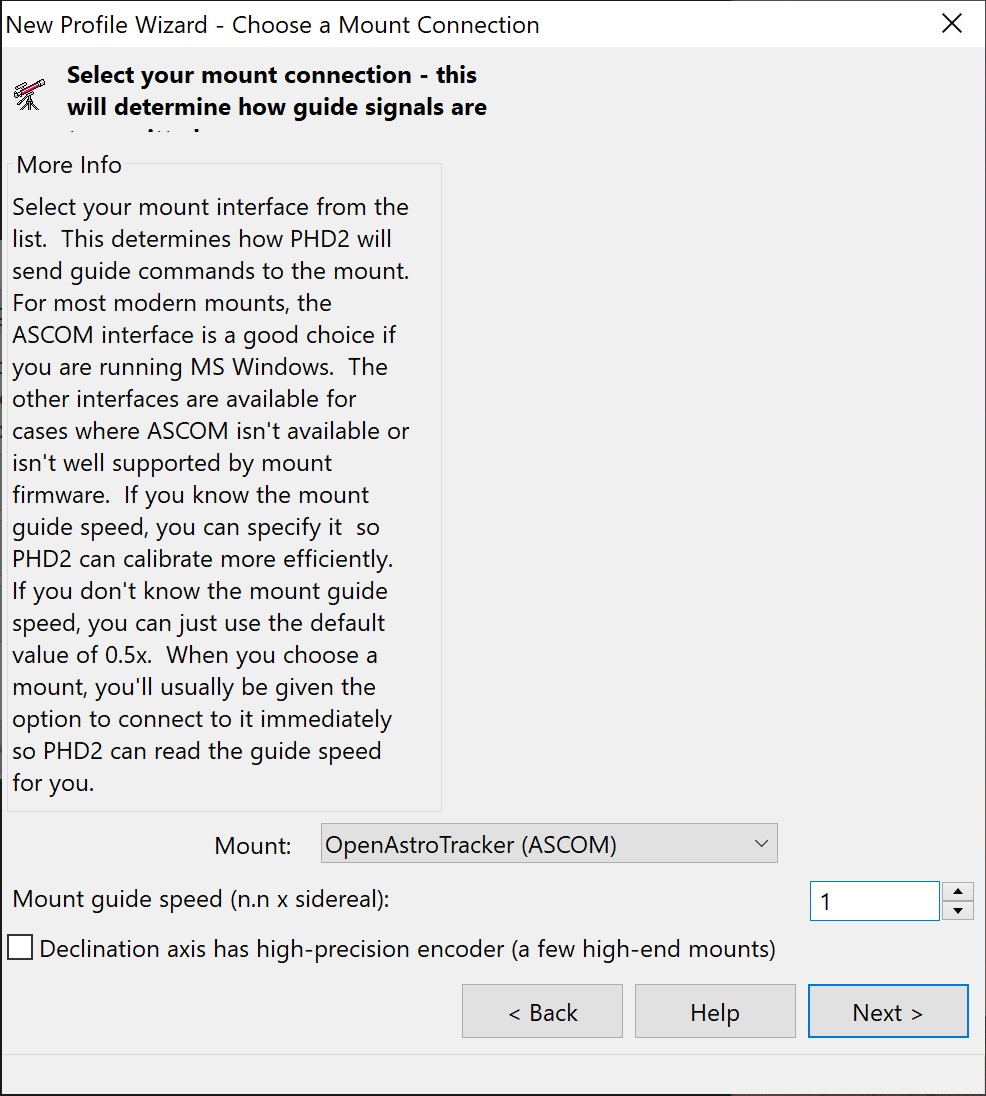
In the second window select your mount driver, OpenAstroTracker (ASCOM).
Set the guide speed to 1.
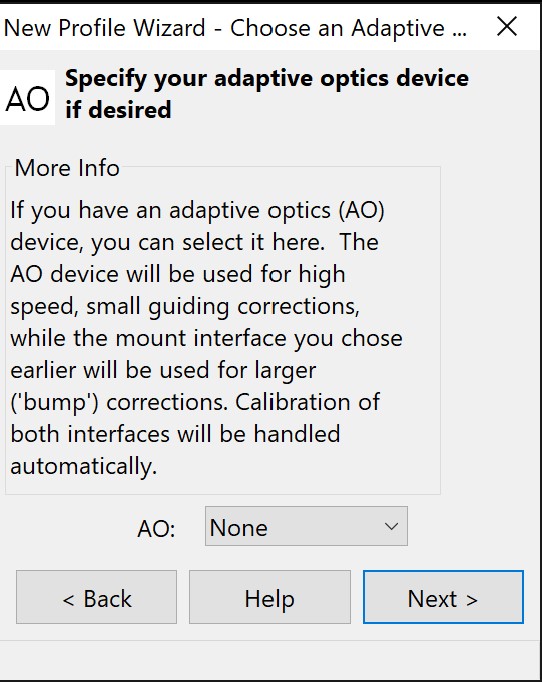
You do not have AO.
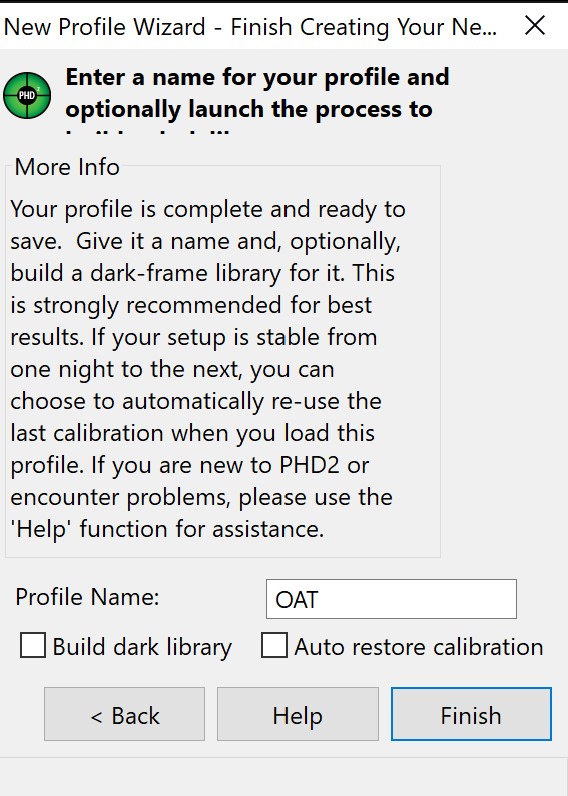
Give a name to your new profile. If you want to, you can now build a dark library for your sensor. Do this by covering the sensor so no light can reach it. A dark library is not necessary though.
If you select "Auto restore calibration" will use your last sessions calibration. Otherwise you have to recalibrate every time (which I recommend anyways).
¶ Connect
Connect the Guiders USB cable and the OpenAstroTracker to one USB port of your computer, each. Open PHD2.
Click: "Guide > Connect Equipment"
The following windows should open:
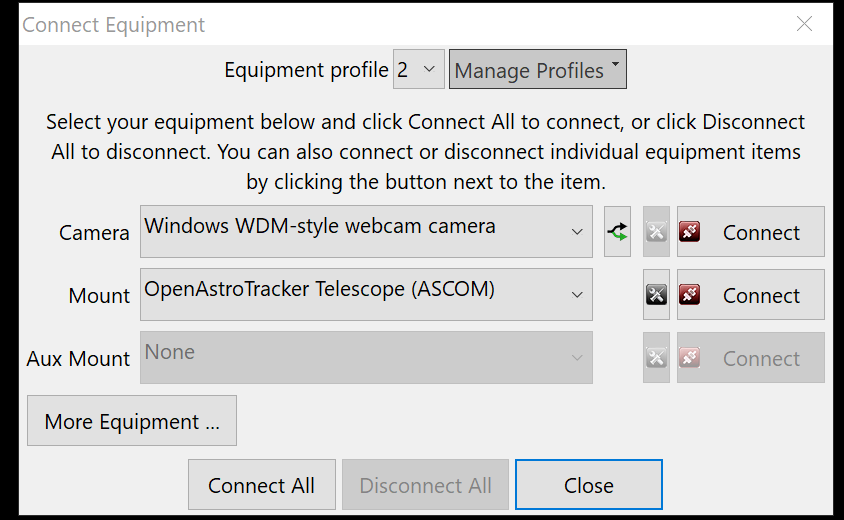
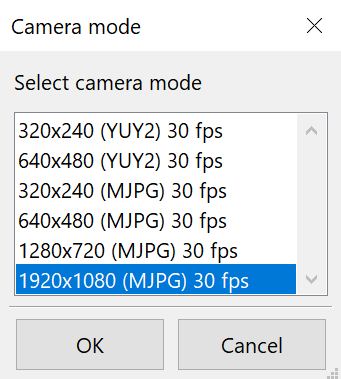
For "Camera", choose "Windows WDM-style webcam". Click the small arrow button next to it. Choose "USB Camera" in the popup. Choose “1920x1080 (MJPG) 30fps”
For the mount, choose “OpenAstroTracker Telescope (ASCOM)”. Click the settings symbol next to it. In the popup, make sure you have the right COM port selected, and that ASCOM has your correct Latitude and Longitude.
Press Connect for both.
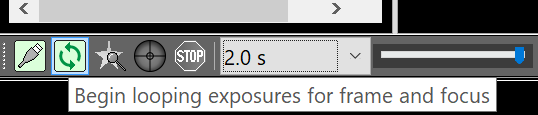
If everything connected without errors, start looping the camera and set the exposure length to something between 1 and 3 seconds. This can be achieved by taking multiple 0.5s exposures and "stacking" the images taking the mean of the images to generate an equivalent long exposure image. INDI users will find this stacking setting on the INDI GUI "Main Control" tab.
See if you can see any stars already. If not, check the slider and set it somewhere to the right. This only affects the brightness onscreen, not the camera itself. If you cant see any stars still, go into the camera settings:
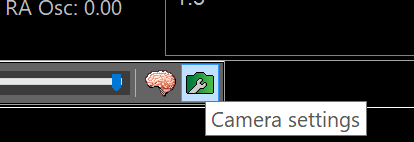
Go into the second tab and remove the tick by the automatic exposure. Set the slider all the way to the right.
You should be able to see several stars now. If not, you are probably out of focus.
If you do see some stars but they are unfocused, focus now. The guider generally holds its focus well, so this is usually a one time thing to do.
If using the AR0130:
The AR0130 seems to have a bug that keeps you from adjusting the exposure manually. Enabling automatic exposure for a few seconds and then disabling it again sets them into manual mode correctly. At the rightmost position you force it to its maximum exposure time, which is 0.5s.
¶ PHD2 settings
Go to View in the top bar and make sure that at least the three following views are selected:
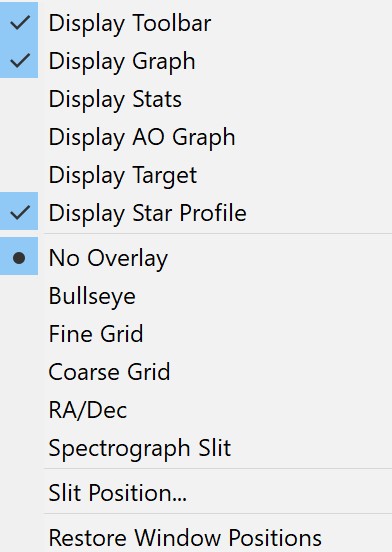
You can try the other views too, but these are the ones that you need.
Click the brain symbol in the bottom bar to open the advanced settings. Go to the Guiding tab.
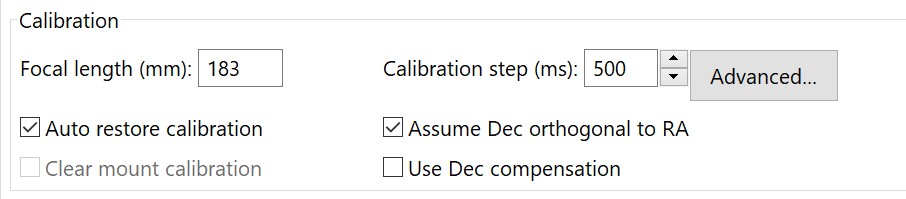
In the Calibration section, make sure the appropriate Focal length of you Guidescope is entered (183mm or 163mm). Set the ticks at "Auto restore calibration" and "Assume Dec orthogonal to RA".
Click the "Advanced button.
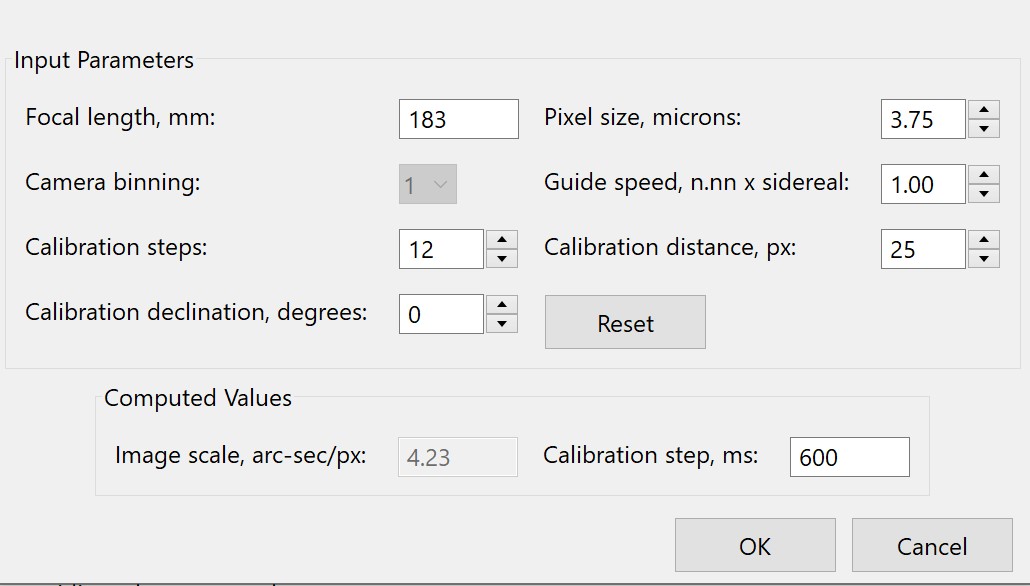
Make sure the appropriate pixel size of your guide cam is entered.
In this window PHD2 will give you a recommended "Calibration step" in ms at the bottom. This is the length of guide pulses it will use to calibrate. From experience, these can be a bit too short. If you notice during calibration that the star does not or just barely moves, increase this value by a few hundred.
Note that PHD2 does not read the INDI GUI setting on the "Main Control" tab for "Use Pulse Cmd". This is significant because INDI supports two types of guide pulse. A very coarse guide pulse is used if "Use Pulse Cmd" is disabled. For successful guiding you need "Use Pulse Cmd" enabled. In that mode the rate at which the motors are tracking is slowed or speeded up for a period of time so that a stars Sidereal motion can catchup or slowed down relative to the telescopes motion. PHD2 does not distinguish between these two types of guide step so if you want to disable guide pulse for a quick test, to see the direction of the motion, then you have to re-configure PHD2 with smaller guide pulse times and fewer guide steps because the guide "steps" produced with Use Guide Pulse cmd enabled are much smaller. With "Use Pulse Cmd" enabled tracking is more accurate and the movement of the star is very slight. The Pulse commands turn the OAT status to Guiding.. also the TR disappears from the LED console window for the duration of the pulse.
¶ Guiding
In most cases, all you ever need to use PHD2 is the bottom bar. See PHD2's documentation on that, but most of it is self-explanatory.
¶ DEC guiding
Before you can calibrate, mind the marked setting. This controls the DEC guiding. If you are using 28by steppers, set this to OFF as they are not precise enough for that.
- Off: No DEC guiding
- North: DEC pulses will only be sent in north direction
- South: DEC pulses will only be sent in south direction
- Auto: DEC pulses are sent in both directions.
On OAT: Be careful with the Auto setting, as that can often cause a feedback loop from overcorrections. Its best to first watch the stars North/south drift and select the according setting instead of auto. North/south drift is caused by sub-optimal Polar alignment, so the drift will always be in the same direction.
For OAE and OAM you can leave this setting on Auto.
¶ Select a star
Now select a star. You can do this manually by simply clicking on any star, or let PHD2 select one automatically with the "Auto-select Star" button (ALT+S). It usually does a good job at selecting good stars.
¶ Run a calibration
With the DEC guidesetting set, you can now run a calibration. You can see if a calibration is currently used by the "Cal" symbol in the bottom right corner:
- Red: No calibration
- Yellow: RA only calibrated
- Green: RA and DEC calibrated
Click the green symbol to start the calibration. If the "Cal" symbol was red, i.e. there was no calibration done prior, a calibration will be performed automatically. If you want to re-do a calibration, shift-click the green symbol.
Wait for the calibration to finish. You can see if a calibration is running by the yellow dotted line around the star.
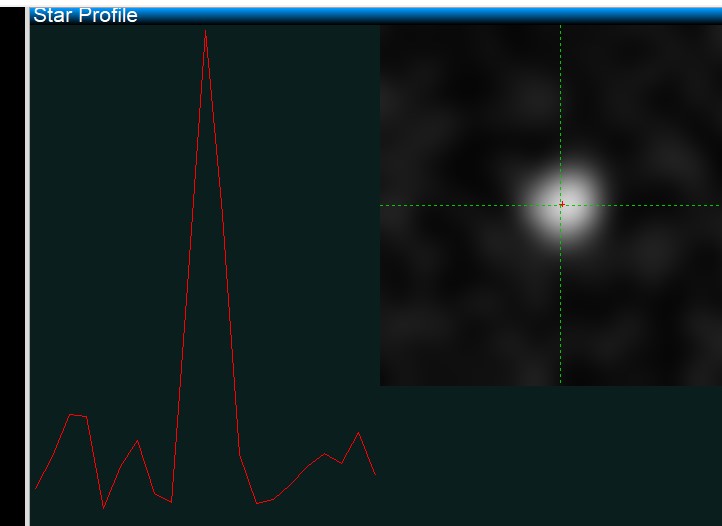
If you selected the "Star profile" view, you can see a zoomed in view of your selected star. If this does not move much during the calibration, or the calibration takes a long time, increase the calibration step duration as described above.
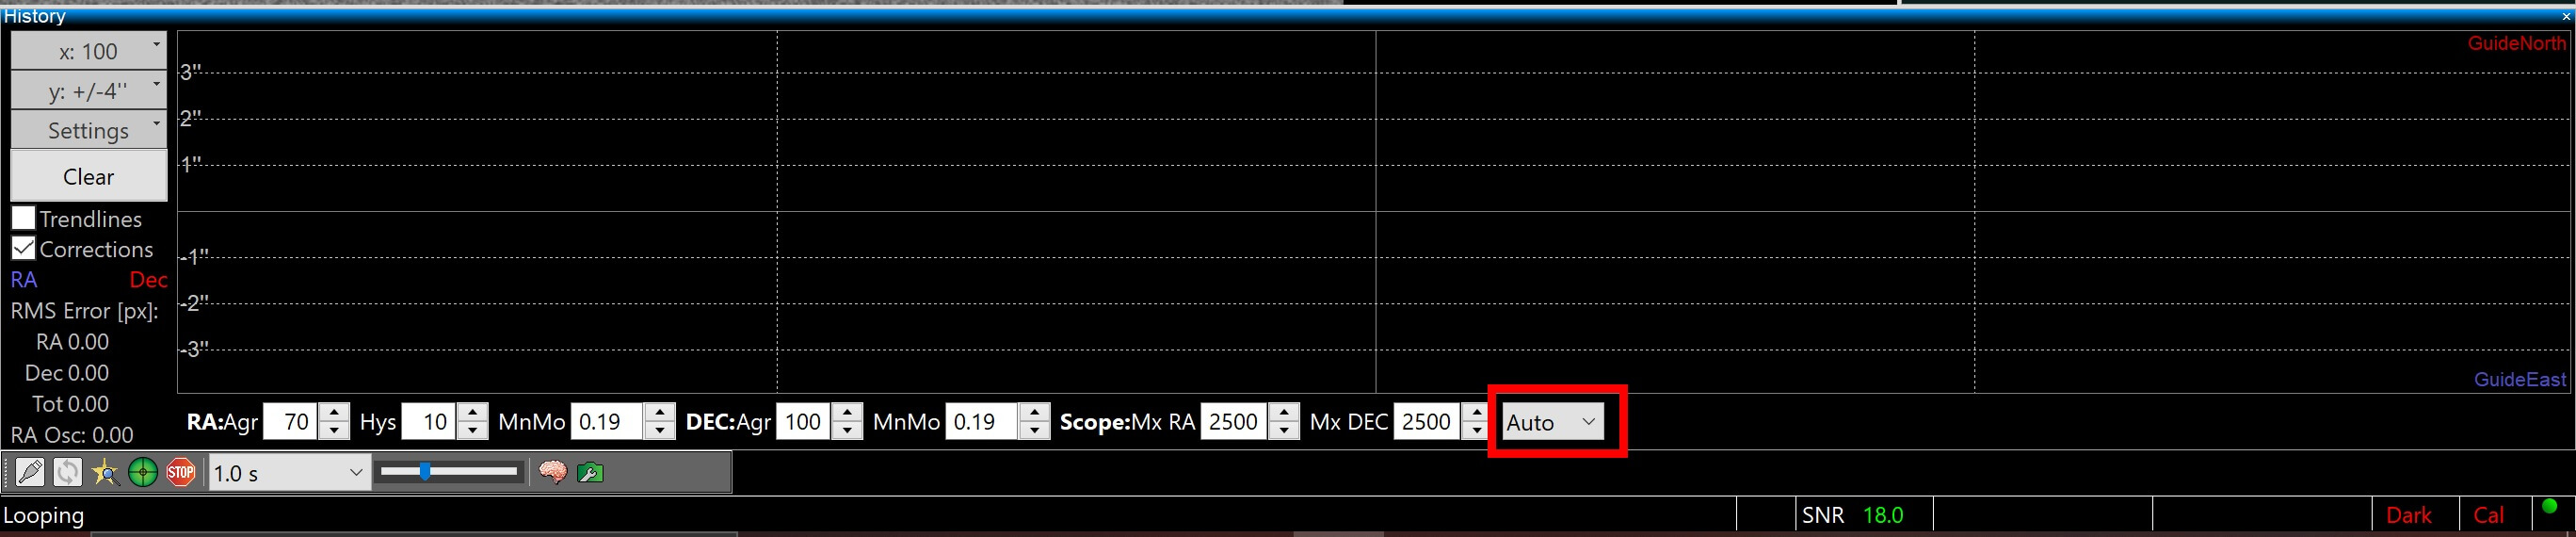
¶ Graph settings
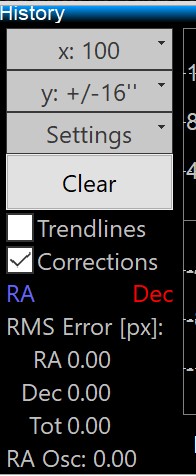
On the lefthand side of the graph, you can control the scaling of the graph. Set this to a value that makes the graph well visible, usually 8" or 4".
If you enable Trendlines you can get a good overview for the RA and DEC graphs. This is especially useful if you are not using DEC guiding, as it will clearly show the direction of your DEC drift.
Below that you can see the RMS error of the last time period selected by x: 100 above. This is an averaged value of all deviations, as a rule of thumb you want it to be lower than the image scale of your main camera. Note that you can still get trails even if the RMS error is low, as it is an average. Outliers caused by wind etc. might still screw your image up.
Good (RA) RMS values to aim for are:
- OAT: 1 - 2"
- OAE: 0.7 - 1"
- OAM: 0.5 - 0.7"
Below the graph you find a couple important settings.

- RA:Agr: This sets the "aggressiveness" of RA pulses. If you see RA often overcorrect, reduce this value. If you see RA only correcting in one direction and never reaching the center, increase it.
- Hys: Hysteresis. Doesnt have a huge effect when changed, I recommend leaving it at default.
- MnMo: RA MinimumMove, measured in fraction of 1 pixel. Correction pulses are issued after this threshold is exceeded. I recommend a value between 0.15 and 0.3. A higher value can help on windy nights.
- DEC:Agr: Does the same as RA:Agr, for DEC
- MnMo: same as RA, this sometimes needs to be set higher than RA to prevent DEC overcorrections.
- Scope:Mx RA/DEC: The maximum length that a single correction pulse can be. Leave at defaults
¶ Exposure length
As mentioned above, the USB camera sensors usually max out at 0.5s exposures. However, you can still select higher times in PHD2, it will "livestack" several 0.5s exposures together to reach the desired length. For example, if you select 2 seconds, it will integrate 4 single images each update. As a benefit this will reduce some of the sensor noise and also get rid of atmospheric turbulence that would otherwise distort the star and may cause a wrong guide pulse. This is called "chasing the seeing" and can cause a lot of problems. You should always set the exposure to at least 1.5s, best even higher. 2.5 to 3.5 seconds work well for me, but you'll have to see what works best for you.
¶ Common issues
¶ Can't see stars
- Check your focus. Ideally you have prefocused the guider during the day
- Make sure the IMX is using the longest possible exposure, as described above
- Does your lens have it's cover on?
¶ Cant achieve focus/stars blurred or dim
- Check if your lens has dew on it.
¶ Graph goes off the charts / pulses in the wrong direction
- Try a recalibration.
¶ Periodic error
-
Try increasing stepper current, it may not be holding the microsteps well enough.
-
If the error period is around 155 seconds (on a standard build with 16 pulley teeth), the Improved RA Mount can greatly reduce it.
-
Example of said periodic error:

¶ INDI Error
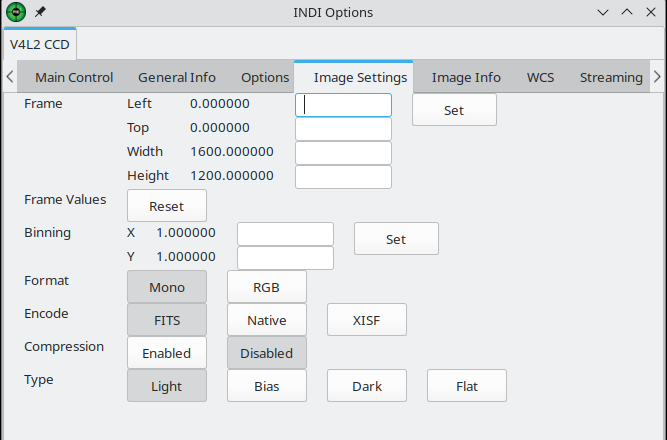
If you get an error, for example "Unsupported type or read error loading FITS file" or "RGB images are not supported, please switch the INDI driver to Mono" when PHD2 connects to the camera then navigate to the INDI Options for the IMX290 camera and select Format "Mono", then press Save on the Options menu and re-try the connection.
¶ Other
- Click "View > RA/DEC" and ensure lines are orthogonal to each other (assume DEC orthogonal to RA setting). If you know your guide cam is mounted horizontally but the lines are at a steep angle, then the calibration is likely bad. Do a re-calibration and/or go to "Tools > Modify calibration > Enter calibration data" and round the RA & DEC angle to the nearest multiple of 90.