¶ What Parts to print
Because this Project has many different versions and options, the amount of files can be quite overwhelming and confusing. To make things easier, use the "Printed Parts Chooser"
Note: To determine which Latitude to choose in the Google Spreadsheet below, use the next highest number from your latitude. For example, if you live at 43N, print the 50 degree version.
Go to File > Copy and copy the sheet into your own google account to be able to use the checkboxes. Select the options that apply to you and print the files that are marked green.
¶ Where to get the parts
Once you know what you need to print, you need to get the files. The best and most up-to-date place is going to be our GitHub area, but Thingiverse is also kept up-to-date (reasonably often).
Note: If you access and STL and it opens in your browser as some text file with a bunch of numbers, use the File > Save As command to save the STL.
¶ Printer Calibration
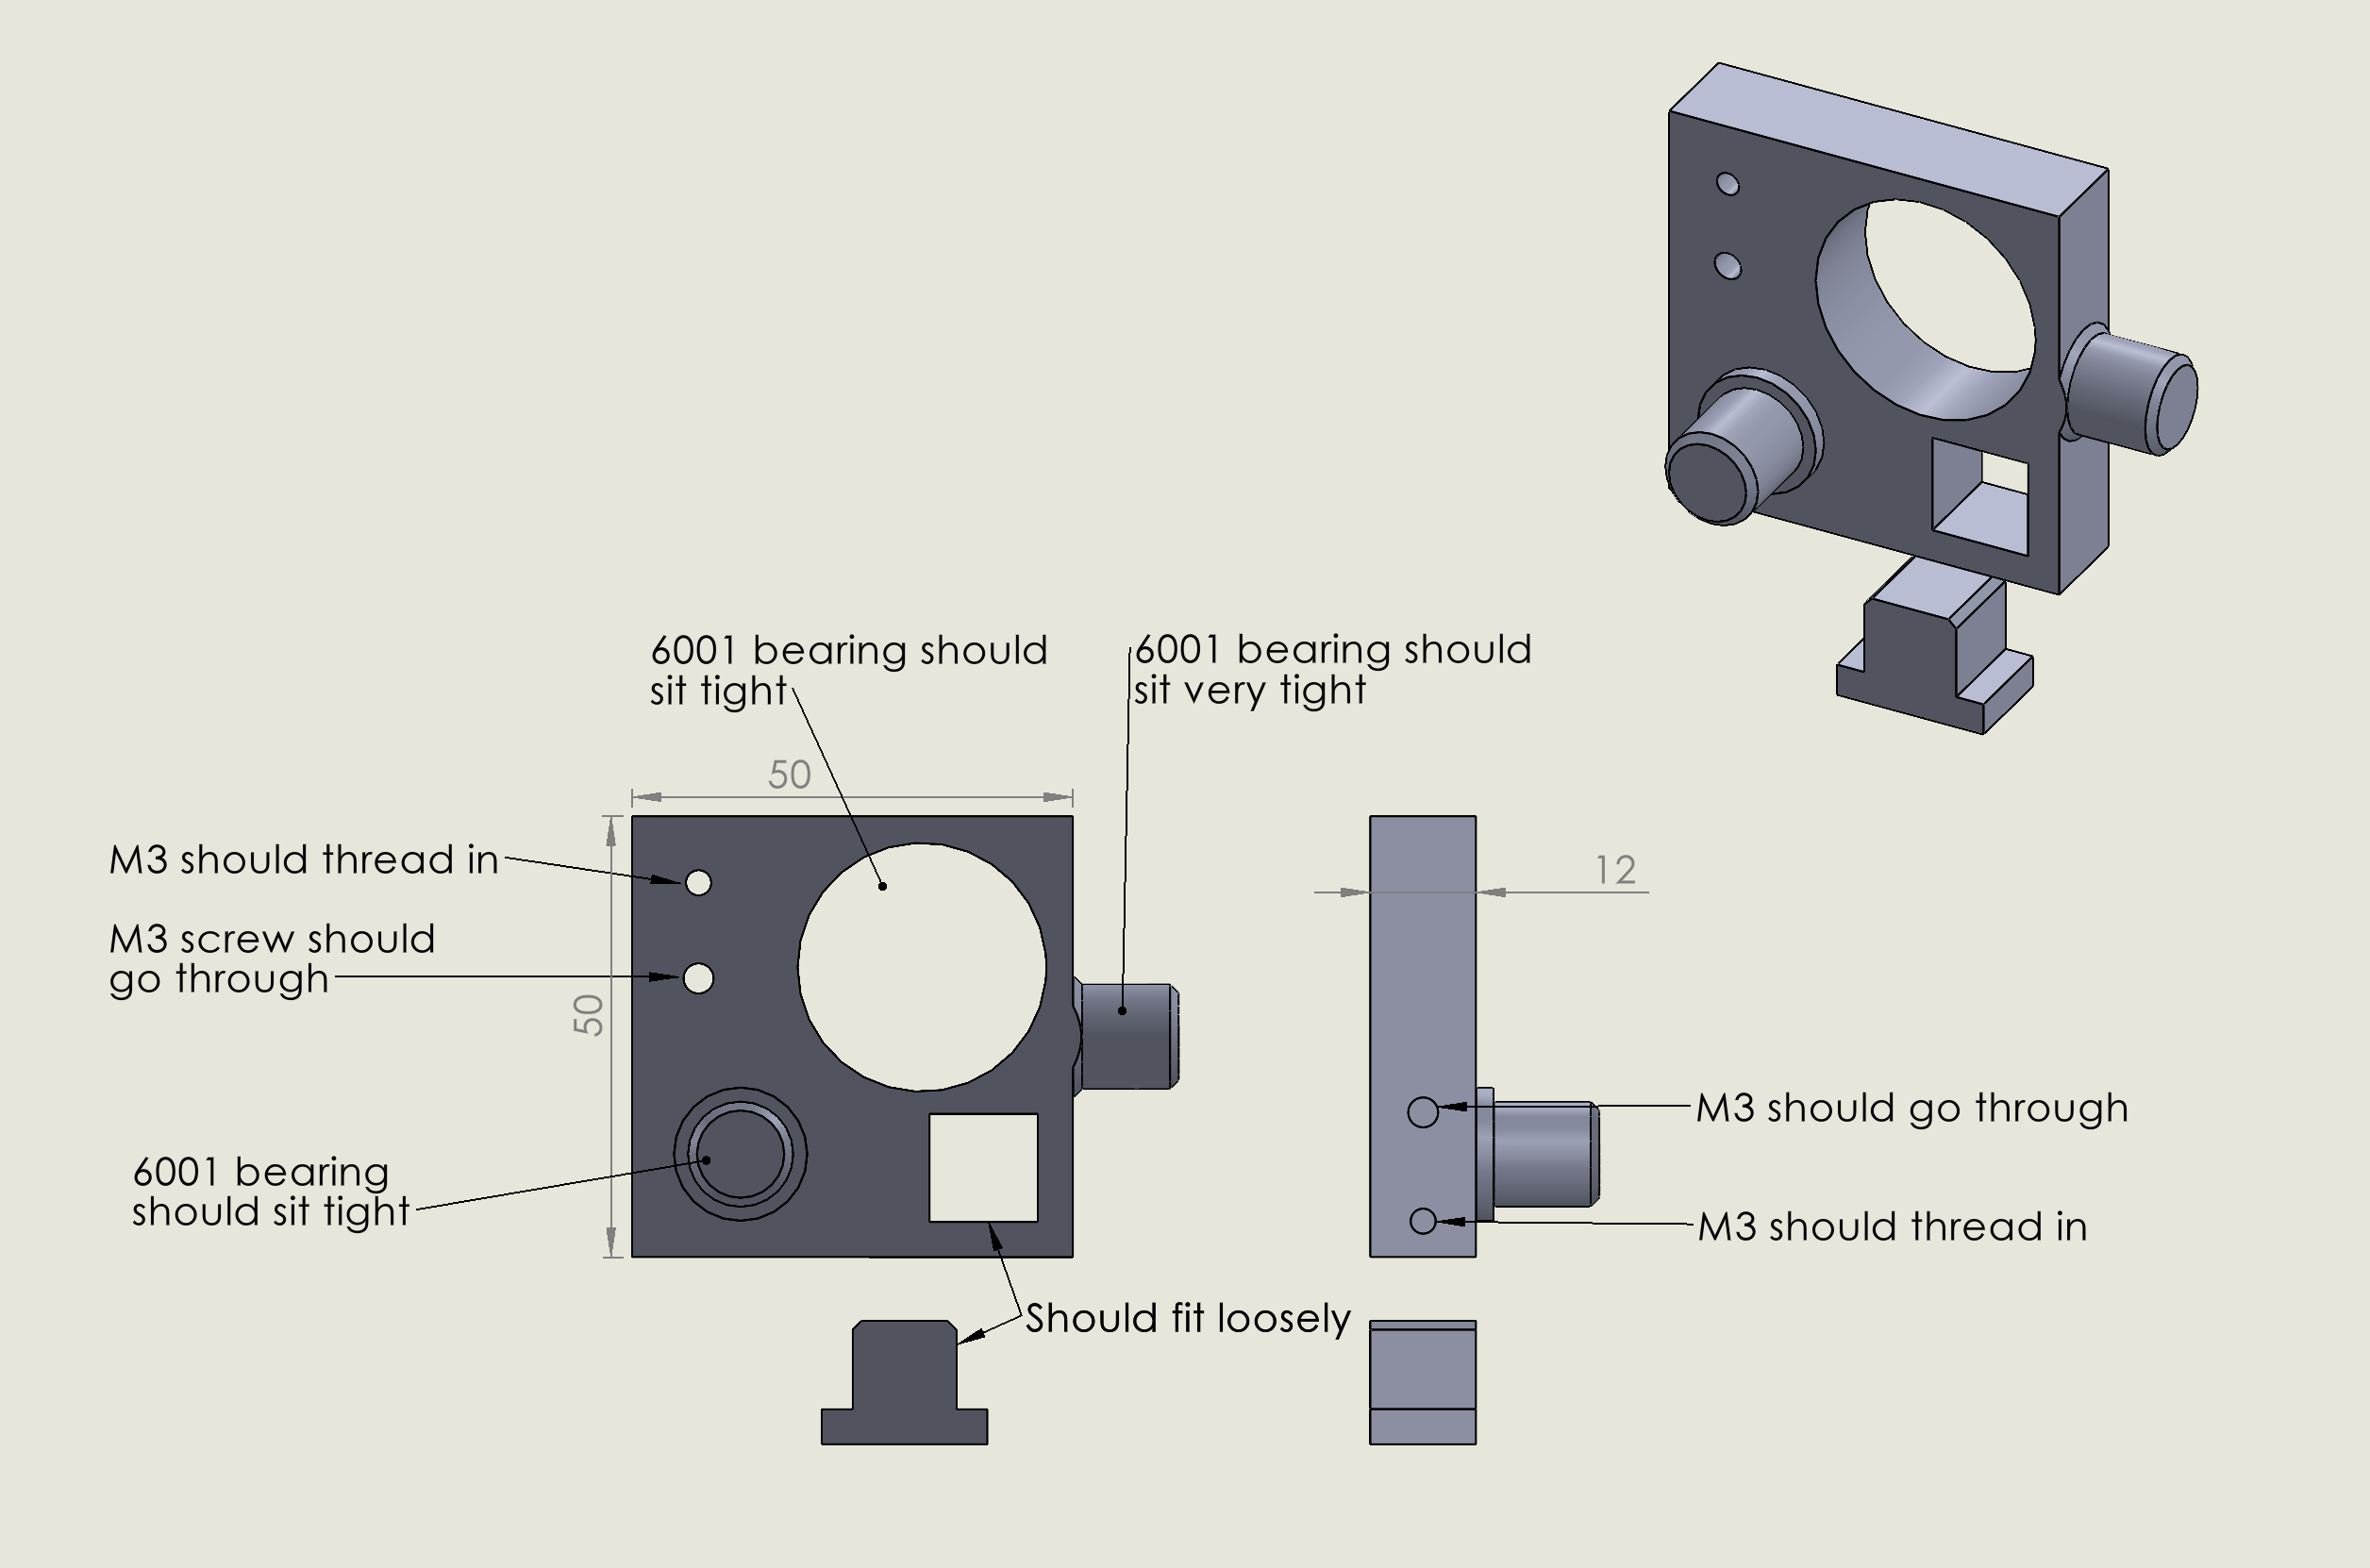
Part: 00_calibration.stl
Print the Calibration part and use the following image to compare your print to the necessary tolerances. A digital caliper is useful.

If youre using Cura, you can use the features “Horizontal Expansion” and “Hole Horizontal Expansion” to alter print- and holesizes without changing your printers calibration.
¶ Recommended Print Settings
Beware of slicing tolerances!
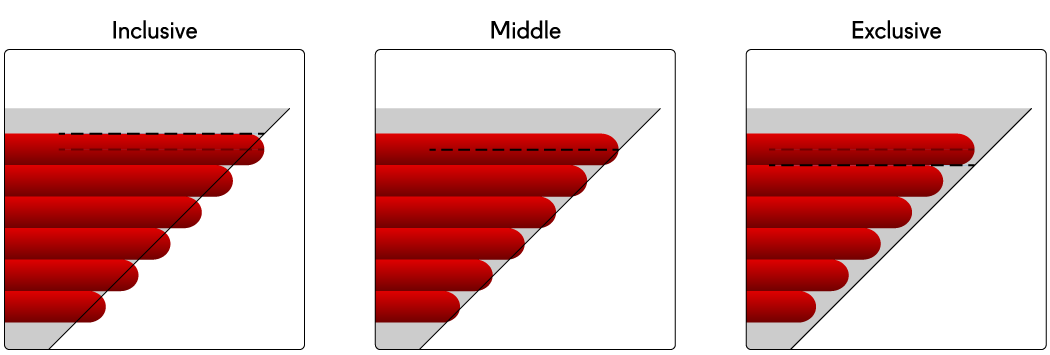
This is something i just recently figured out, but the stock Cura slicing tolerance (found in the Experimental Settings) is "middle", and as such, all parts are optimized for this. However, Prusaslicer uses some sort of "Exclusive" slicing, which will cause any holes to come out slightly oversized. Be sure to slice the parts with Cura set to "Middle" and wherever possible use Cura over Prusaslicer for now.

Parts should be printed using PLA.
Most Parts do not need much precision or need to be very sturdy.
Generally, for all parts you should be using at least 3 Walls (perimeters) and 3 top/bottom layers. 15-20% infill and 0.2mm layer height will be enough.
Most parts can even be printed with a 0.6mm nozzle to save some printing time.
There are a few parts that need special attention though:
- All RA ring parts: Need to be very sturdy, increase the Wall count (consider 7 Walls), especially for the middle part. By using the "Z Seam position" feature in Cura, make sure the Z Seam is not at the outer surface of the ring. This surface needs to be as smooth as possible.
- DEC ring and Poles also need to be sturdy, increase Wall count
- Make sure to print the RA and DEC rings without supports to ensure the holes for the belt don't get clogged
- M14 mounts: print with a lower layer height (0.12-0.16) to get the thread nice
¶ Best Practices
If you are designing your own pieces, checkout the CAD Design Guidelines page for some information on dimensioning things.