OpenAstroTracker (OAT) is an open-source DIY star tracker which can be build from simple, affordable and 3D printed parts. The main intention behind this device is to provide an affordable possibility to enter the world of astrophotography.
¶ You want to build an OAT?
Here are the steps:
- Read this page thoroughly.
- Read the What features and add-ons should I go with? again and think about what you want your OAT to be able to do. Some optional features / addons are not useful depending on how you use your OAT, while others may be invaluable.
Read the following Wiki pages sequentially, as they are in the order you will likely need them:
¶ How it works
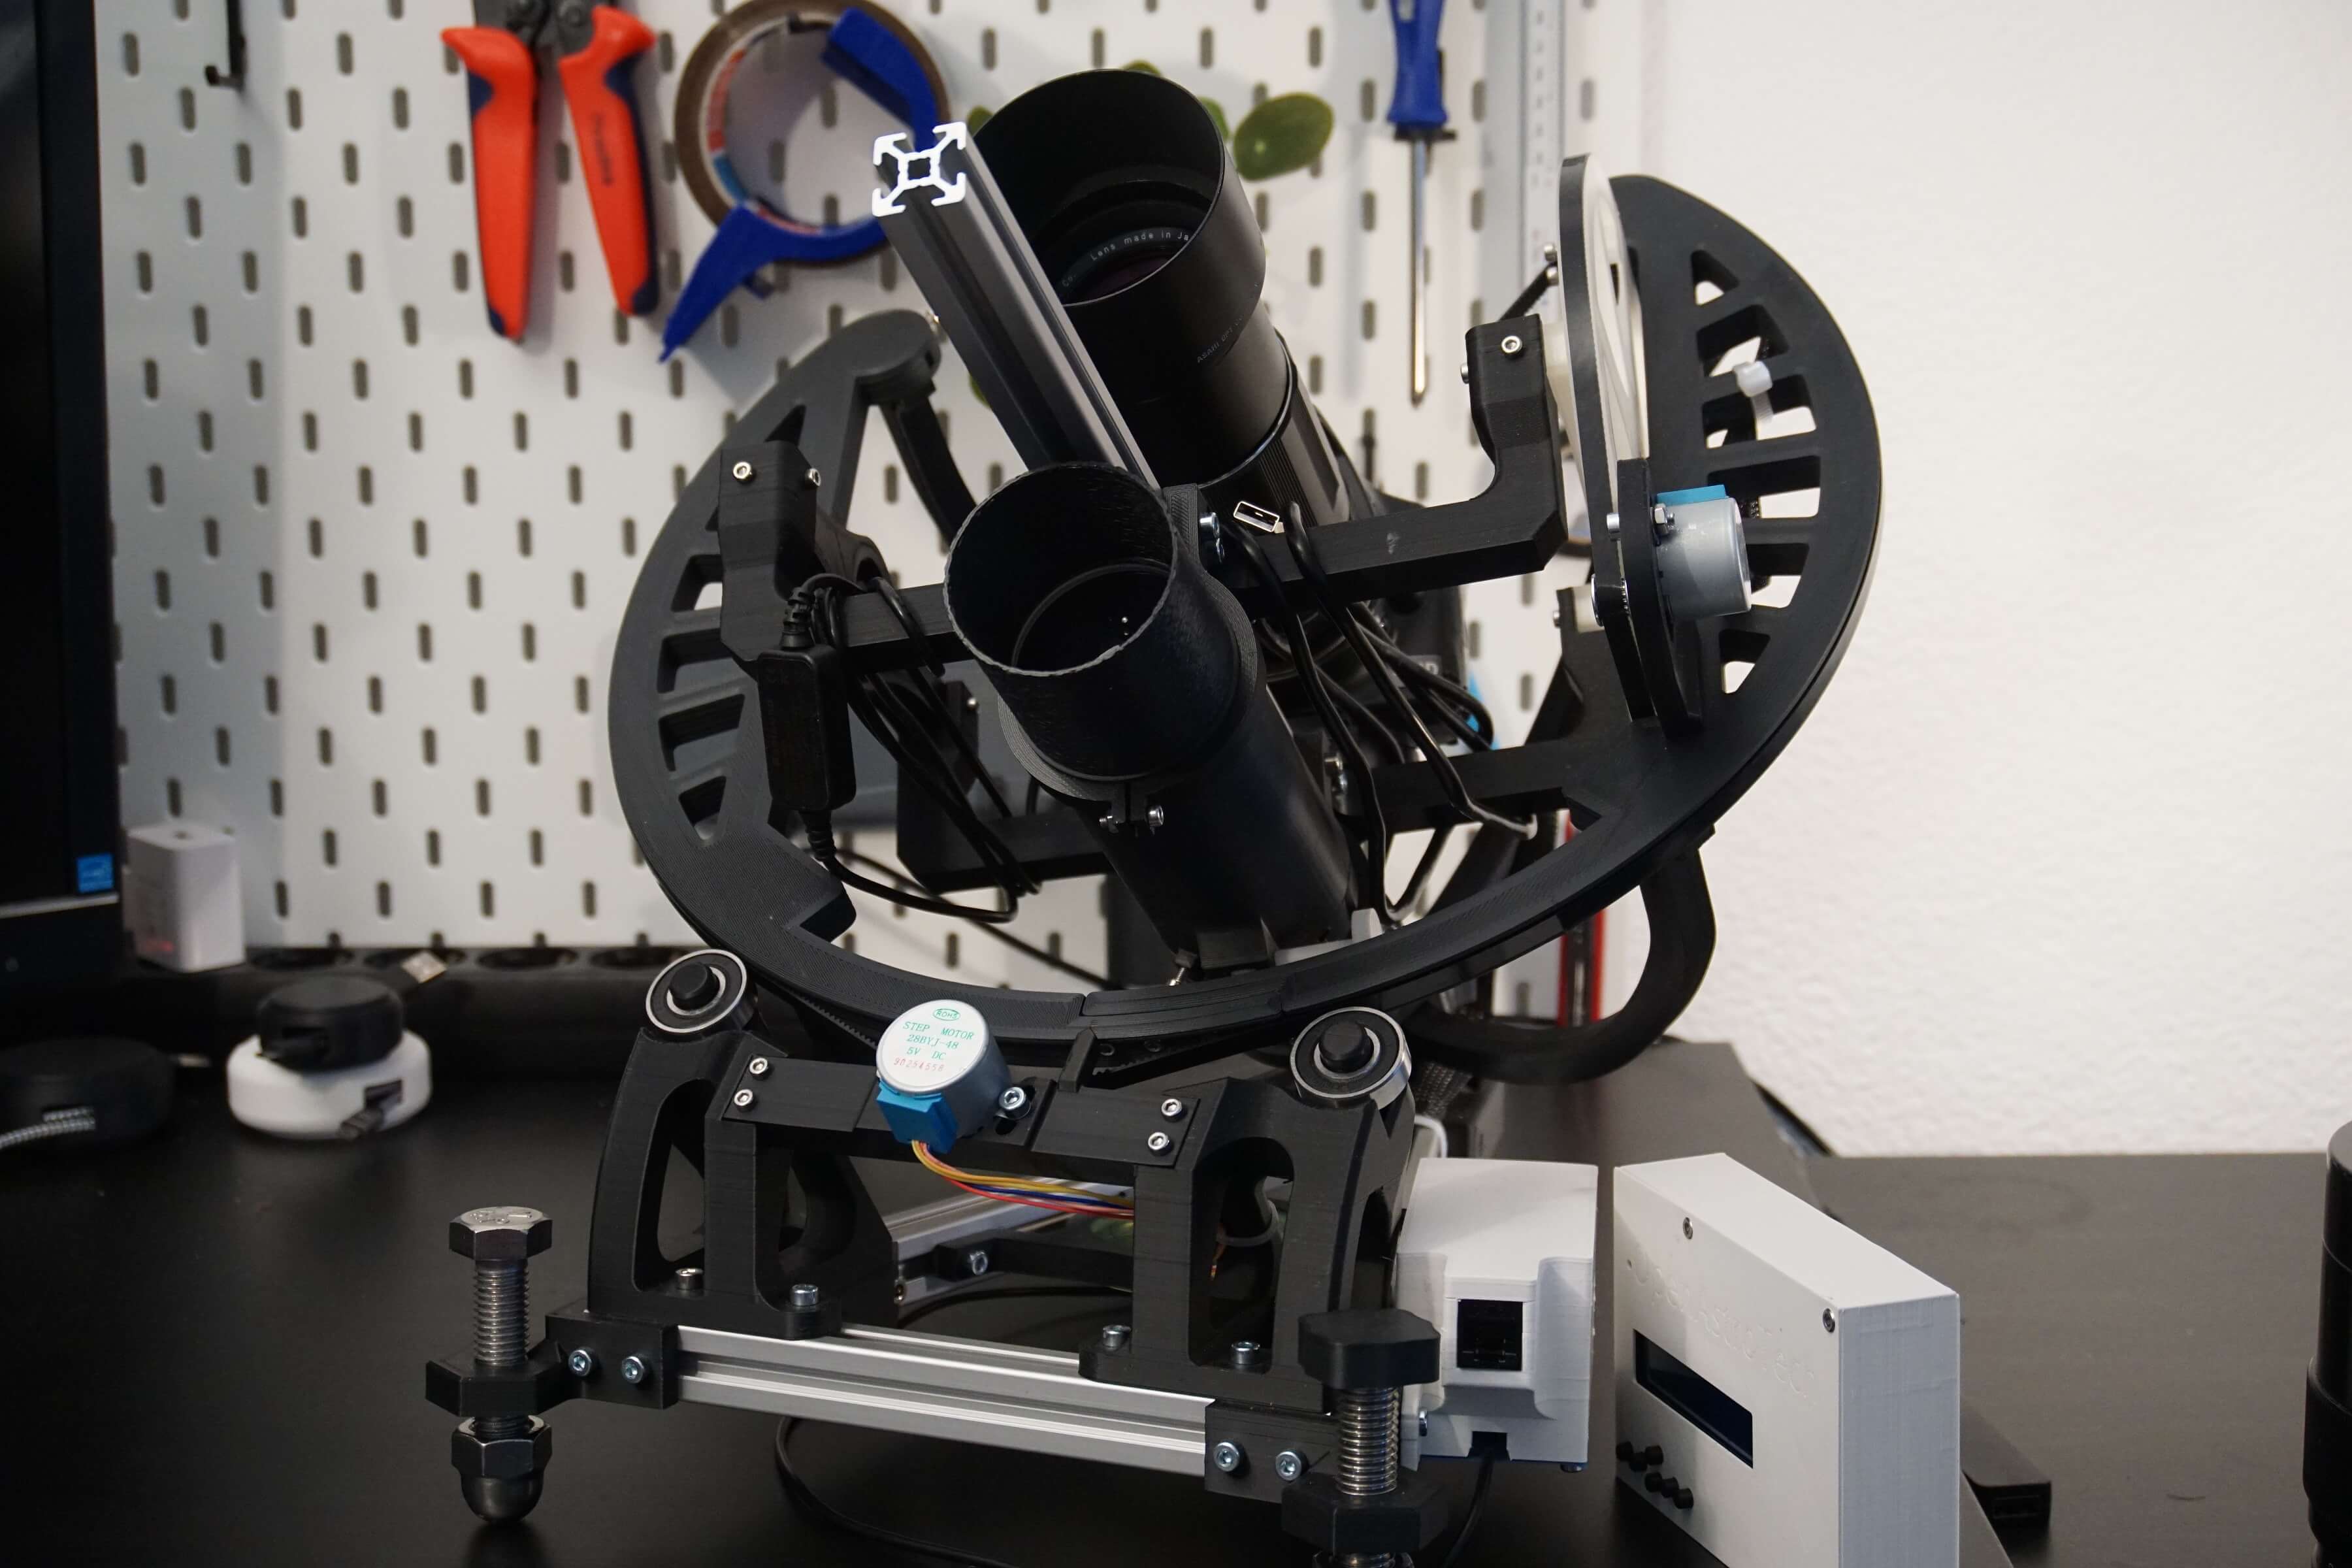
OpenAstroTracker is an equatorial mount which "compensates for Earth's rotation by having one rotational axis parallel to the Earth's axis of rotation". You can mount a camera (mostly a DSLR or DSLM) on top of it and it rotates with the same speed as our earth rotation in order to remove stars movement relatively to the camera and allow longer exposures this way. The mount is being controlled by an Arduino. The Arduino is controlling multiple stepper motors which in turn rotate the camera mount. The mount provides multiple options for control: LCD Keypad, USB Serial connection, WiFi. Latter two enable remote control with special astrophotography software based either on the LX200 protocol, ASCOM or INDI platforms.
Since the second version of OAT (aluminium base) it is very easy to extend the tracker by various add-ons:
- OpenAstroGuider, a DIY camera and lens which tracks movements of the tracker and allows the controller software to correct tracking issues thus drastically increasing maximal exposure time and image quality.
- Built in GPS module automates several setup steps by parsing current location and time from GPS satellites.
- Digital Level allows a very convenient way of leveling your tracker in order to improve polar alignment, tracking precision and GoTo precision.
- AutoPA is a bigger add-on which is able to automate the polar alignment process by moving whole tracker and using plate solving to align the tracker to the celestial pole.
- Many others to come...
¶ Features
Even thought the project is still under development, OpenAstroTracker already provides a lot of features which can be otherwise found only on very expensive mounts which can cost you thousands of dollars.
¶ Remote Control
OpenAstroTracker firmware implements the Meade LX200 protocol. This allows you to use nearly any popular astrophotography software out there to control the mount remotely. In general this enriches the feature set of the standalone tracker by many other features which were implemented into tools like NINA, Sequence Generator Pro, Stellarium, KStars etc. If you use the ESP32 board, you can connect and control the tracker from your mobile devices via SkySafari Plus (check the App store).
¶ GoTo
With the help of the GoTo feature you can let the mount point on the celestial object of your interest automatically. Without GoTo you would need to make multiple photos of the night sky and step by step approach your target. With GoTo you can simply enter your target in the LCD menu or control software and the mount will align itself to point towards this target.
¶ Polar alignment helpers
The quality of your images will be mostly dependent on the quality of your polar alignment. In order to help you, OpenAstroTracker already includes several procedures to assist you with rough or precise polar alignment procedure.
¶ Add-ons
There are already some awesome and very helpful add-ons out there which improve the tracking quality or just make usage of this tracker much more convenient. But there is still a lot to come!
¶ WiFi
Builds based on an ESP32 board allow wireless control of the mount while keeping support for serial connection over a USB cable.
ESP32 is not the primary platform. While it is officialy supported and functional, it is not tested as much as the MKS or RAMPS. Also we don't recommend starting with it if you are a complete beginner. WiFi requires additional setup and adds potential issues.
The ESP32 also does not have the same feature set as the MKS or RAMPS due to its limited pins available.
¶ Hardware
The tracker can be built in a few variations, some are due to older ways things were done, some are budget-dependent, etc. Some depend on your targeted usage.
¶ The Frame
There are variations of the frame that you can choose from, depending on budget and requirements.
- Aluminium base, Aluminium camera mount - the base shape is a aluminium extrusion triangle with printed connecting parts. This version is the most stable and has the least flex.
- Printed base, printed camera mount - all parts are 3D printed. This causes the tracker to have a lot of play and flex, which means tracking is better suited for wide field shots.
- Printed base, Aluminium camera mount - the camera mount is made stiffer by using 2020 aluminium extrusion and easier to mount the camera to (supports a quick release plate, for example).
We strongly recommend you choose the first option, the rigidity and precision achievable with this frame is much better than the other two.
¶ The Stepper Motors and Drivers
You have two (officially supported) choices for the motors themselves.
¶ NEMA17 steppers
The tracker moved onto these steppers because they are more powerful and do not have a gearbox, but achieve higher precision through microstepping and generally perform significantly better (with the TMC drivers). They are more expensive, they require more power and they require holding power (so even when nothing is moving, the motor draws power to stay in position). They also require a driver board and there are more variations. We strongly recommend the Bigtreetech TMC2209 drivers. There is no (or neglectable) backlash or periodic error since there's no gears.
NEMA steppers are the strongly recommended option with TMC2209 drivers unless you're on a very tight budget or you're sure you'll never use more than approx. 50mm lenses. They are significantly better in every way than the following option.
¶ Modified 28BYJ-48 steppers
Originally the tracker was built with these very cheap steppers and ULN driver boards. This option is no longer supported and the steppers need to be modified to be bipolar and use the same driver board as the NEMAs. These steppers are very low cost and use an internal gearbox to get reasonably small steps without using microstepping. They use very little power and do not require much holding power (since the gearbox essentially does not allow the motor to turn). The gearbox does introduce some inaccuracies like periodic error (gear inaccuracies) and backlash (gear play/slop which is significant when changing direction (or during a weight transfer while tracking).
Because of these inaccuracies it is not recommended to use much more than 100mm lenses with these steppers.
¶ The Electronics
We support three main control boards. Which one you choose depends mainly on how you want to use the tracker.
| Type | Description | LCD | Standalone/Laptop | Connectivity |
|---|---|---|---|---|
| MKS Gen L | Recommended board for new builds. It has Pololu-style driver slots and has all wiring internal to the board to simplify construction. Needs 12V power. | Yes | Standalone & Laptop | USB |
| RAMPS | It has Pololu-style driver slots and but requires some additional wiring to utilize all features for improved performance. Needs 12V power. | Yes | Standalone & Laptop | USB |
| ESP32 | Requires external driver boards for both stepper types. Capable of control via iPad/iPhone/Android over Wifi. | No | Laptop/Wifi control | USB or Wifi |
¶ Software
¶ The Controlling Software
The Arduinos that are part of the tracker you can think of as the brain for the device. You now have the choice of software to control the tracker. You can use:
- A Windows laptop running OATControl connected via USB
- OAT Simulation to view the OAT mount.
- A PC laptop running any Astro program, such as Stellarium, APT, SGP, NINA etc, using (supplied) ASCOM drivers connected via USB. What is ASCOM?
- An iOS/Android device running SkySafari+ connected via Wifi (ESP32 only)
- A Raspberry Pi running Astroberry connected via USB to the tracker and controlled from a web browser on the same network.
- others....
¶ The Image Capture Software
In addition to controlling the mount, you also need to control your camera. Although you could also use an intervalometer without anything else, using a laptop really brings out OAT's and your camera's full potential.
The options open to you depend on the camera you wish to use. Some cameras are supported by special proprietary software packages and you might be forced to use those. For the two major DSLR producers, you have way more options, as many program support these two out of the box.
For beginners, the BackyardNIKON or BackyardEOS programs on PC are great. They allow you to control all aspects of your camera and stream the view to your laptop screen, which is particularly useful for polar alignment (part of setup you need to do every session). They also allow you to plan an imaging session (take n pics with these camera params, then take m pics with these etc.)
Sequence Generator Pro is another more advanced PC program that allows you to control all your gear from one place, plan complete imaging sessions over multiple nights, etc. Very full featured and well supported.
NINA is another advanced imaging Software that is, unlike SGP, free and OpenSource.
¶ The Image Processing Software
After you've captured all your pictures, you'll need to process them. There are quite a few options available to you.
-
DeepSkyStacker - Free, but capable program. Processes Darks, Flats, Lights, etc. Stacking only, no editing.
-
Siril - Free and Cross-platform, can stack and edit.
-
PixInsight - The Rolls-Royce of image processors, both in features and price. Very steep learning curve. Best results.
-
AutoStakkert & Registaxx - These are programs used for stacking Planetary images only. As the achievable focal length for OpenAstroTracker is quite short for planets, use one of the other options.
¶ What features and add-ons should I go with?
This depends on how you intend to use the OAT. There are a number of scenarios that determine which features and add-ons make sense and which don't.
¶ I will run it standalone with no laptop or other computer
- You should definitely get the LCD screen.
- You'll need the bubble level.
- While the GPS is useful, with an LCD, memory becomes too scarce, so you'll need to enter your location via the computer you use to flash the firmware or the LCD.
- The guider is useless for you.
- AutoPA can be used but is not worth it.
- Focuser can be used, but is not required.
¶ I will run it attached to a laptop, taking short exposures with lenses less than 150mm
- You don't really need the LCD screen.
- You don't need a level at all.
- The GPS is not useful.
- The guider is not needed, but could be used. If you do want to guide, TMC2209 drivers and NEMA17 steppers are a must.
- AutoPA could be added, but is not necessary.
- Focuser is recommended, but is not required.
¶ I will run it attached to a laptop, taking long exposures or working with lenses more 150mm
- You don't really need the LCD screen.
- You don't need a level at all.
- The GPS is not useful.
- The guider is a must.
- TMC2209 drivers and NEMA17 steppers are a must.
- AutoPA is strongly recommended.
- Focuser is strongly recommended. If instead you choose to focus manually, a Bahtinov Mask can also be used to achieve precise focus.