¶ OAM Blind Joints and Taps
¶ Taps
The necessary locations for threads are shown in the images in the Drilling Blind Joints section.
Additionally you will need to prepare the following:
- 6x 100mm extrusions tapped on both ends. These are named EX-G.
- 2x 100mm extrusions tapped on one end. These are names EX-H
- The 4040 extrusion needs to be tapped on one side, two diagonal holes.
¶ 6mm Extrusions
If you are using the B-Type style with the special 6mm center hole, you don't have to tap them. You can just screw a M6 bolt into them and it will cut it's own thread. If you are using zink-plated M6 bolts, take one of them as a sacrificial bolt to make your threads. It's possible that the plating comes off while screwing it into the untapped hole, which would make corrosion very likely. If you are using stainless steel M6 bolts, you can just screw them in.
¶ 5mm Extrusions
If you are using extrusions with a 5mm center hole, you will have to use a M5 tap.
You can either hand or machine tap the extrusions with a drill. In either case, it is recommended to use a bit of grease preferably, or oil if no grease is at hand. Simply apply a bit of grease to the tap before starting to cut.
We recommend using a hand tap instead of a power tool, like a drill. It is safer and much likelier to succeed.
If you do decide to tap with a drill, put the torque/clutch on a very low setting. A tap should never be forced in, it will break otherwise. Getting a broken tap out of a hole is VERY annoying.
While cutting the thread, when the resistance gets high, stop and reverse the tap by half a turn to break the edge its forming, then continue on with another forward. Go slow, without force and try to cut as straight as possible. Putting the extrusion in a vice or clamp helps a lot. Doing one turn forward, half a turn back, one (or one and a half) turn(s) forward, etc. works very reliably.
When the cut is done, remove the tap just as slow and carefully. Don't remove it with full speed.
¶ Drilling Blind Joints
¶ Preparations
You'll need:
- a drill
- a drill bit, 5.5 or 6mm
- coolant, ethanol or water is fine for thin aluminum
- printed drill jig
- a vice or clamp
- a sacrificial piece of wood (optional)
After printing the Jig, please make sure that it has the correct length. It should be 205mm long from end to end. If your Jig is not within +/- 1mm of this, please check your printers calibration before proceeding.
¶ Drilling
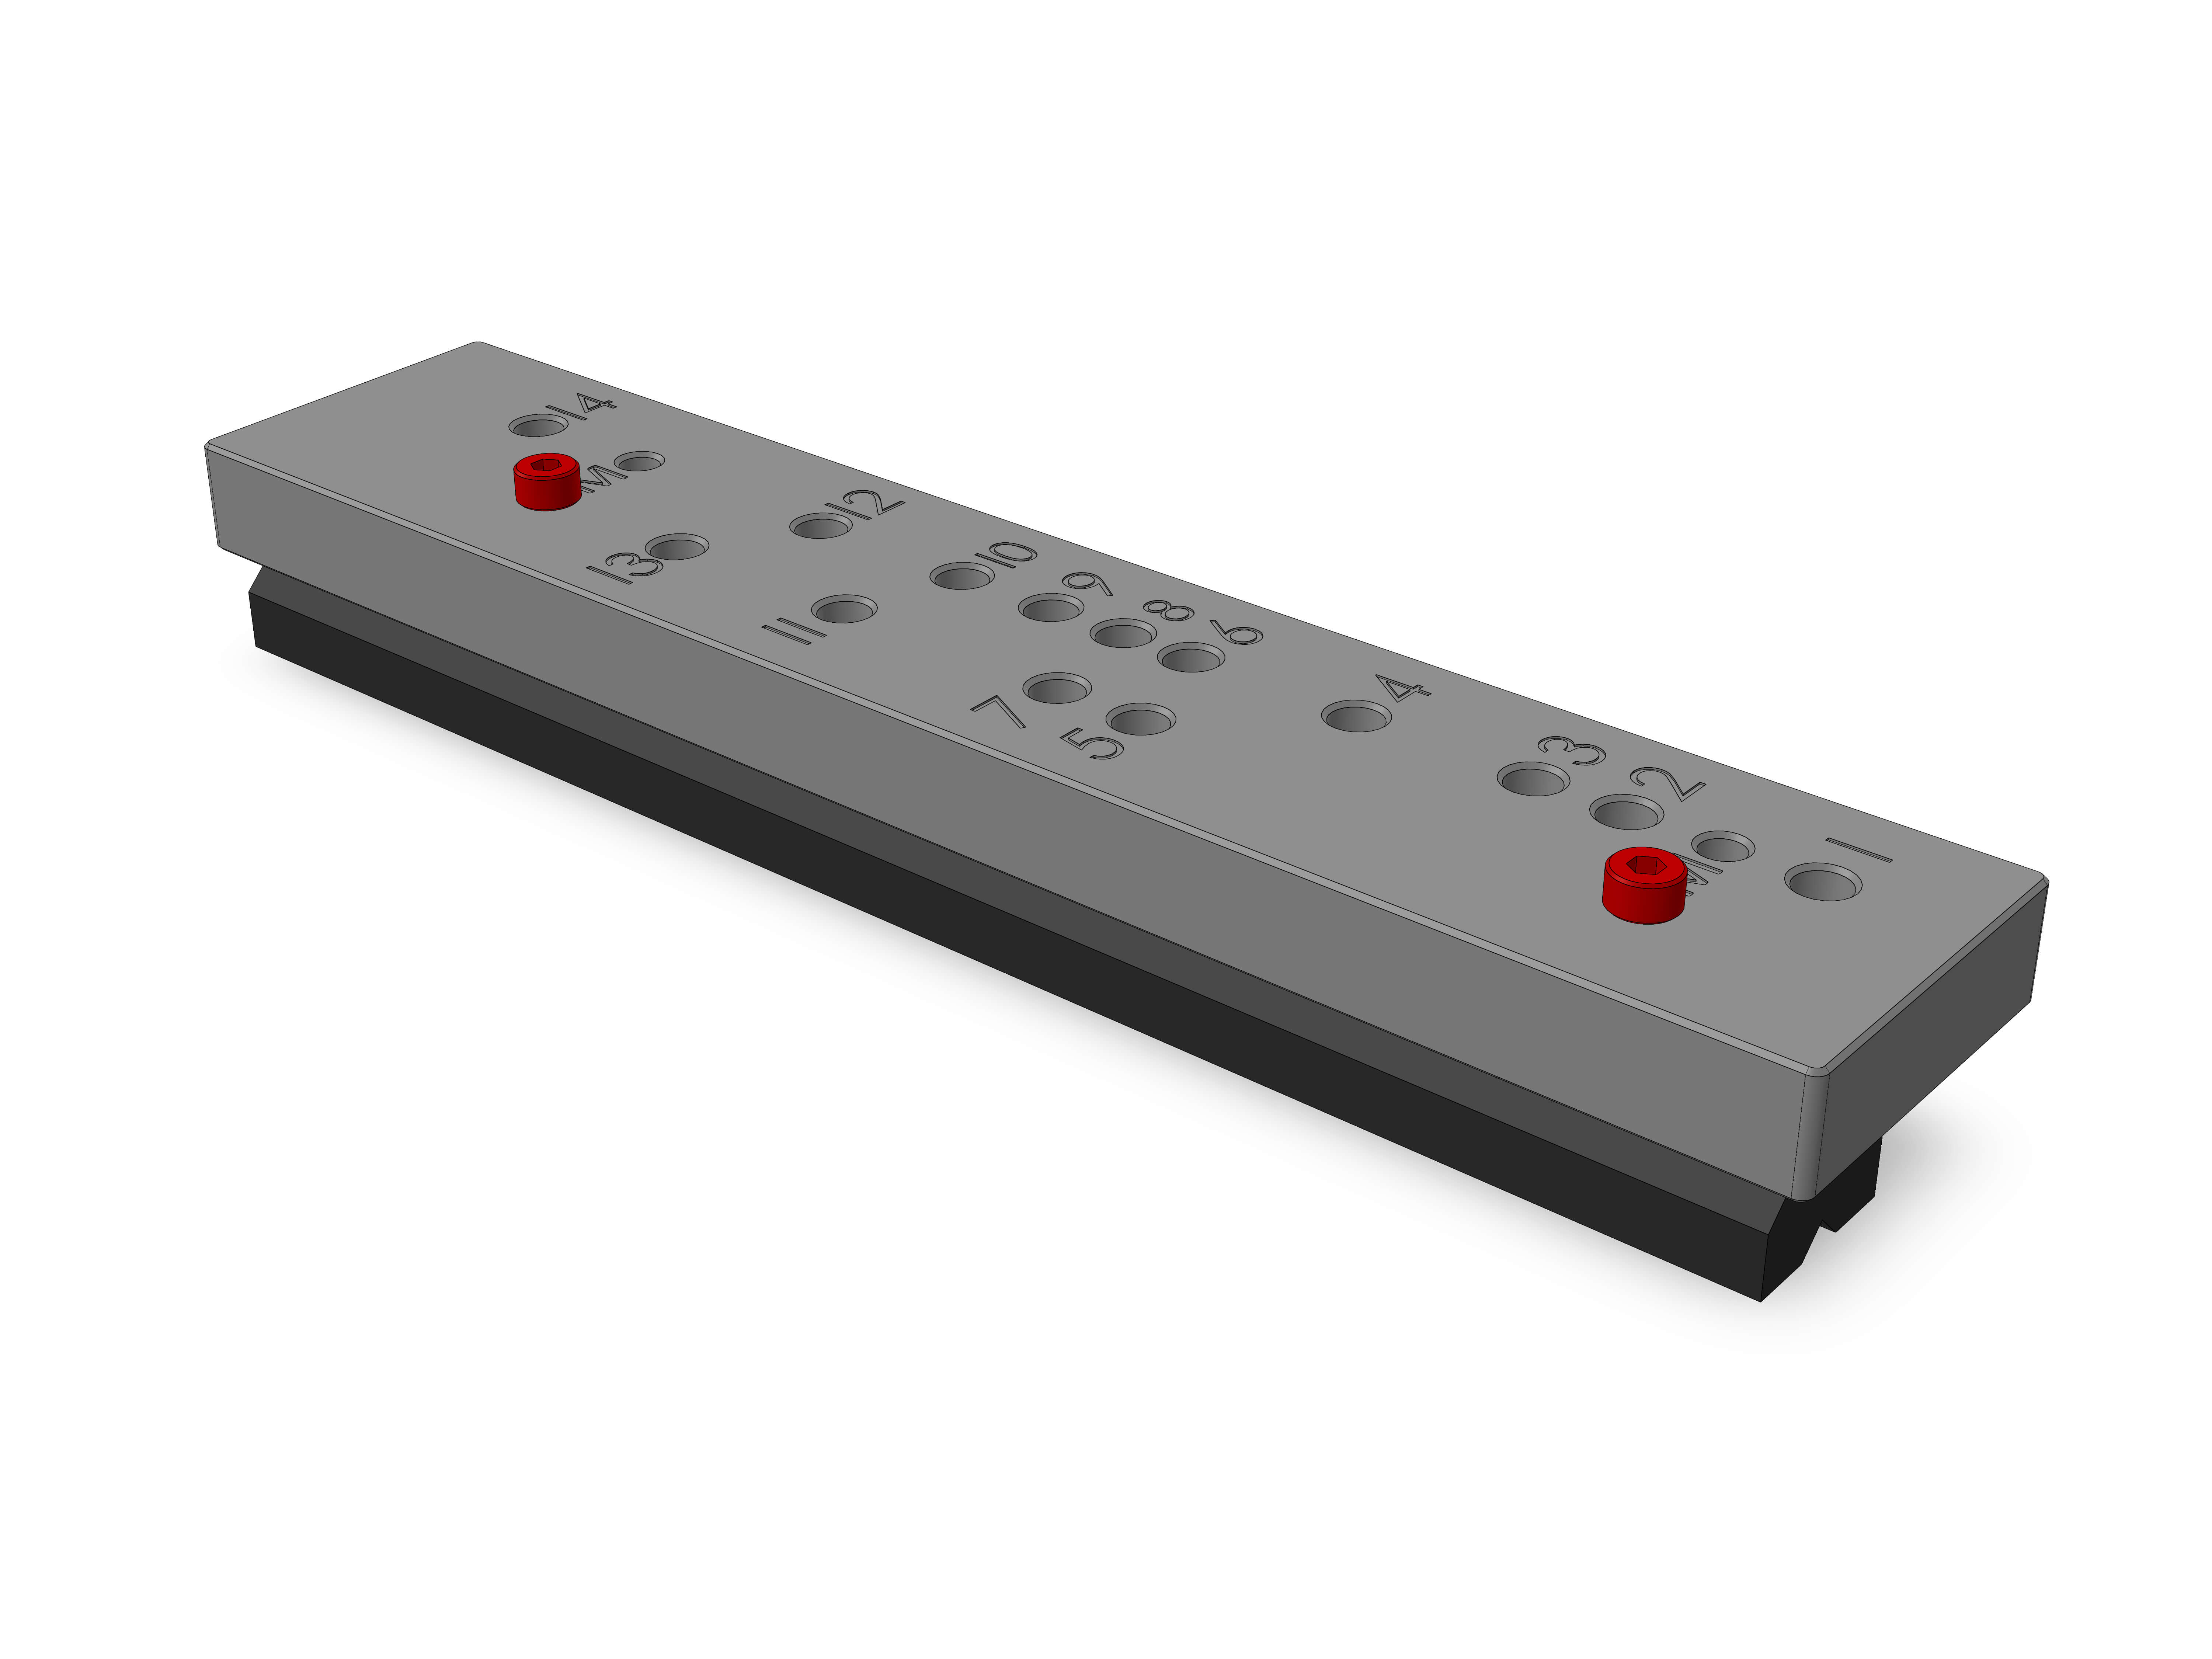
Use the printed jig for aligning the holes. The jig has several numbered holes to help.
As an example on how to use the Jig, we'll look at the extrusion for DEC:
¶ EX-A : DEC extrusion
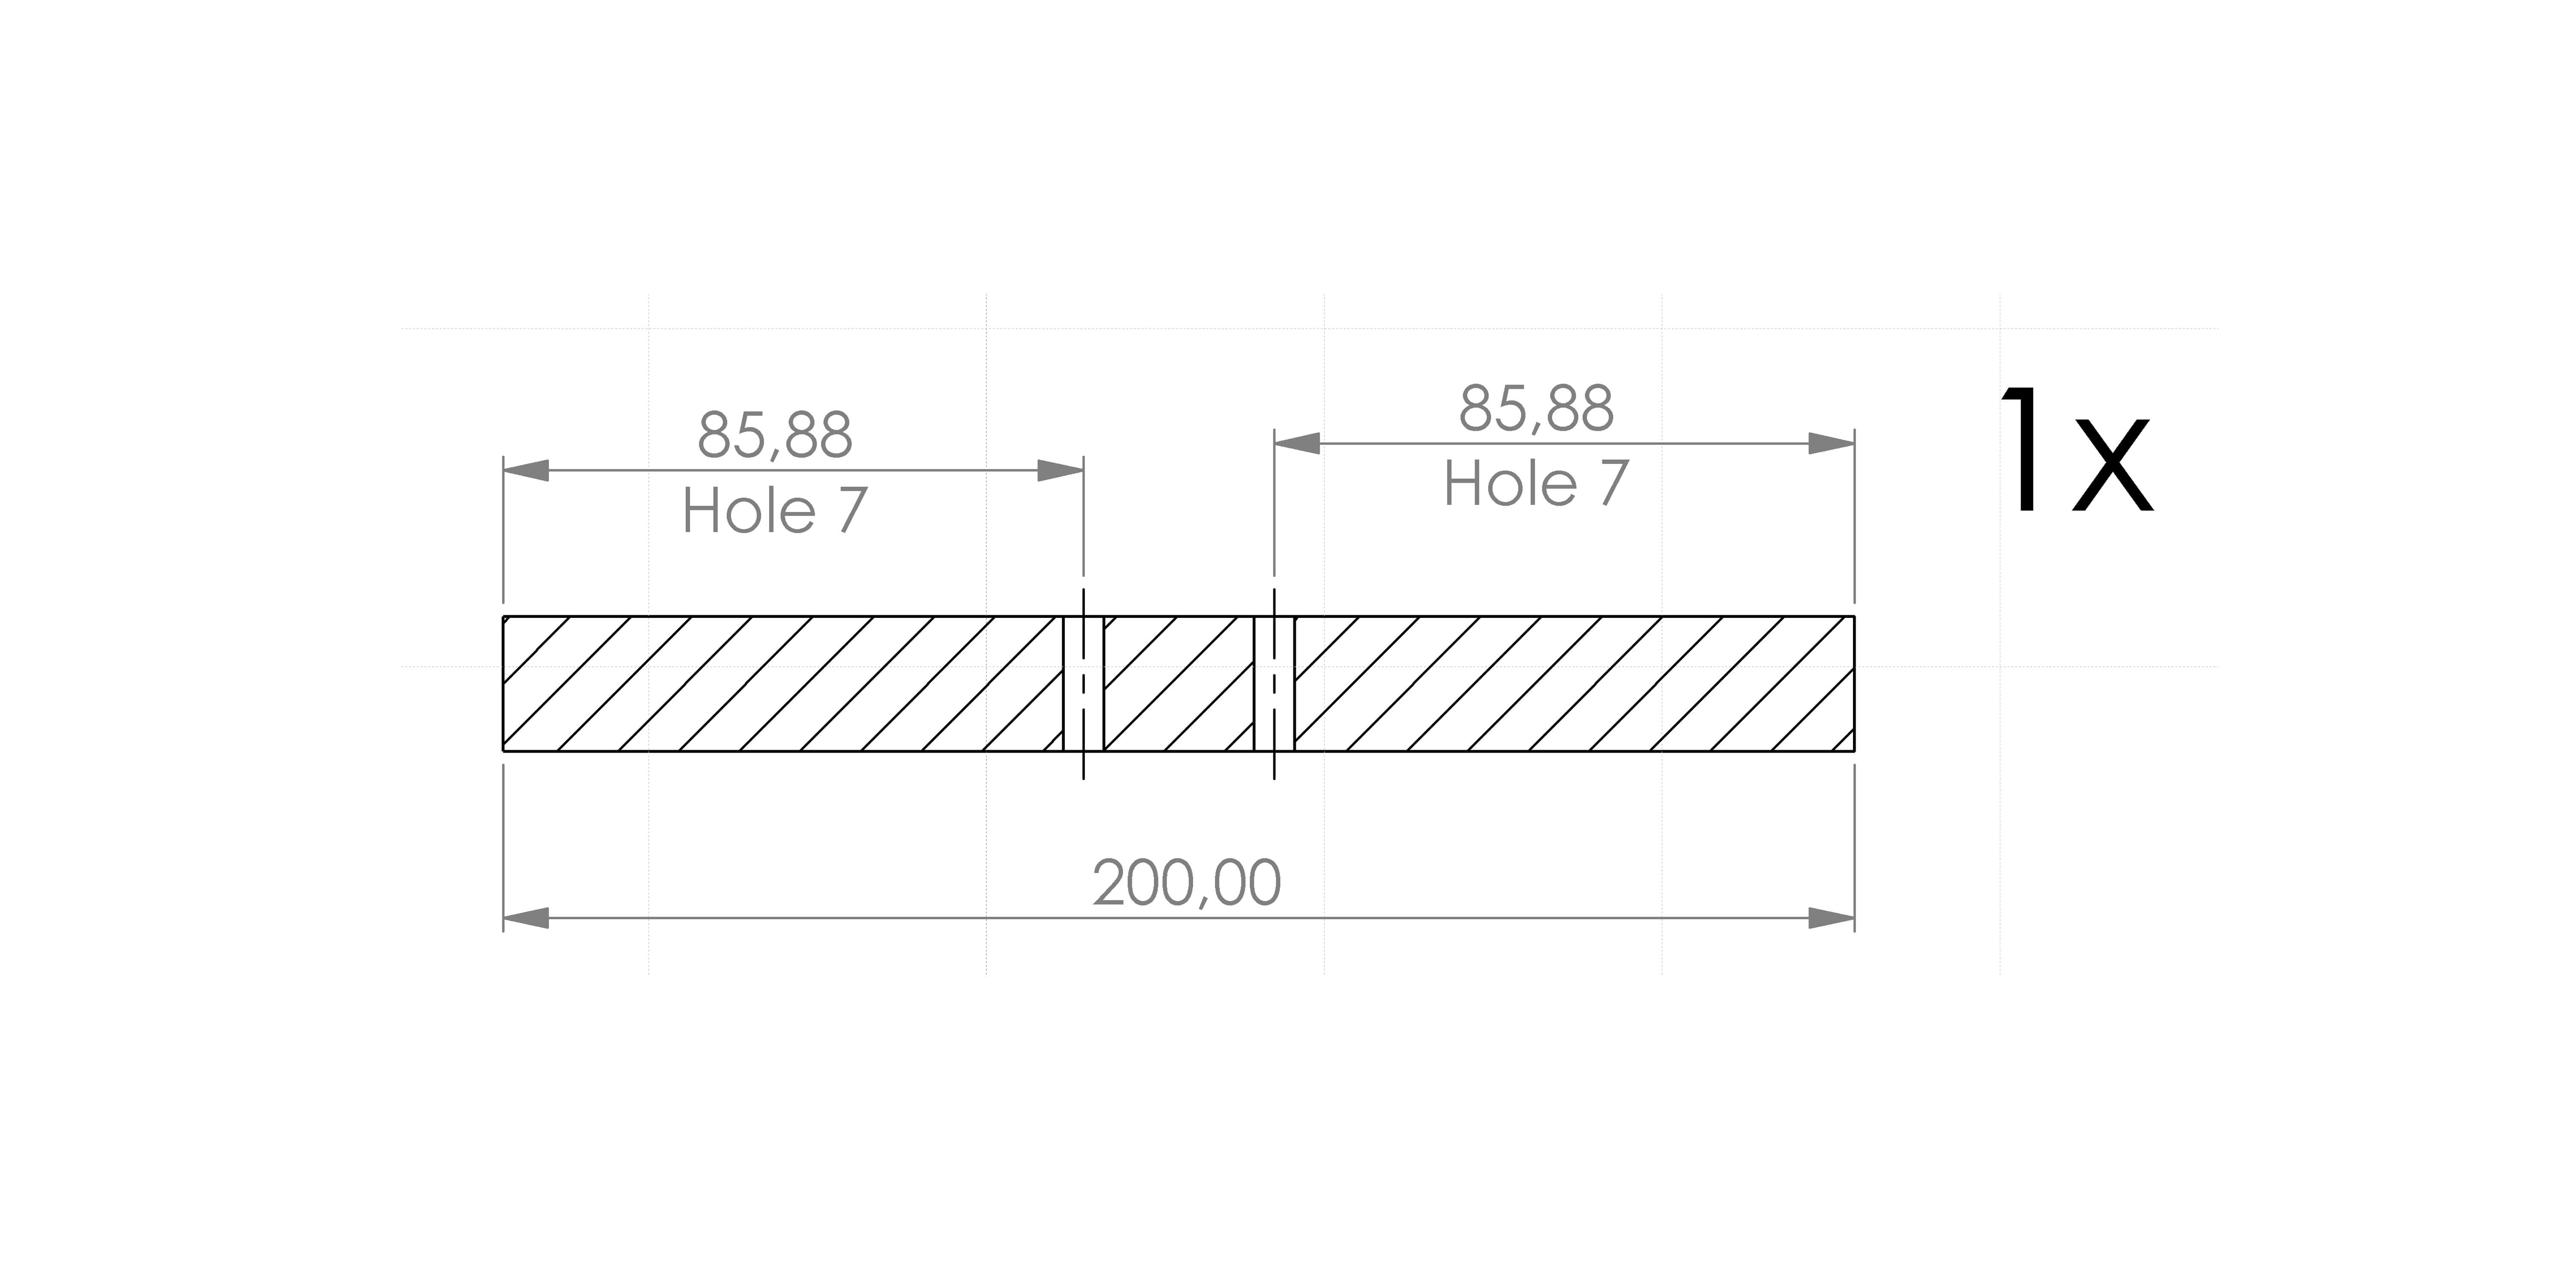
According to the image, you need to drill two holes on a 200mm 2020 extrusion.
Since the two holes have the same distance from the edge, the same hole on the Jig will be used, but the extrusion will be flipped in the Jig. The side from which the measurement in the drawing is done, indicates from which side you will have to align the jig.
Attach the Jig to the extrusion with 2 M4x12 and M4 Tnuts. Use the holes marked "M" for this. Since the hole 7 is on the left side, attach the extrusion on the left side aswell.
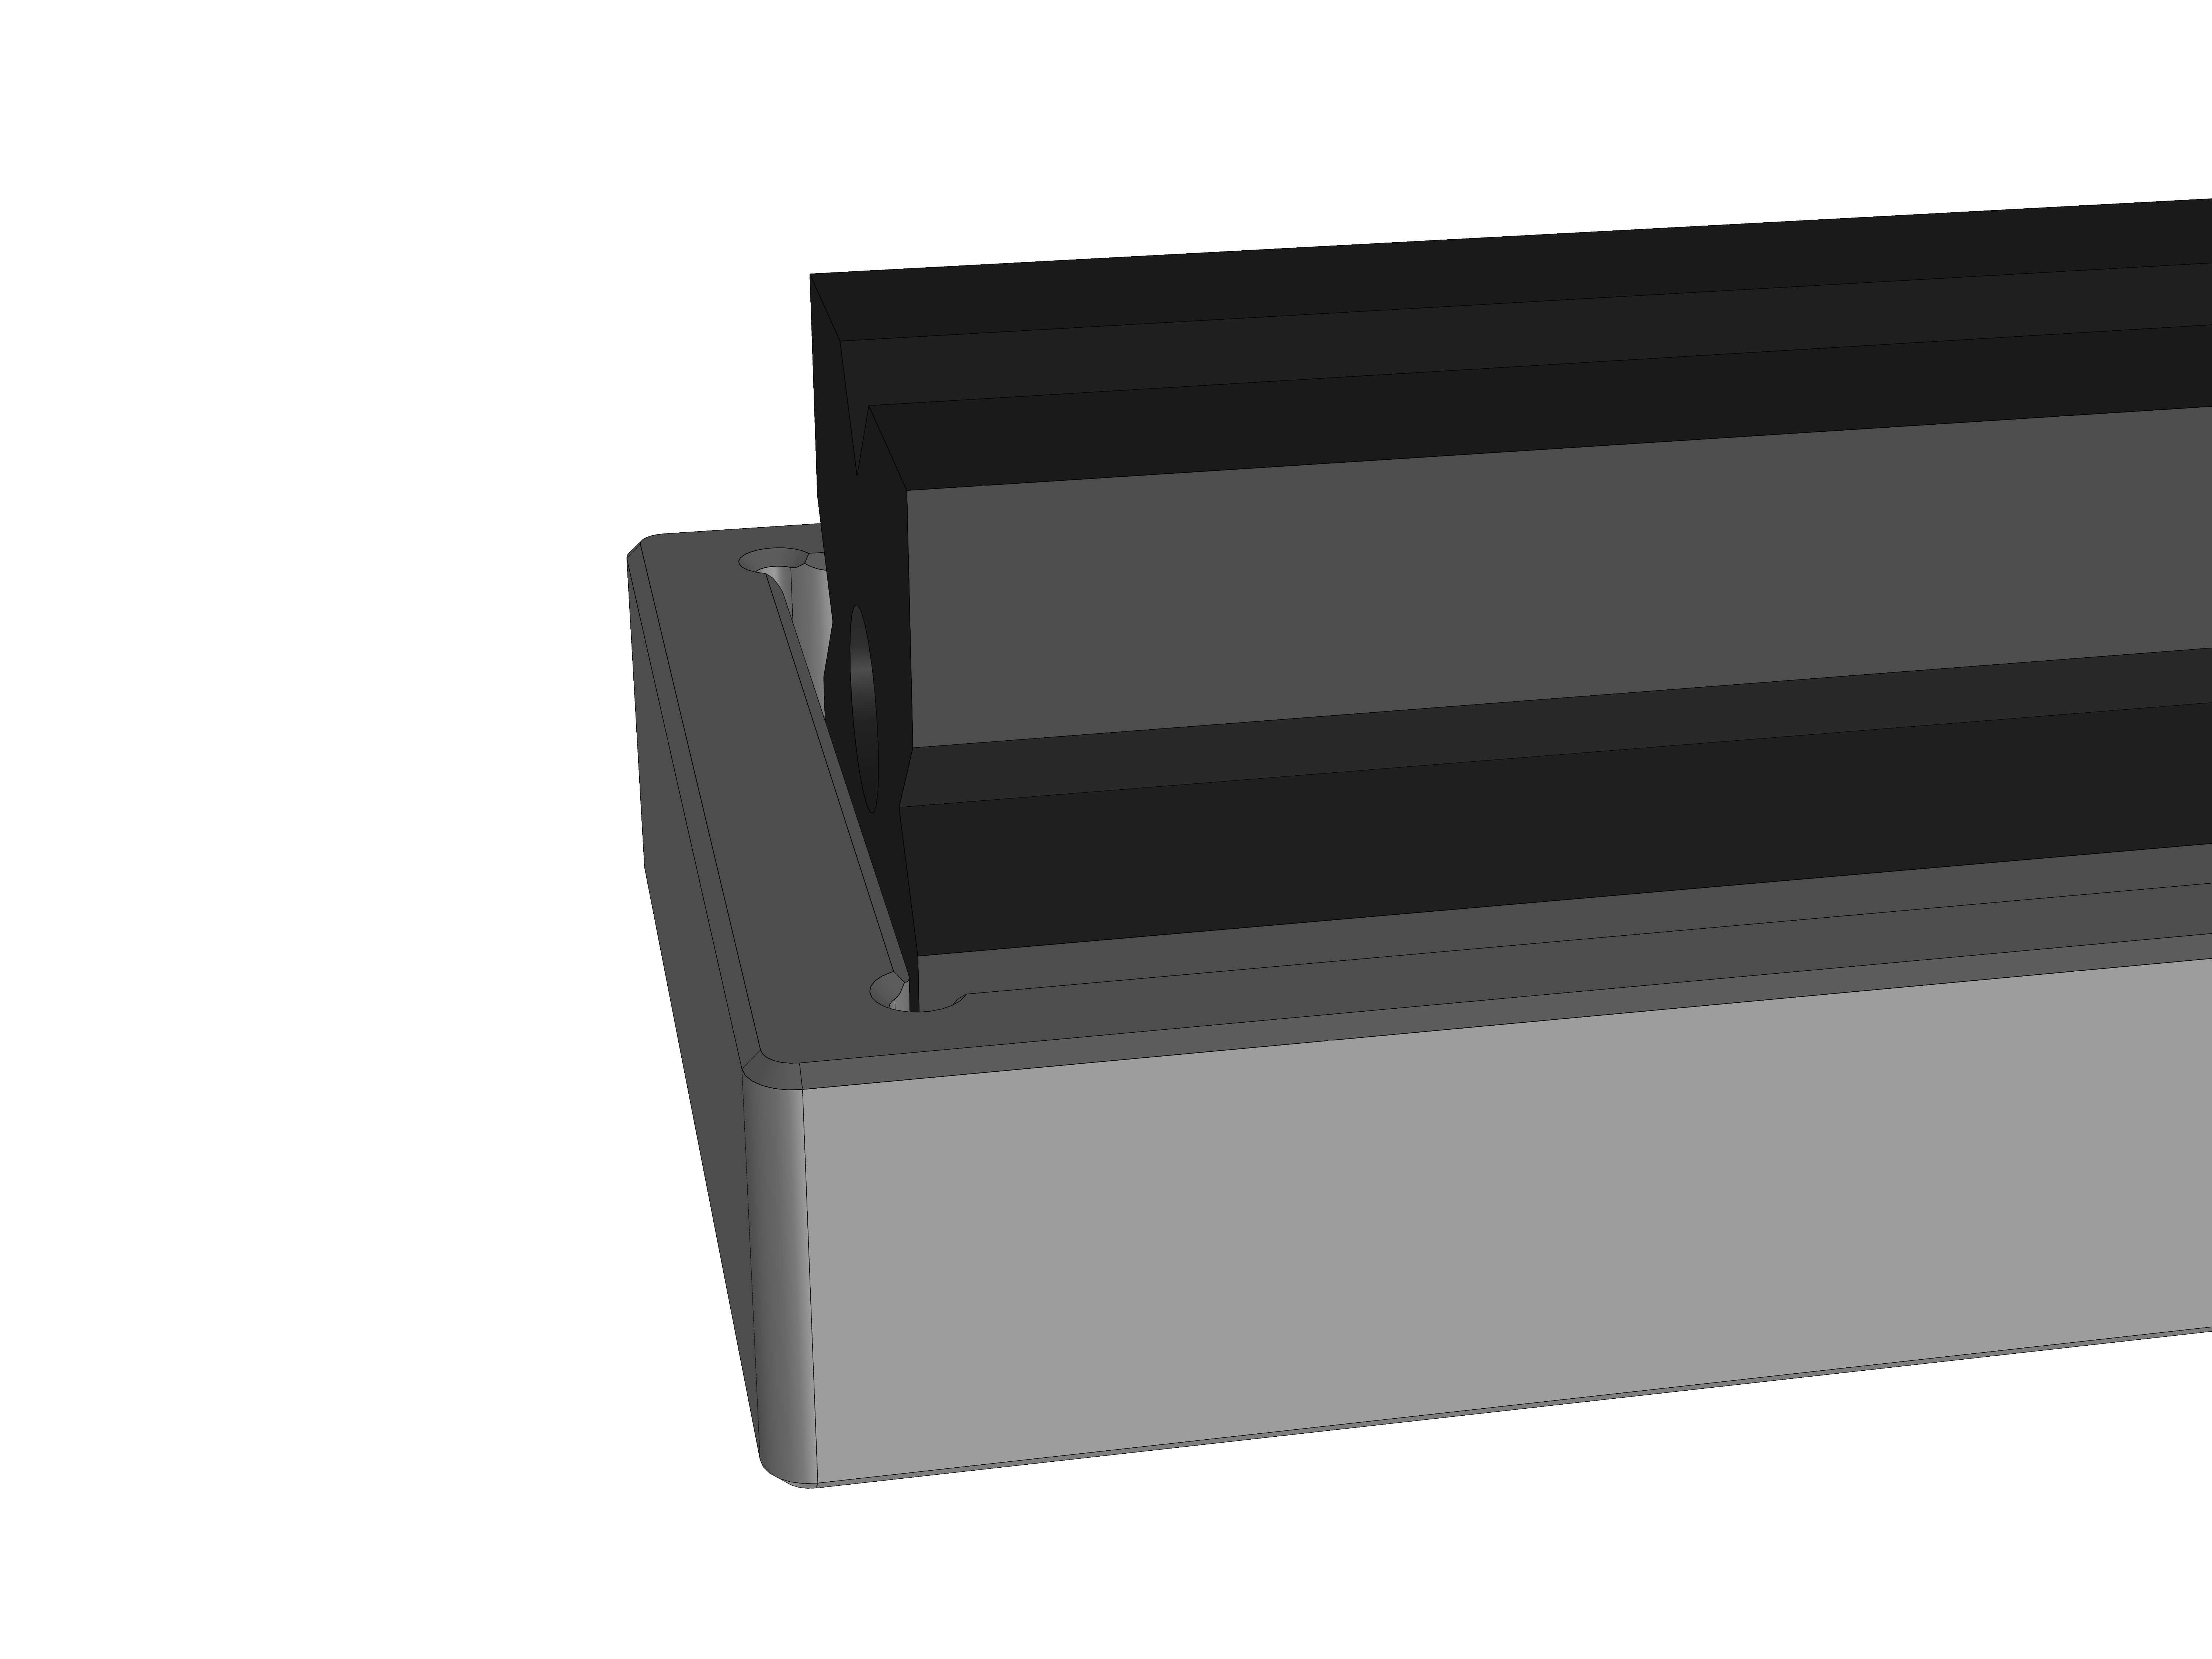
Before drilling, make sure the extrusion is inserted firmly against the end edge of the jig.
When drilling, don't use the jig for the entire cut. Instead, only use it to drill a small notch, deep enough so your drill bit can't slide. Then remove the jig and do the full cut.
Then flip the extrusion around and drill hole 7 from the other side again.
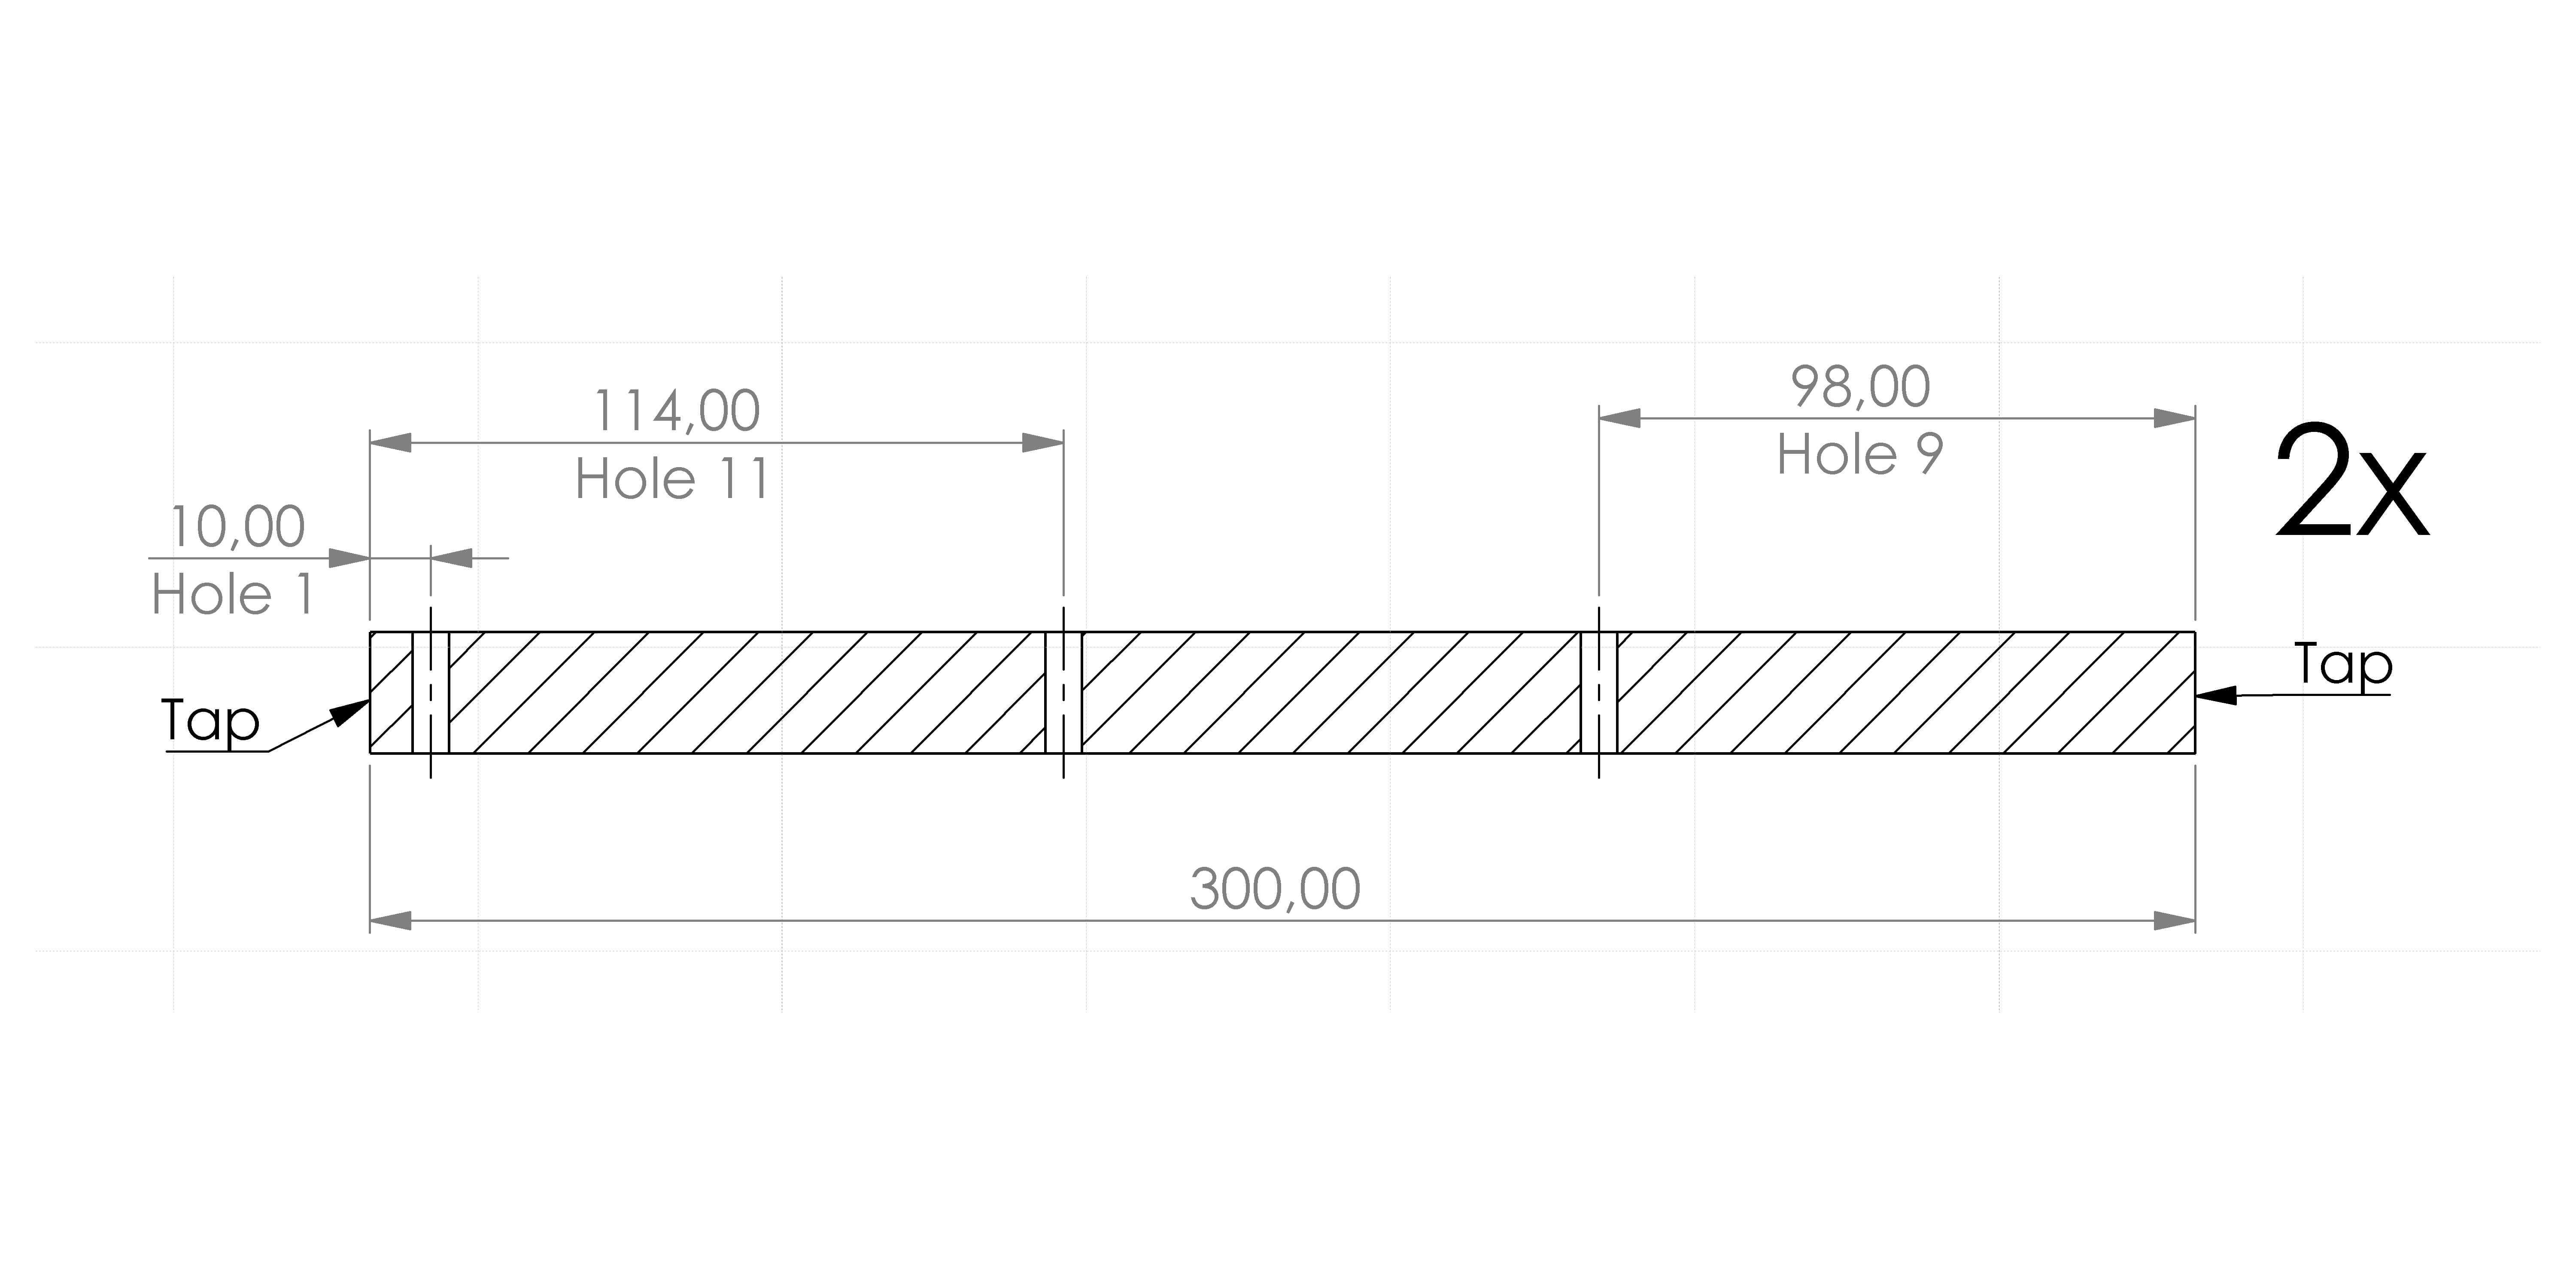
¶ EX-C : Top - Top assembly extrusion
These are the 300mm extrusions that sit at the very top of the top assembly.
Note that it has to be done 2 times.
It has to be tapped from both sides as indicated.
Note for hole 9 you have to flip the extrusion again.
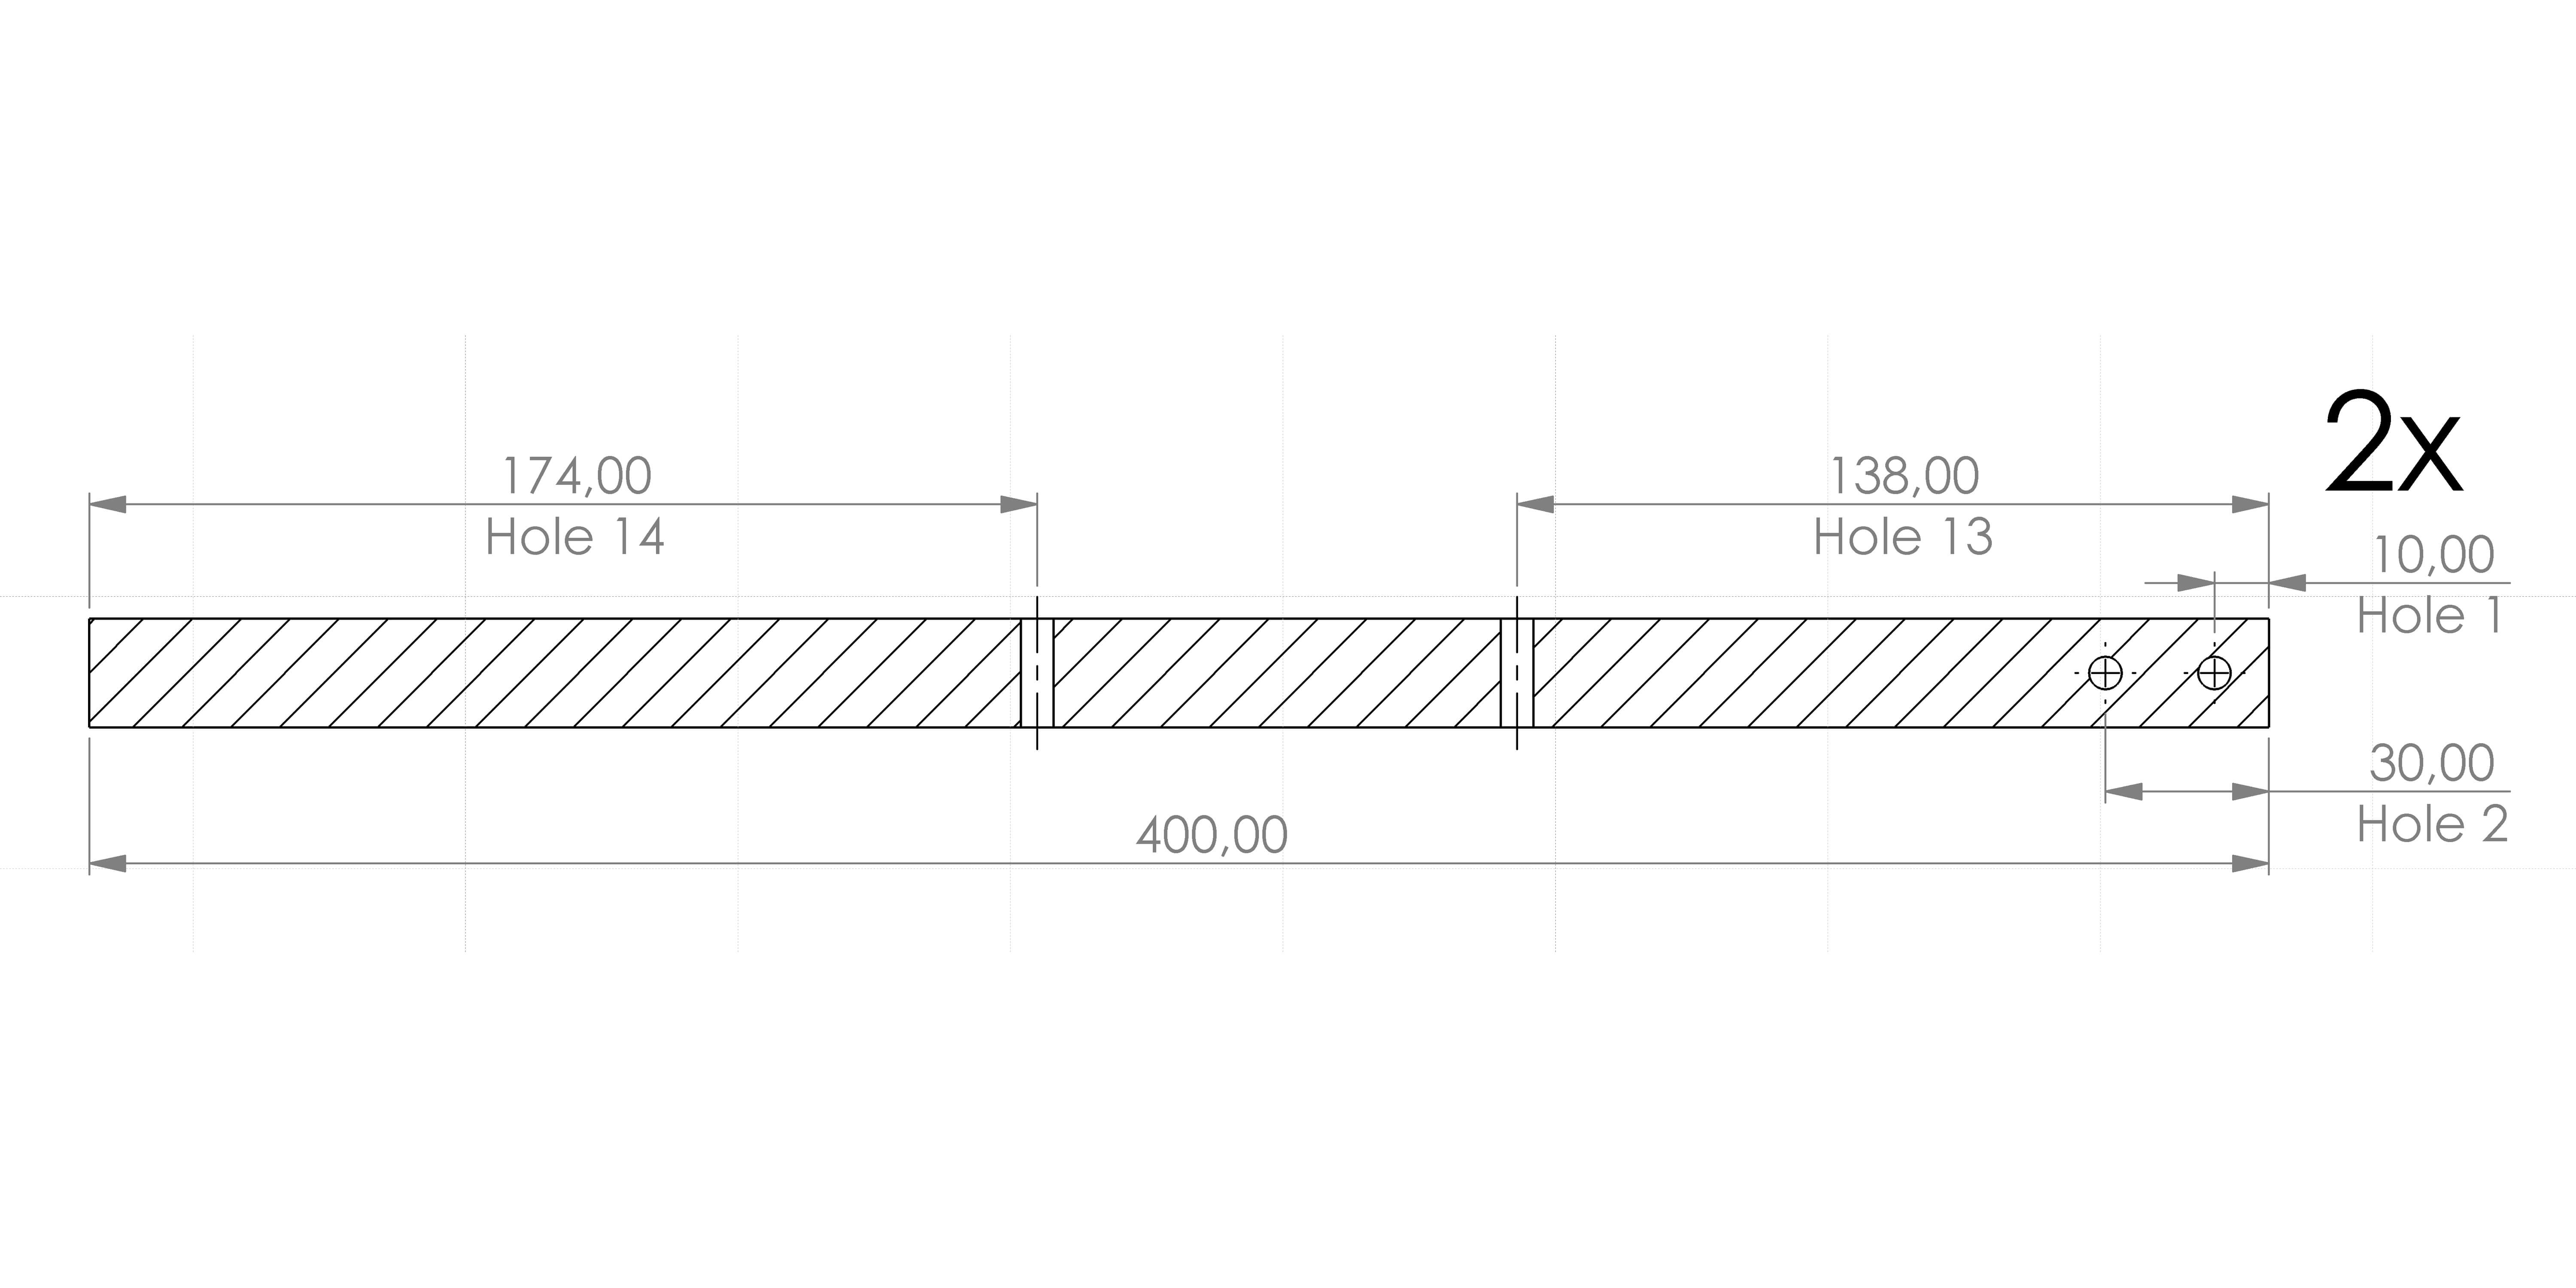
¶ EX-D : Bottom - Top assembly extrusion
These are the 400mm extrusions that sit at the bottom of the top assembly.
Note the 2 holes at the right side. Those have to be drilled from the side, relative to the other 2 holes.
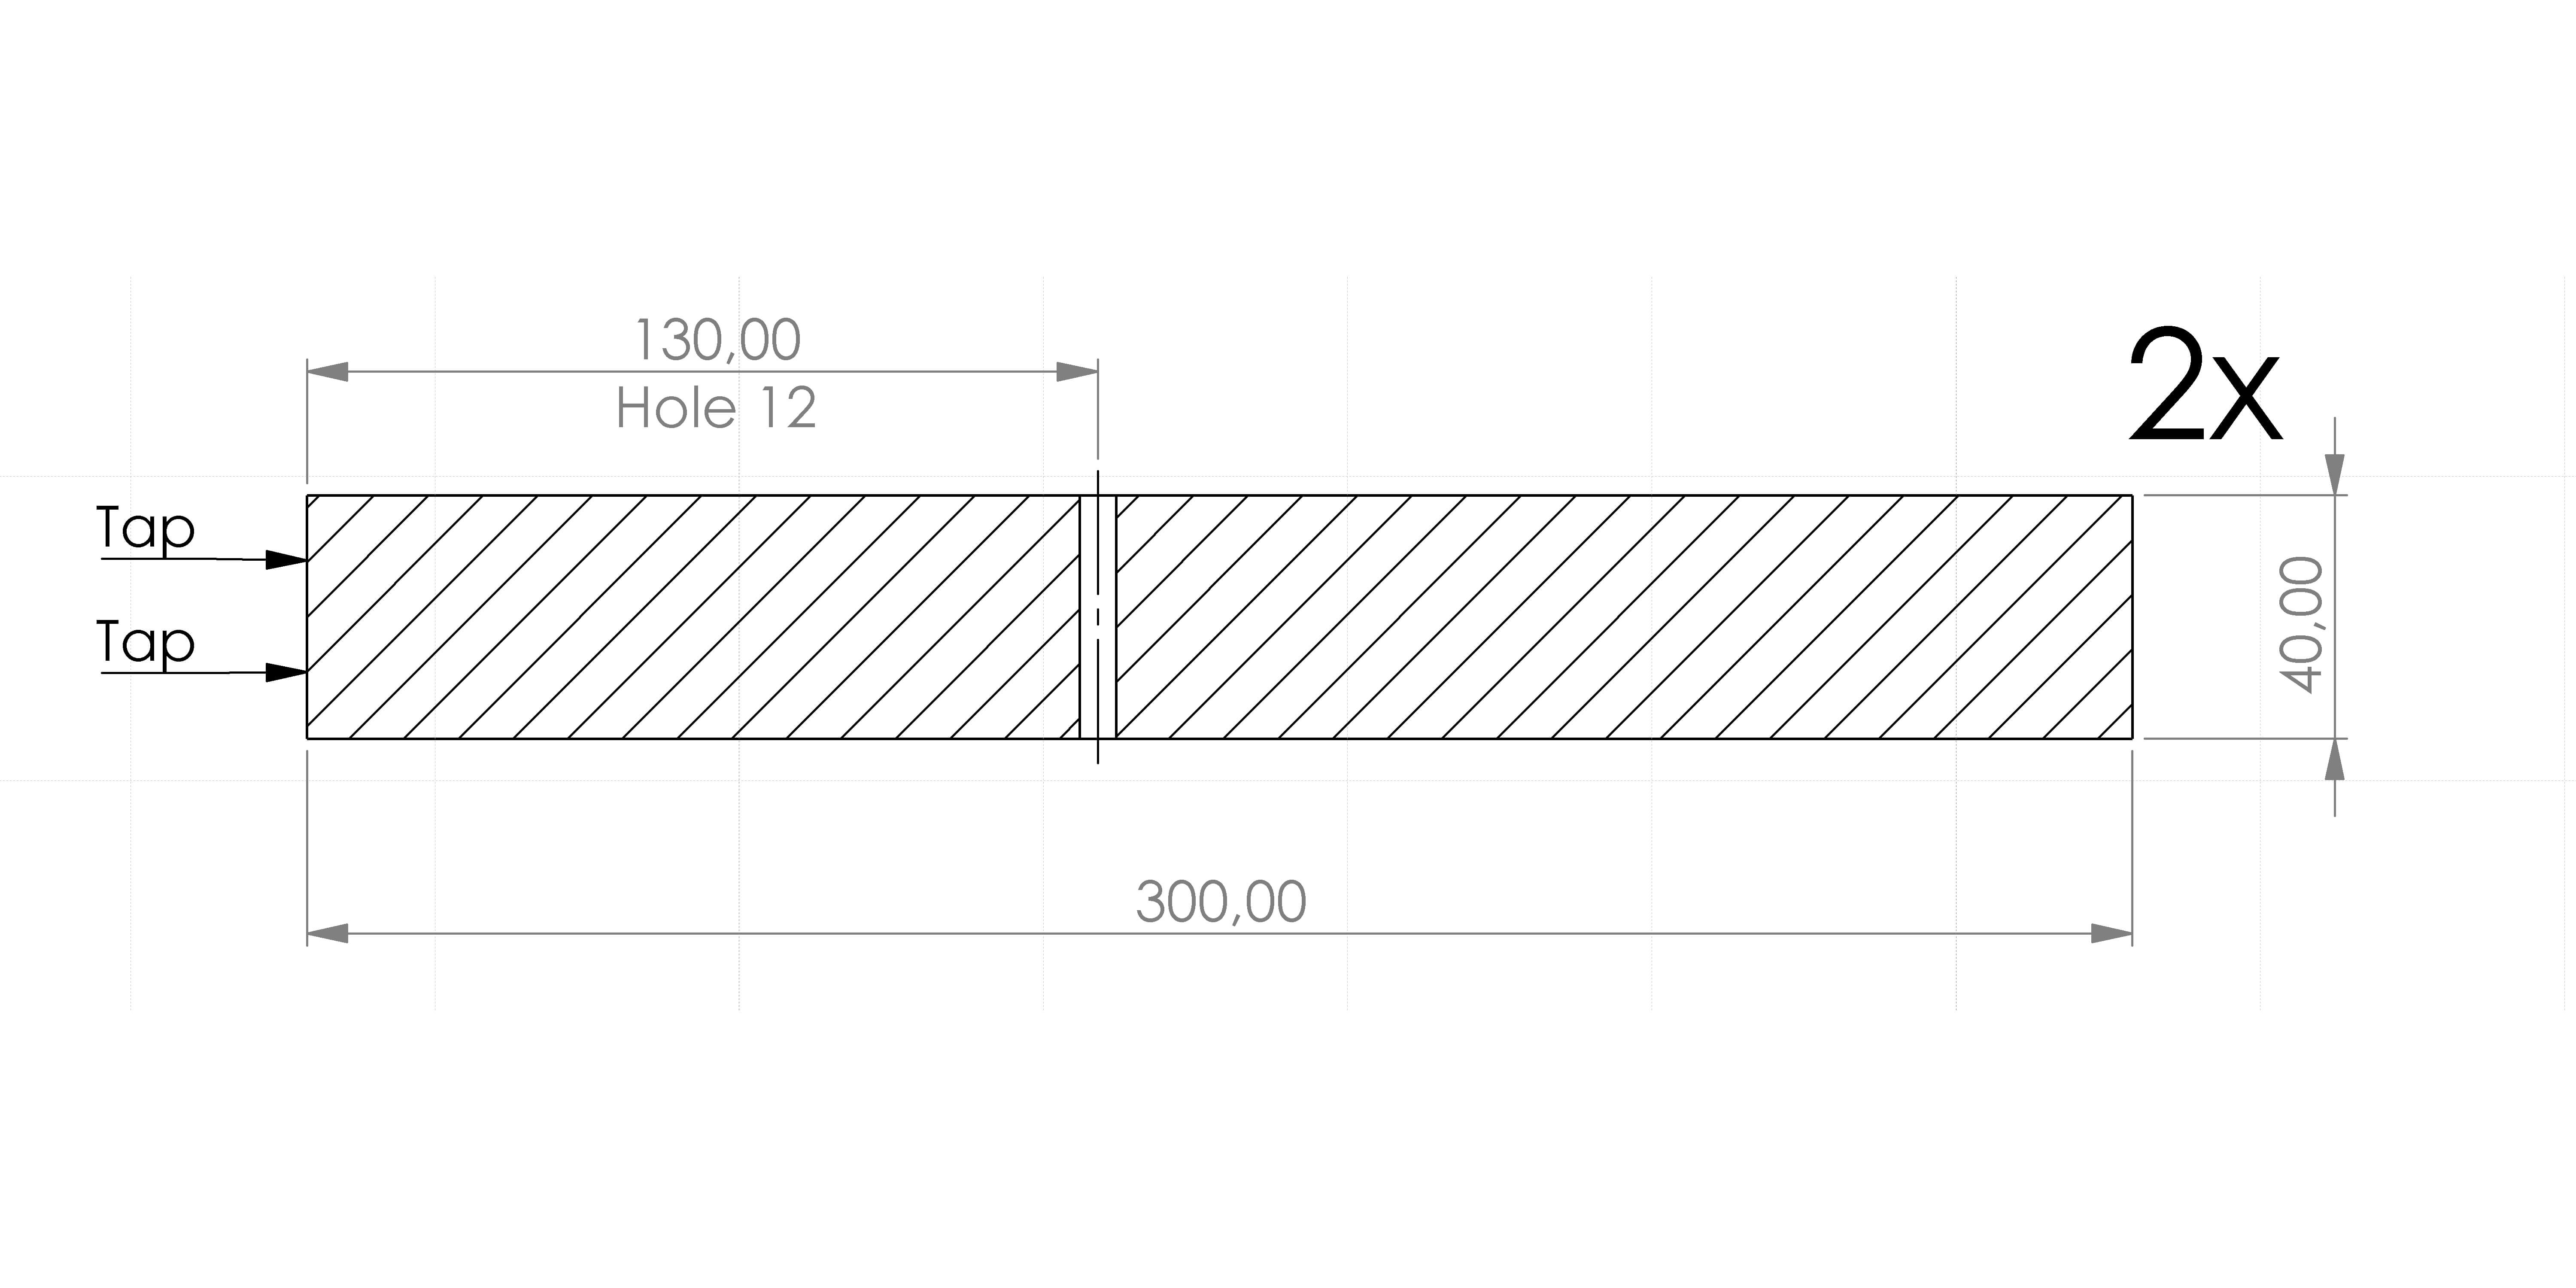
¶ EX-E : Top assembly 2040 extrusion
These are the 300mm 2040 extrusions for the top assembly.
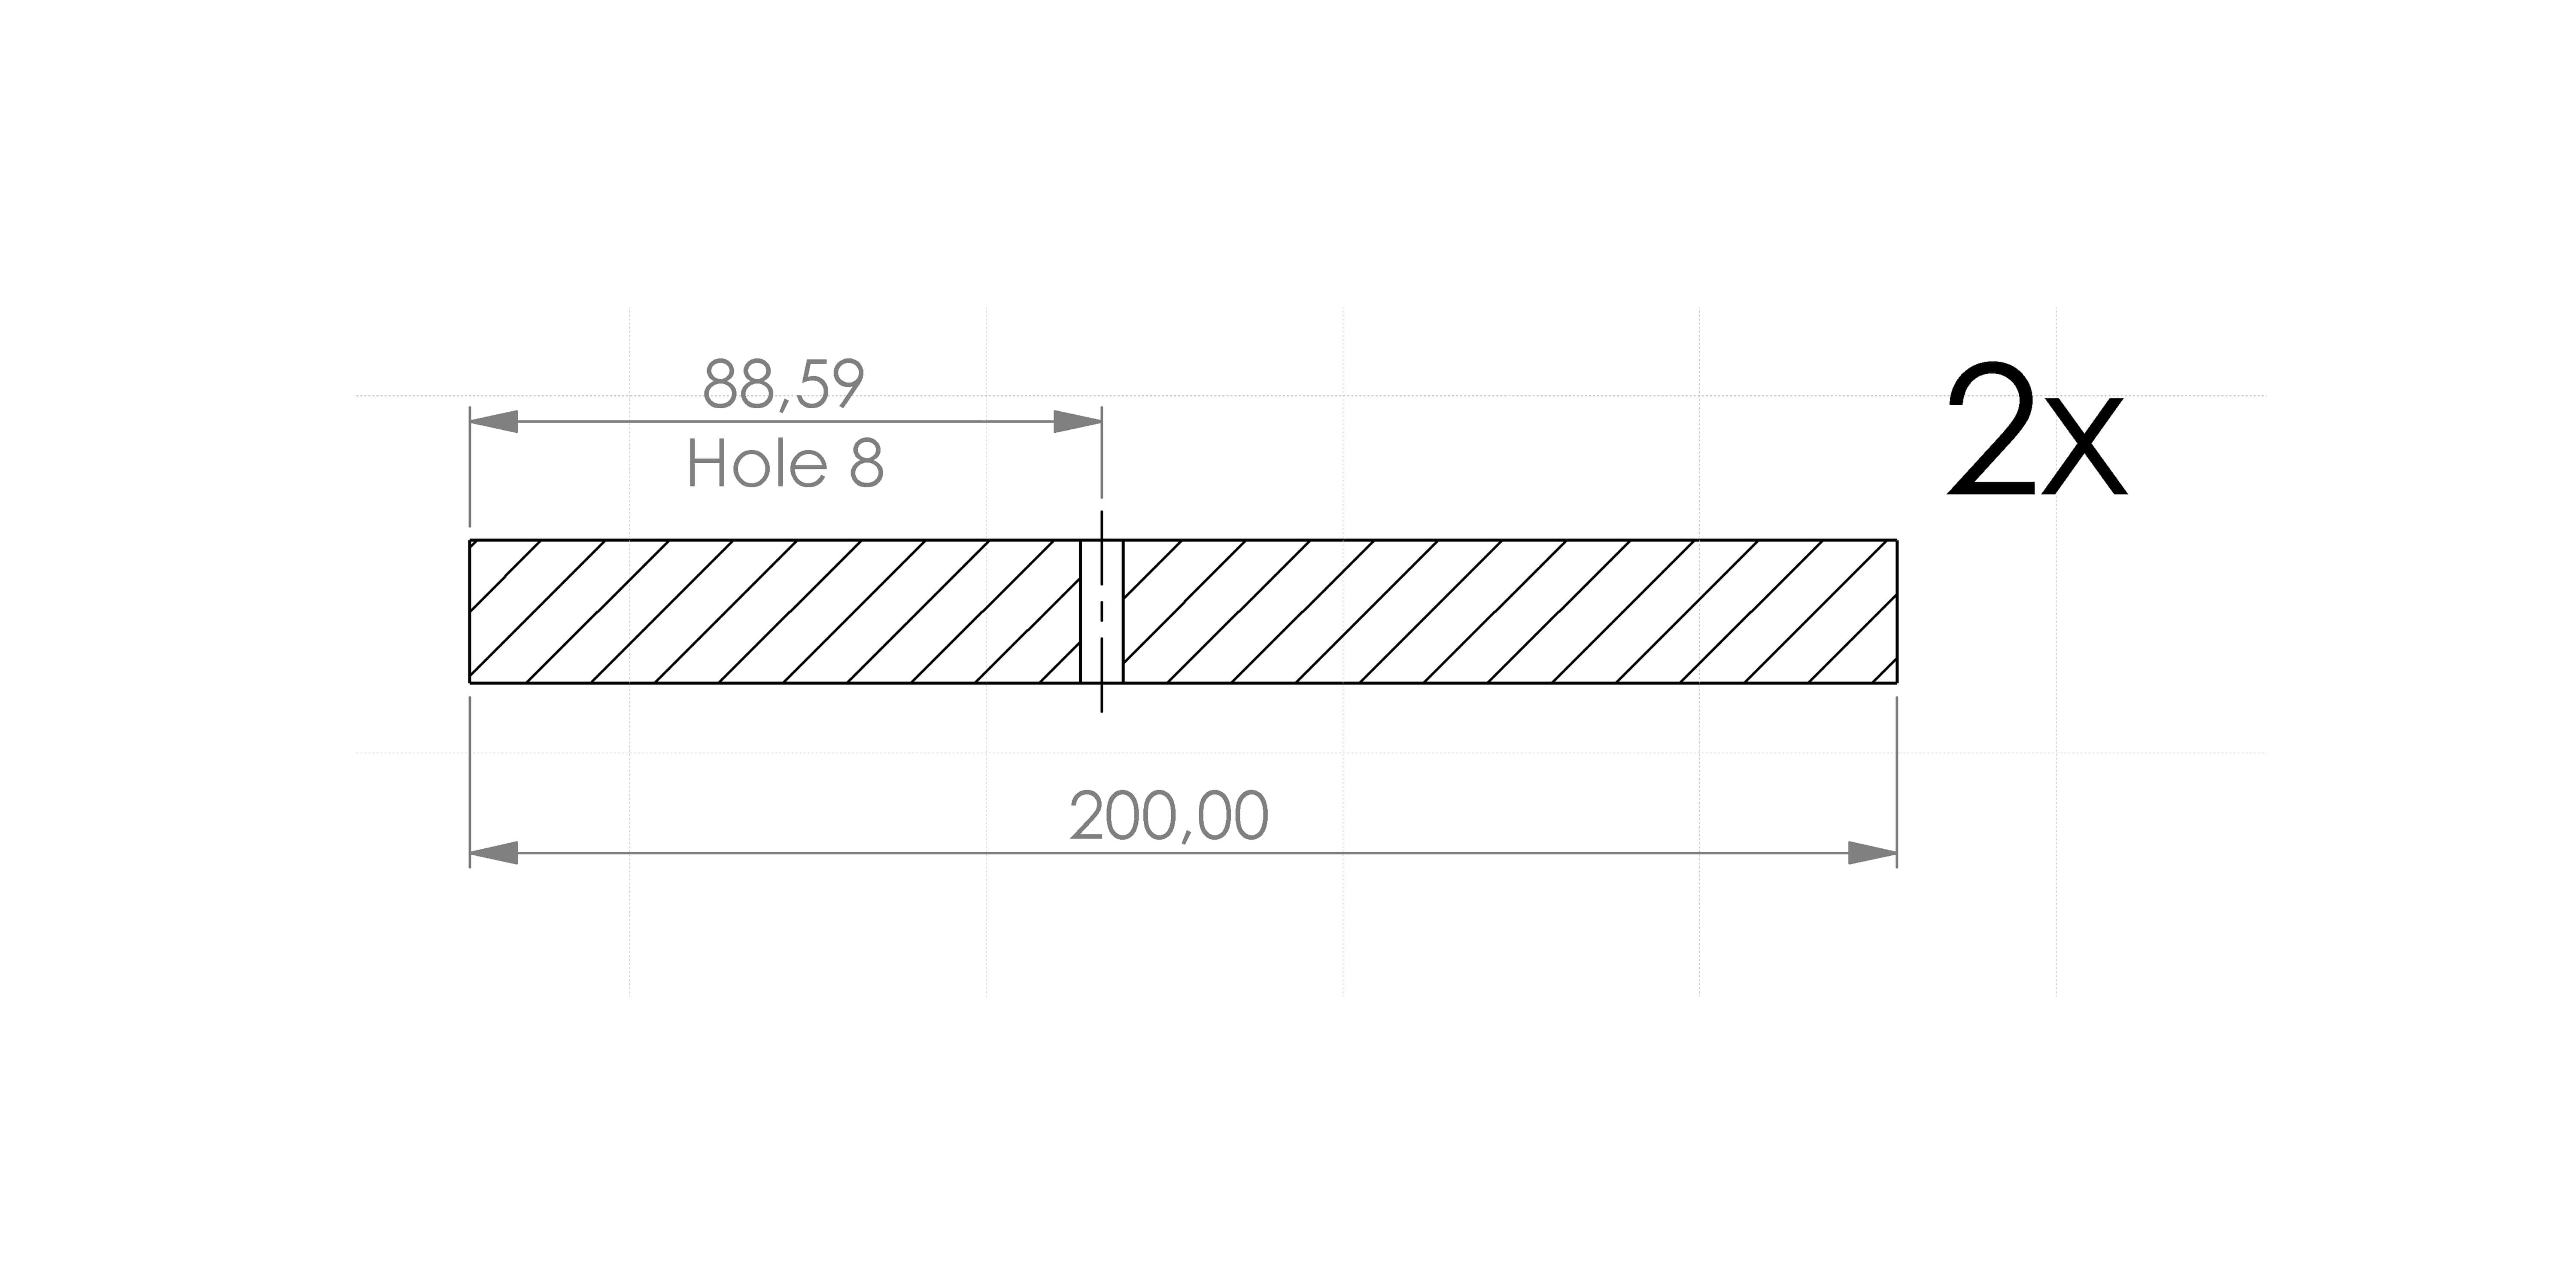
¶ EX-F : Base brace extrusion
These are the 200mm extrusions that stiffen the base assembly.
¶ EX-B : ALT-AZ base extrusion
These are the 300mm extrusions for the ALT-AZ base.
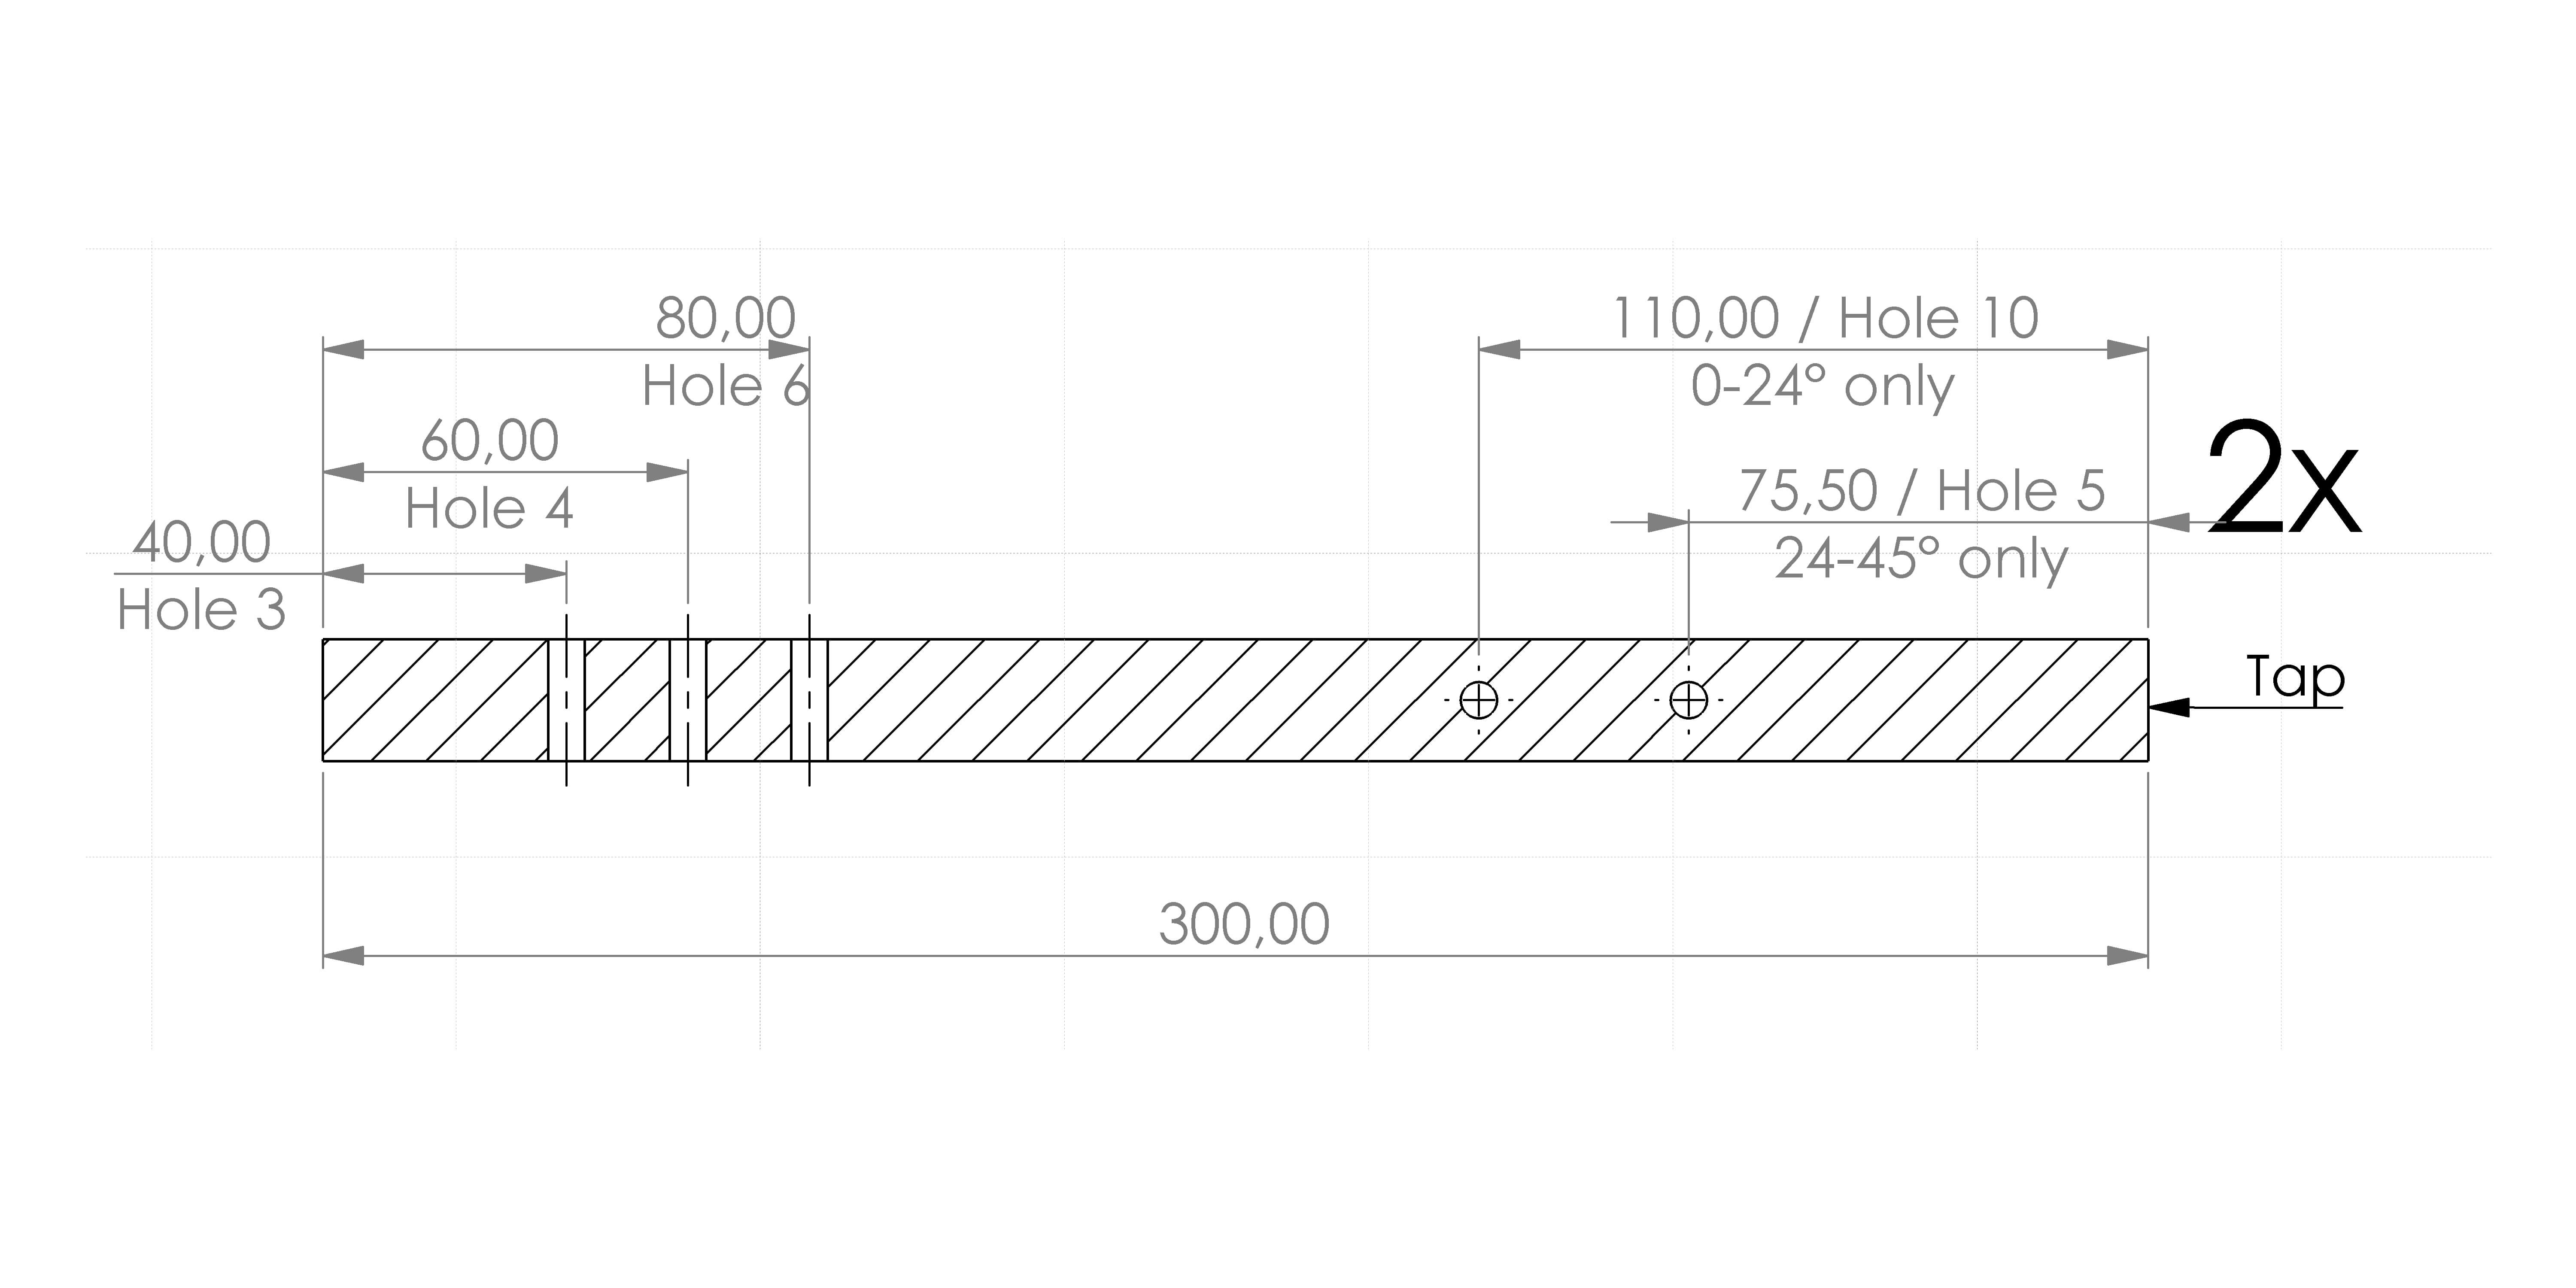
Note the holes on the right, their position depends on your latitude.
- Above 45° you don't need either of them
- Between 24 and 45° you need hole 5
- Between 0 and 24° you need hole 10
Note that the right side holes are drilled on the side again.
