¶ Preparation
¶ Assembly
OAM Assembly Part 1: Base
OAM Assembly Part 2: ALTAZ base
OAM Assembly Part 3: Top Assembly
OAM Assembly Part 4: Gearboxes
OAM Assembly Part 5: Final Assembly
¶ OpenAstroMount Assembly Part 4: Gearboxes
In this step:
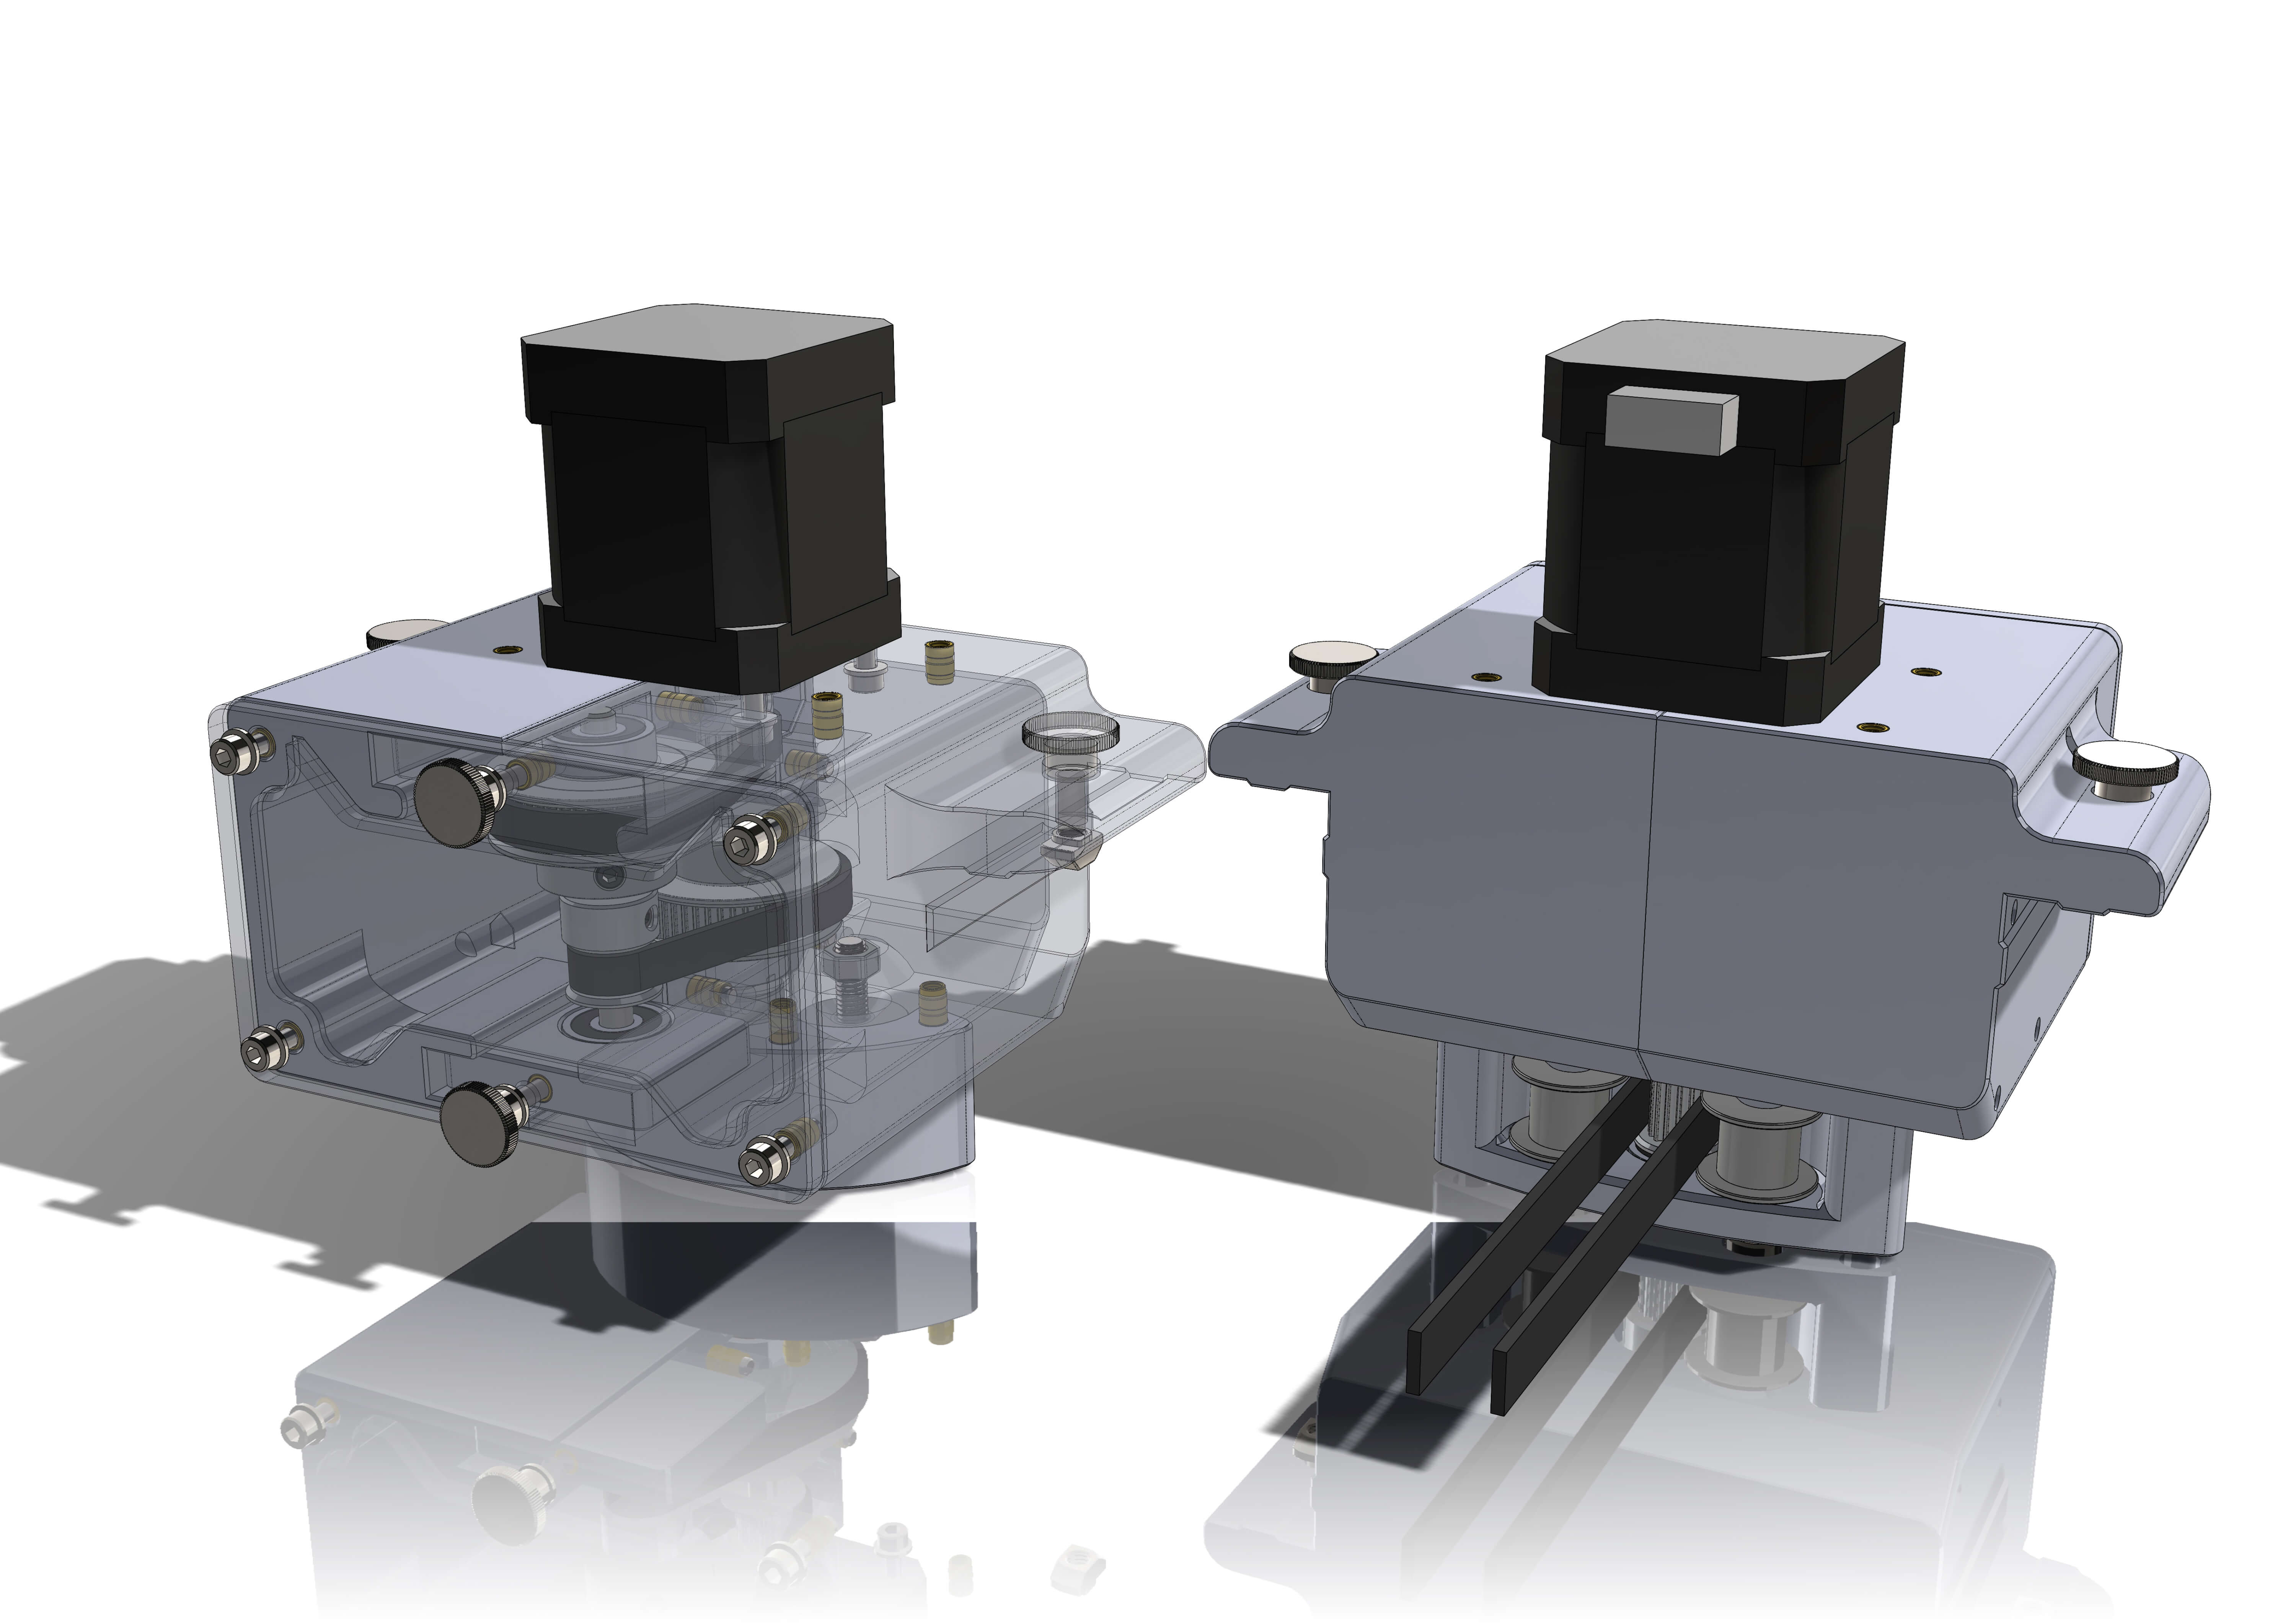
The gearboxes for RA and DEC are identical. It's recommended to build them one after another, not both at the same time. Use whichever of the two you think is built better for RA.
¶ Shaft preparation
Go through your 50mm shafts and 625 bearings. Ideally you'll have to find a pair (1 shaft, 1 bearing) with a very tight fit for RA. A looser fit is OK for DEC.
Parts:
Bearing_insert_helper
Hardware:
- 50mmx5mm shaft (2)
- 625 bearings (2)
- GT2 16T 9mm pulley (2)
- GT2 48T pulley (2)
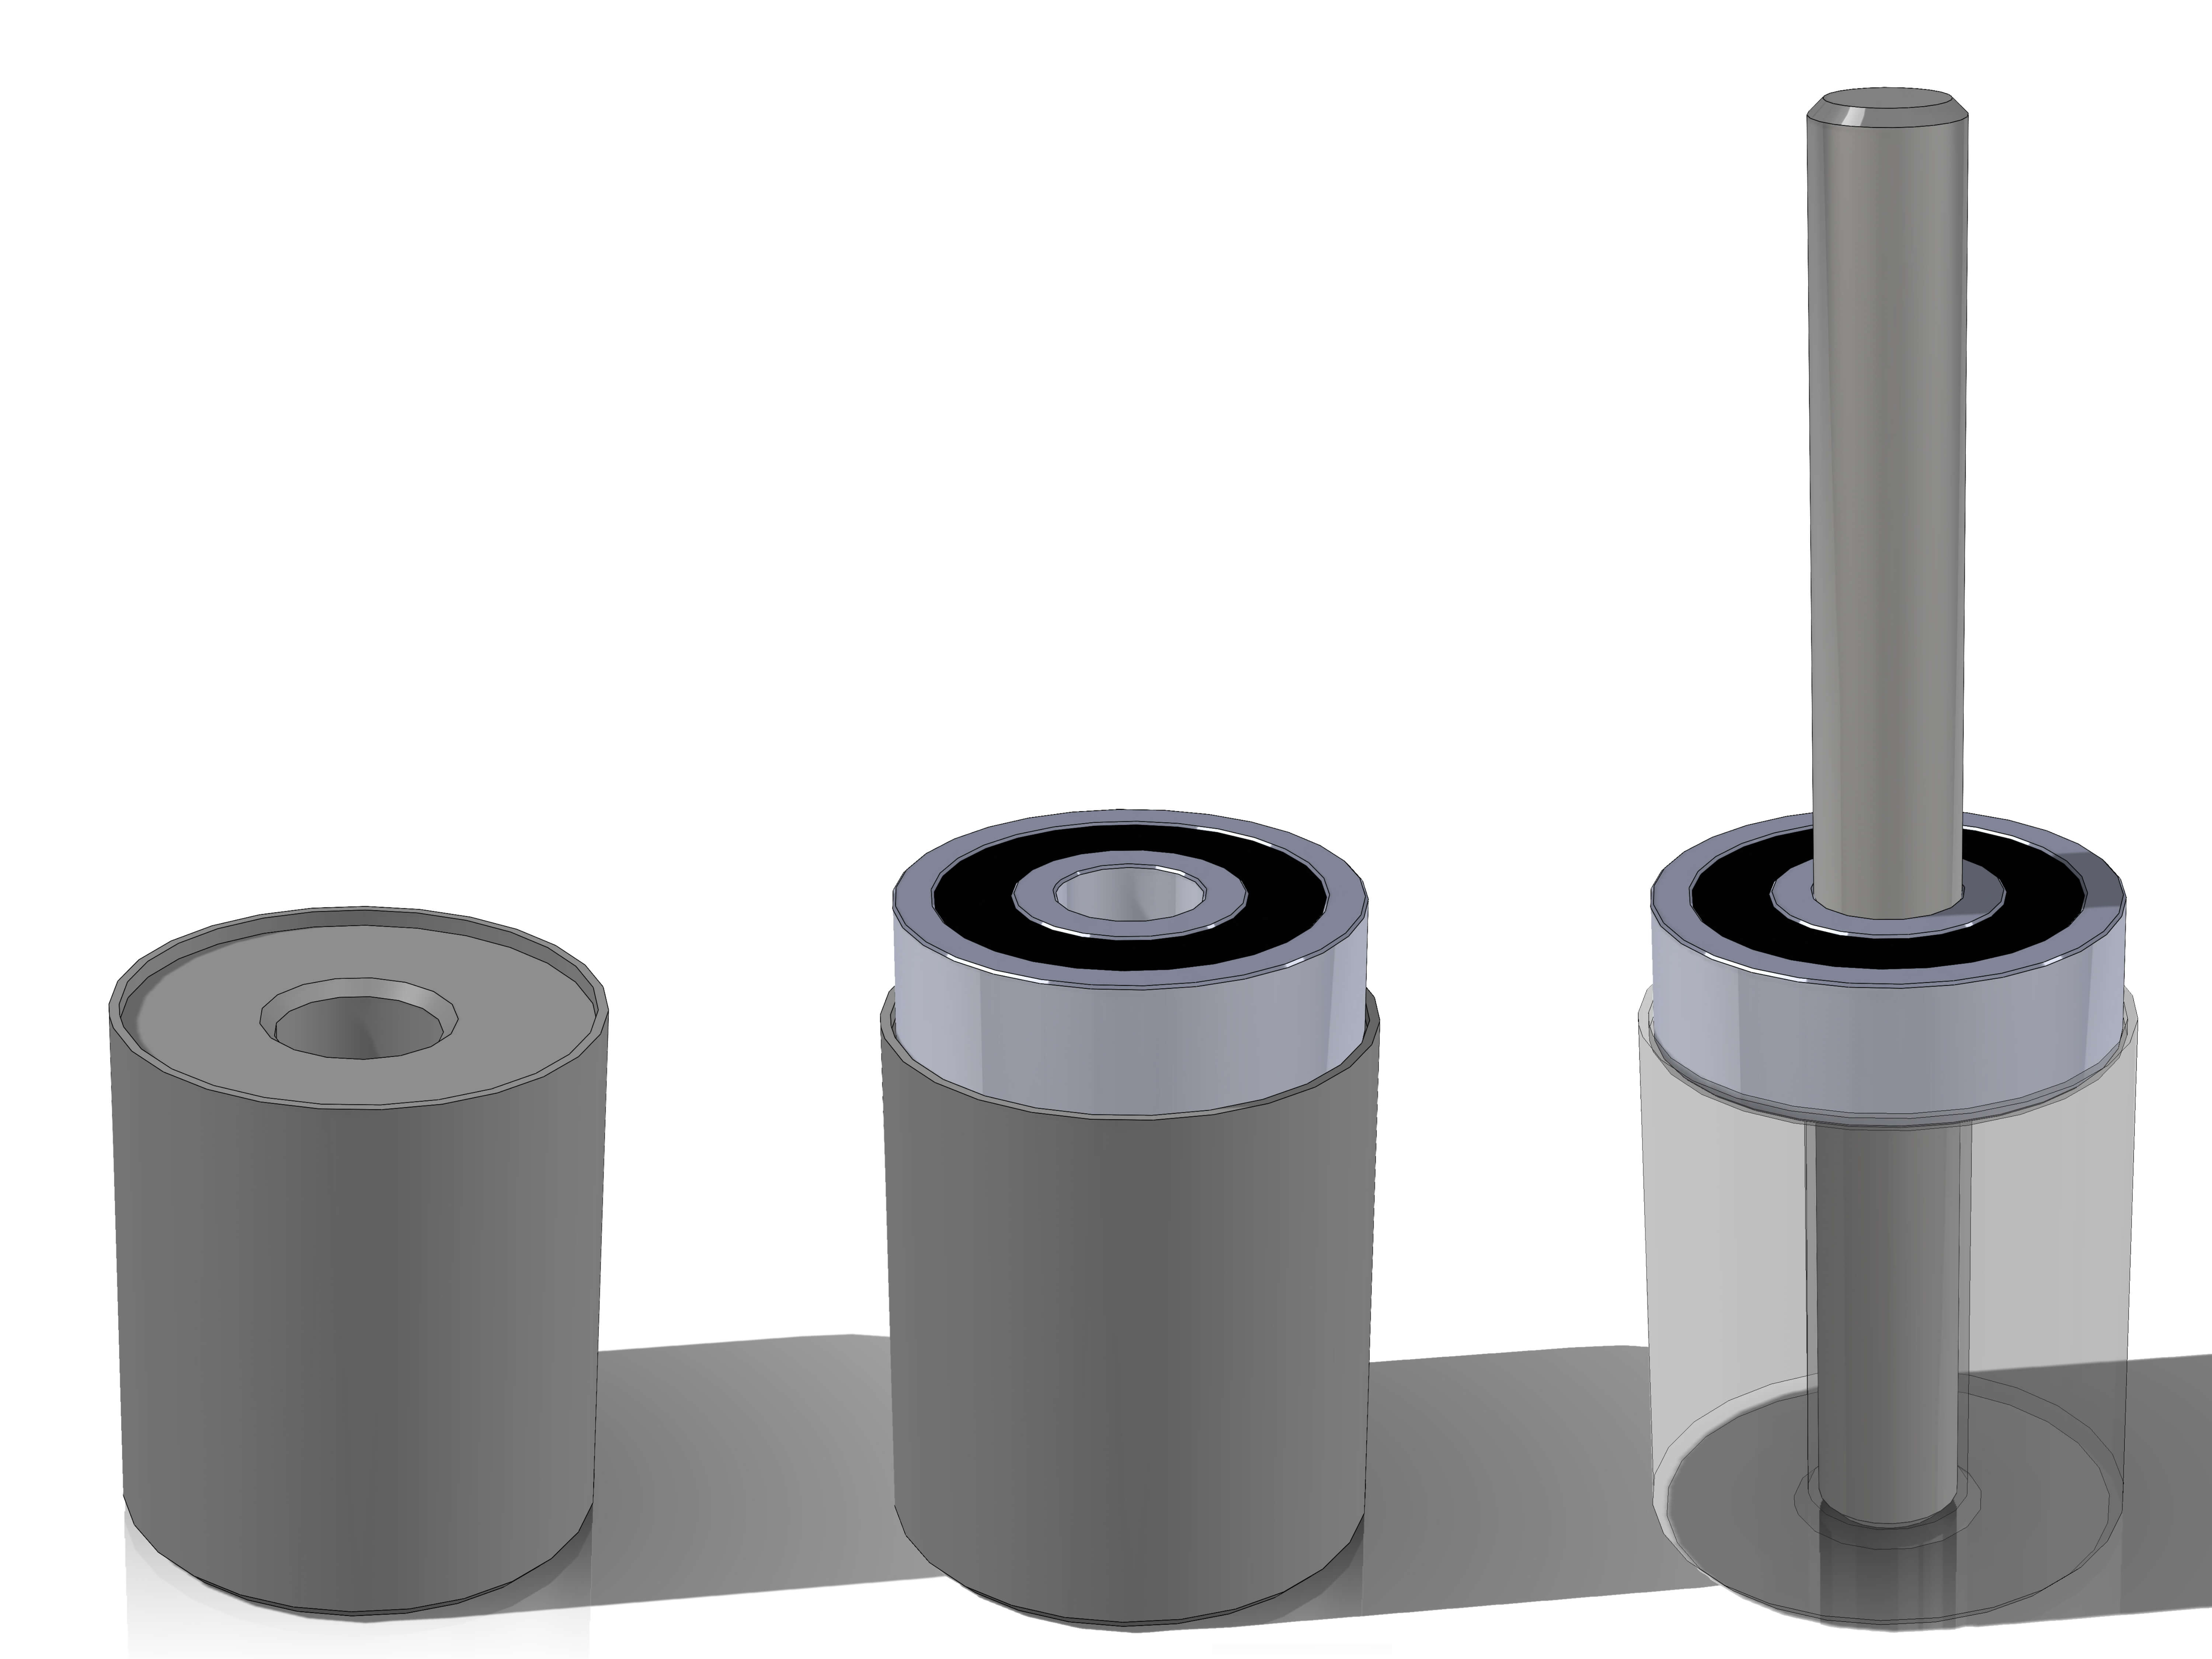
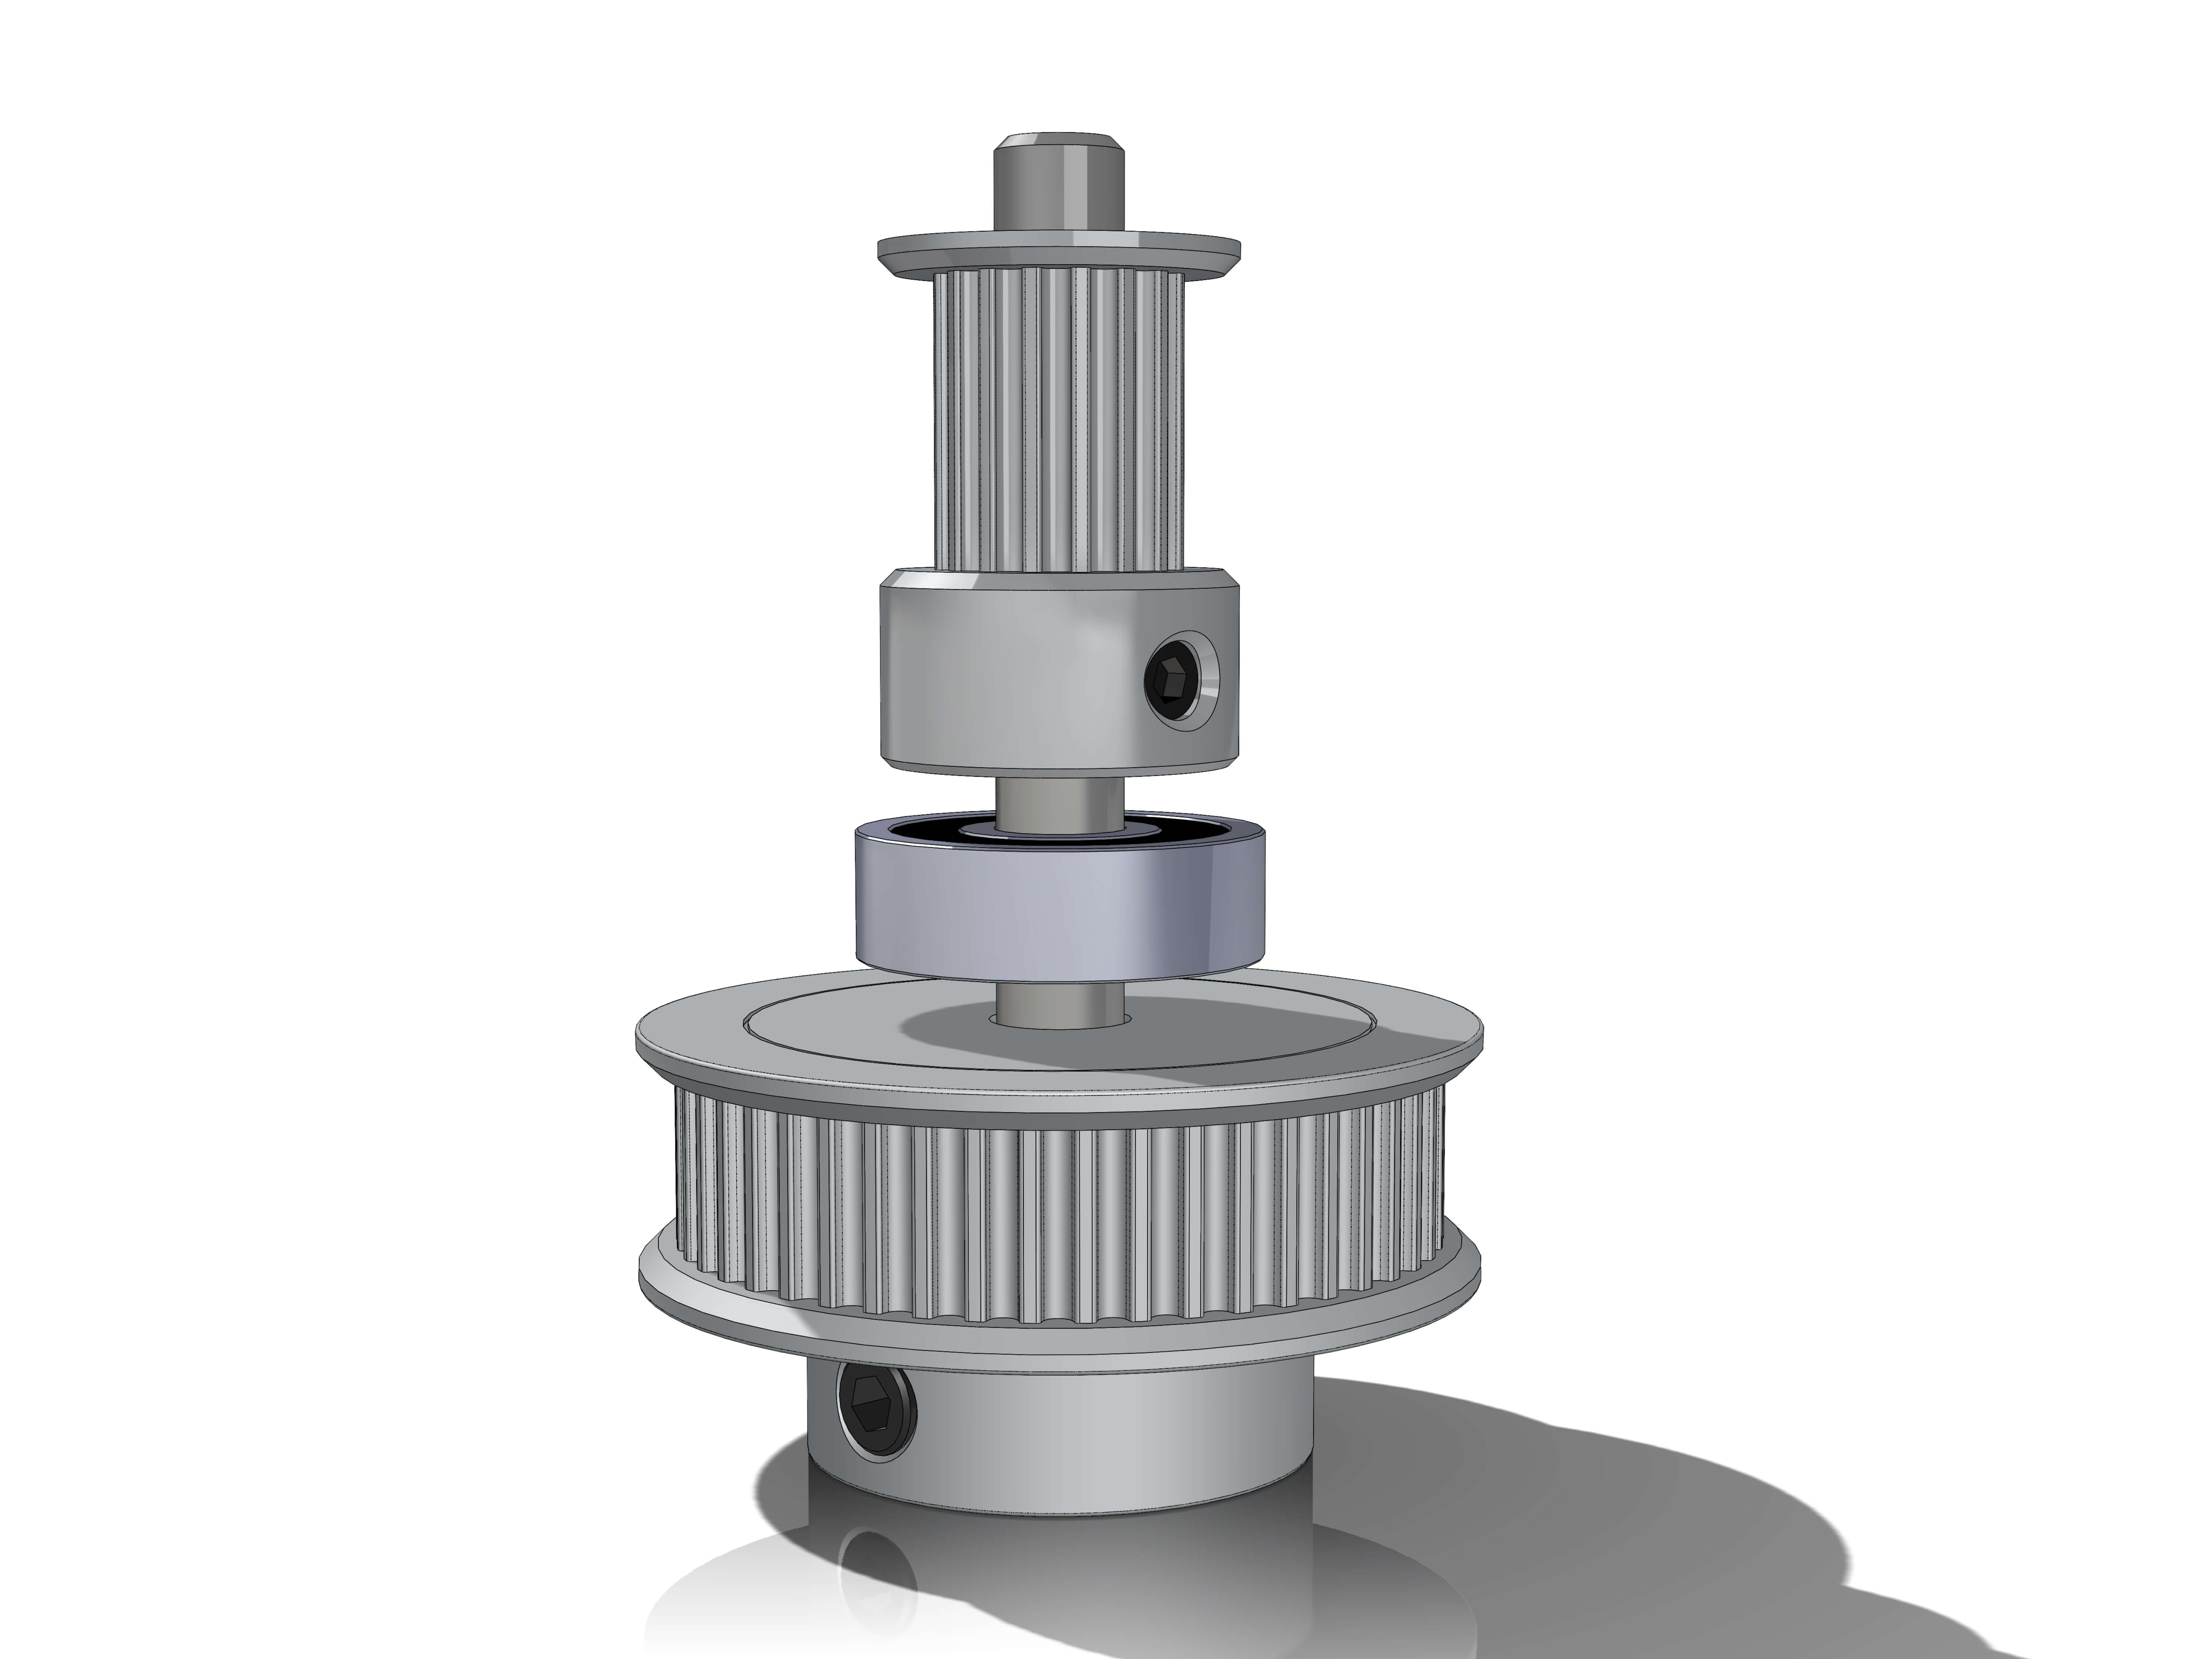
Take the bearing with the tight fit. Lay it on top of the Bearing_insert_helper part.
Use a vice, clamp or similar to push a shaft through until it reaches the end of the insert_helper.
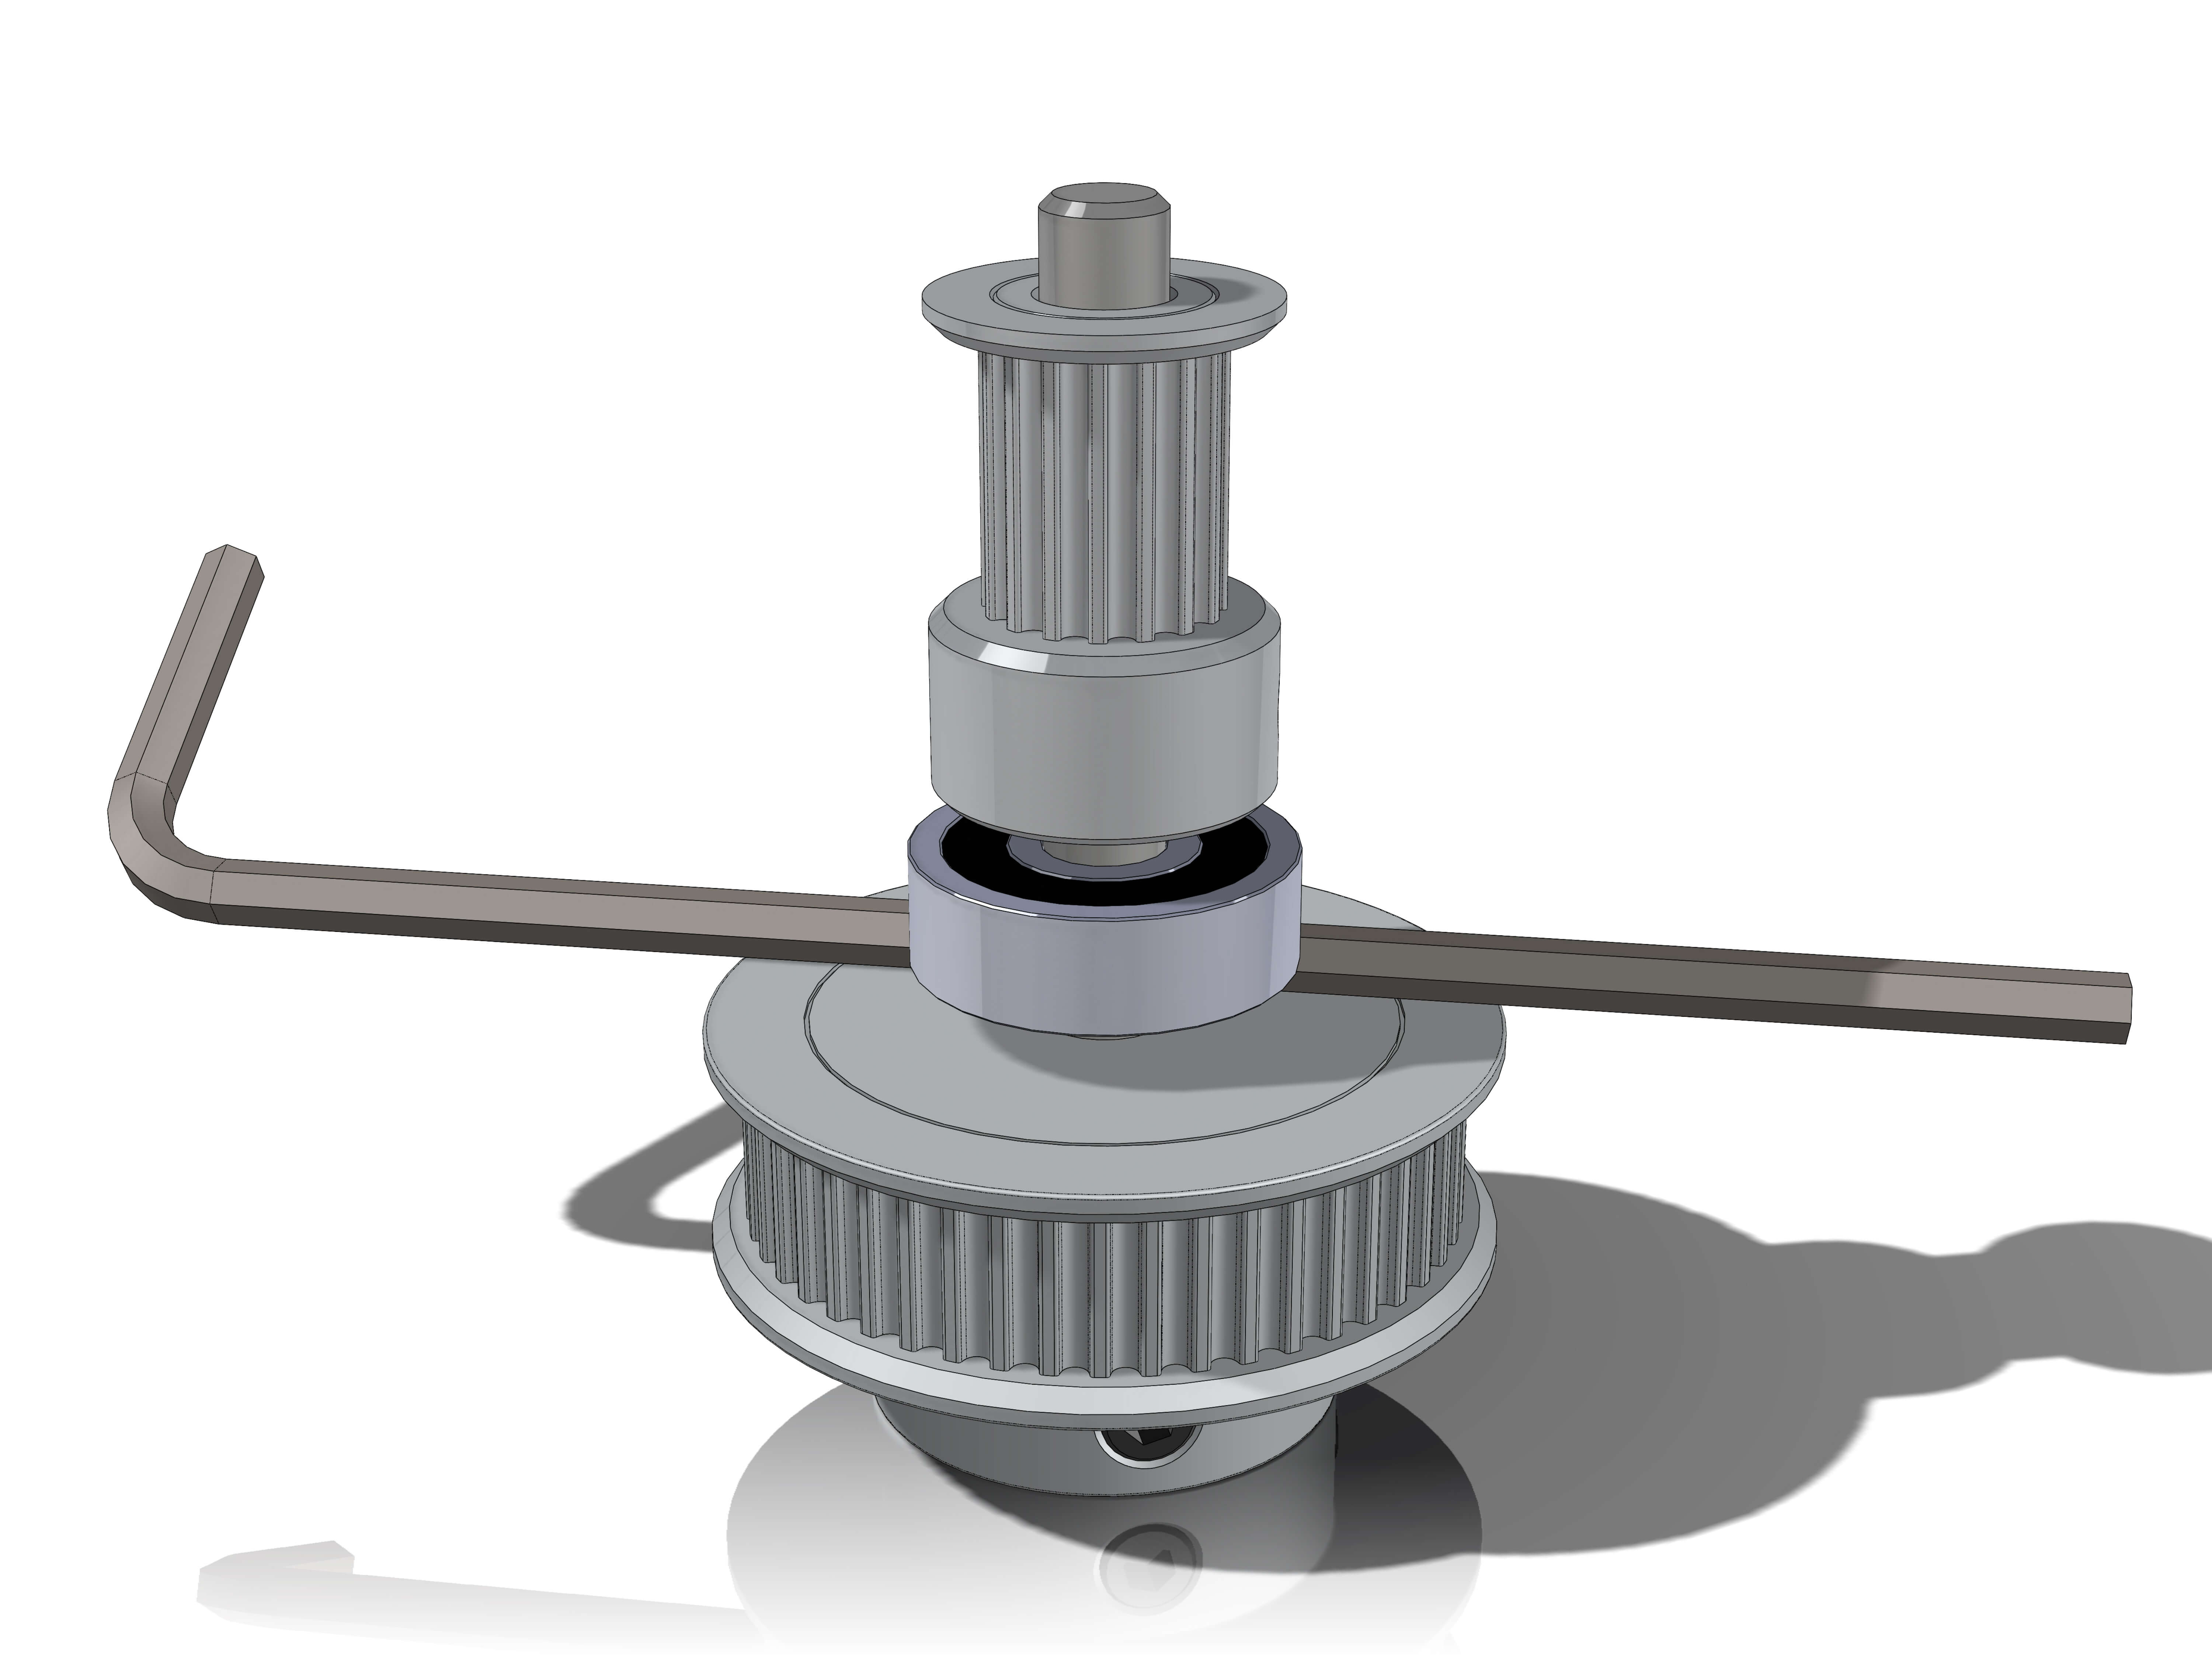
Then attach a GT2 16T 9mm pulley to the longer end of the shaft and a GT2 48T pulley to the shorter end.
Use a M3/2.5mm Hex Key for correct spacing as shown. The pulleys need a distance of about 2.5mm to the bearing.
Use this shaft, or the one with the best fit for your RA gearbox.
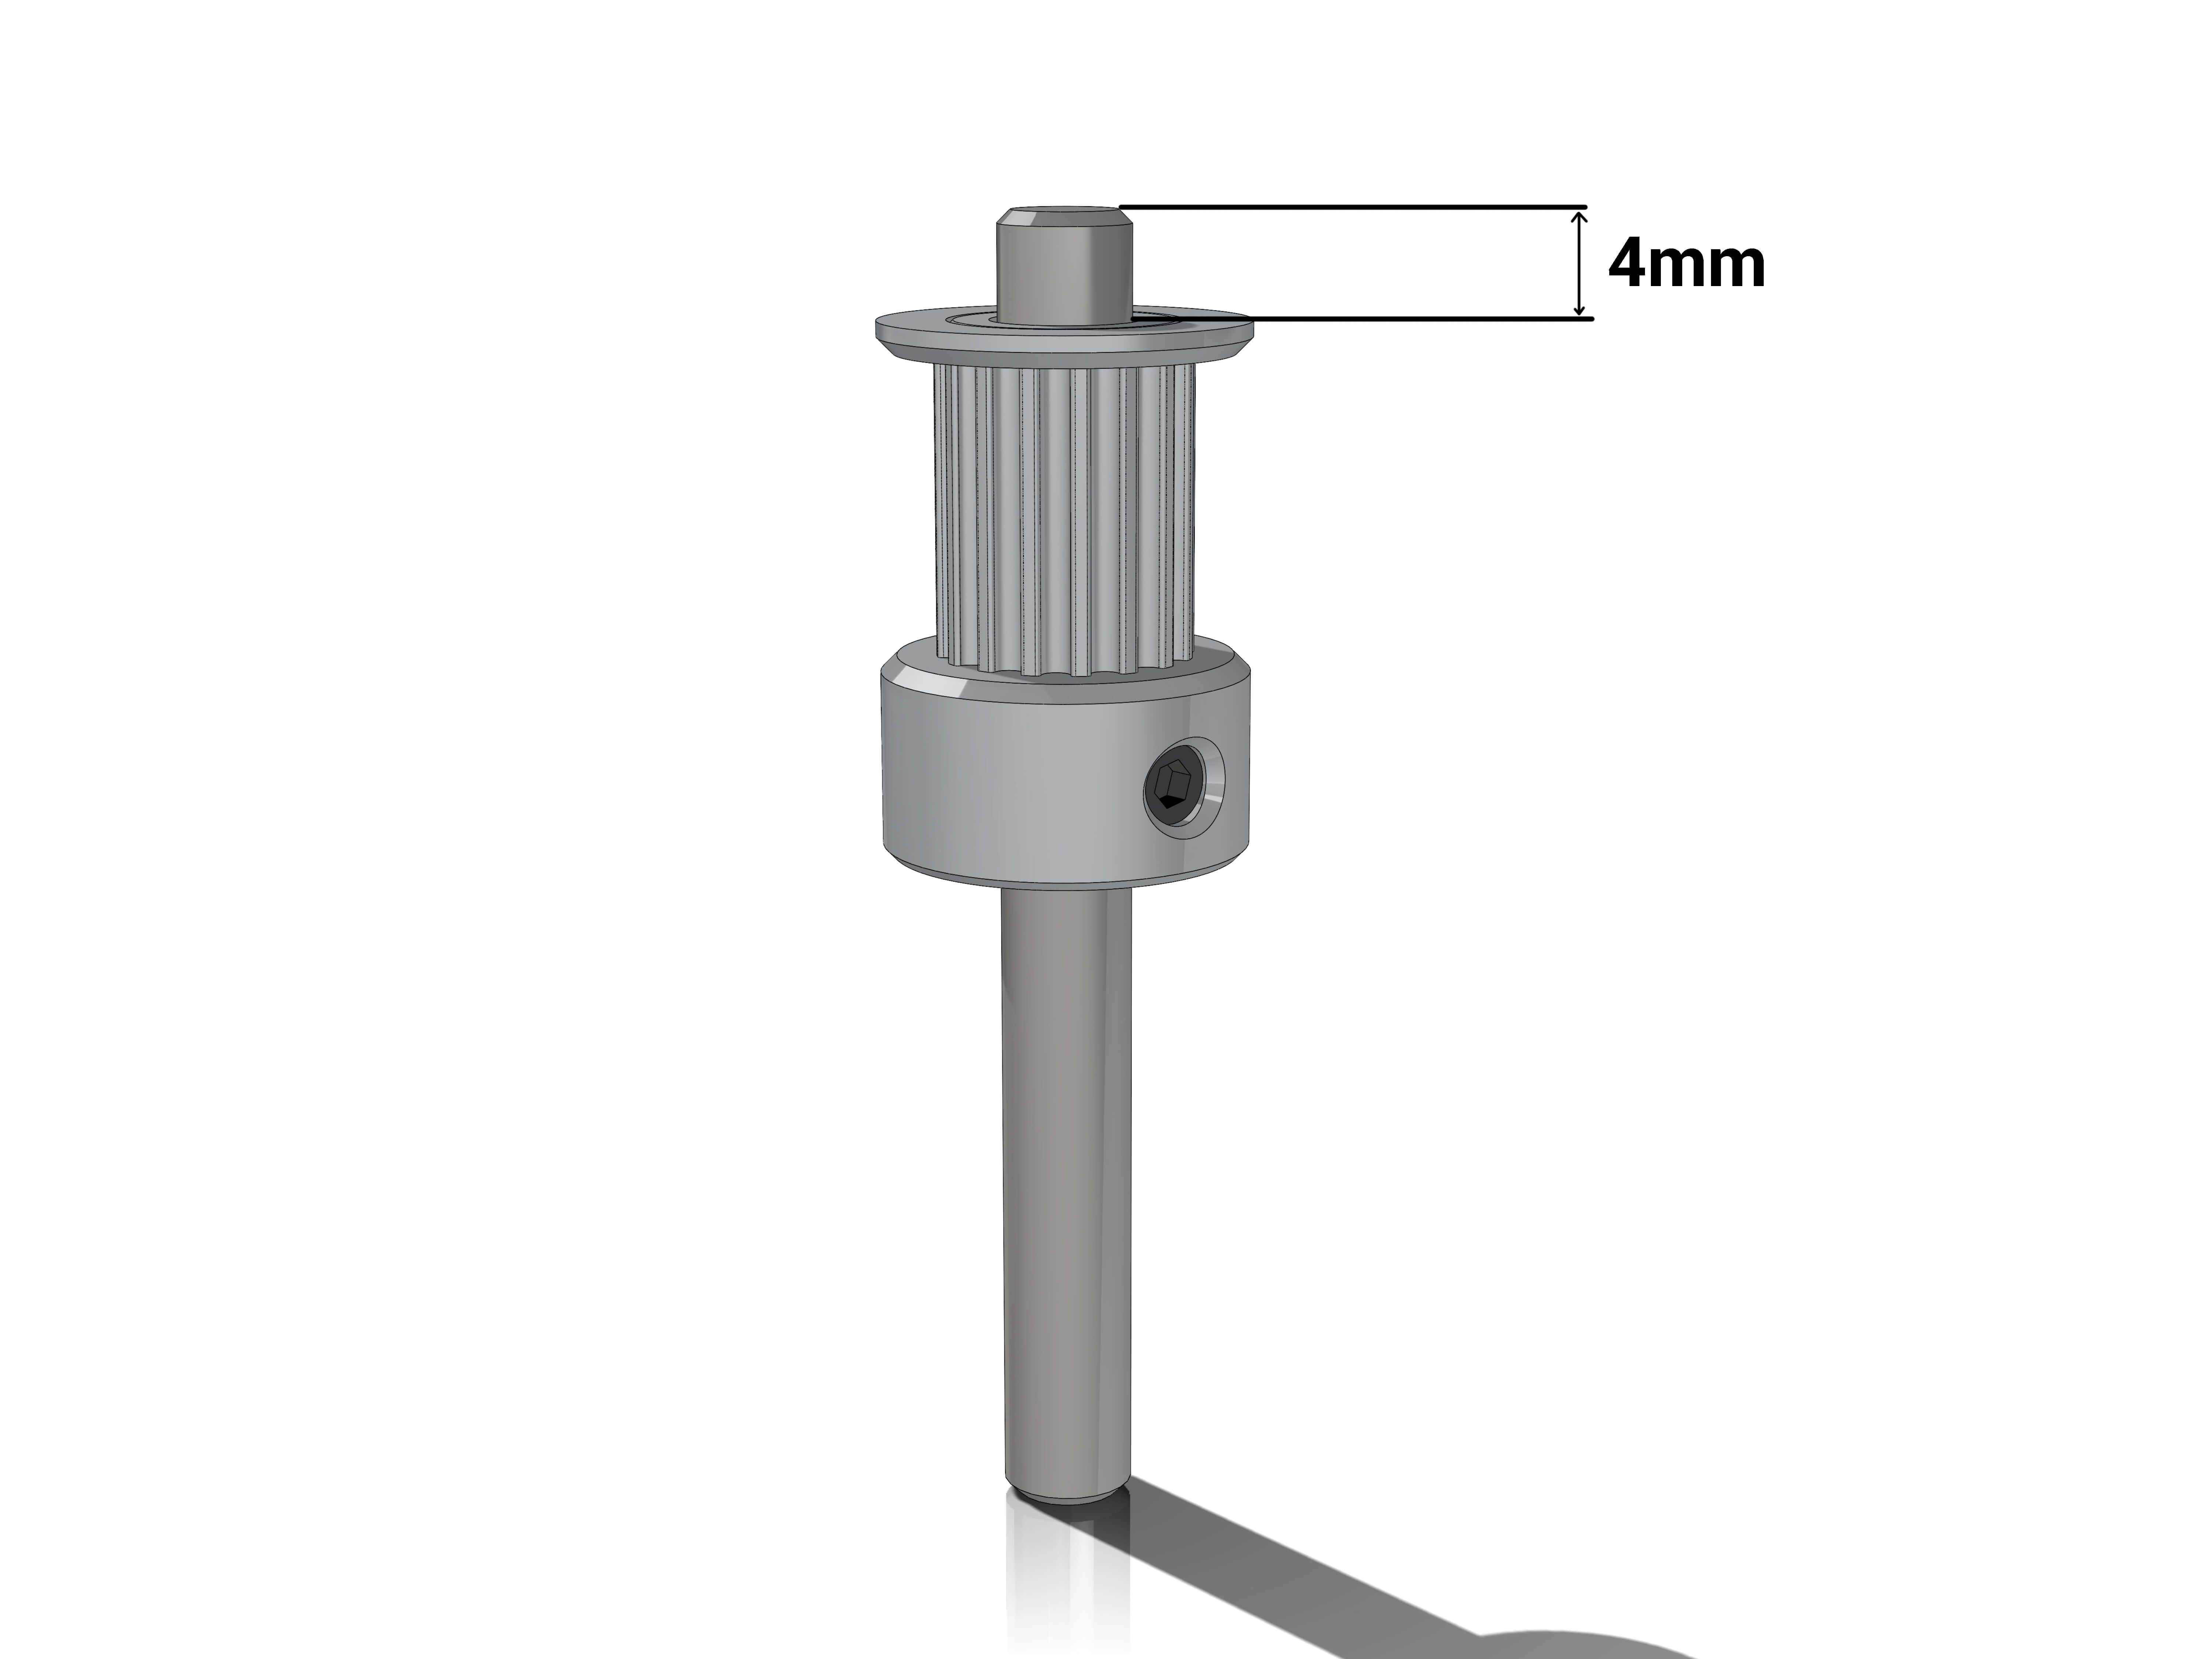
For shafts with a looser fit use either calipers or a M5/4mm HEx Key to space the top of a GT2 16T 9mm pulley about 4mm from the top of a shaft. This doesnt have to be exactly 4mm but should be in the ballpark.
Then use your M3/2.5mm Hex Key again to correctly space the bearing and 48T pulley.
¶ Assembly
From here on, everything needs to be done twice but as mentioned do this assembly one at the time and use the better one for RA.
Hardware:
- NEMA17 stepper
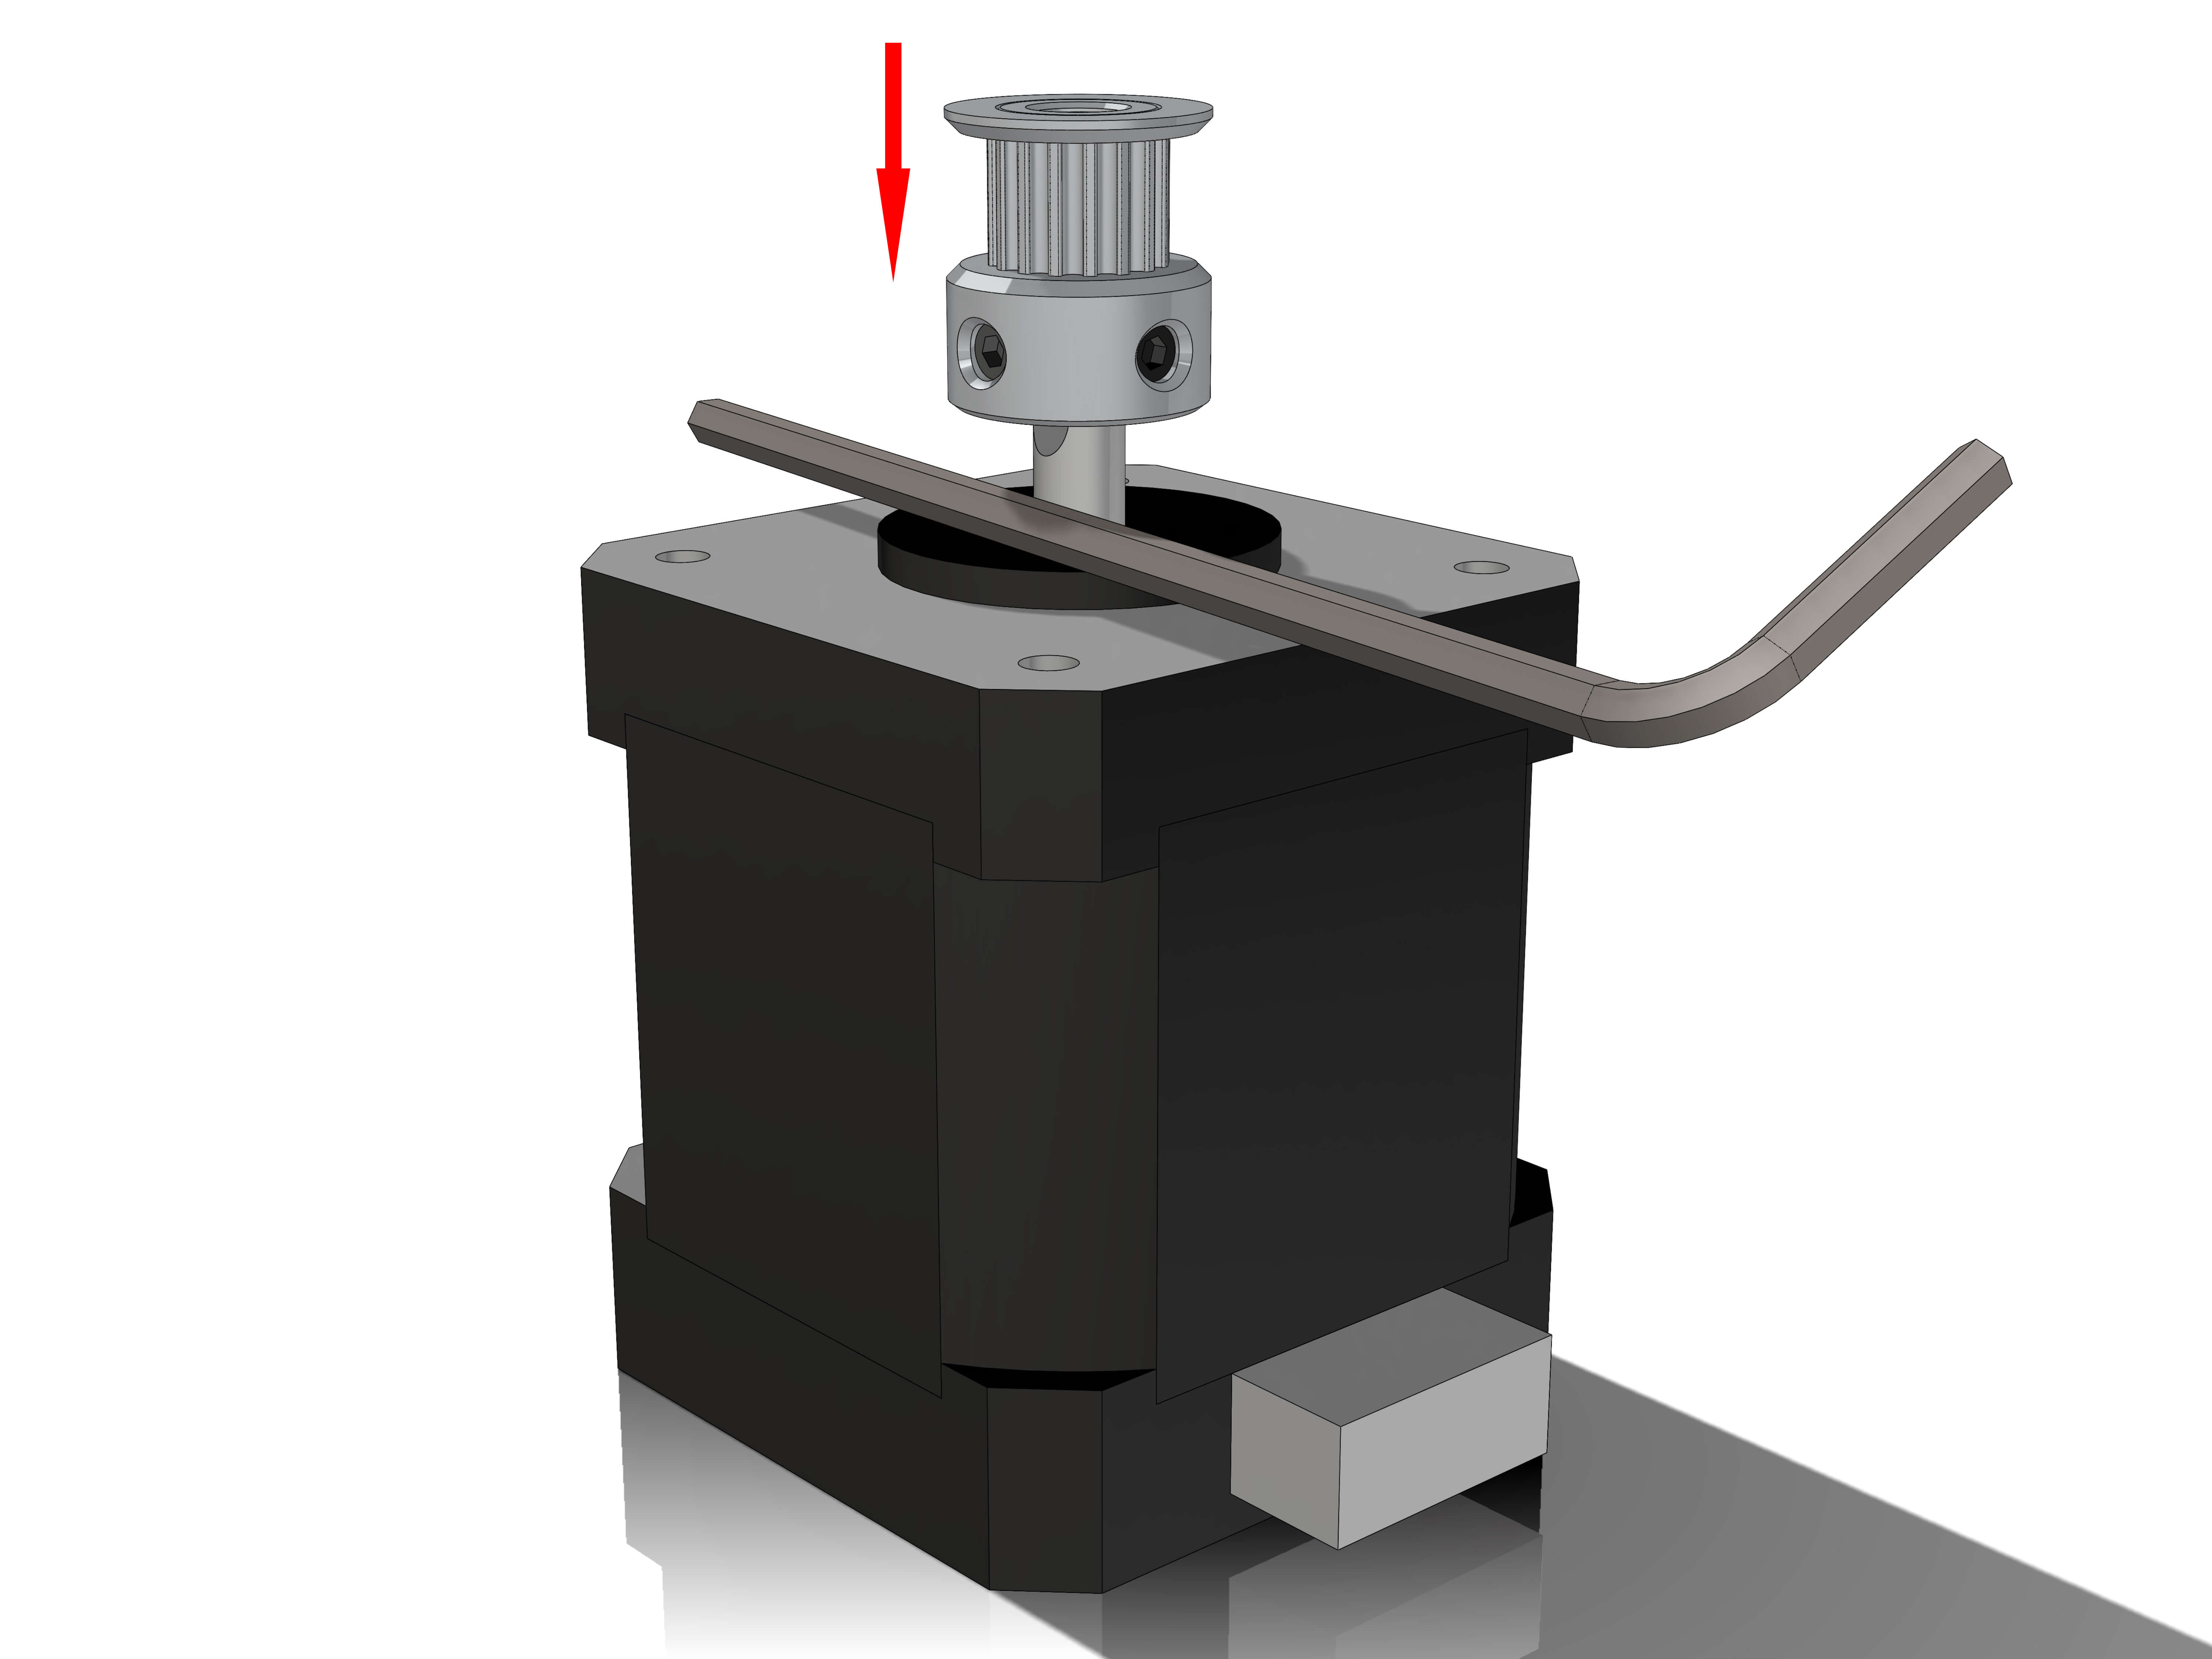
- GT2 16T 6mm pulley
Take a GT2 16T 6mm pulley and attach it to your stepper. Use a M3/2.5mm Hex Key for spacing as shown.
If the shaft of your stepper sticks out more than 1mm or so, it would be good to shorten it (or cut it with a saw or a dremel disc). It will make it easier to get the belts over in a later step.
(If you have different steppers for RA and DEC, use the one with more resolution or higher torque for RA)
Parts:
- Gearbox_body_left
- Gearbox_body_right
Hardware:
- M3 inserts (11)
- M3x10 screws (4)
- M3 washers (4)
- M5 nuts (2)
- M3x12 screws (3)
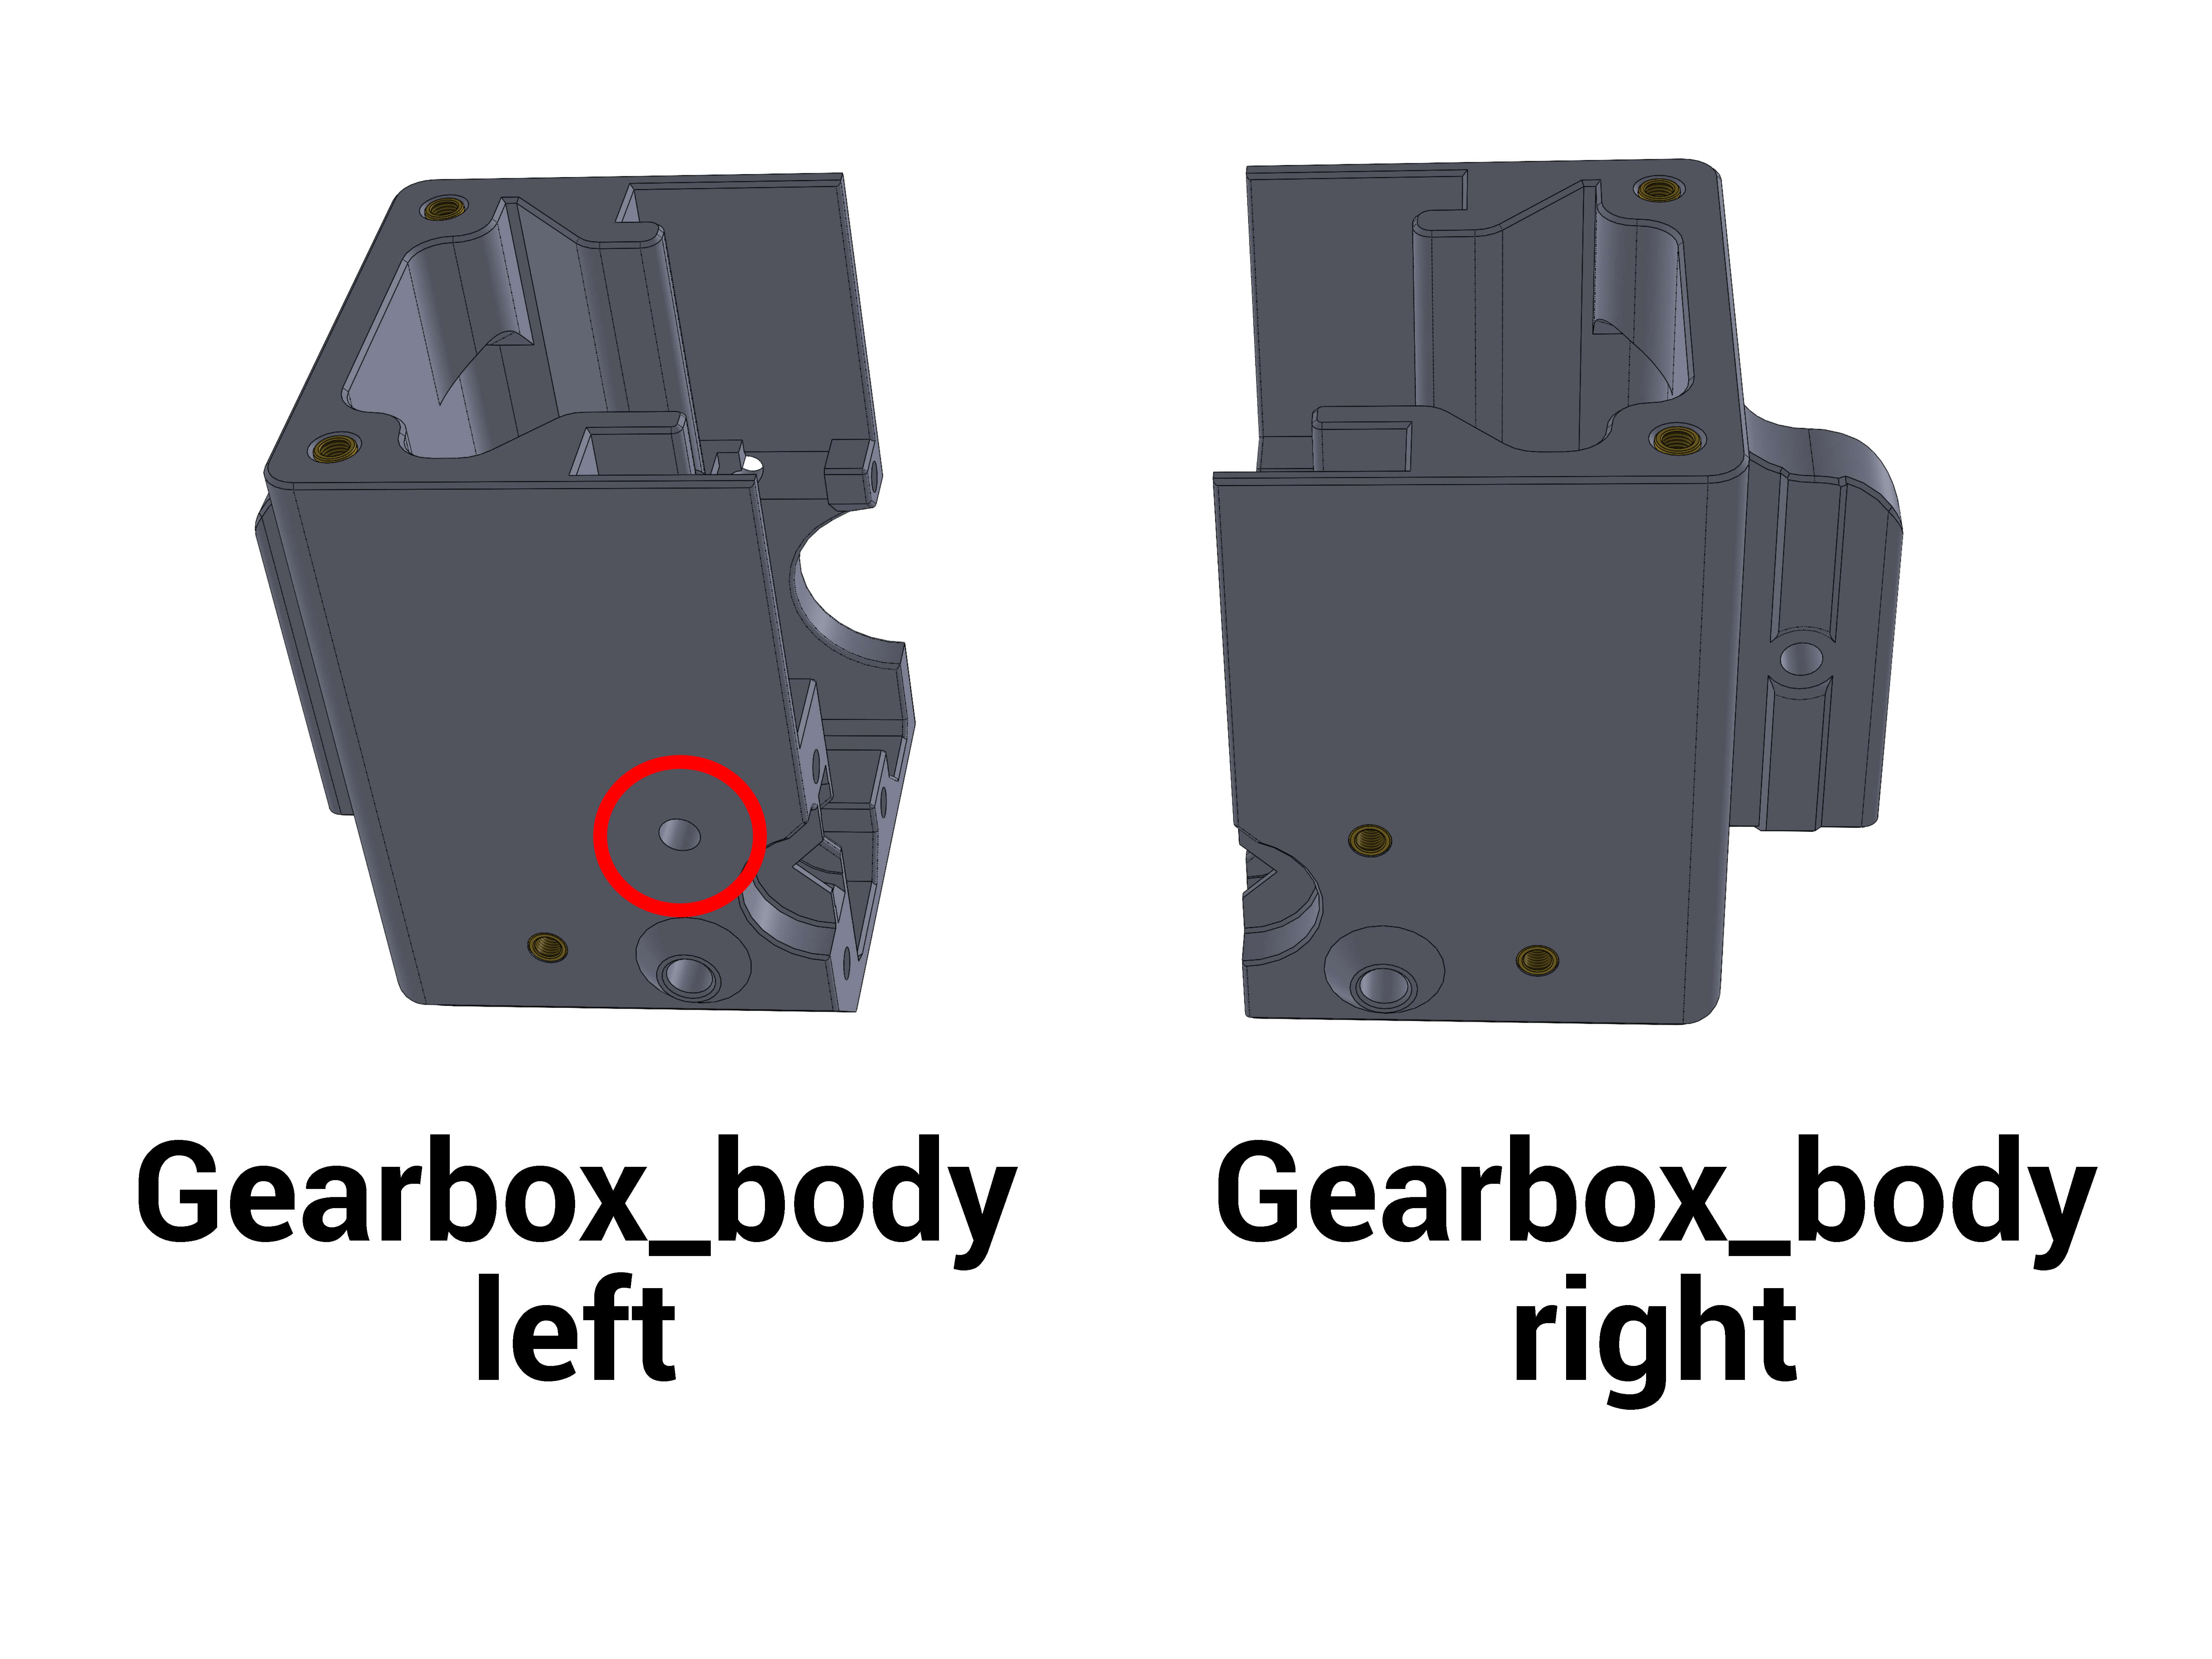
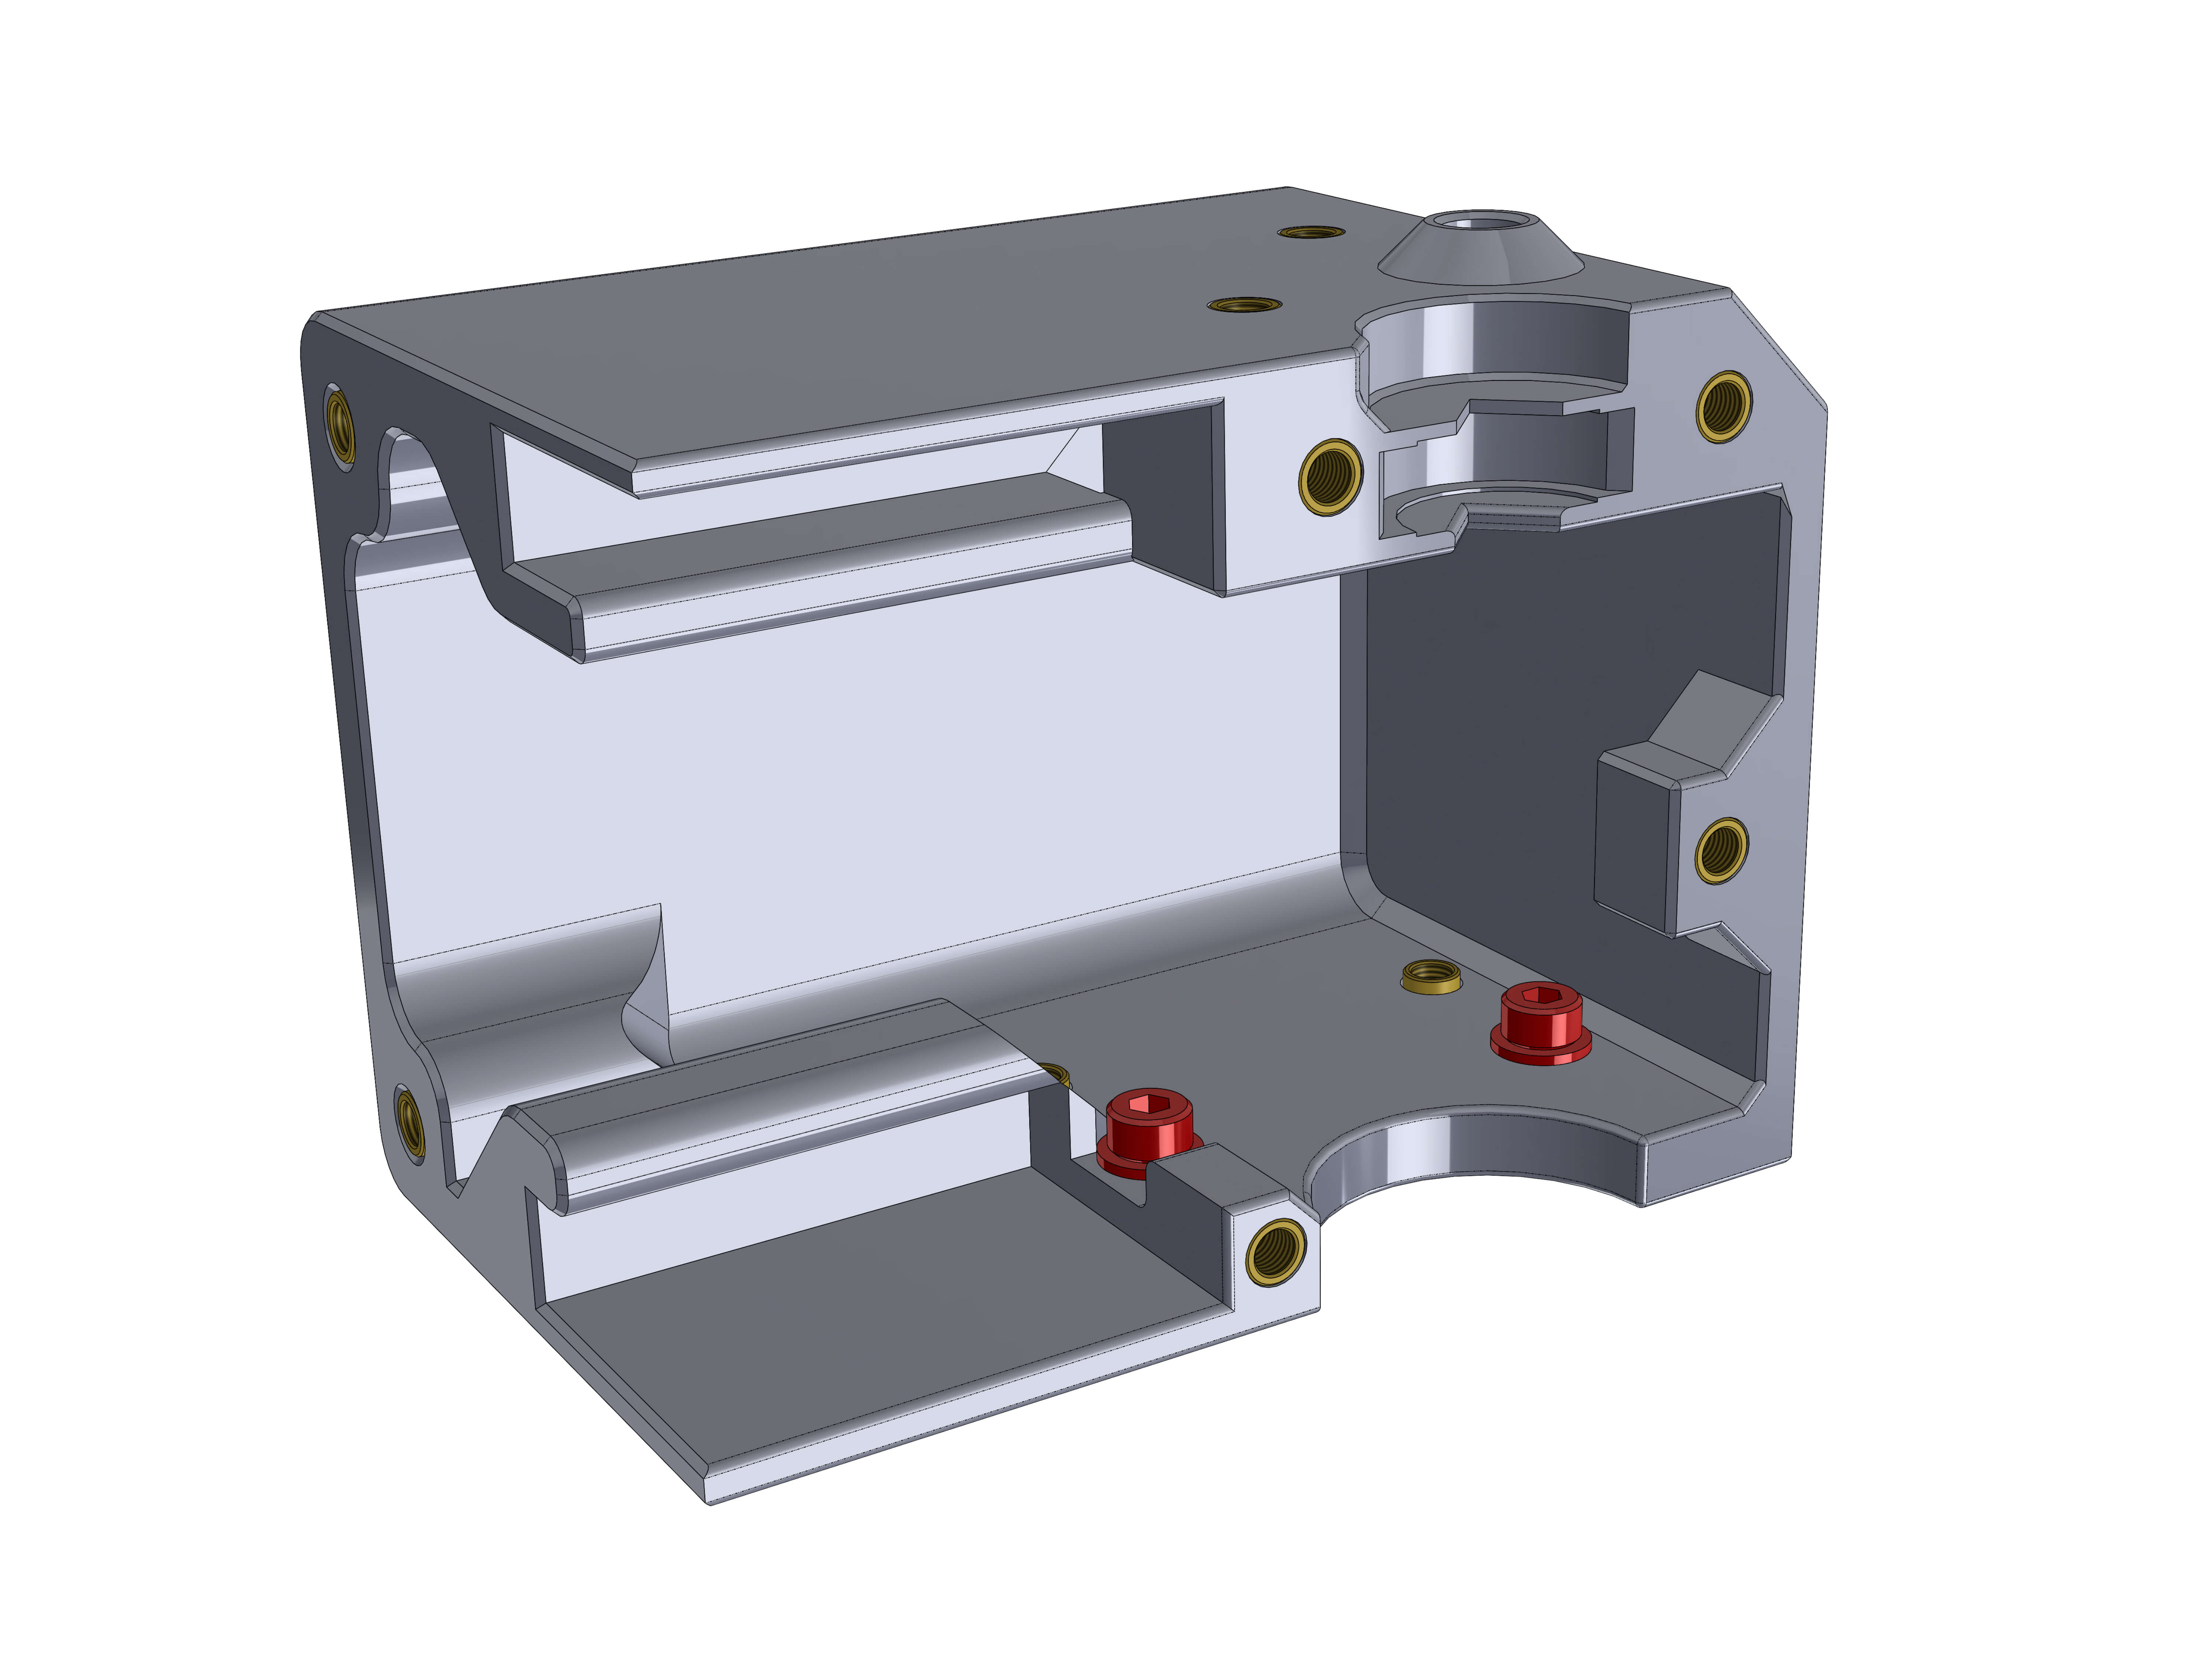
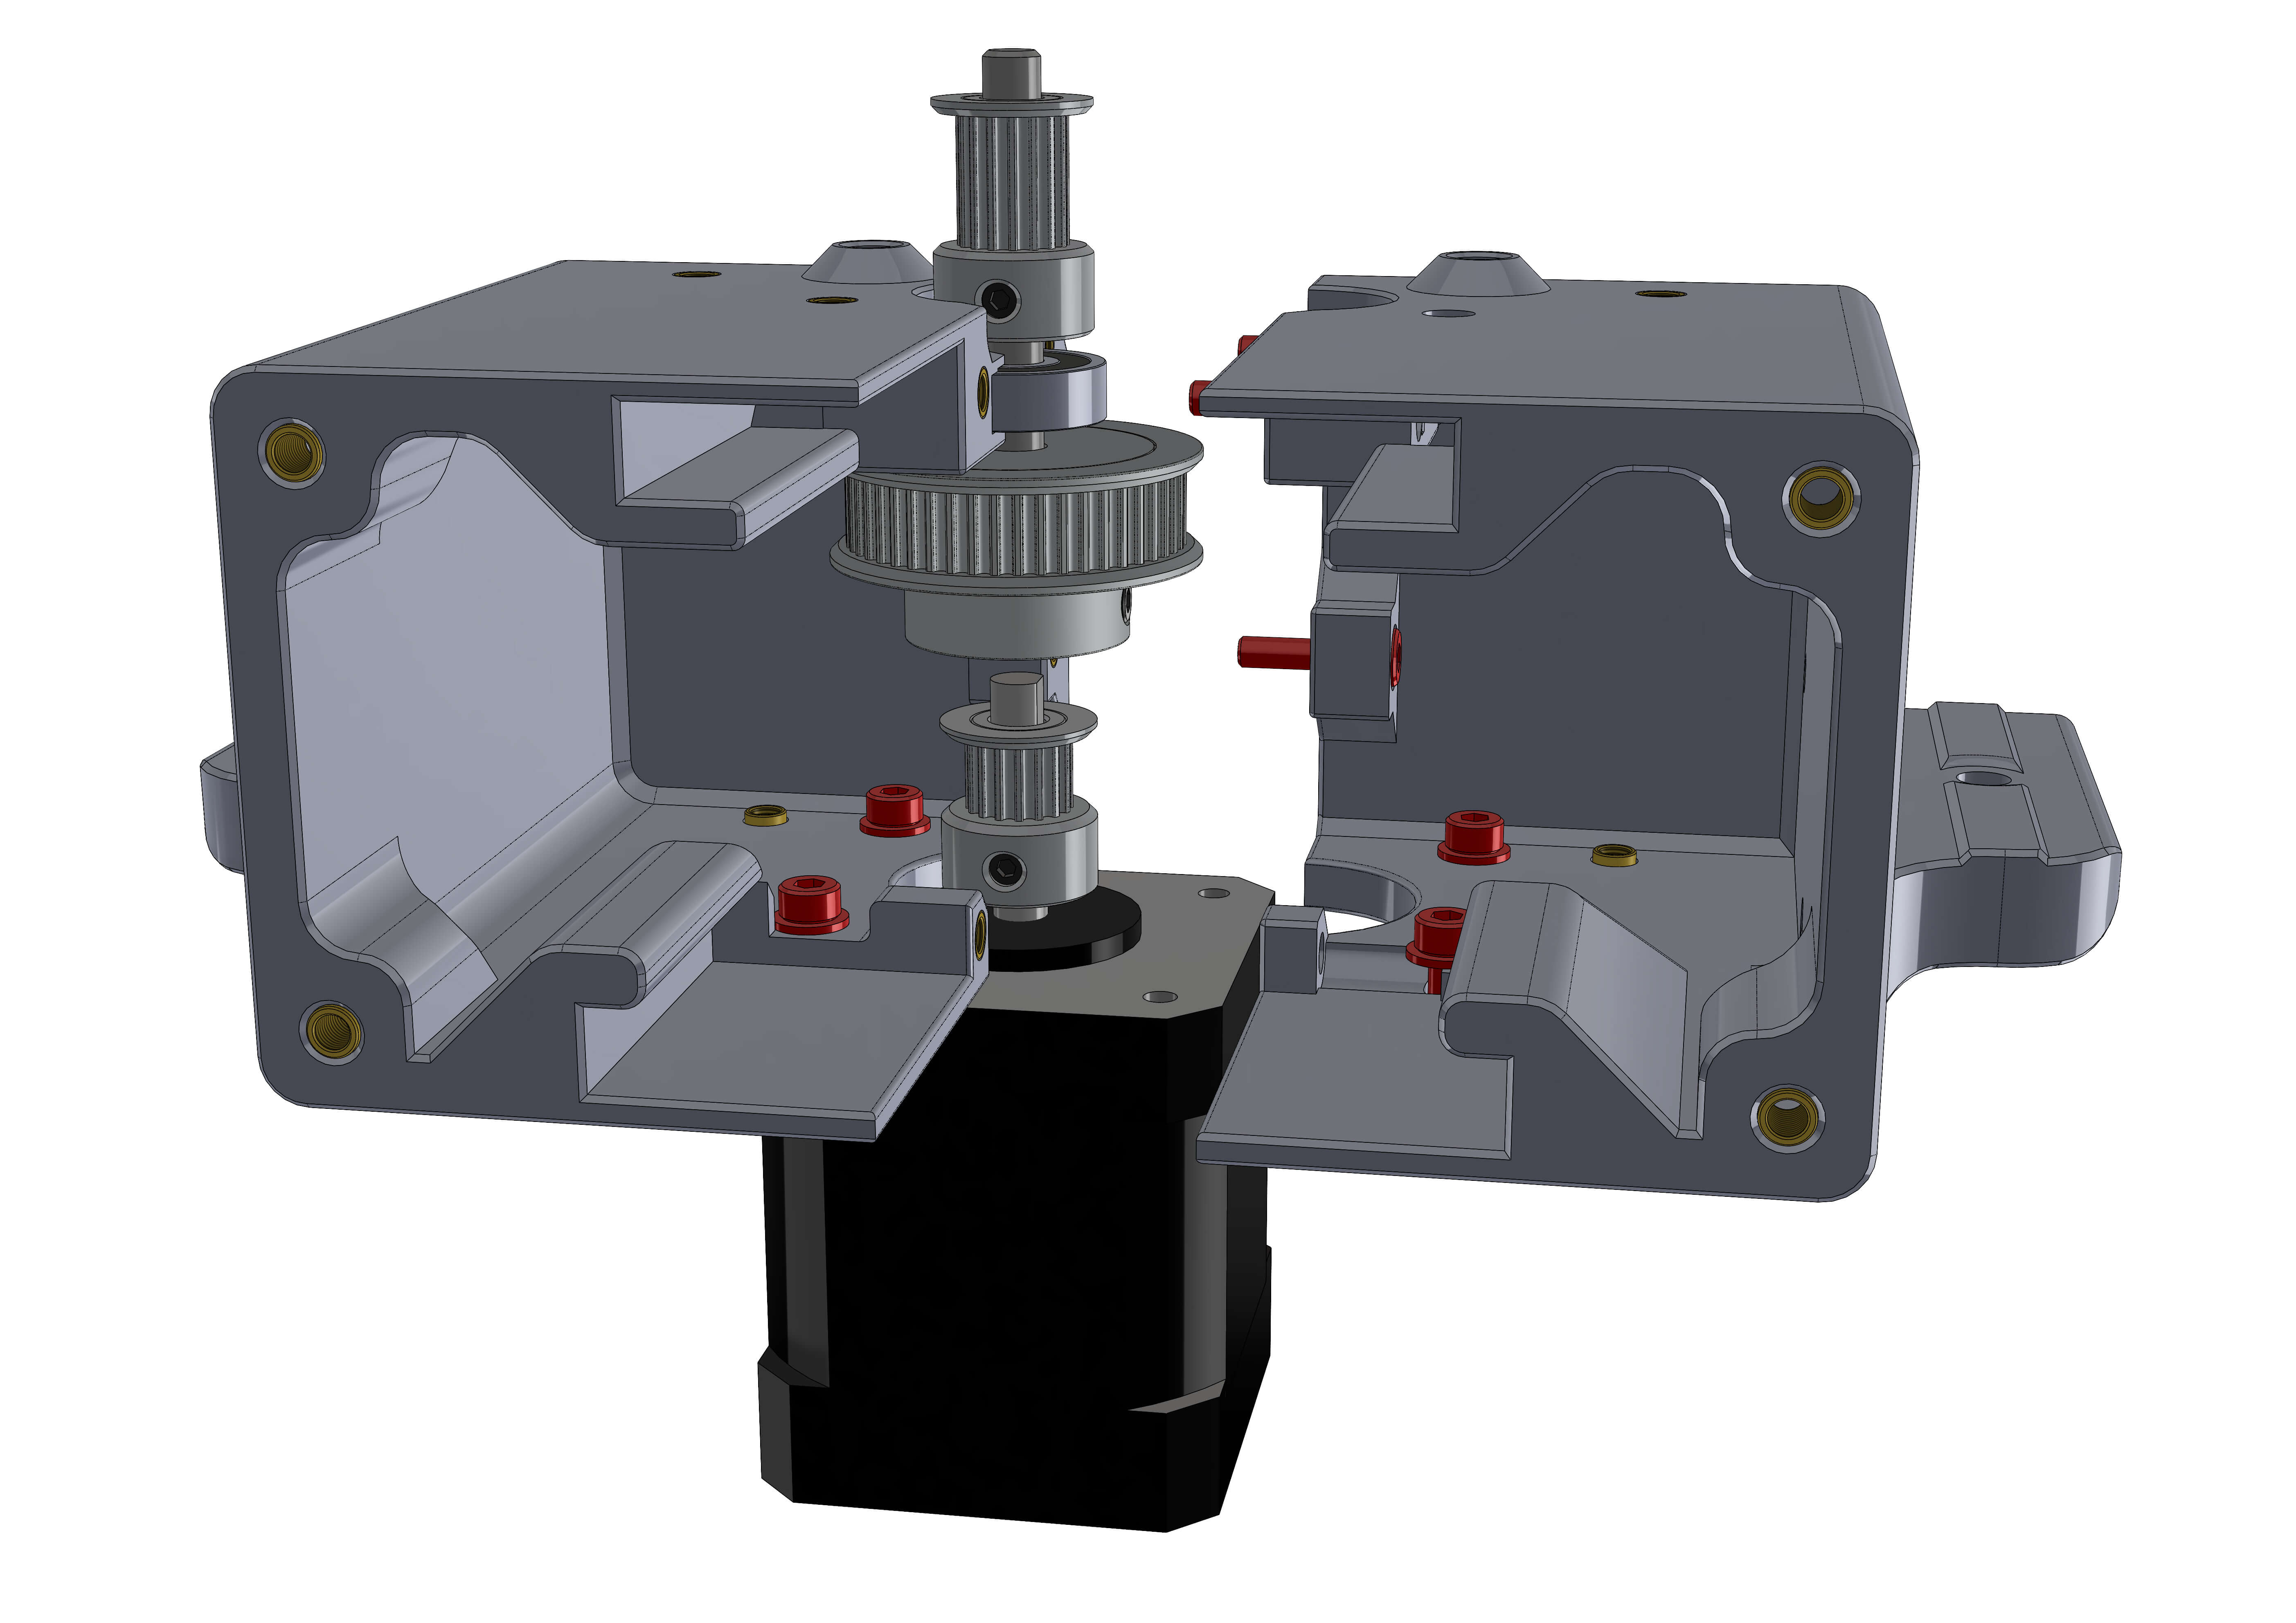
The two gearbox halves are referred to left and right according to this image.
Insert two of the inserts on the top of each half. Insert two inserts on the side of the right part and one on the left as shown.
Note the missing heatsert on the left half, this is intentionally left out.
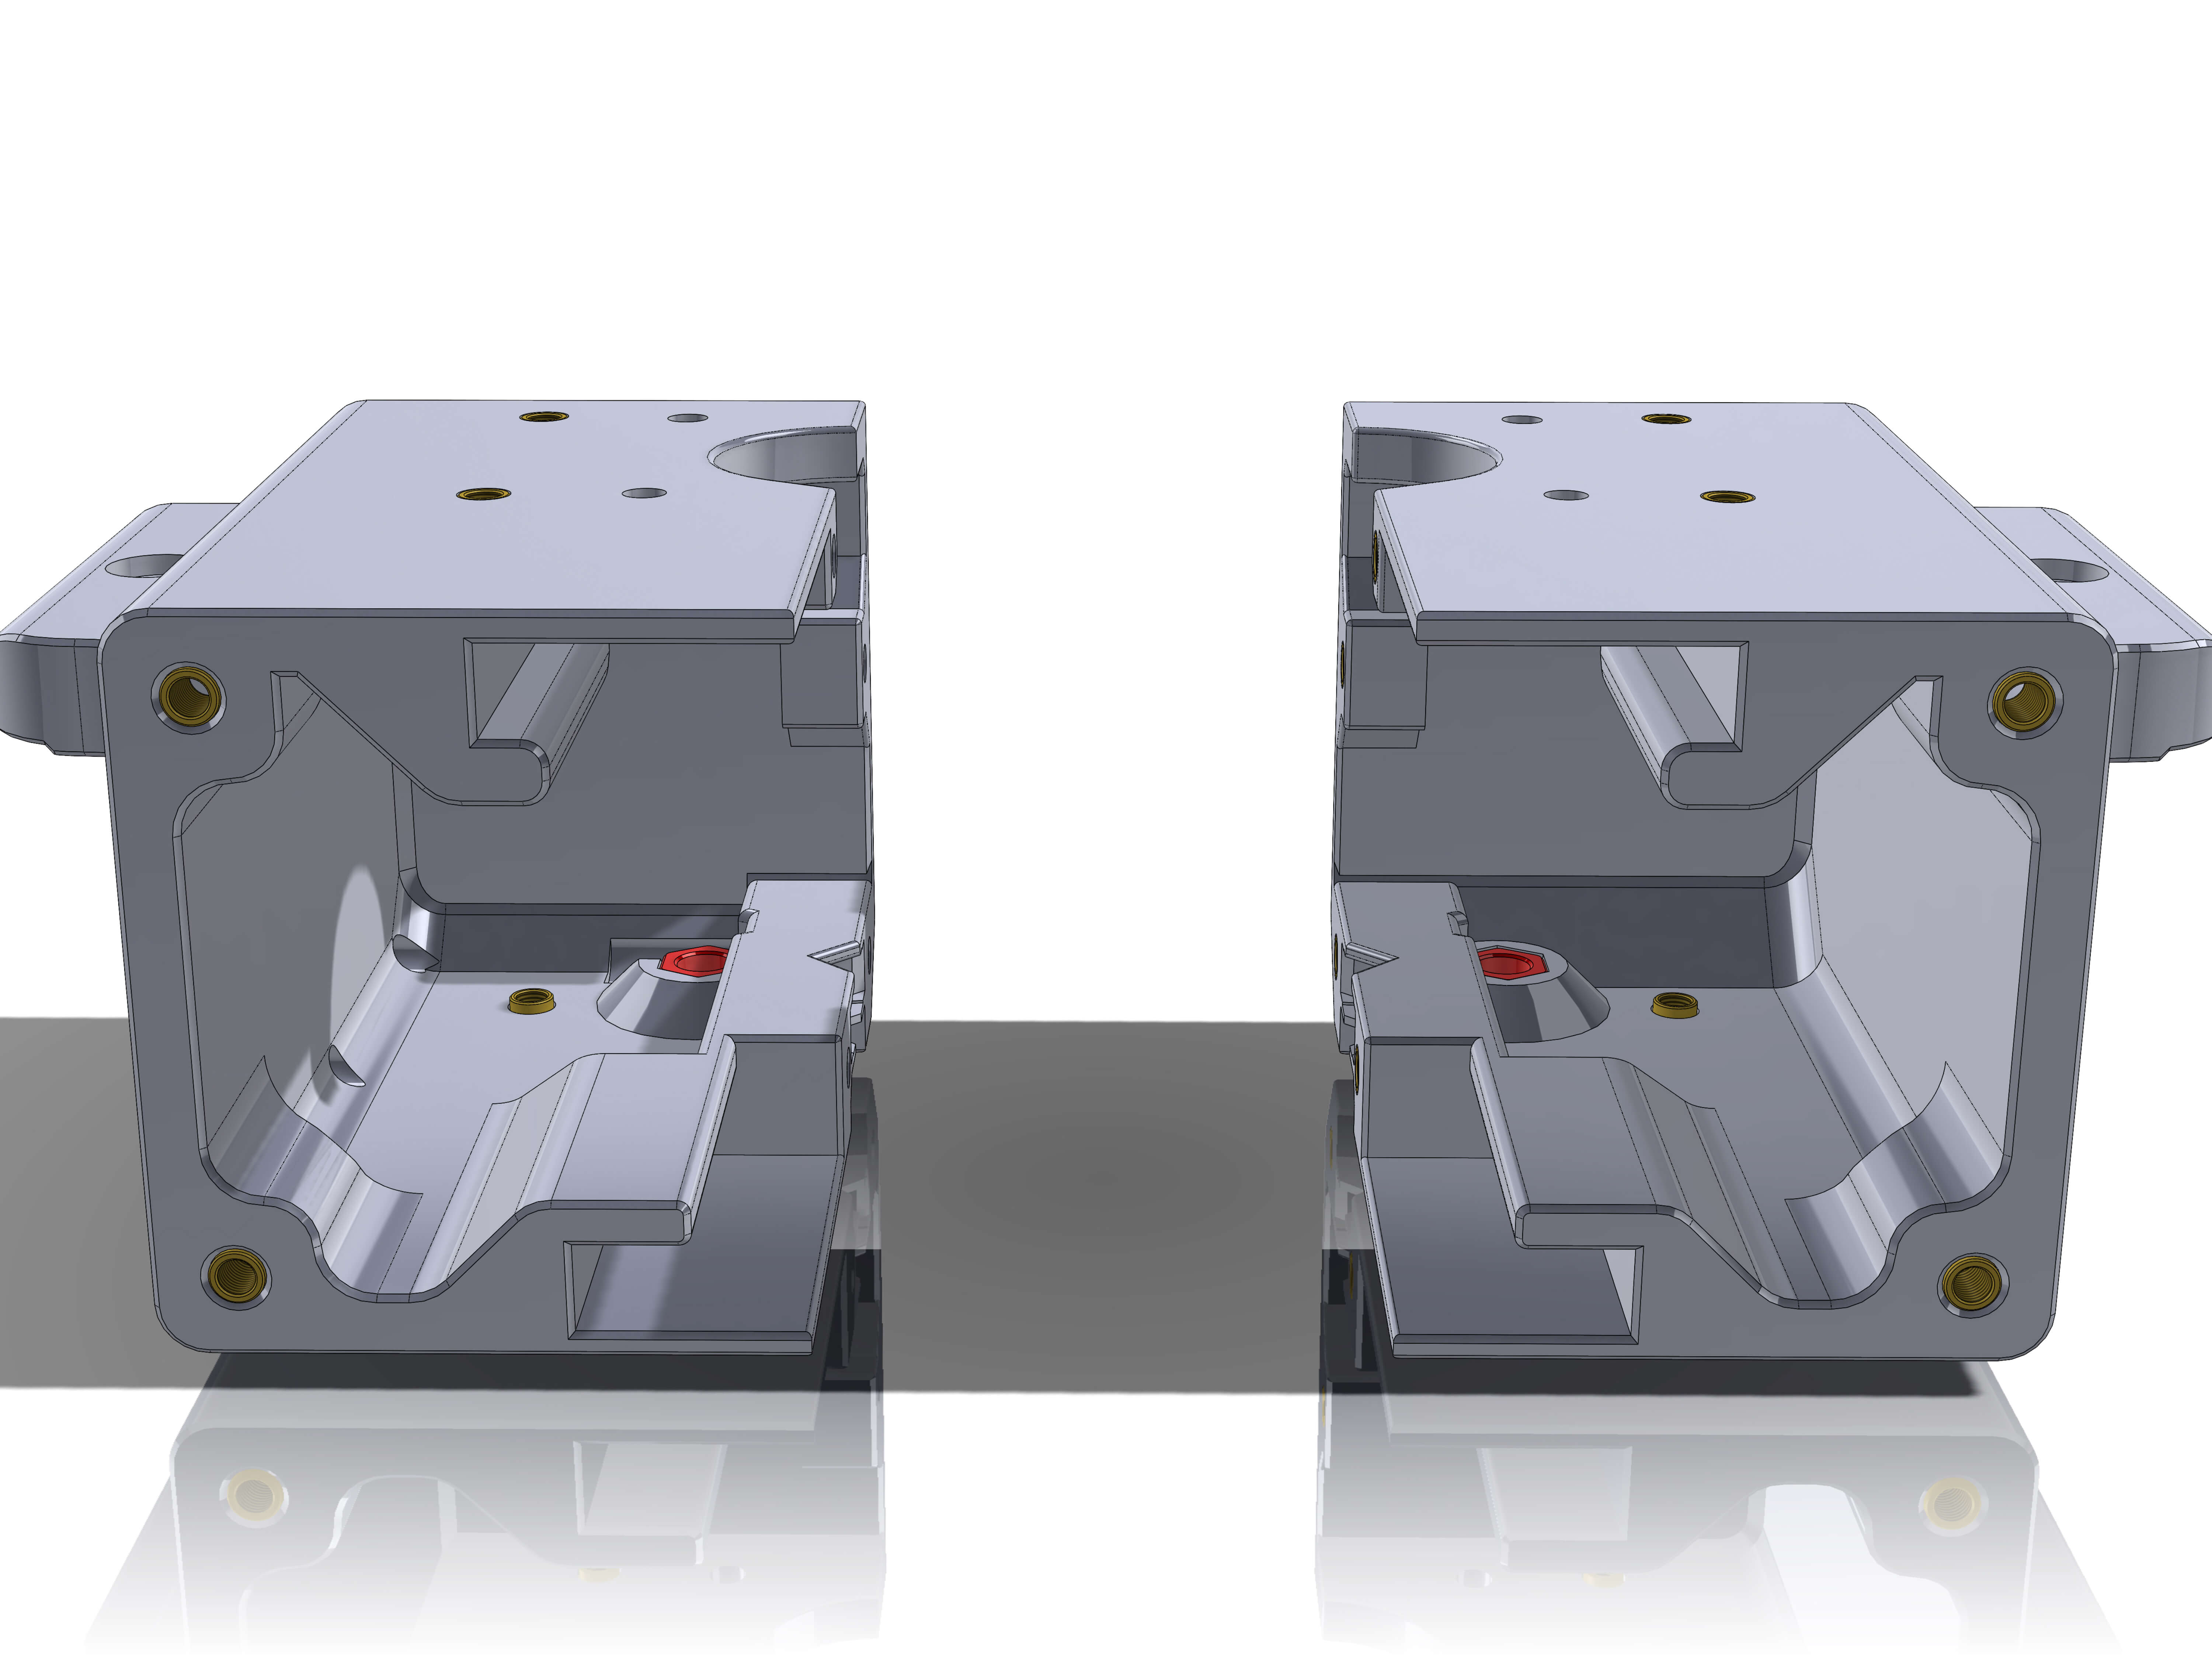
Insert two M5 nuts into both halves.
Take the right half.
Insert the 4 inserts as shown.
Attach two M3x10mm and M3 washers as shown.
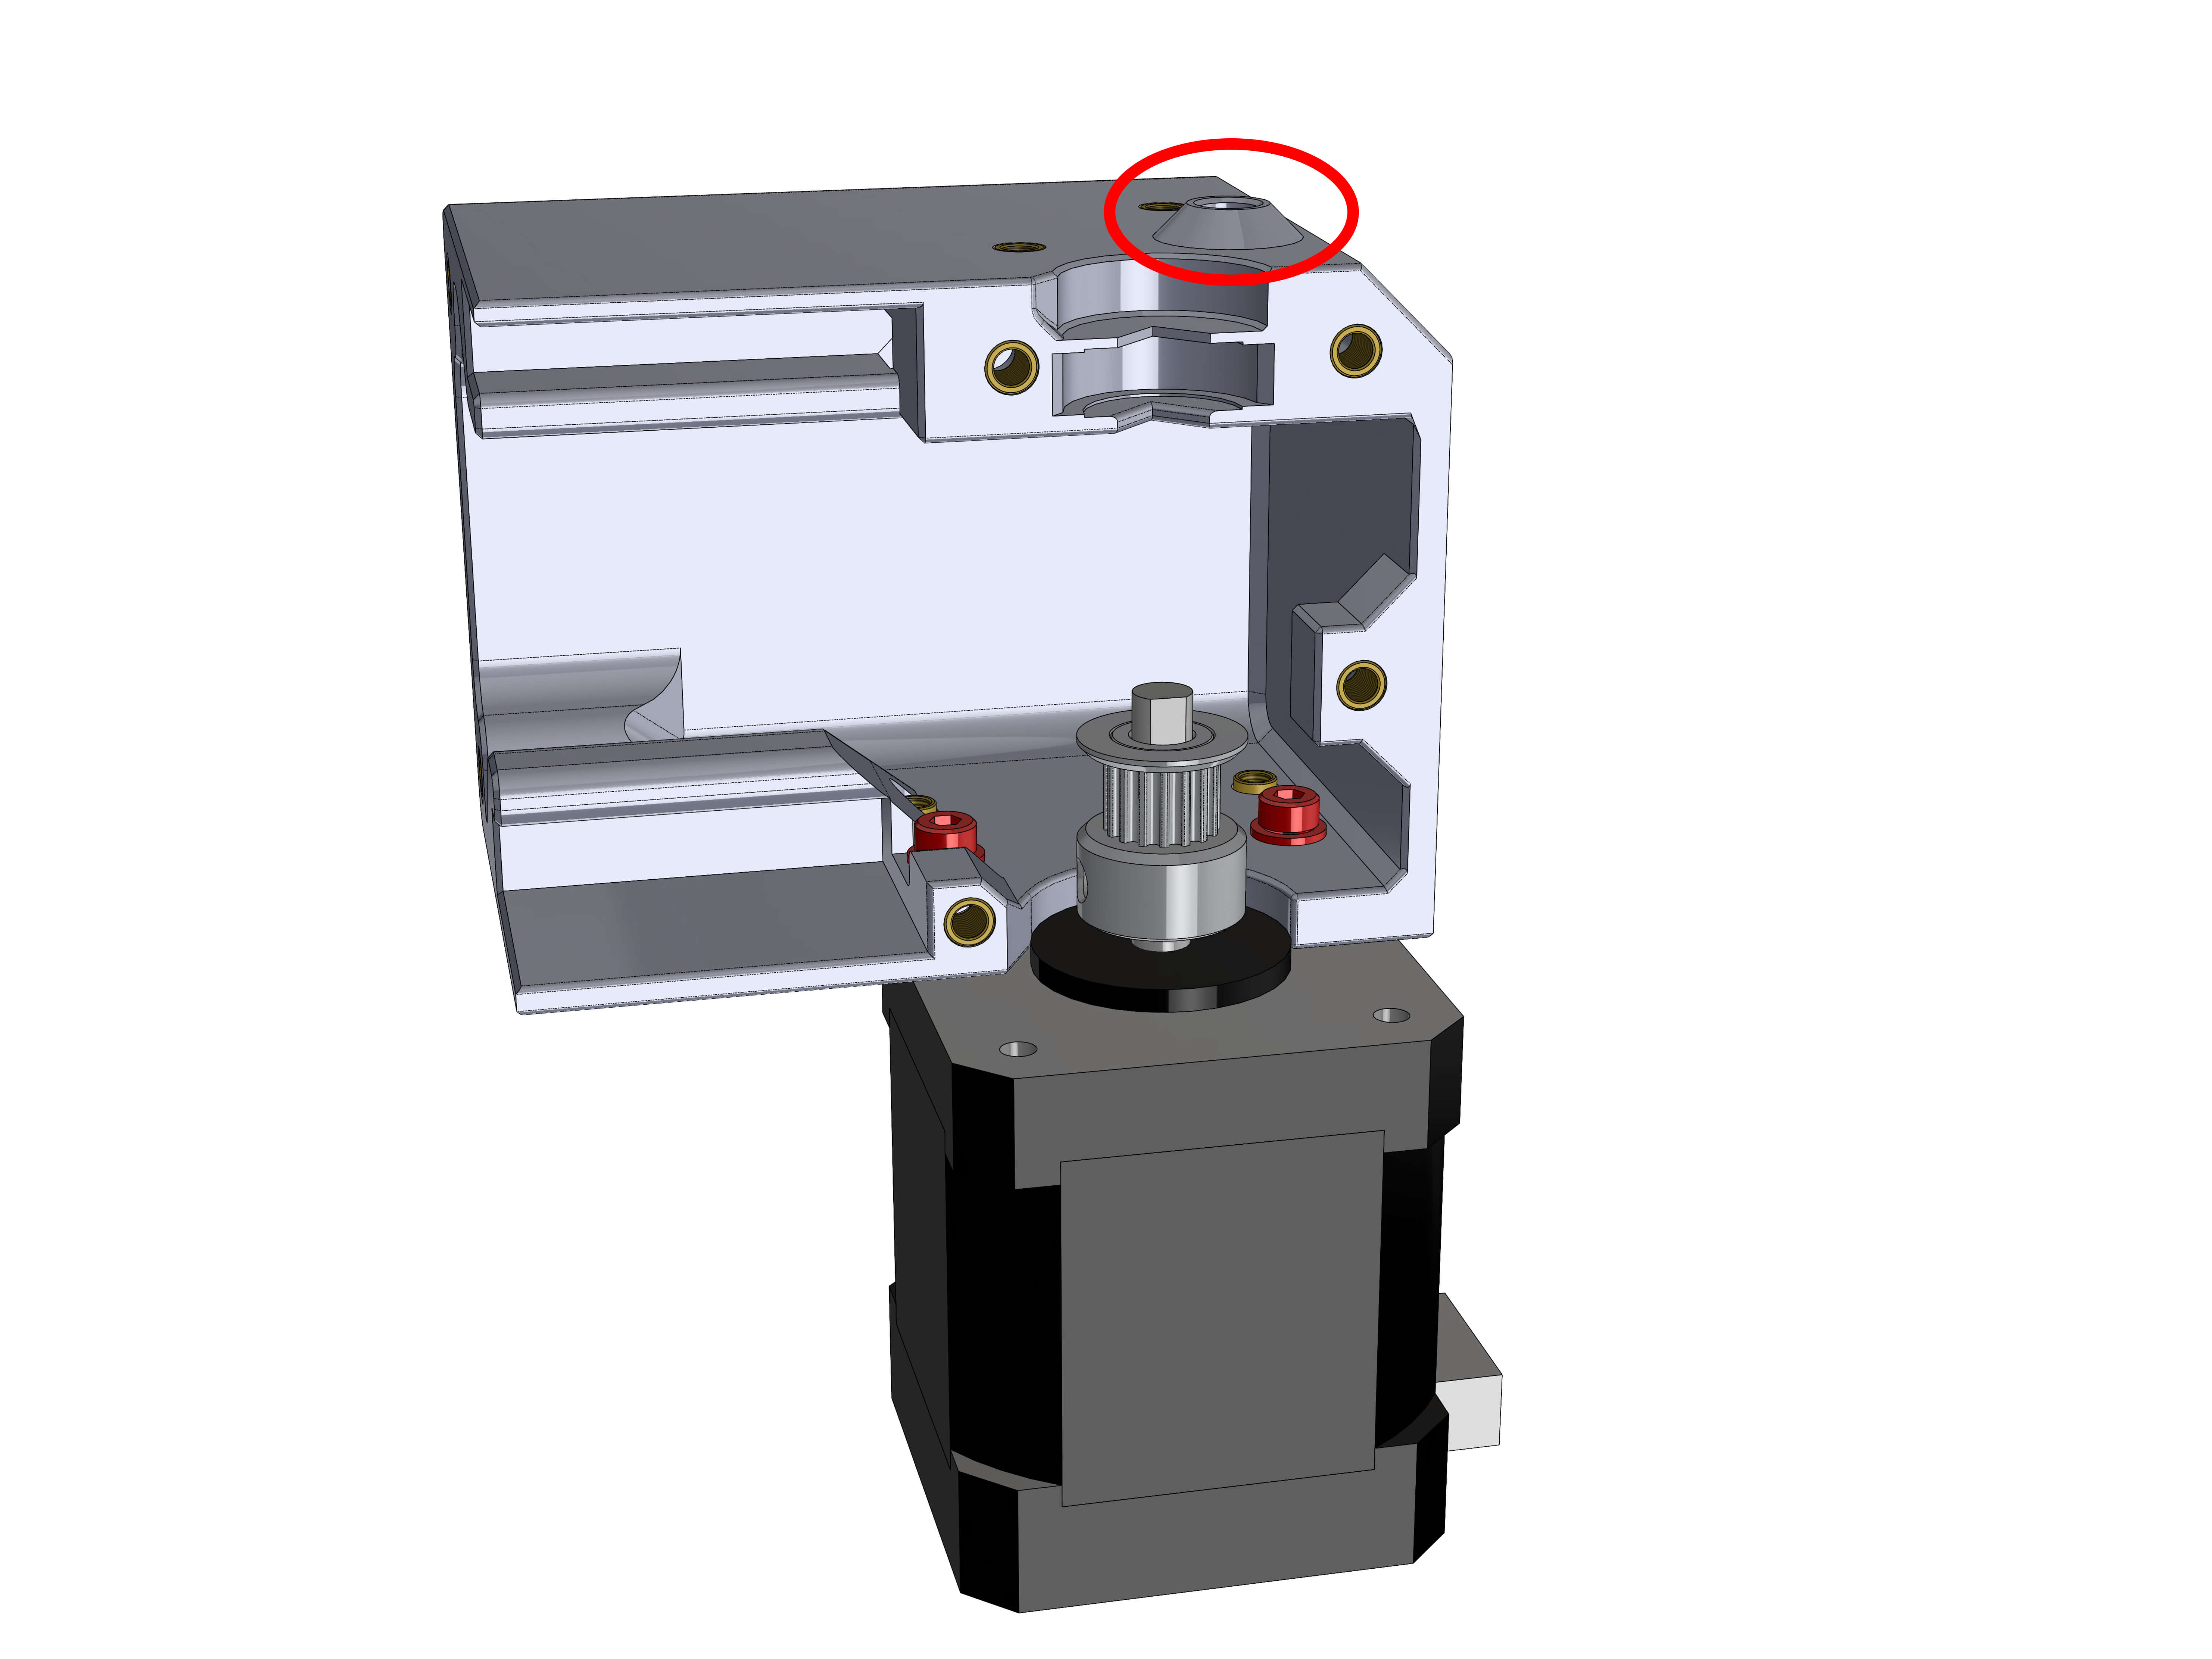
Attach a stepper as shown. Orient it so that the cable/plug faces away from the gearbox body.
Use the marked hole to access the rear screw.
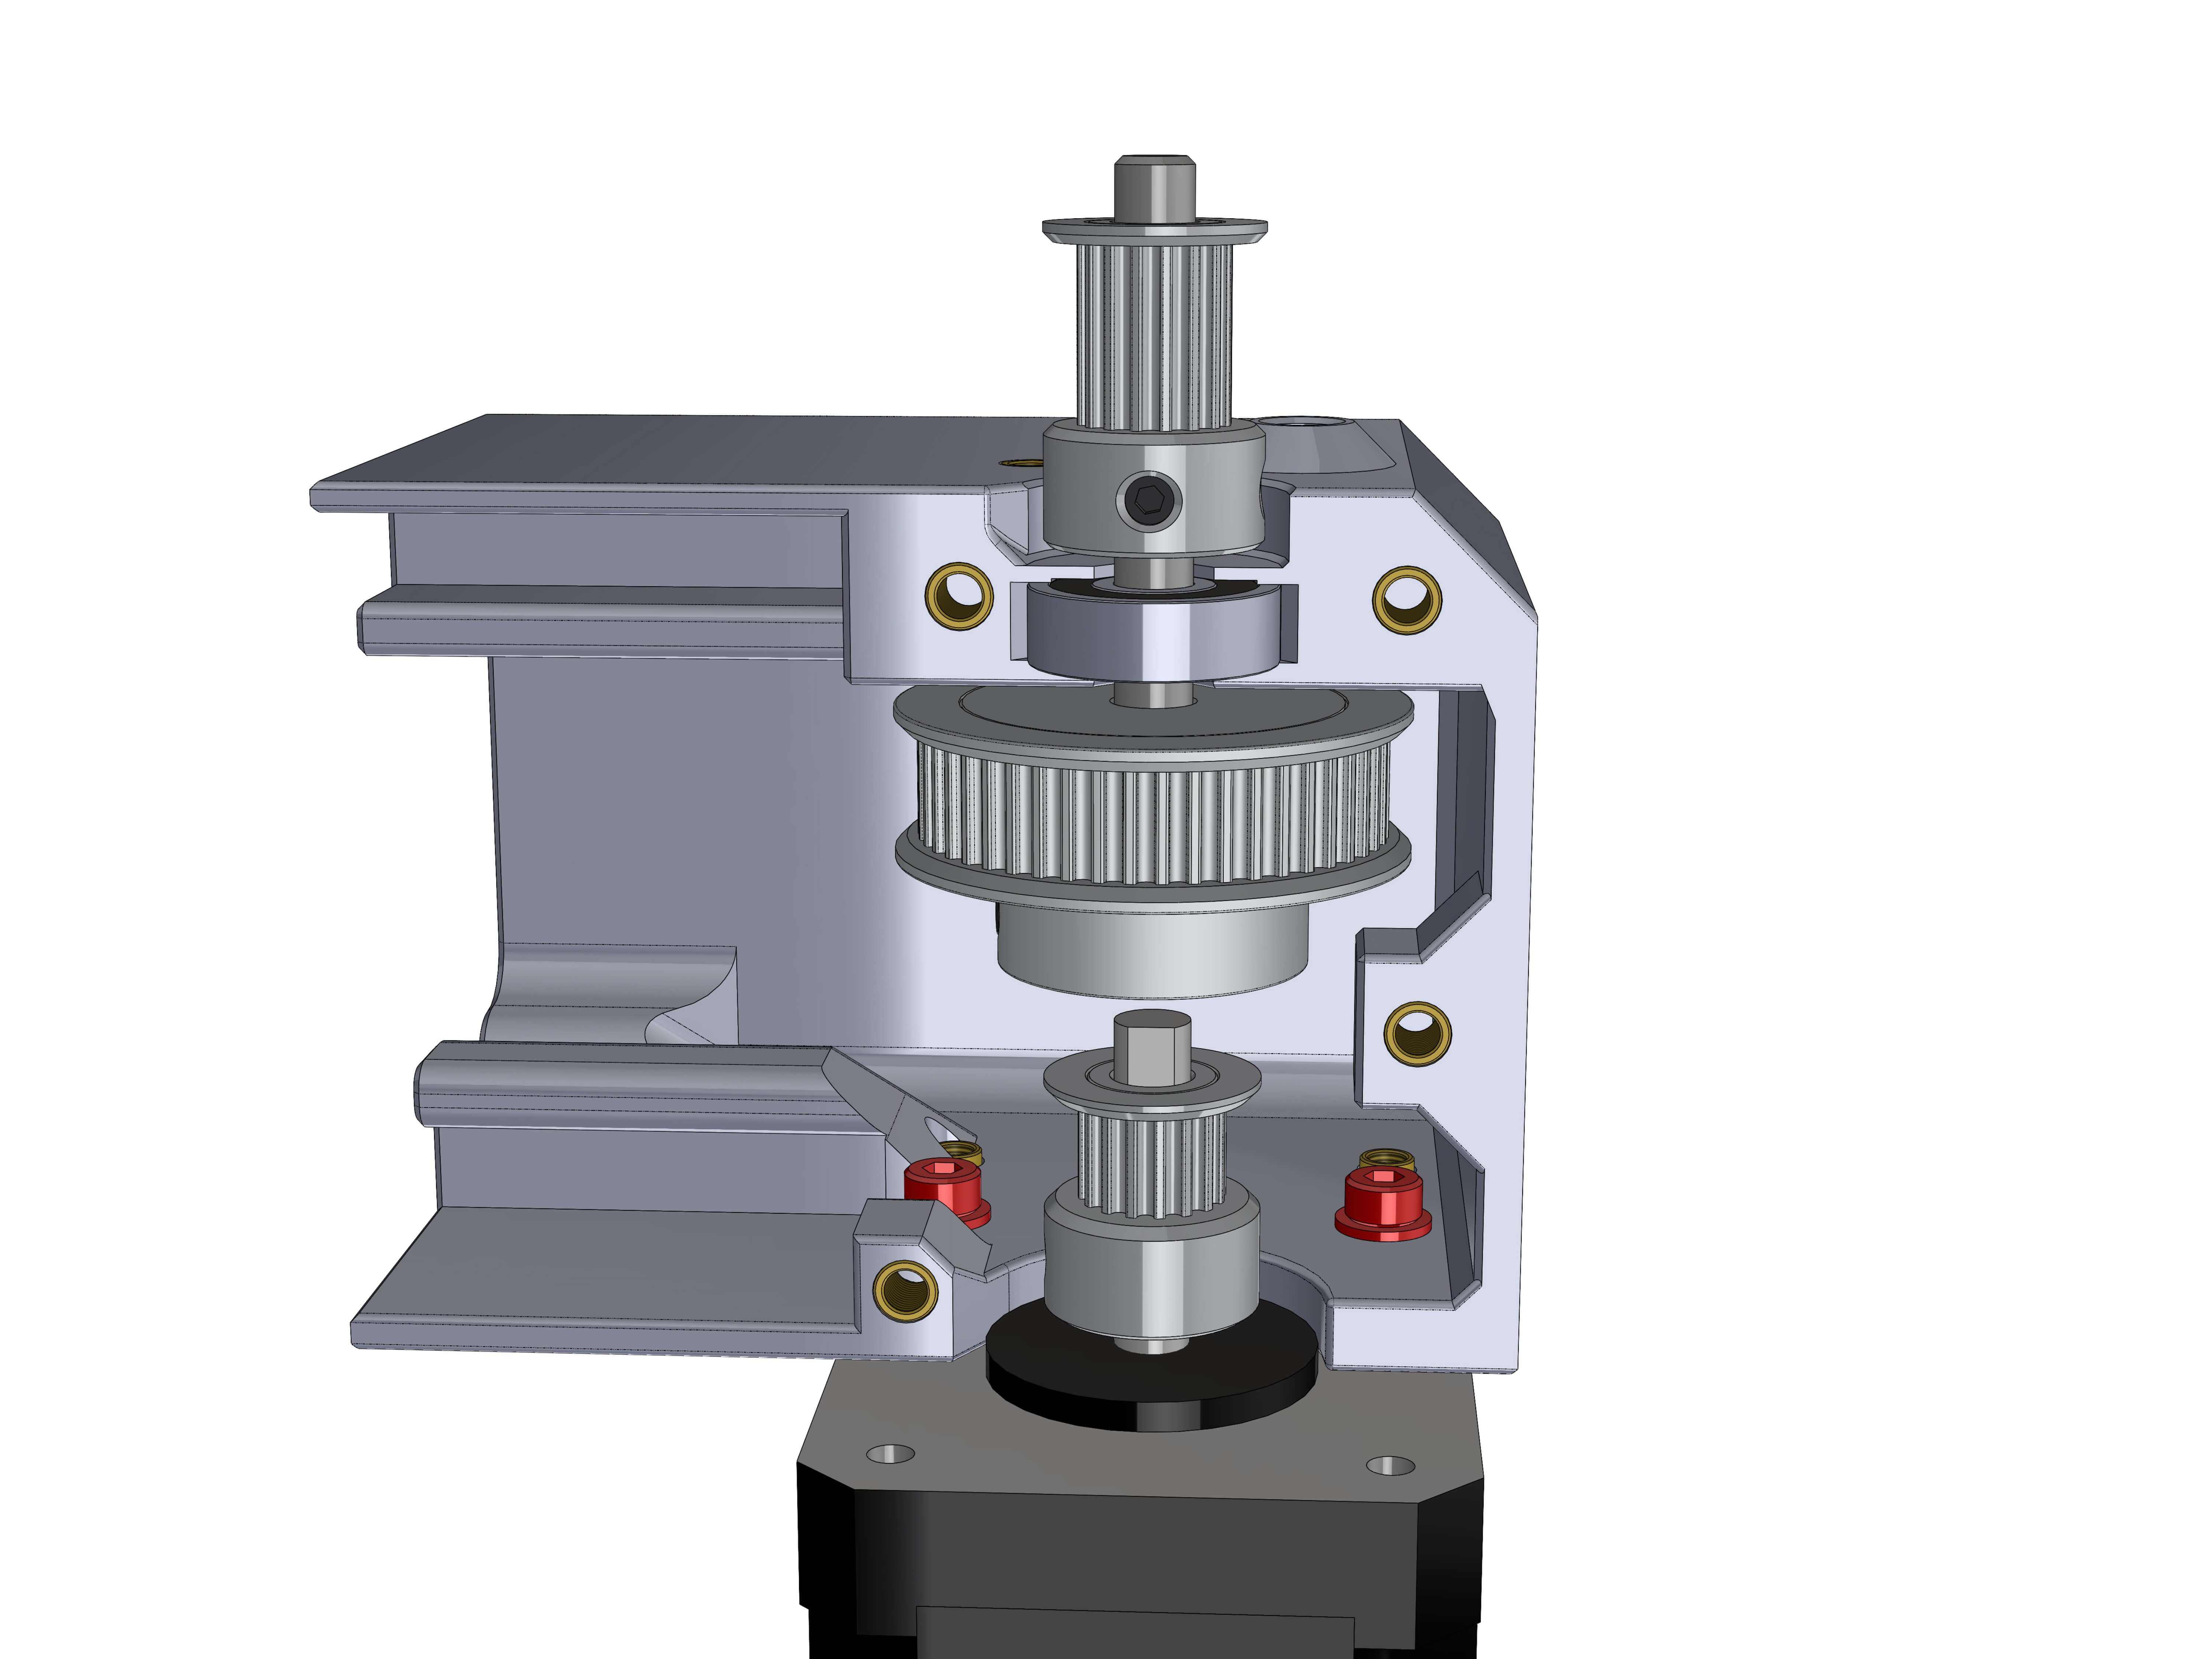
Attach a shaft with pulley from the previous steps as shown.
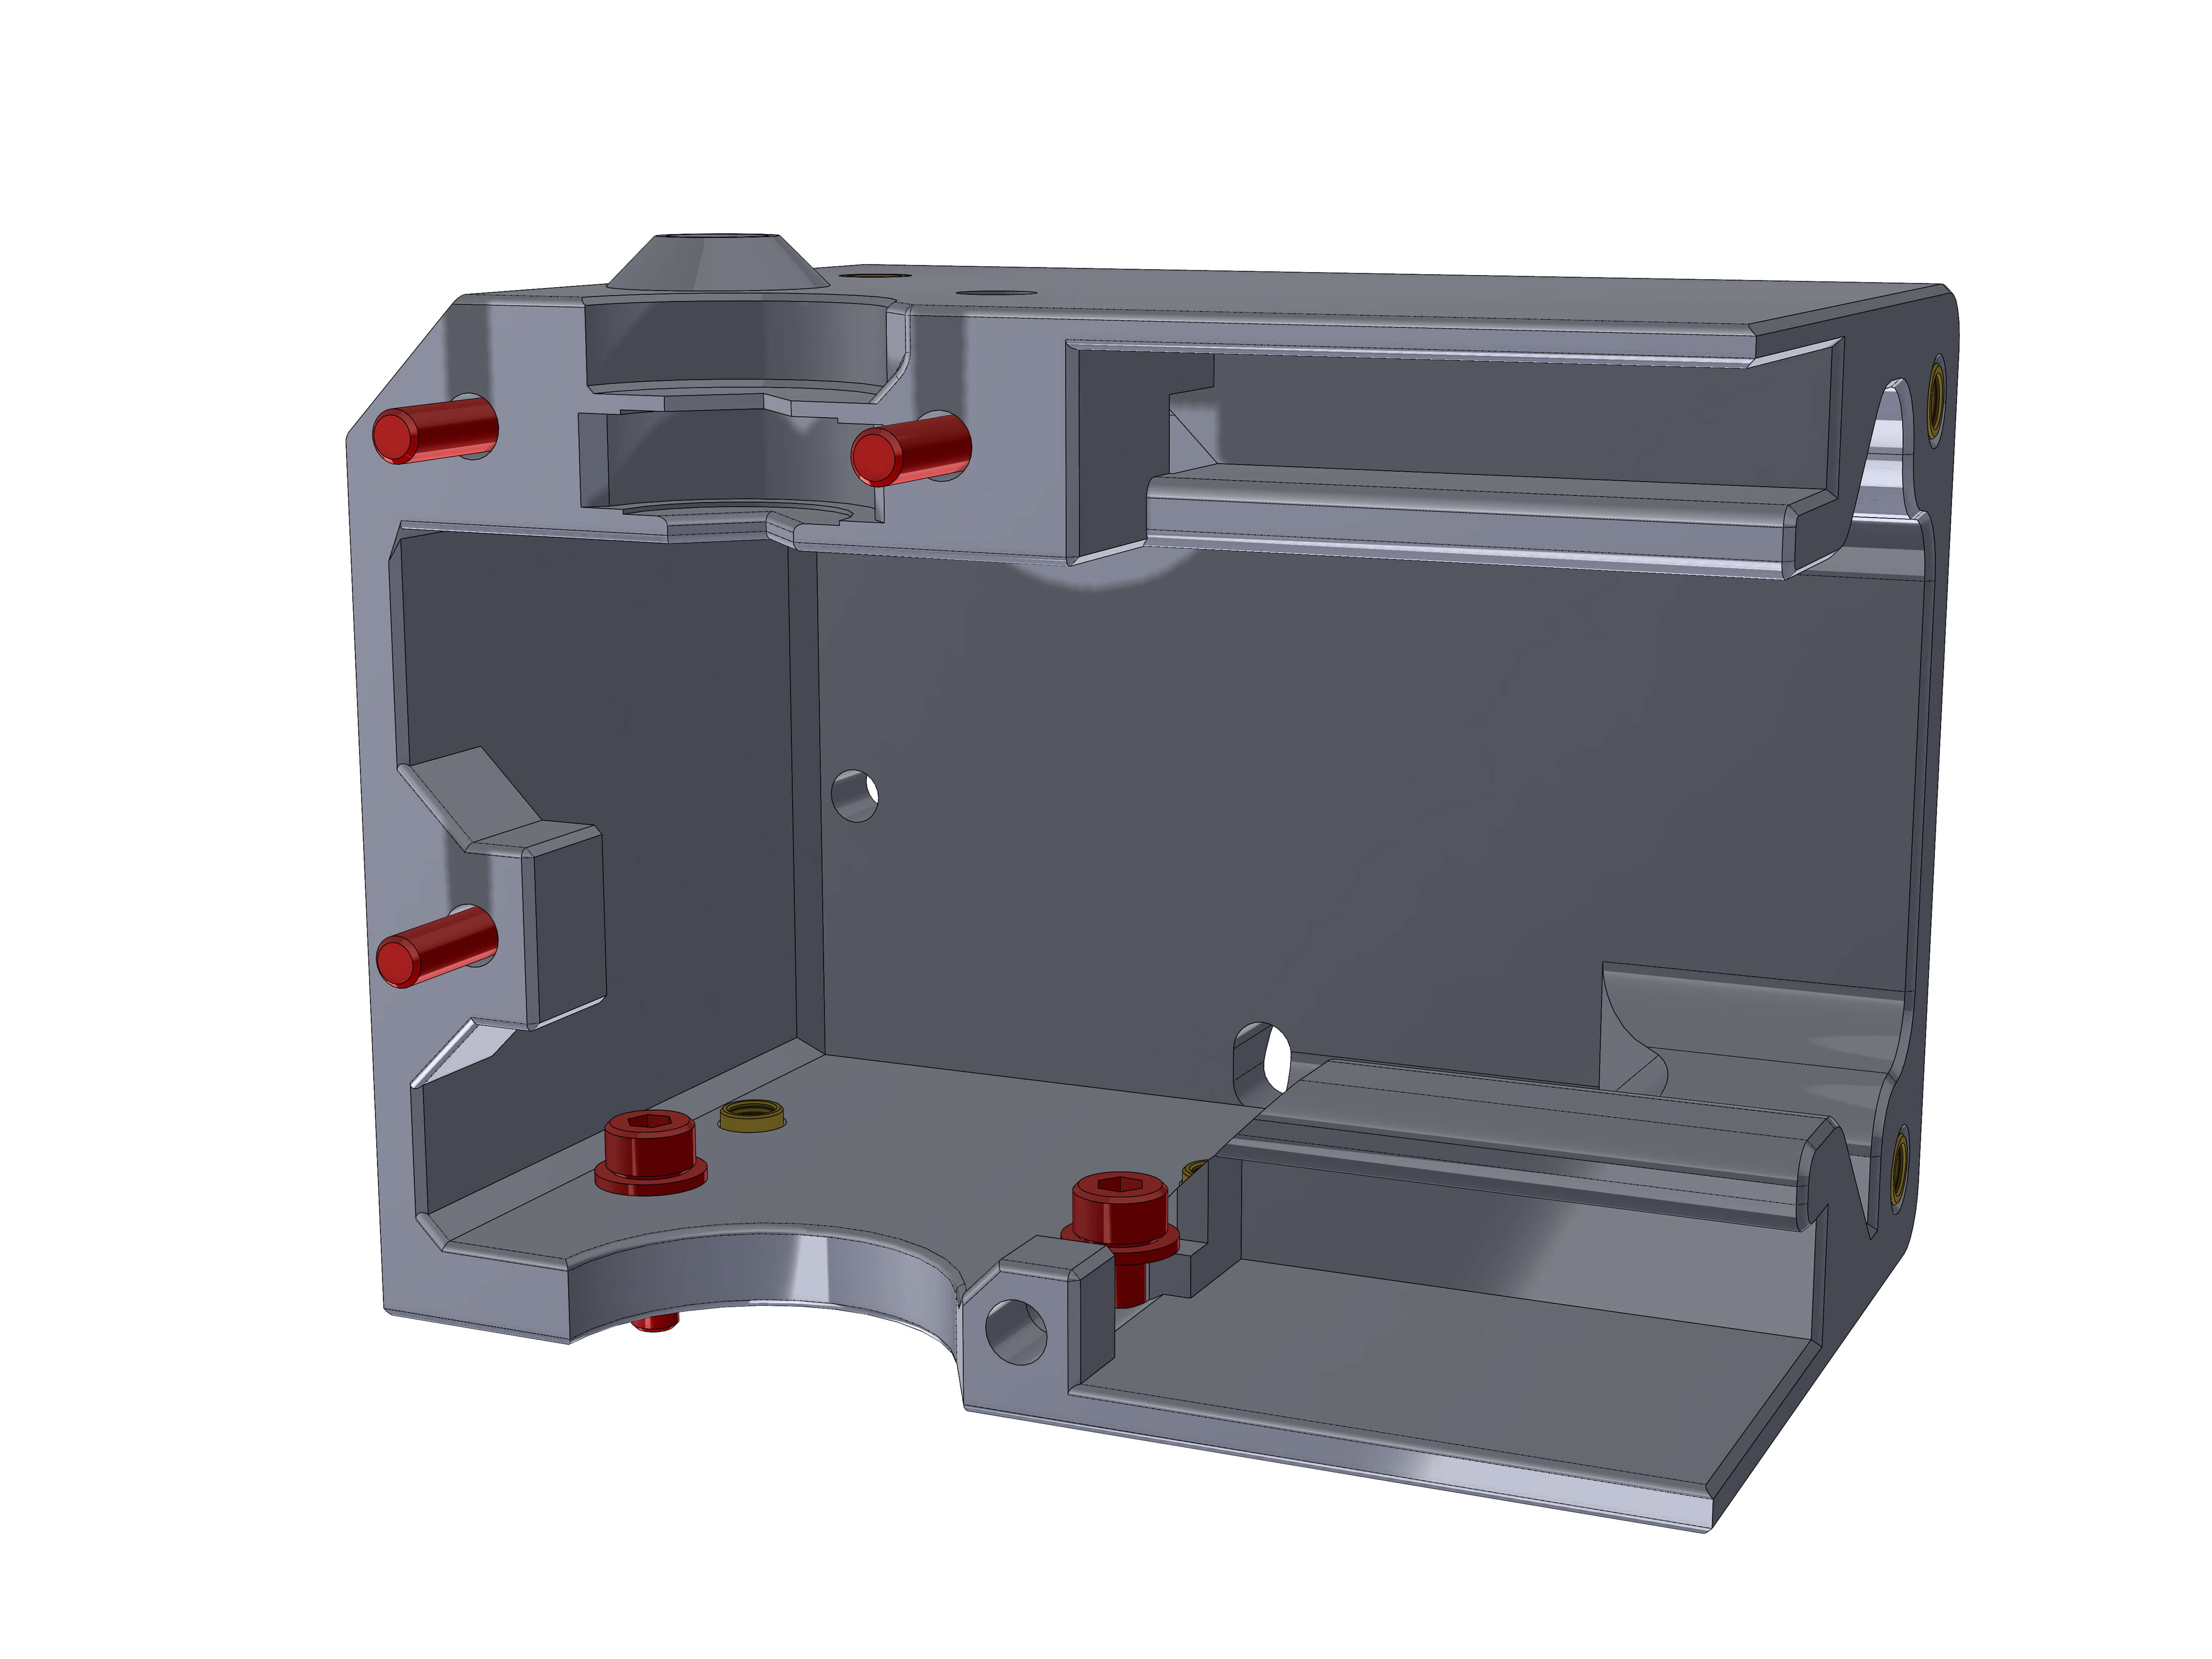
Take the left half of the gearbox. Attach two M3x10 and washers like before.
Additionally attach 3 M3x12mm screws in the shown locations.
Now comes probably the most fiddly part.
Attach the two halves together so that none of the screws fall out.
Tighten the three M3x12 screws first, then the stepper screws.
Tighten the two stepper screws from the top, through the larger hole and the hole left out from the missing insert.
After doing this you can insert the missing insert. You can also leave it away, it will make disassembly very difficult if you ever want to disassemble the gearbox.
Parts:
- Slider_top
- Slider_bottom
Hardware:
- 625 bearings (2)
- M3 inserts (2)
- 50mm shaft
- GT2 16T 6mm pulley
- GT2 48T pulley
- 130T belt (2)
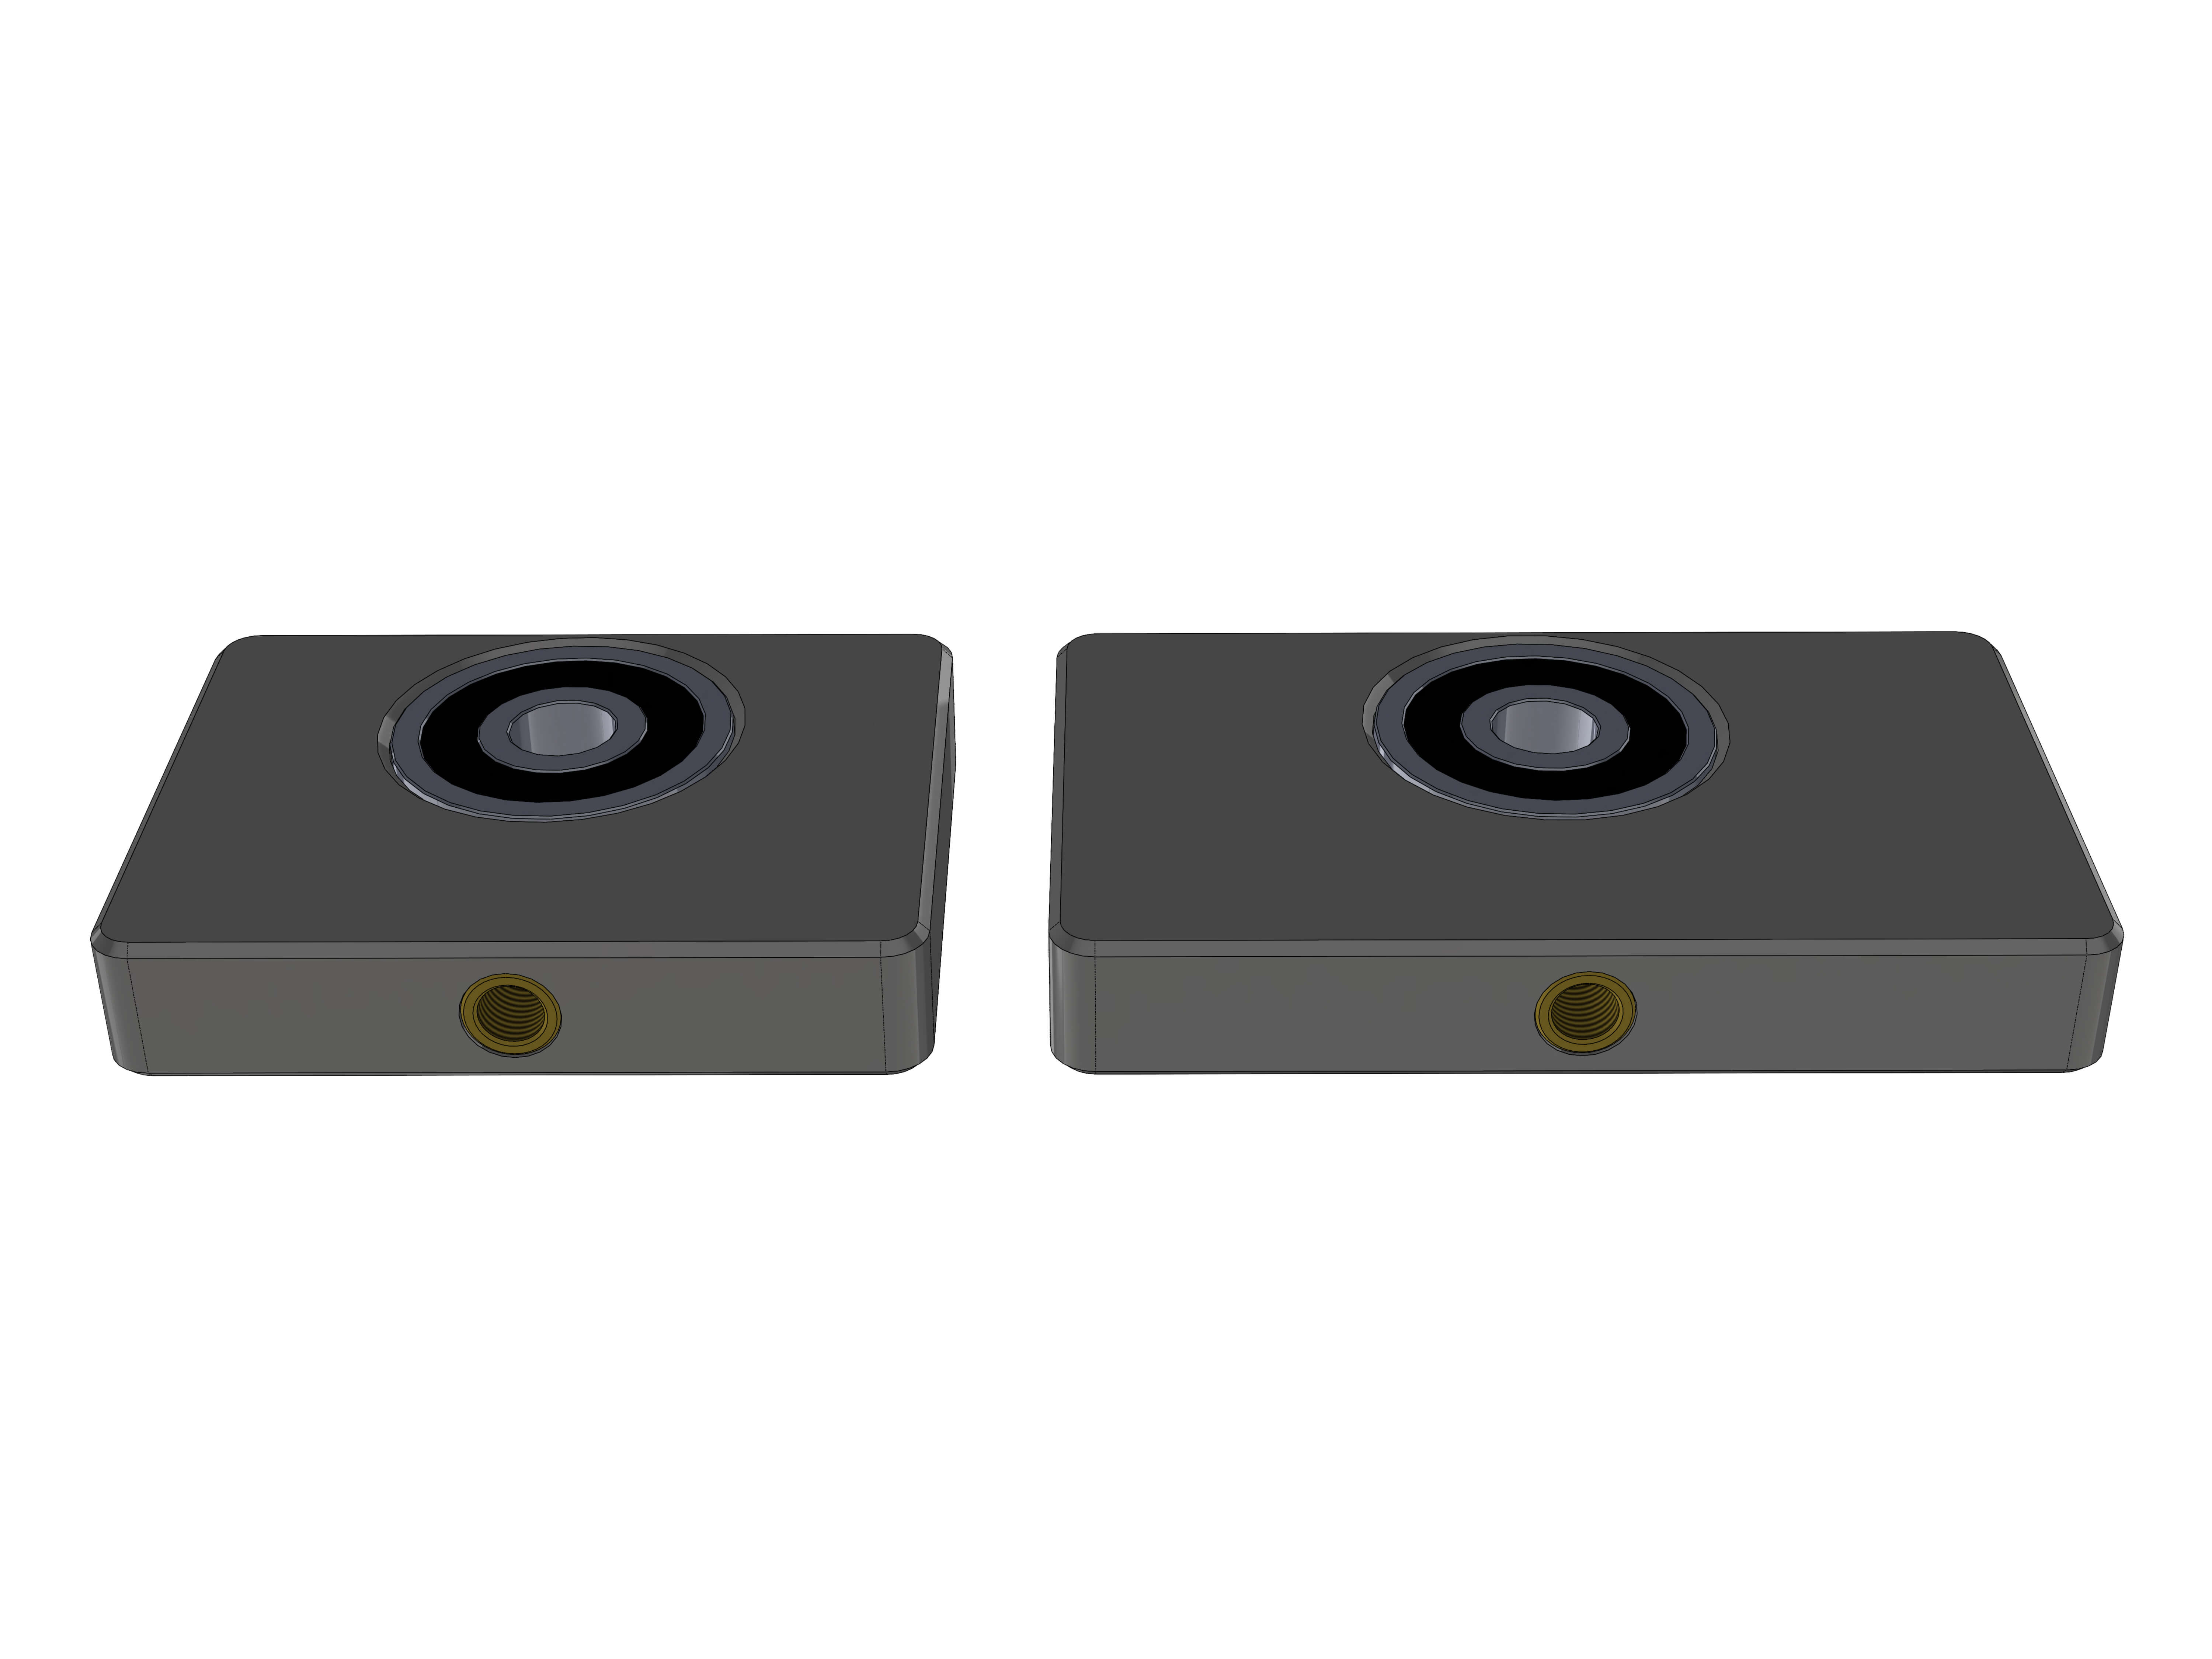
Take the Slider_top and Slider_bottom and insert a 625 bearing into each of them. They should have a rather tight fit.
Insert the M3 inserts into the side of each part.
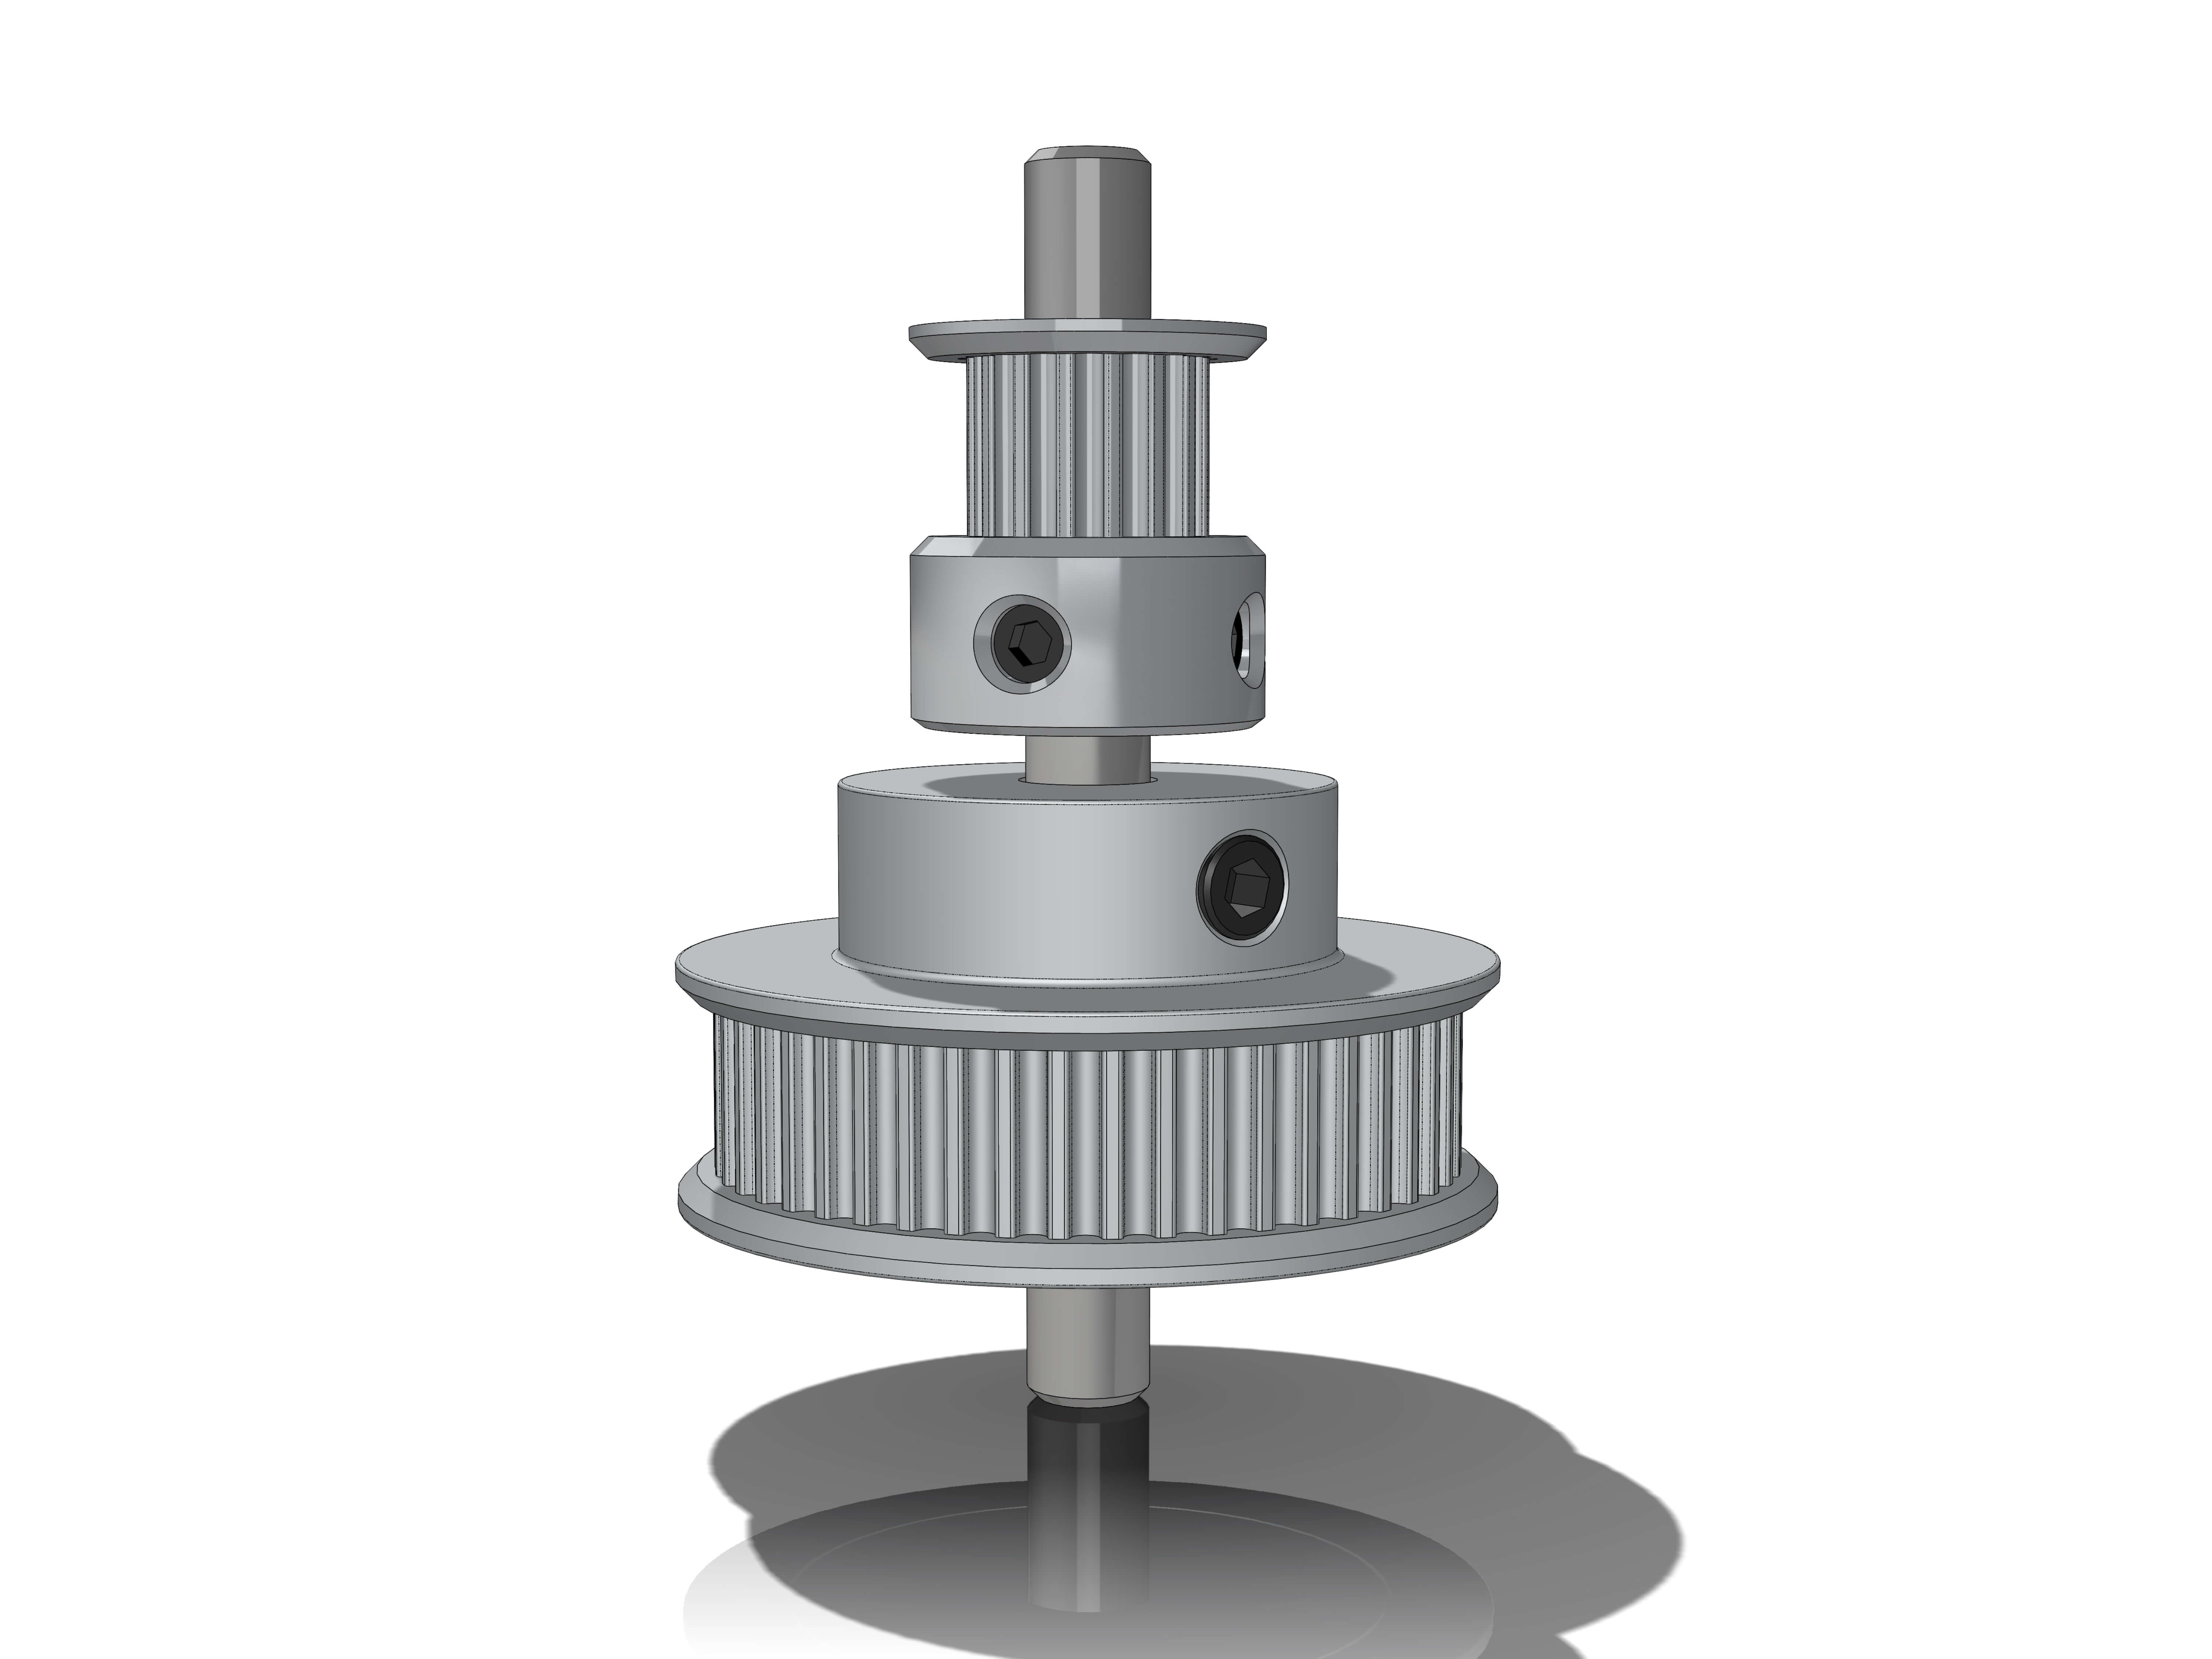
Take a 50mm shaft and put a GT2 16T 6mm and 48T 6mm pulley on it in the shown orientation. Don't tighten the grub screws yet.
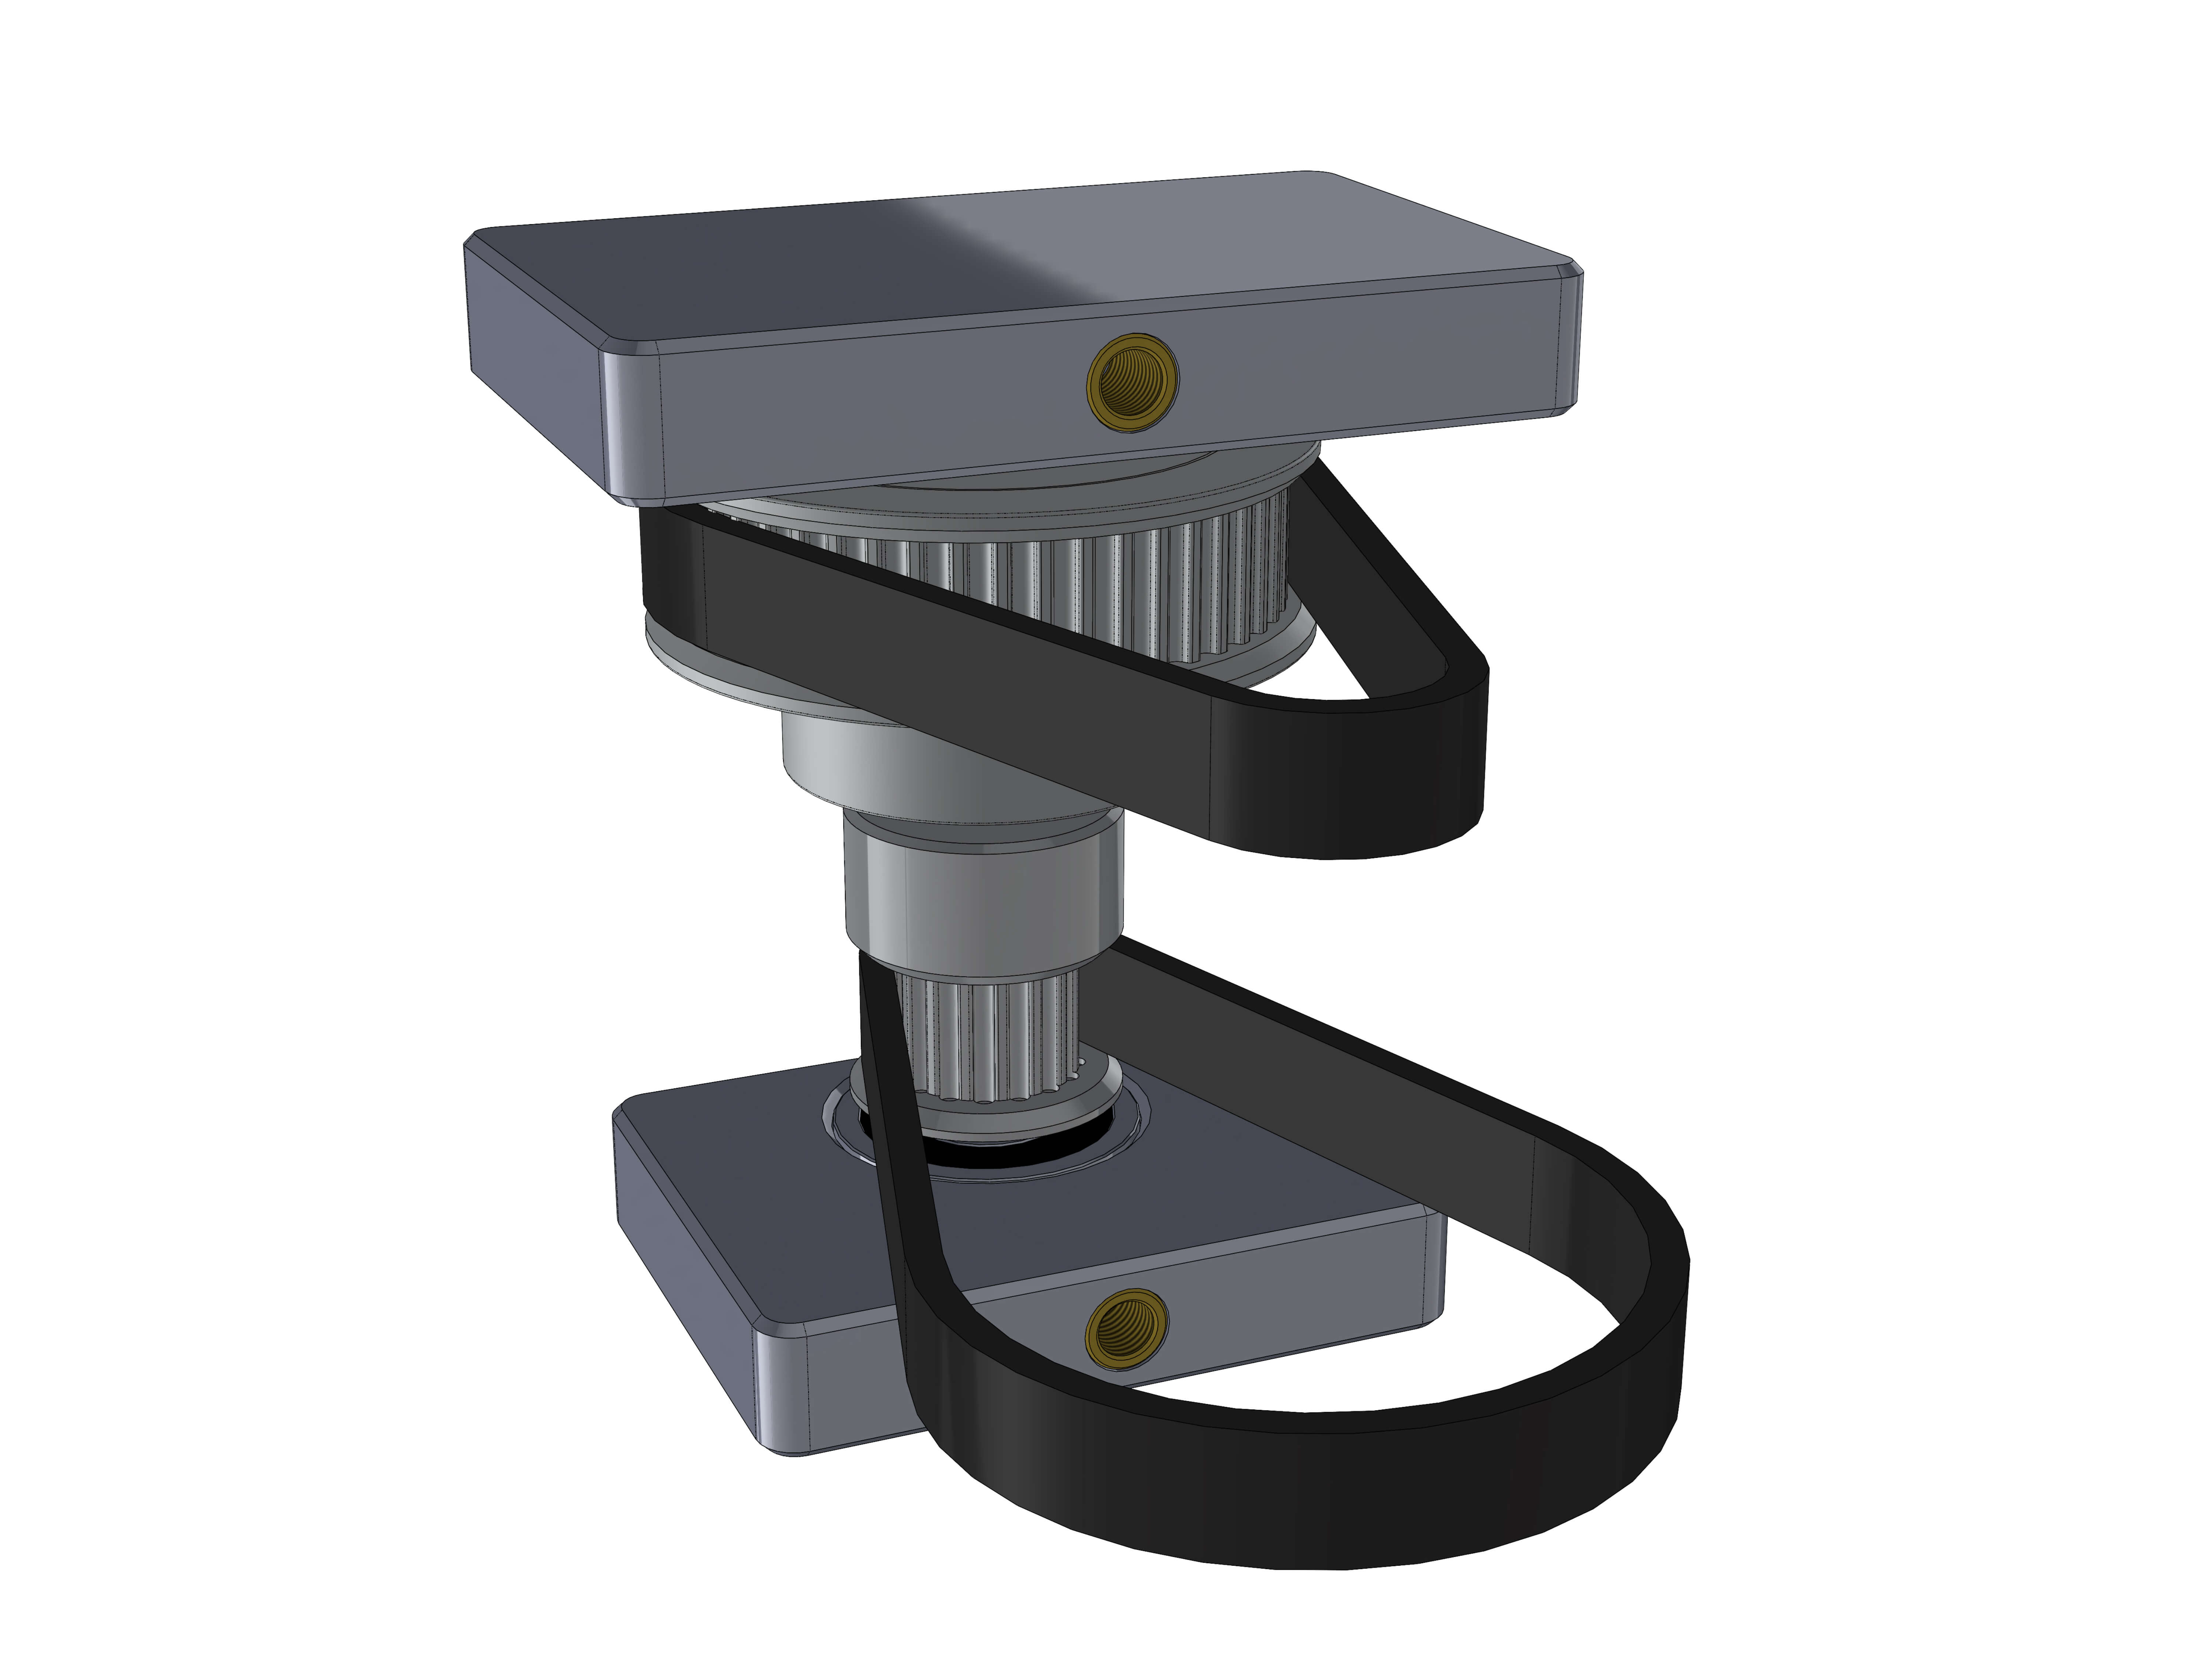
Put the Slider_top and Slider_bottom with the 625 bearings on the shaft.
Slider_top is the wider one of them and should be on the side of the 48T pulley.
Slide the 130T GT2 belts onto the assembly. They don't have to be aligned to anything yet, it's just rather hard to model a loose belt.
Slide the assembly in the gearbox with the threaded inserts facing outwards.
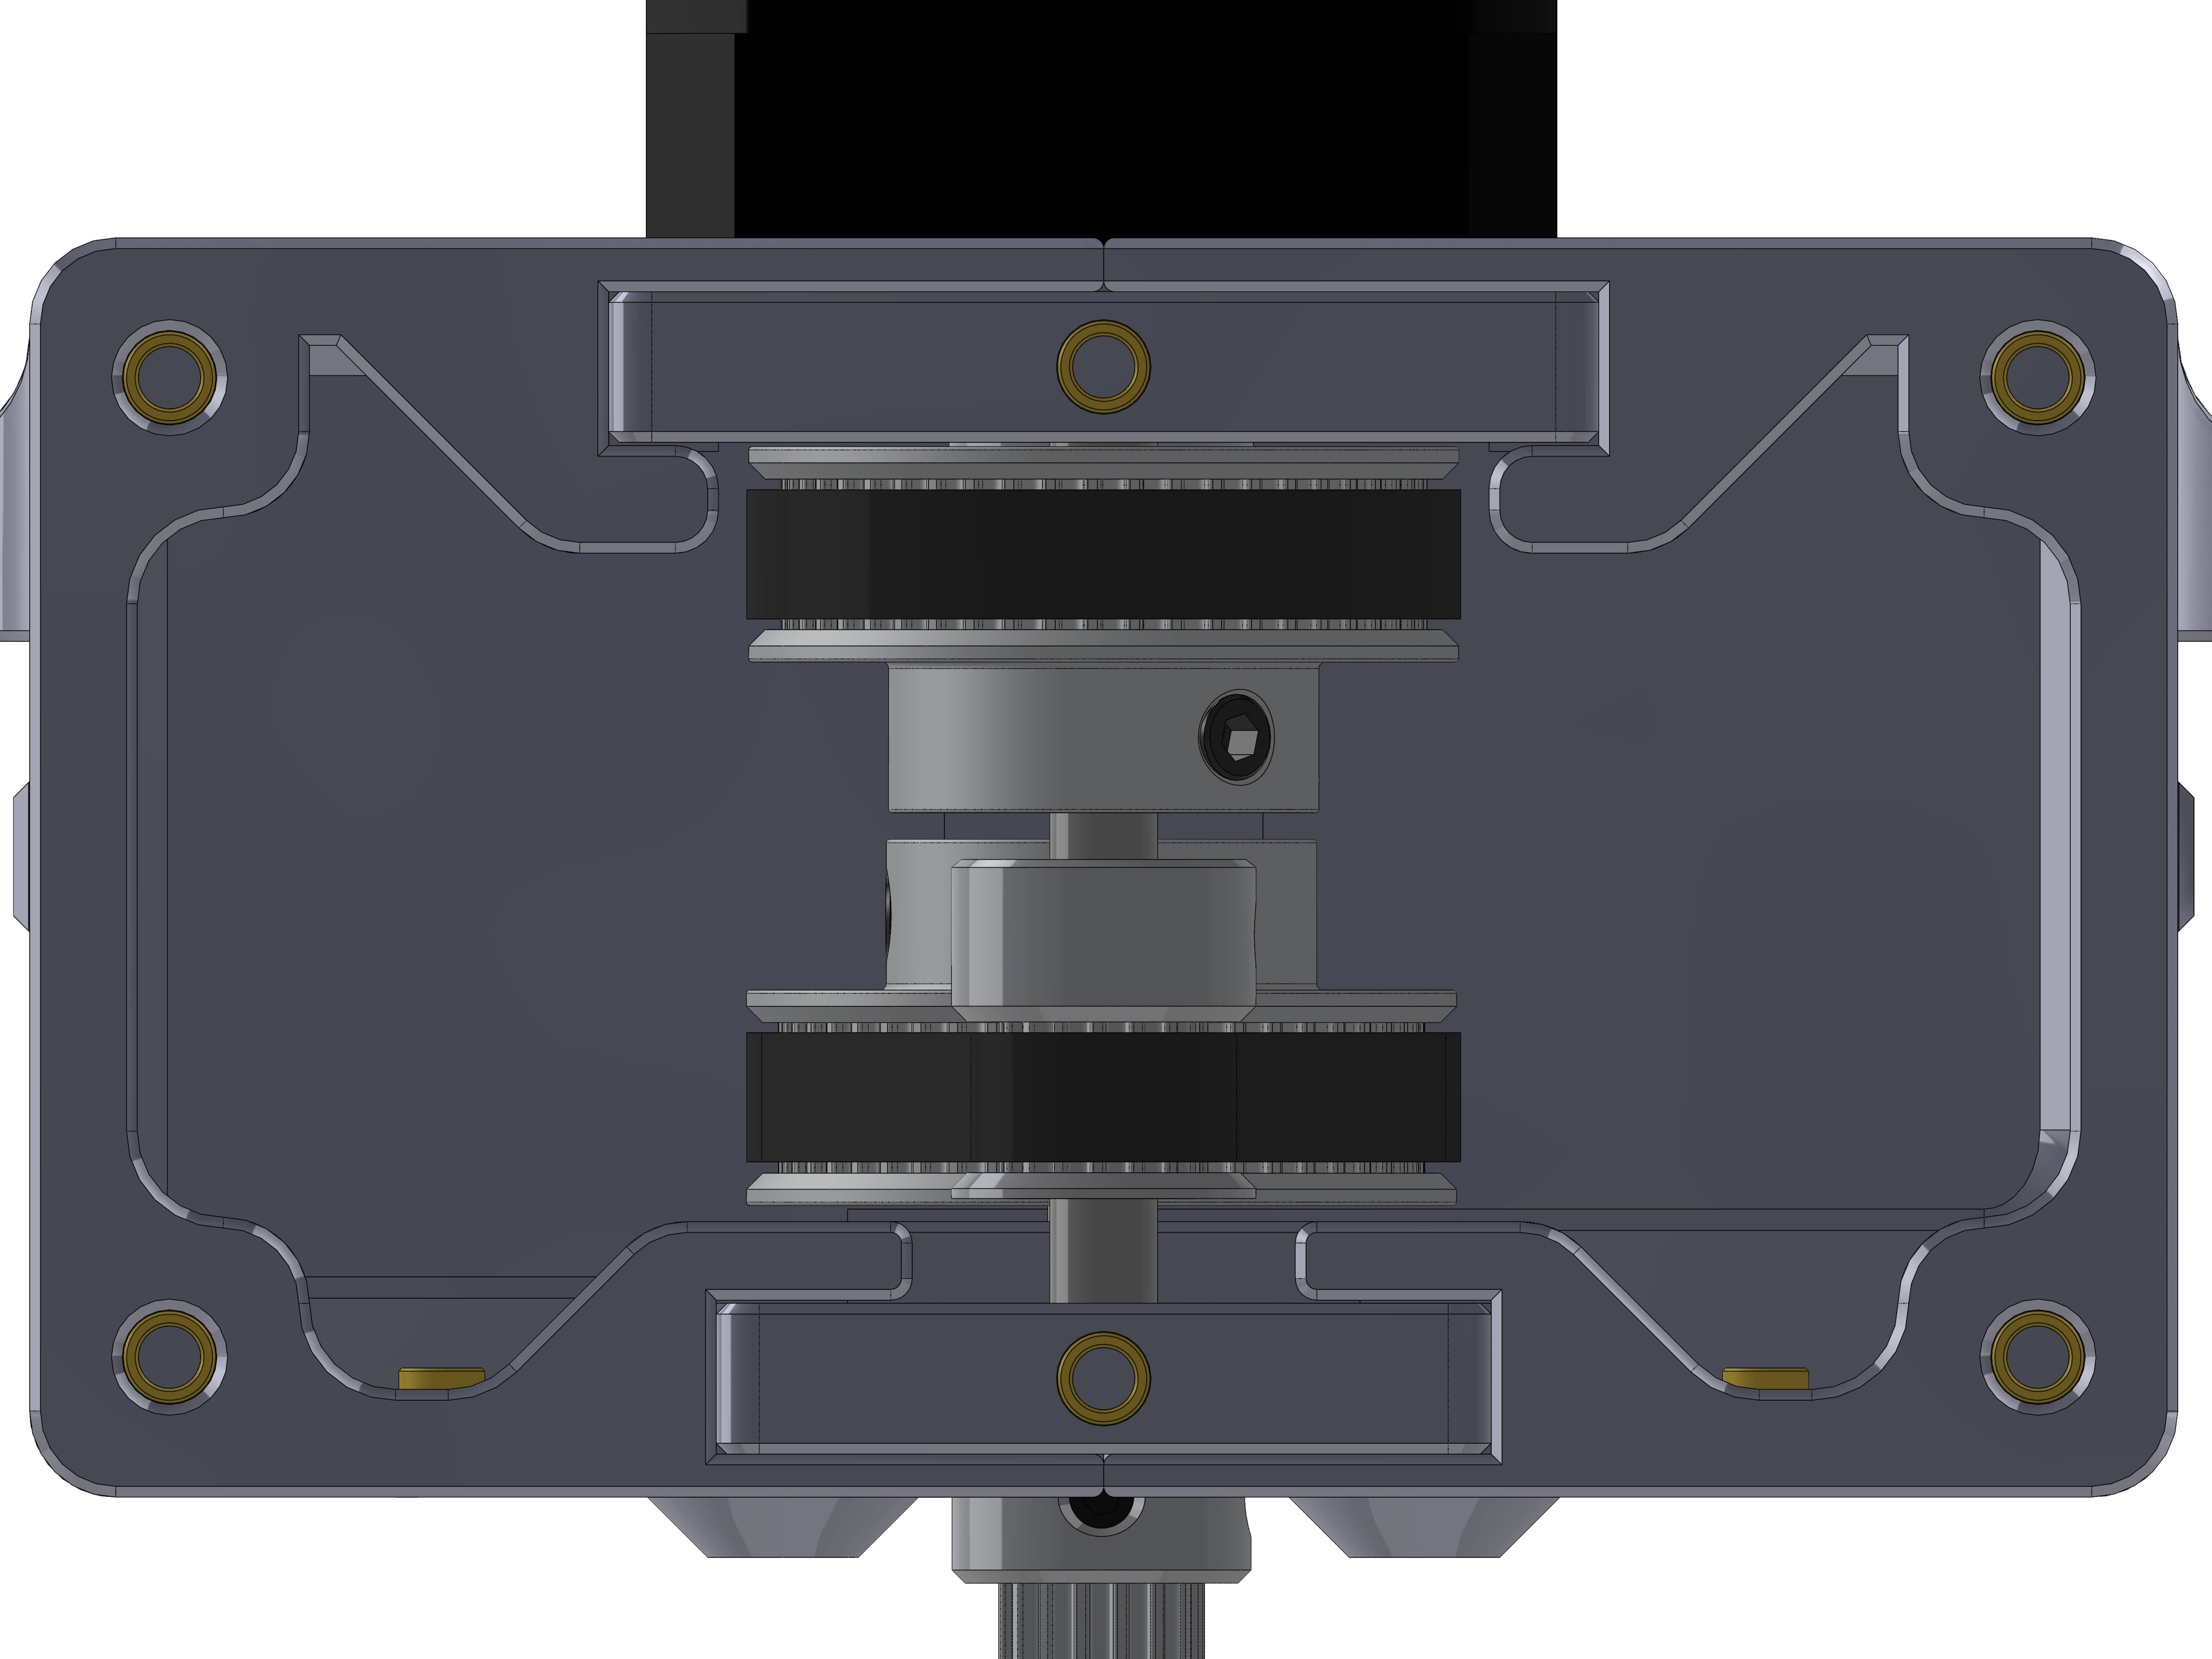
The 48T pulleys should align with the 16T pulleys and vice versa.
Getting the belts over the pulleys in the gearbox can be a bit fiddly.
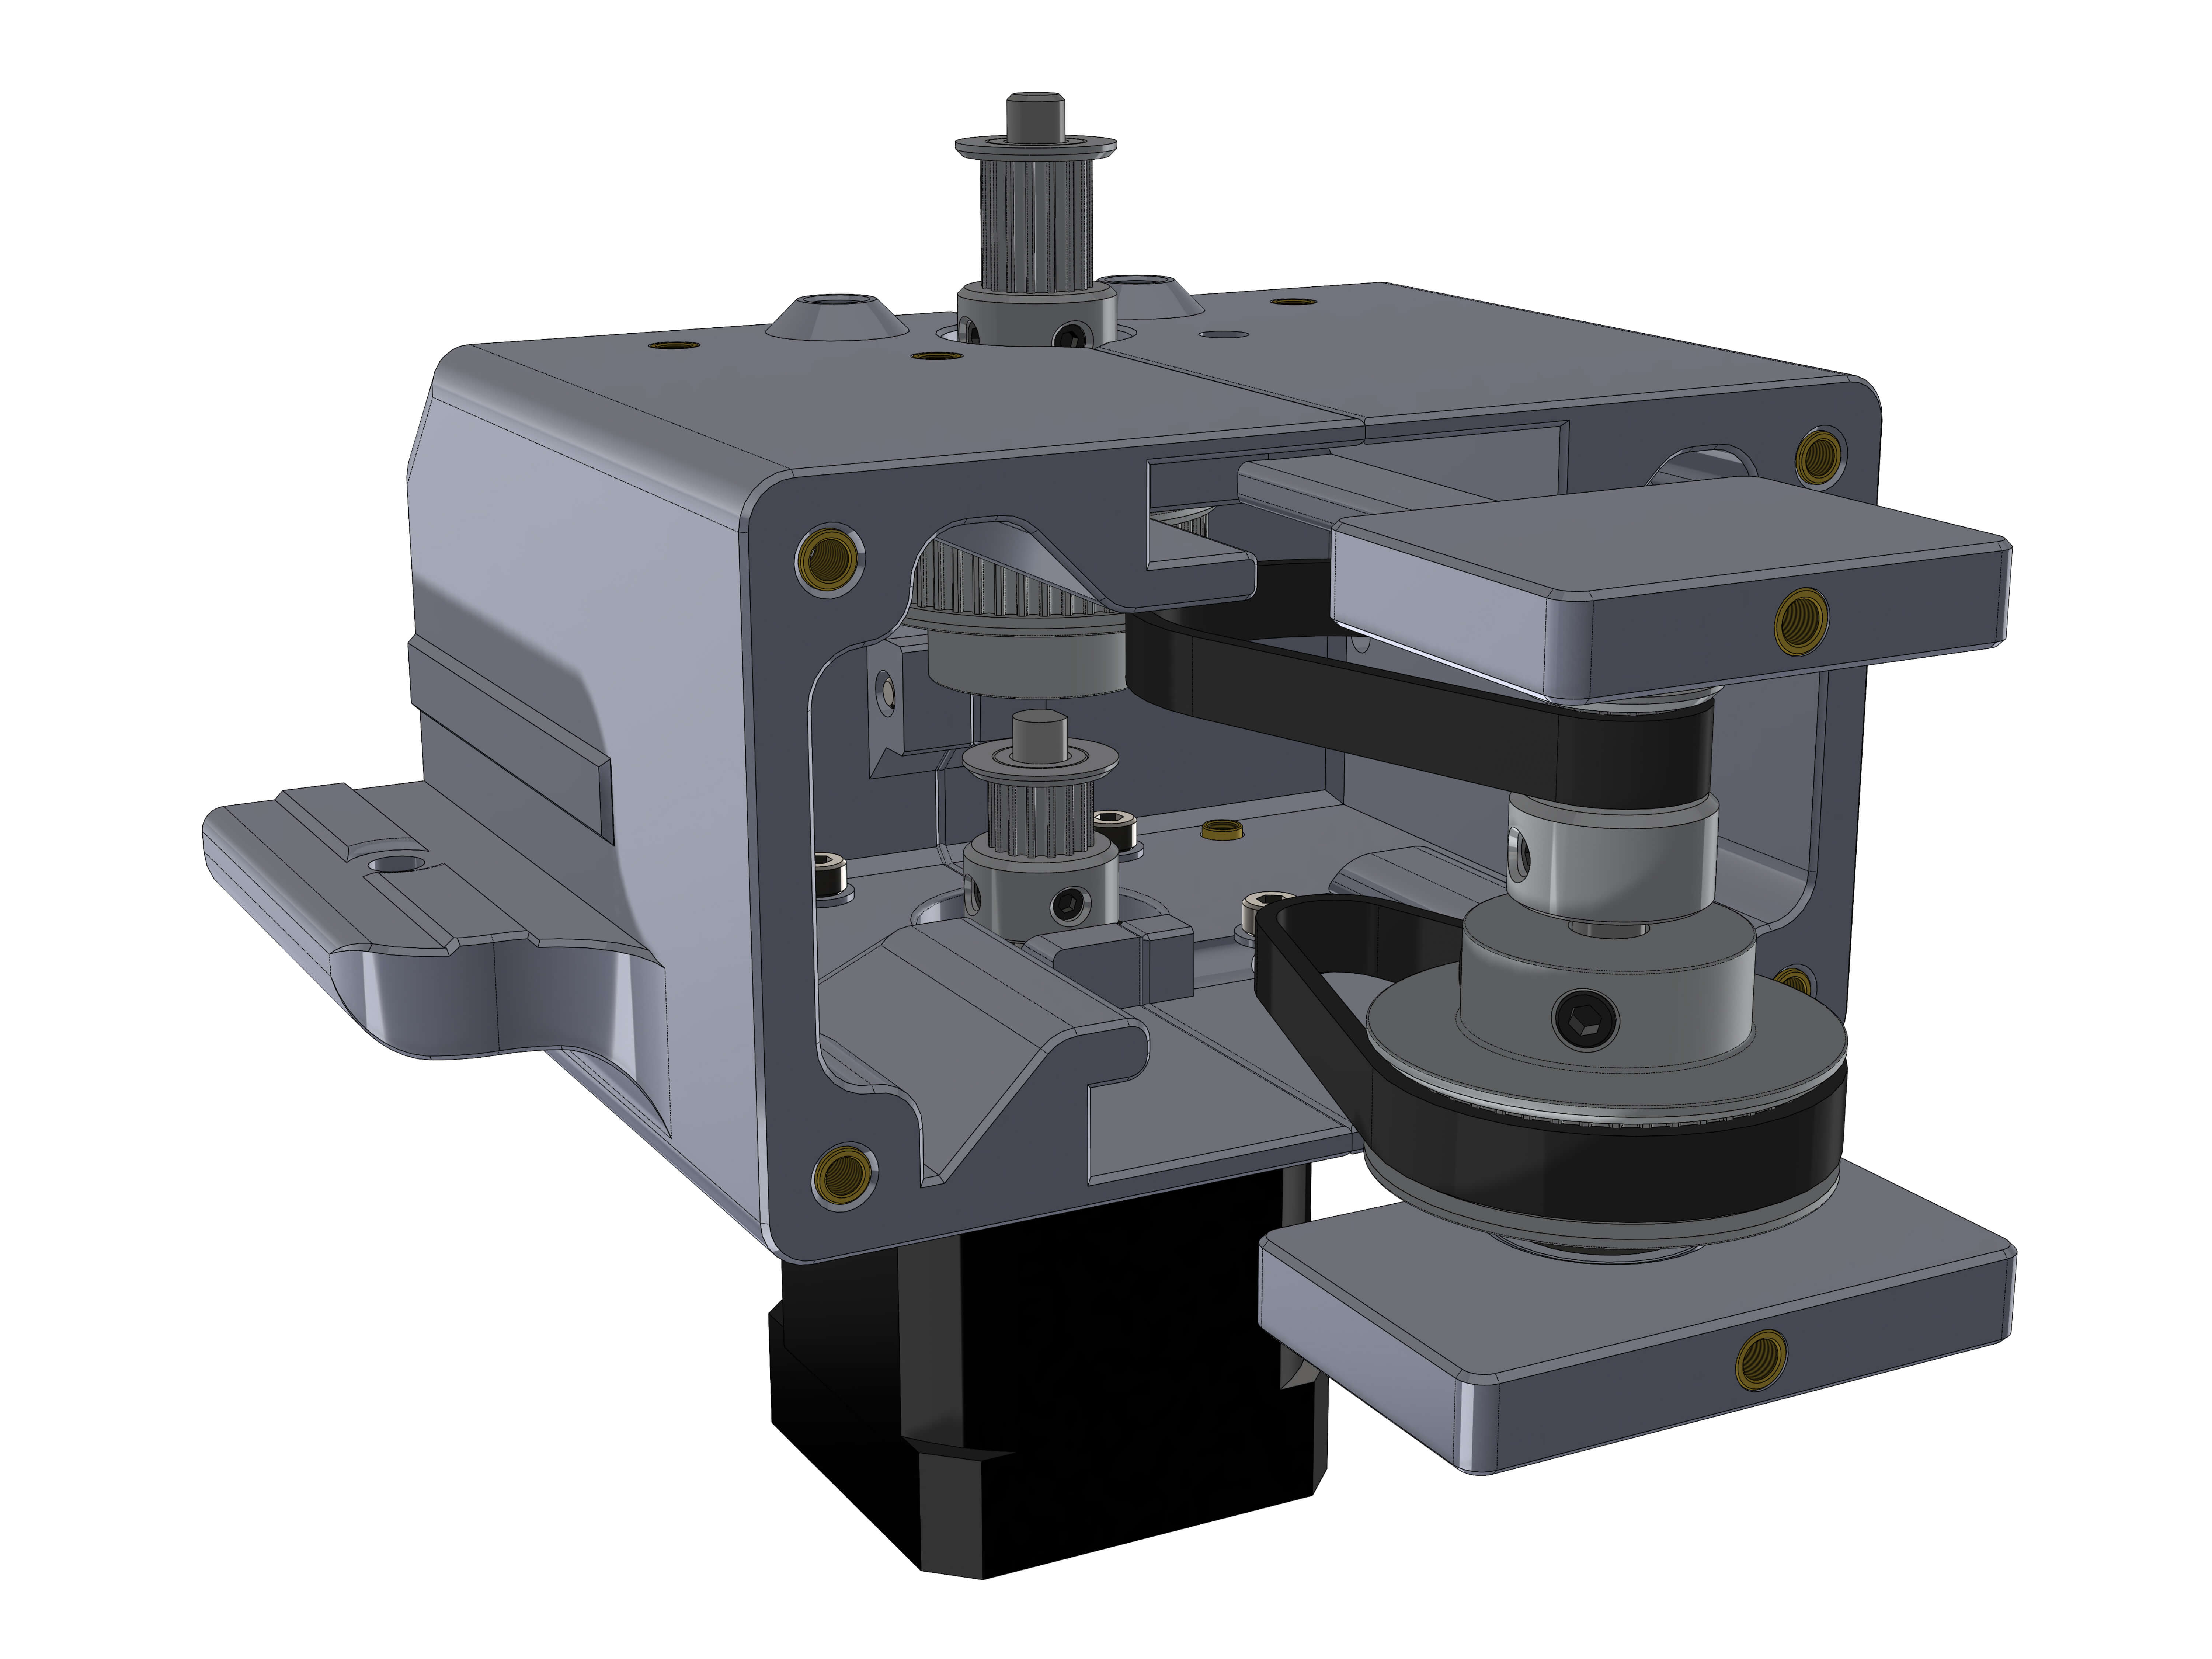
Look at the gearbox straight from the top and align the pulleys edges to each other. Then tighten the grubscrews.
Parts:
- pulley_cover
- 625 bearing
- GT2 9mm belt
- M3x12 screws (3 or 4)
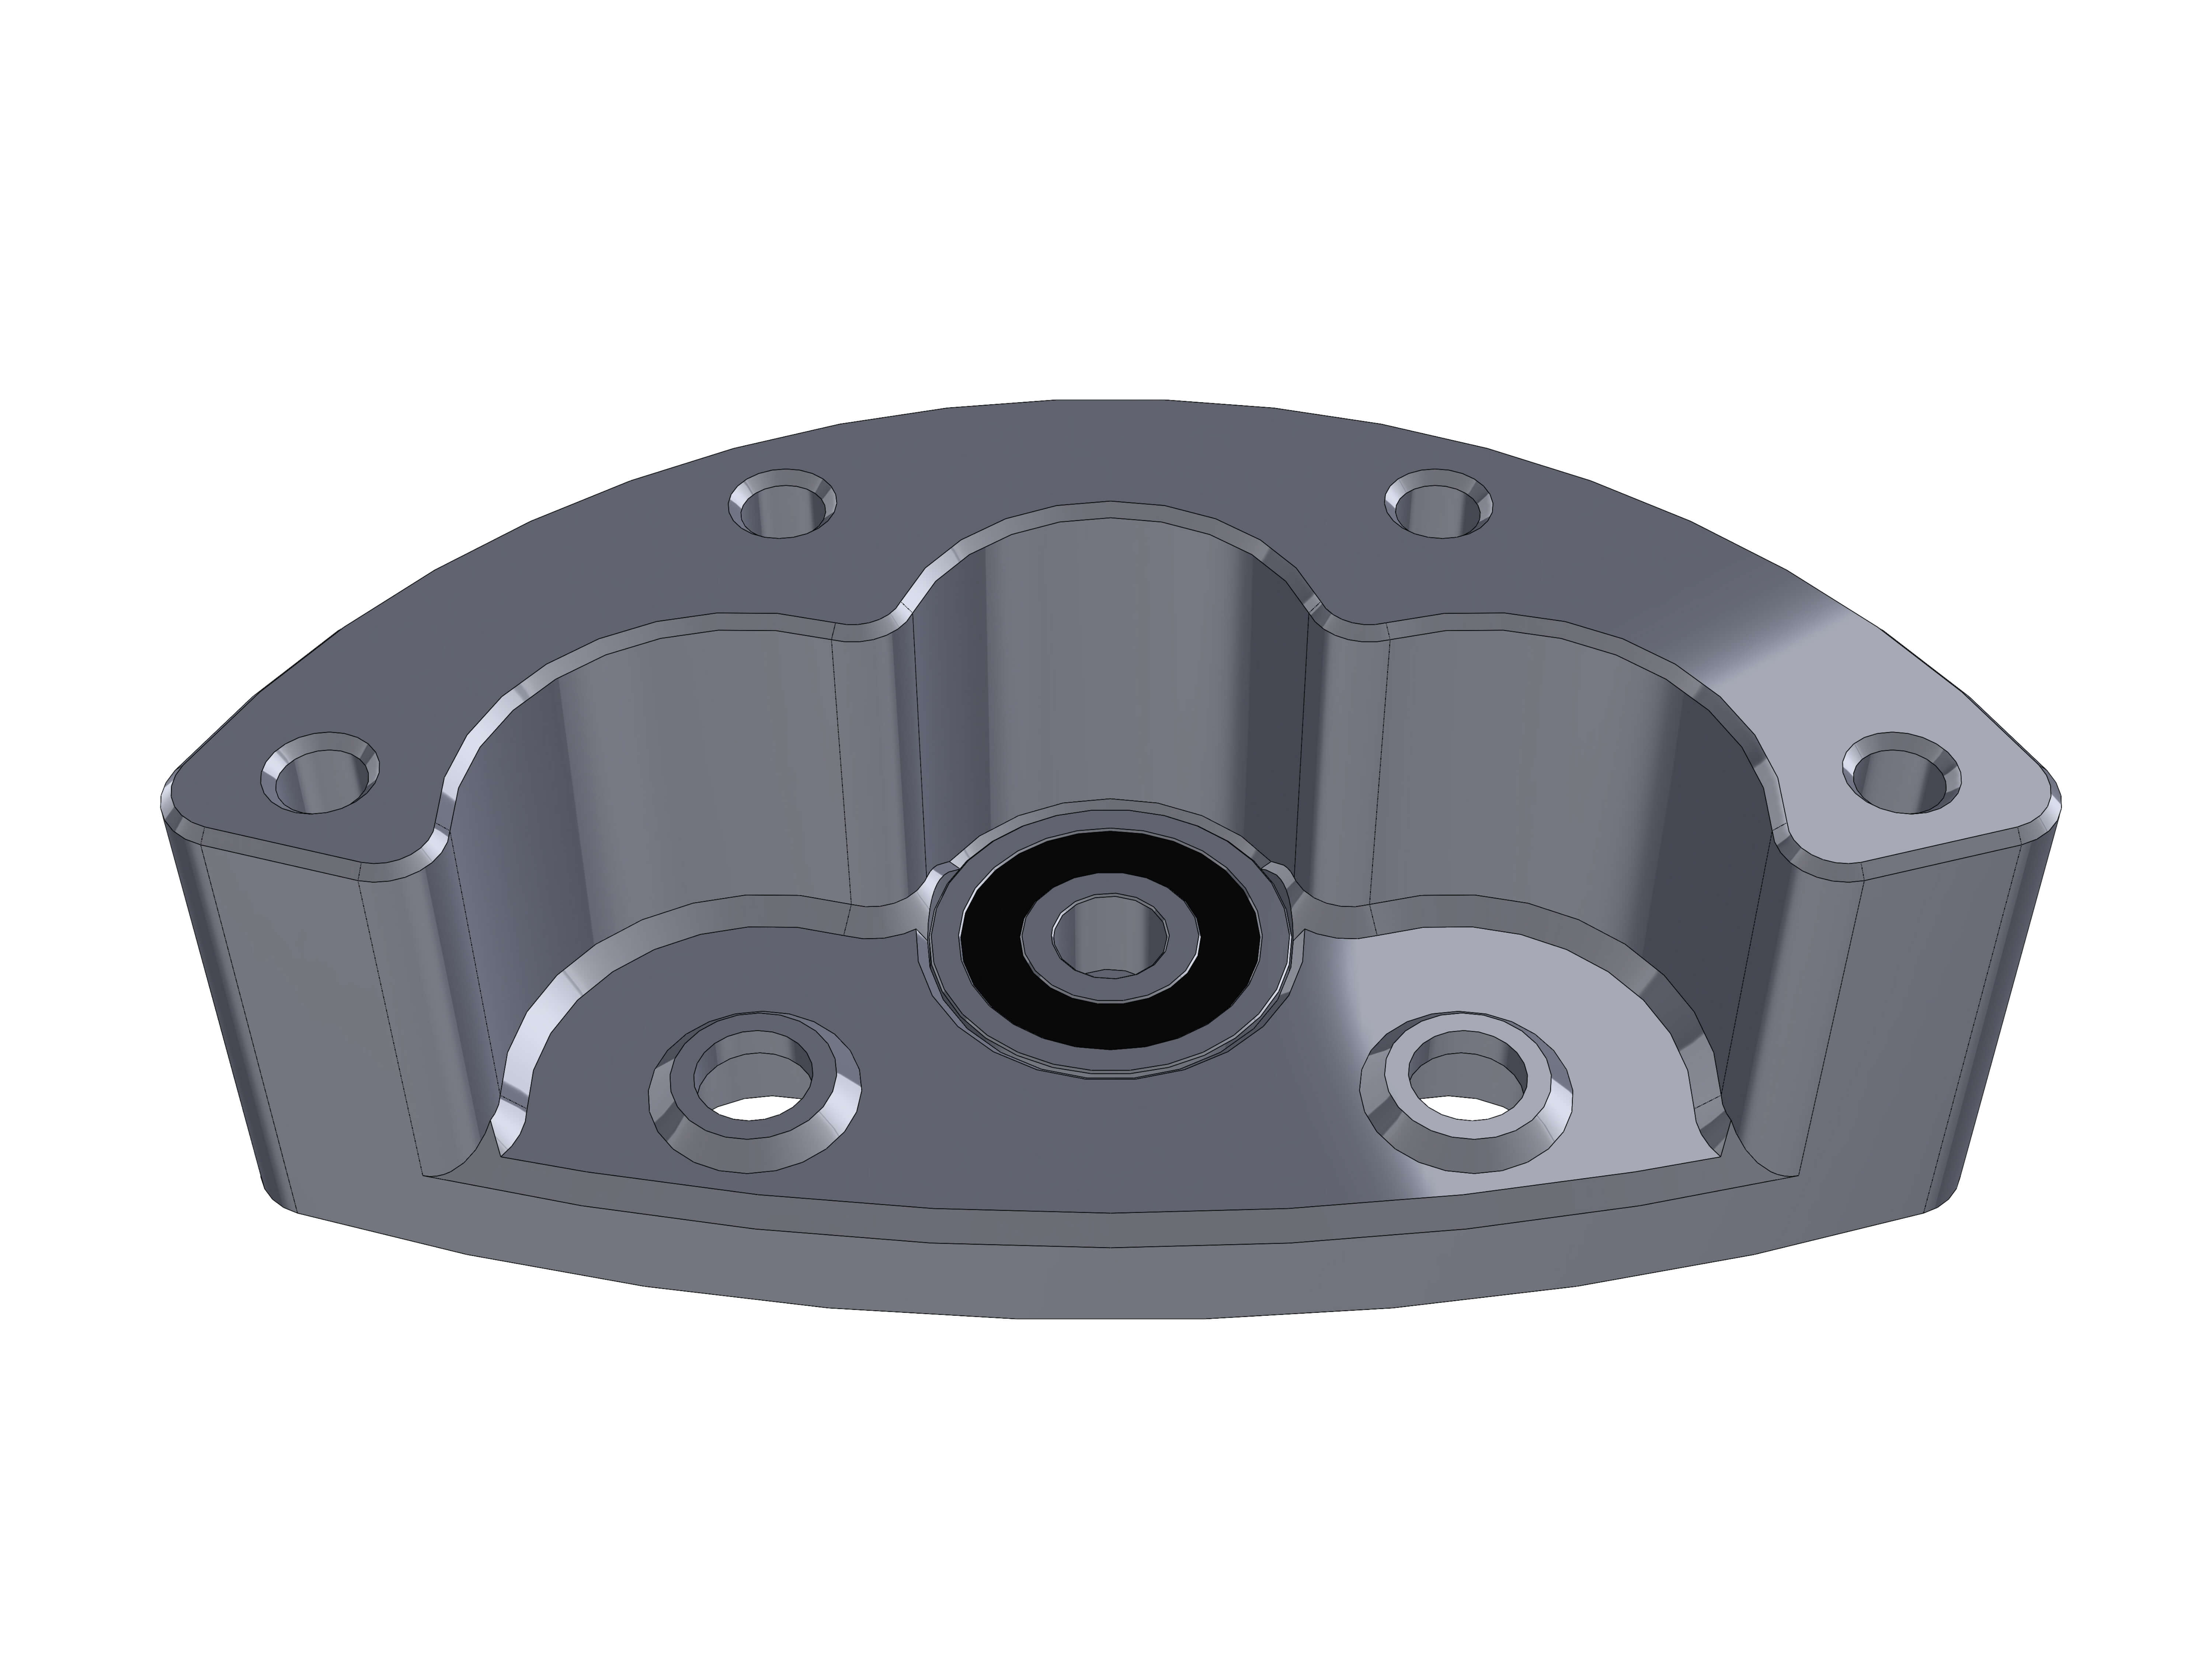
Take the pulley_cover and insert a 625 bearing into it. It should have a rather tight fit.
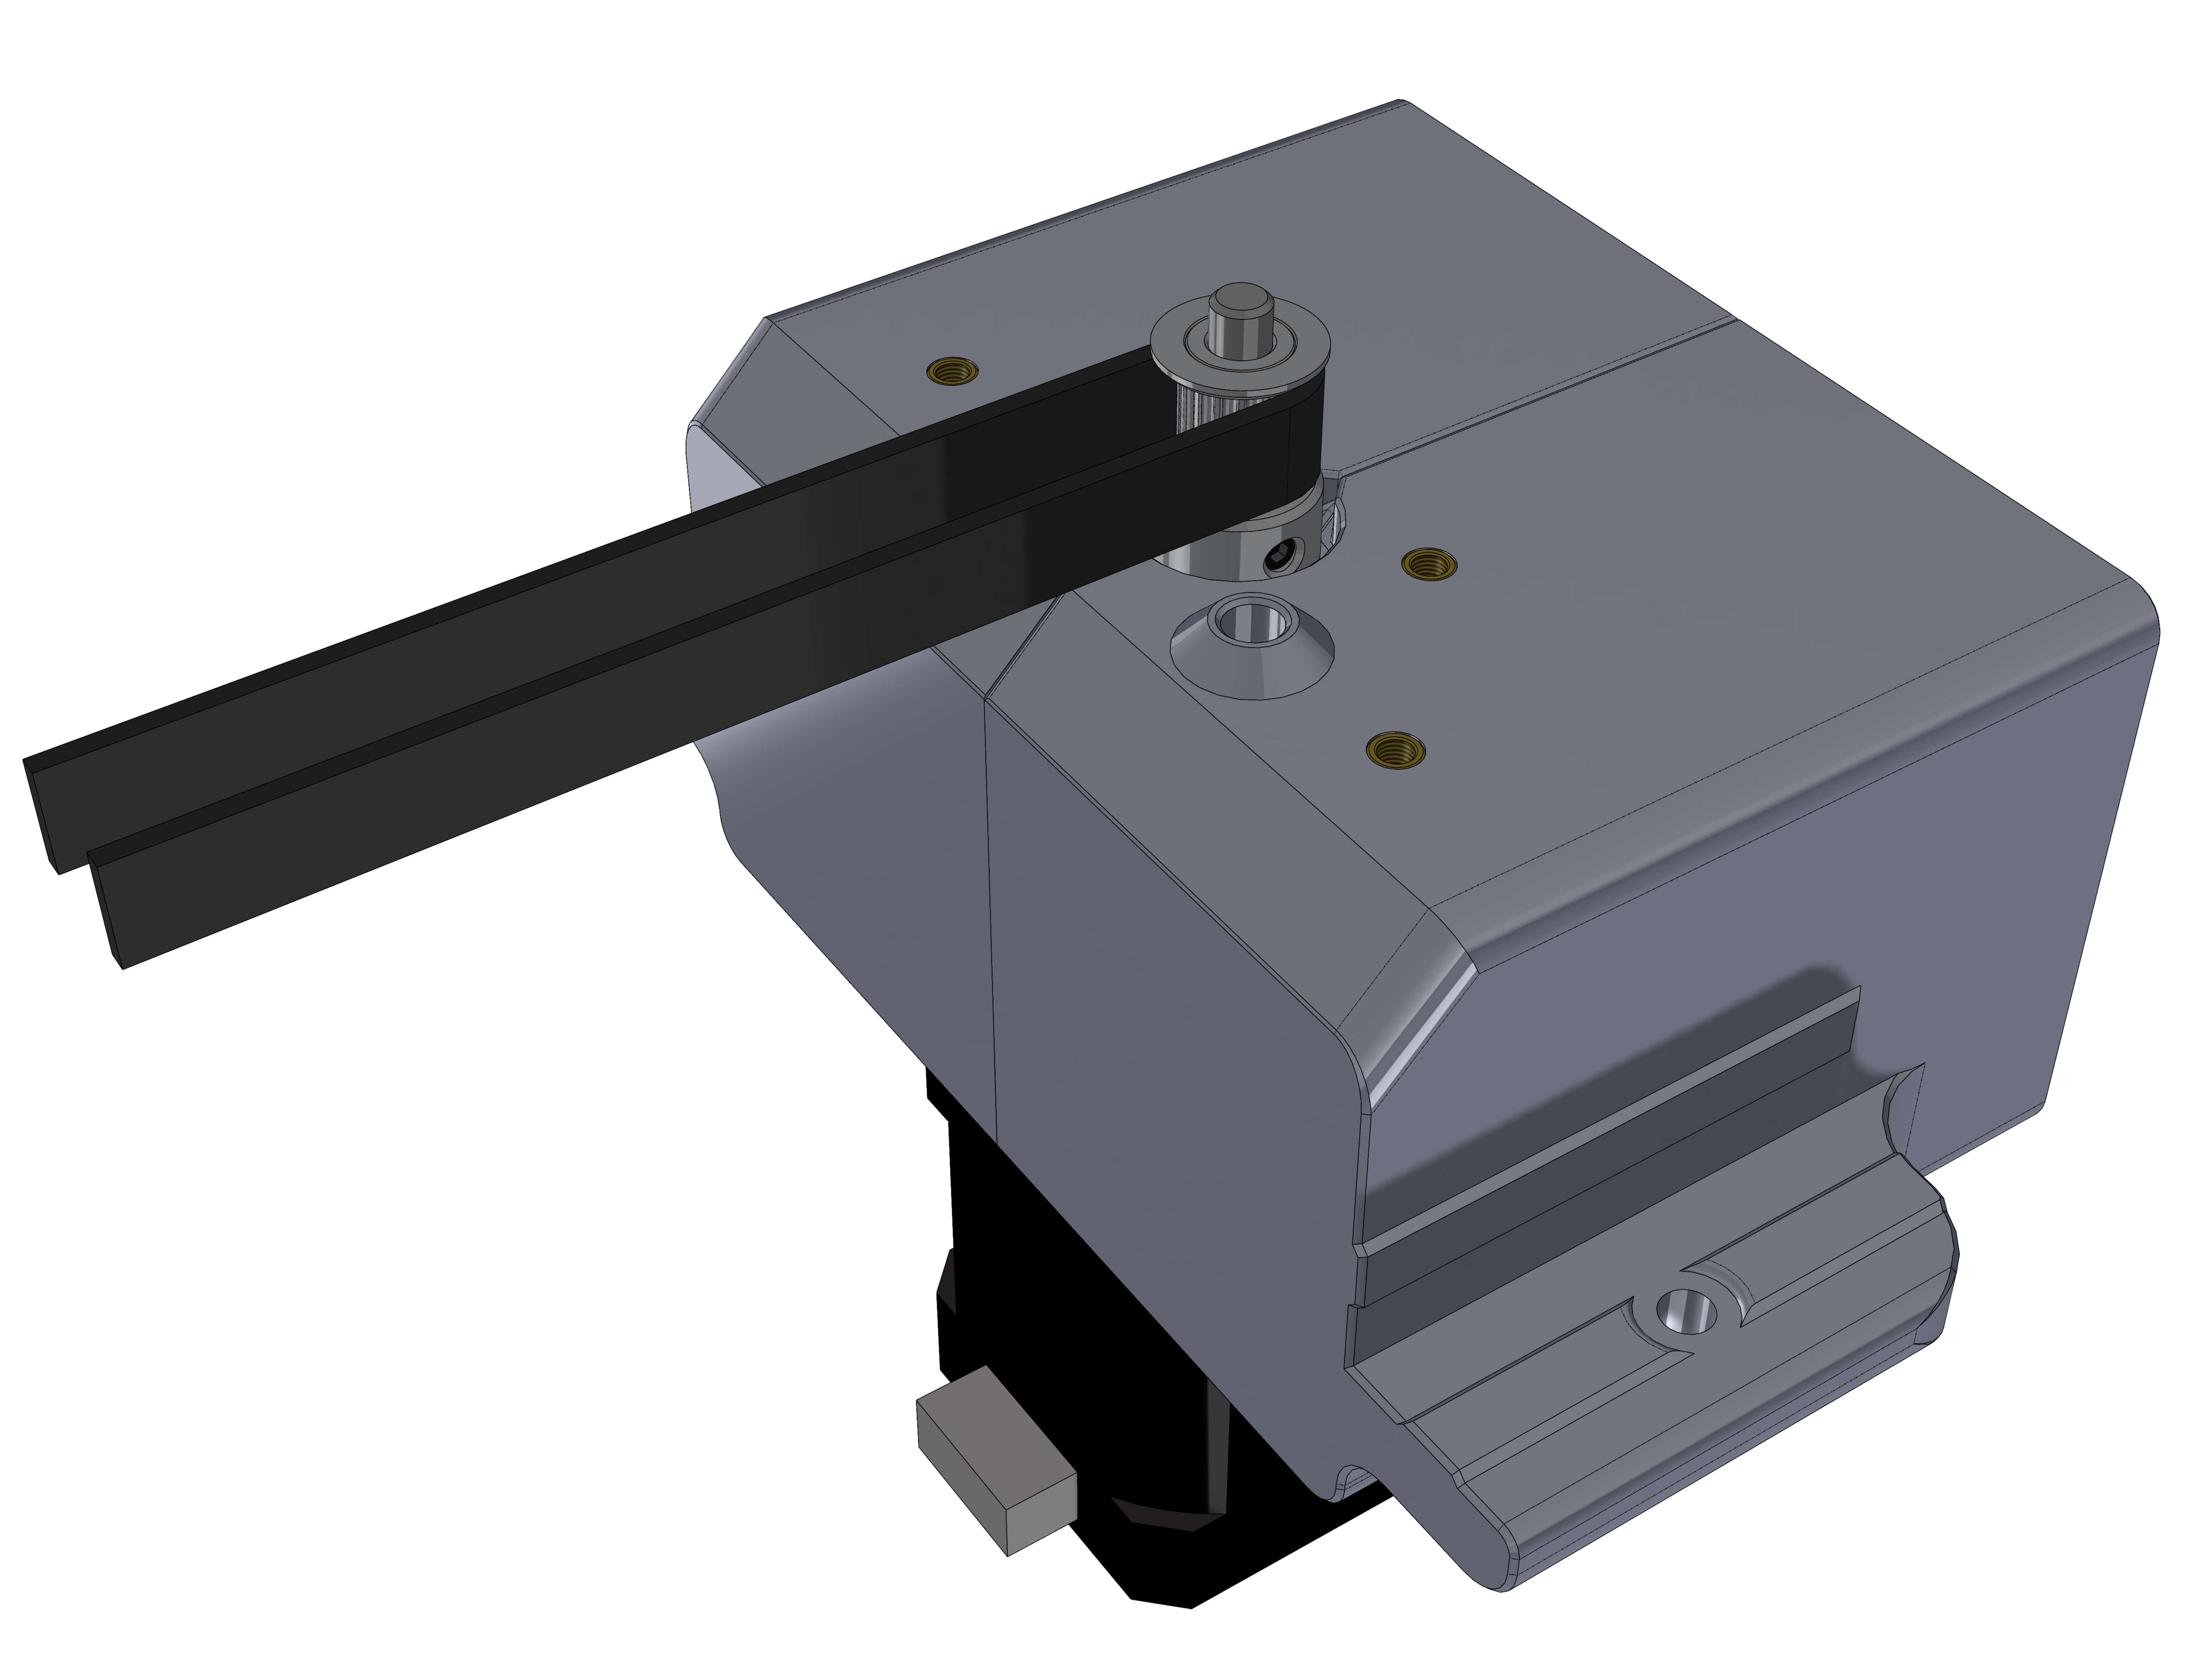
Take a length of the GT2 9mm belt and lay it around the outer pulley equally.
For DEC you'll need about 90 cm, for RA 125 cm.
Attach the pulley_cover on top. If the shaft slides while pushing the bearing on top, reach inside the gearbox body and push slightly against the 48T pulley. No pulley should scrape against the body.
Use 3 or 4 M3x12 screws and only screw them in lightly without tightening them.
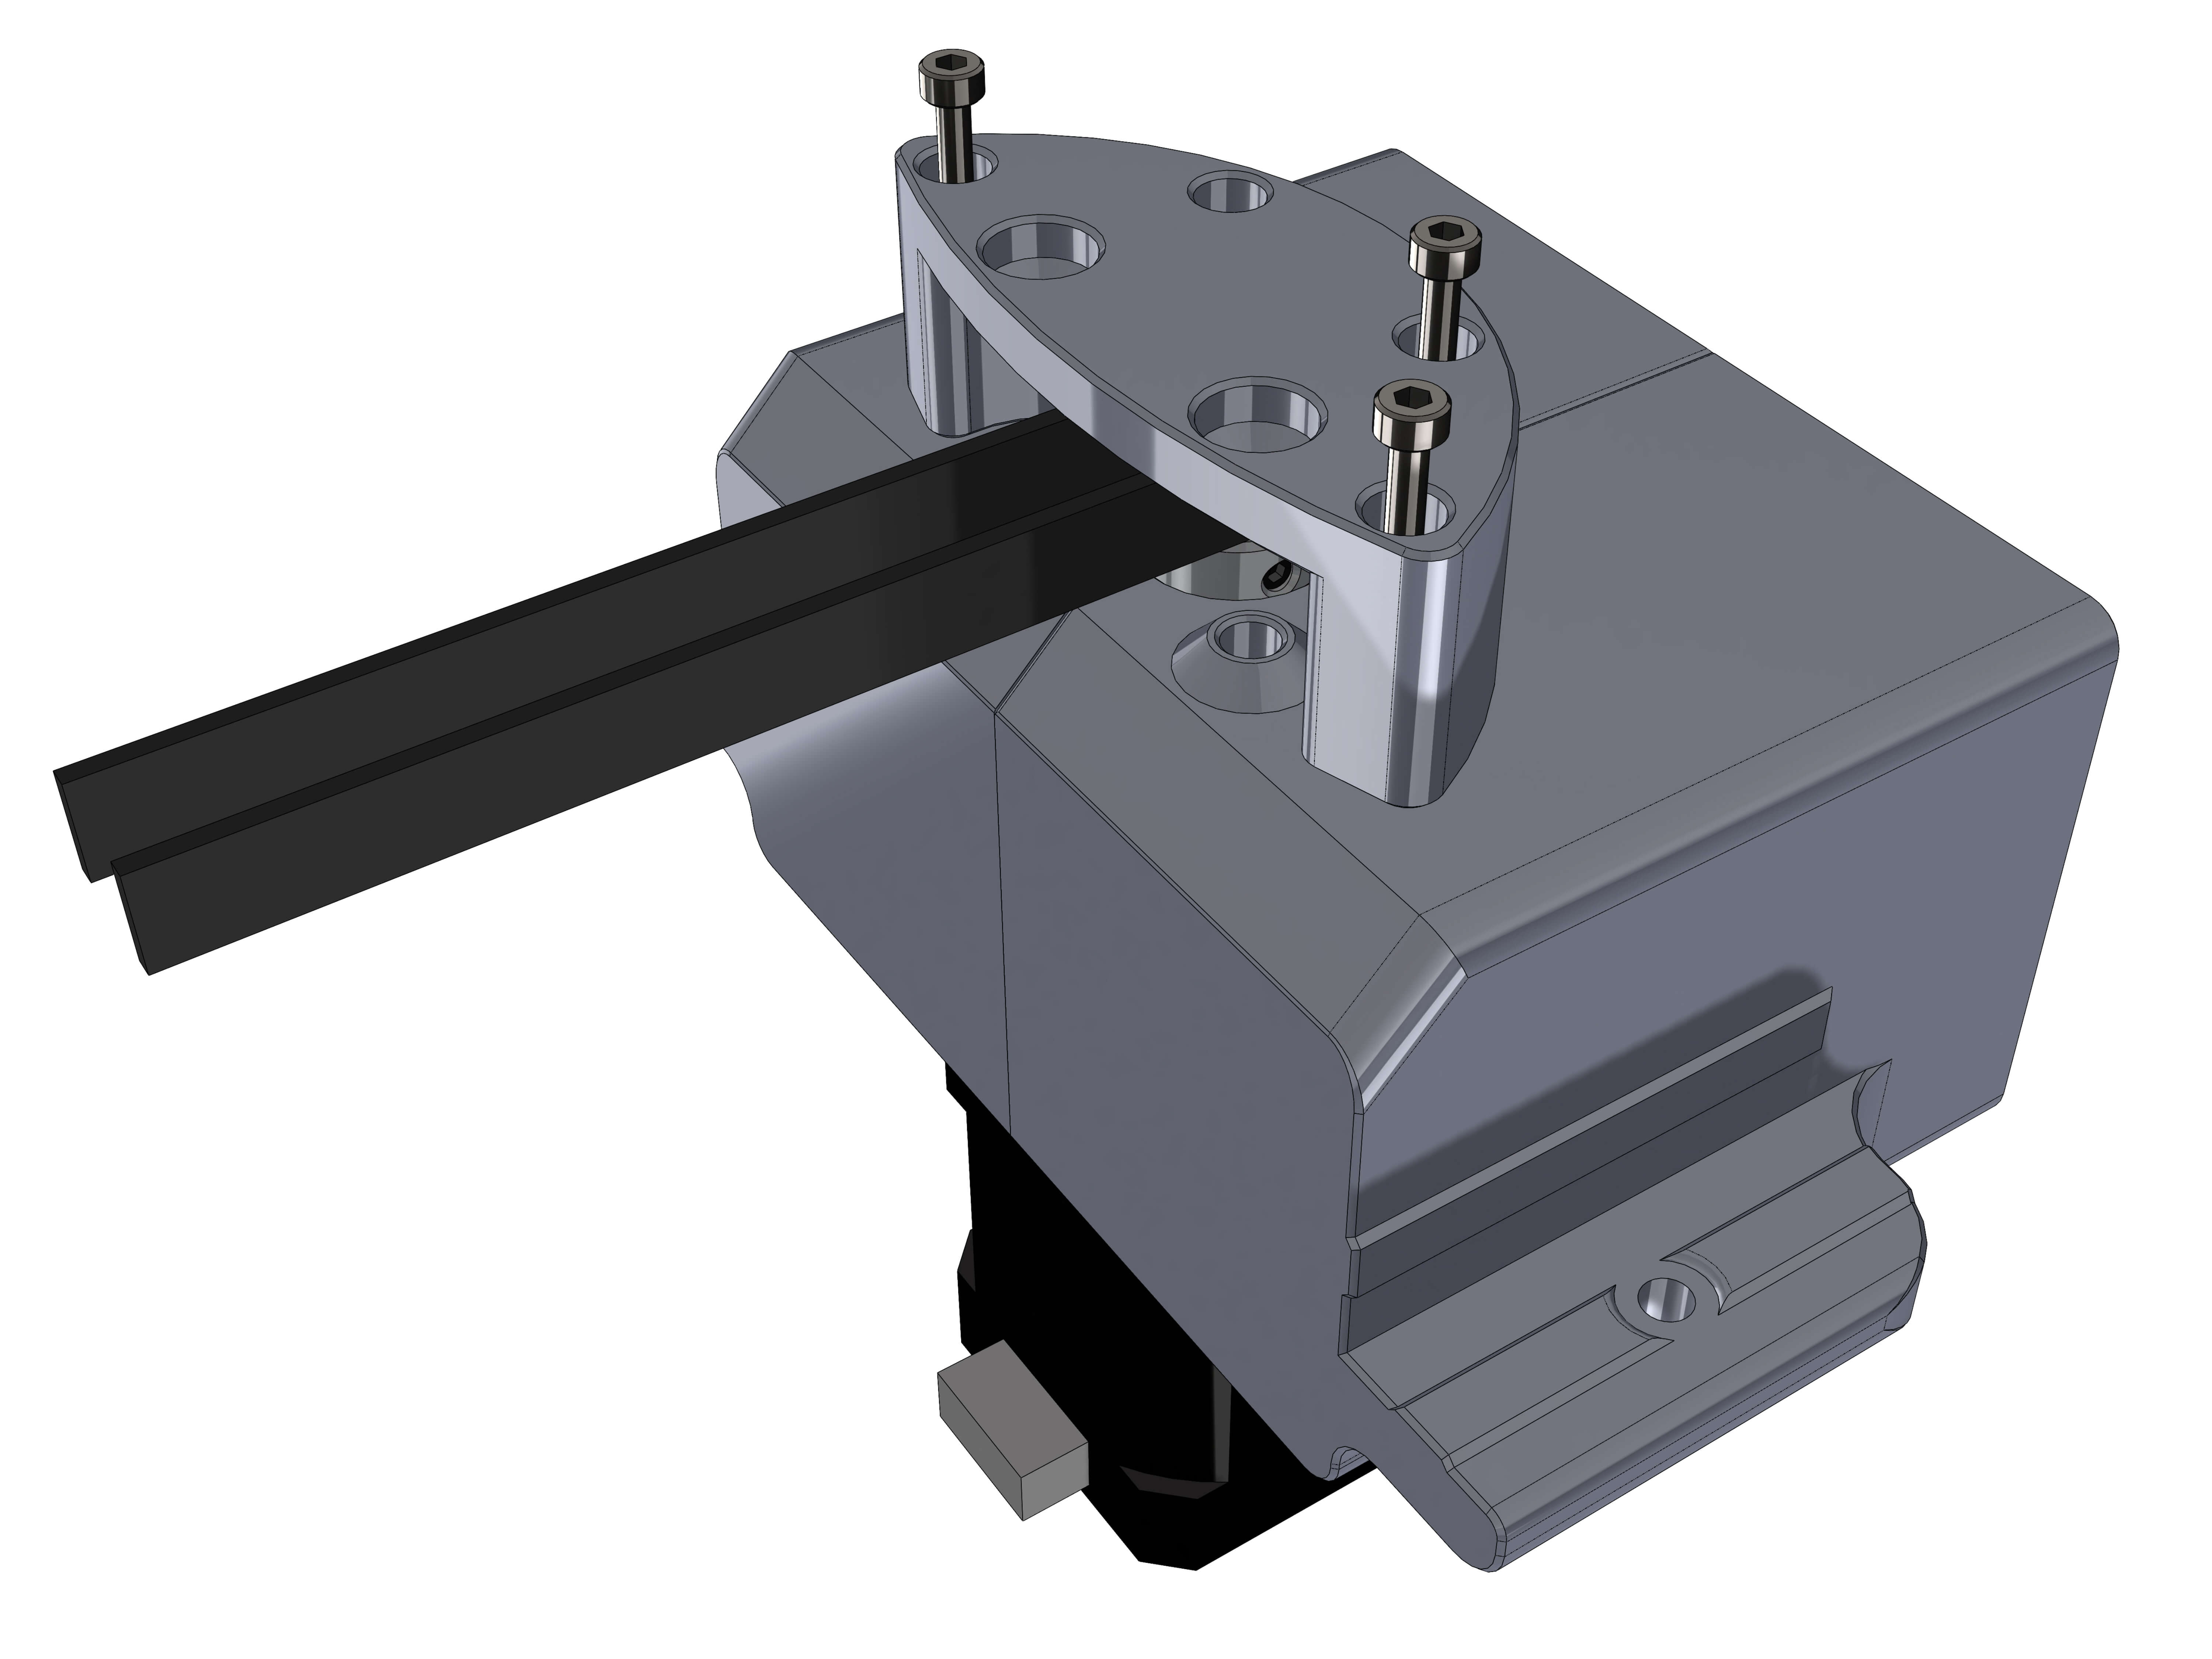
Hardware:
- GT2 20T 10mm toothless idlers (2)
- M5x30 screws (2)
Insert the 20T 10mm toothless idlers. Then screw the M5x30 screws in. Screw them in until the idlers stop spinning easily, then untighten the M5 screws a quarter turn to ensure the idlers always spin smoothly.
After doing that tighten the M3 screws.
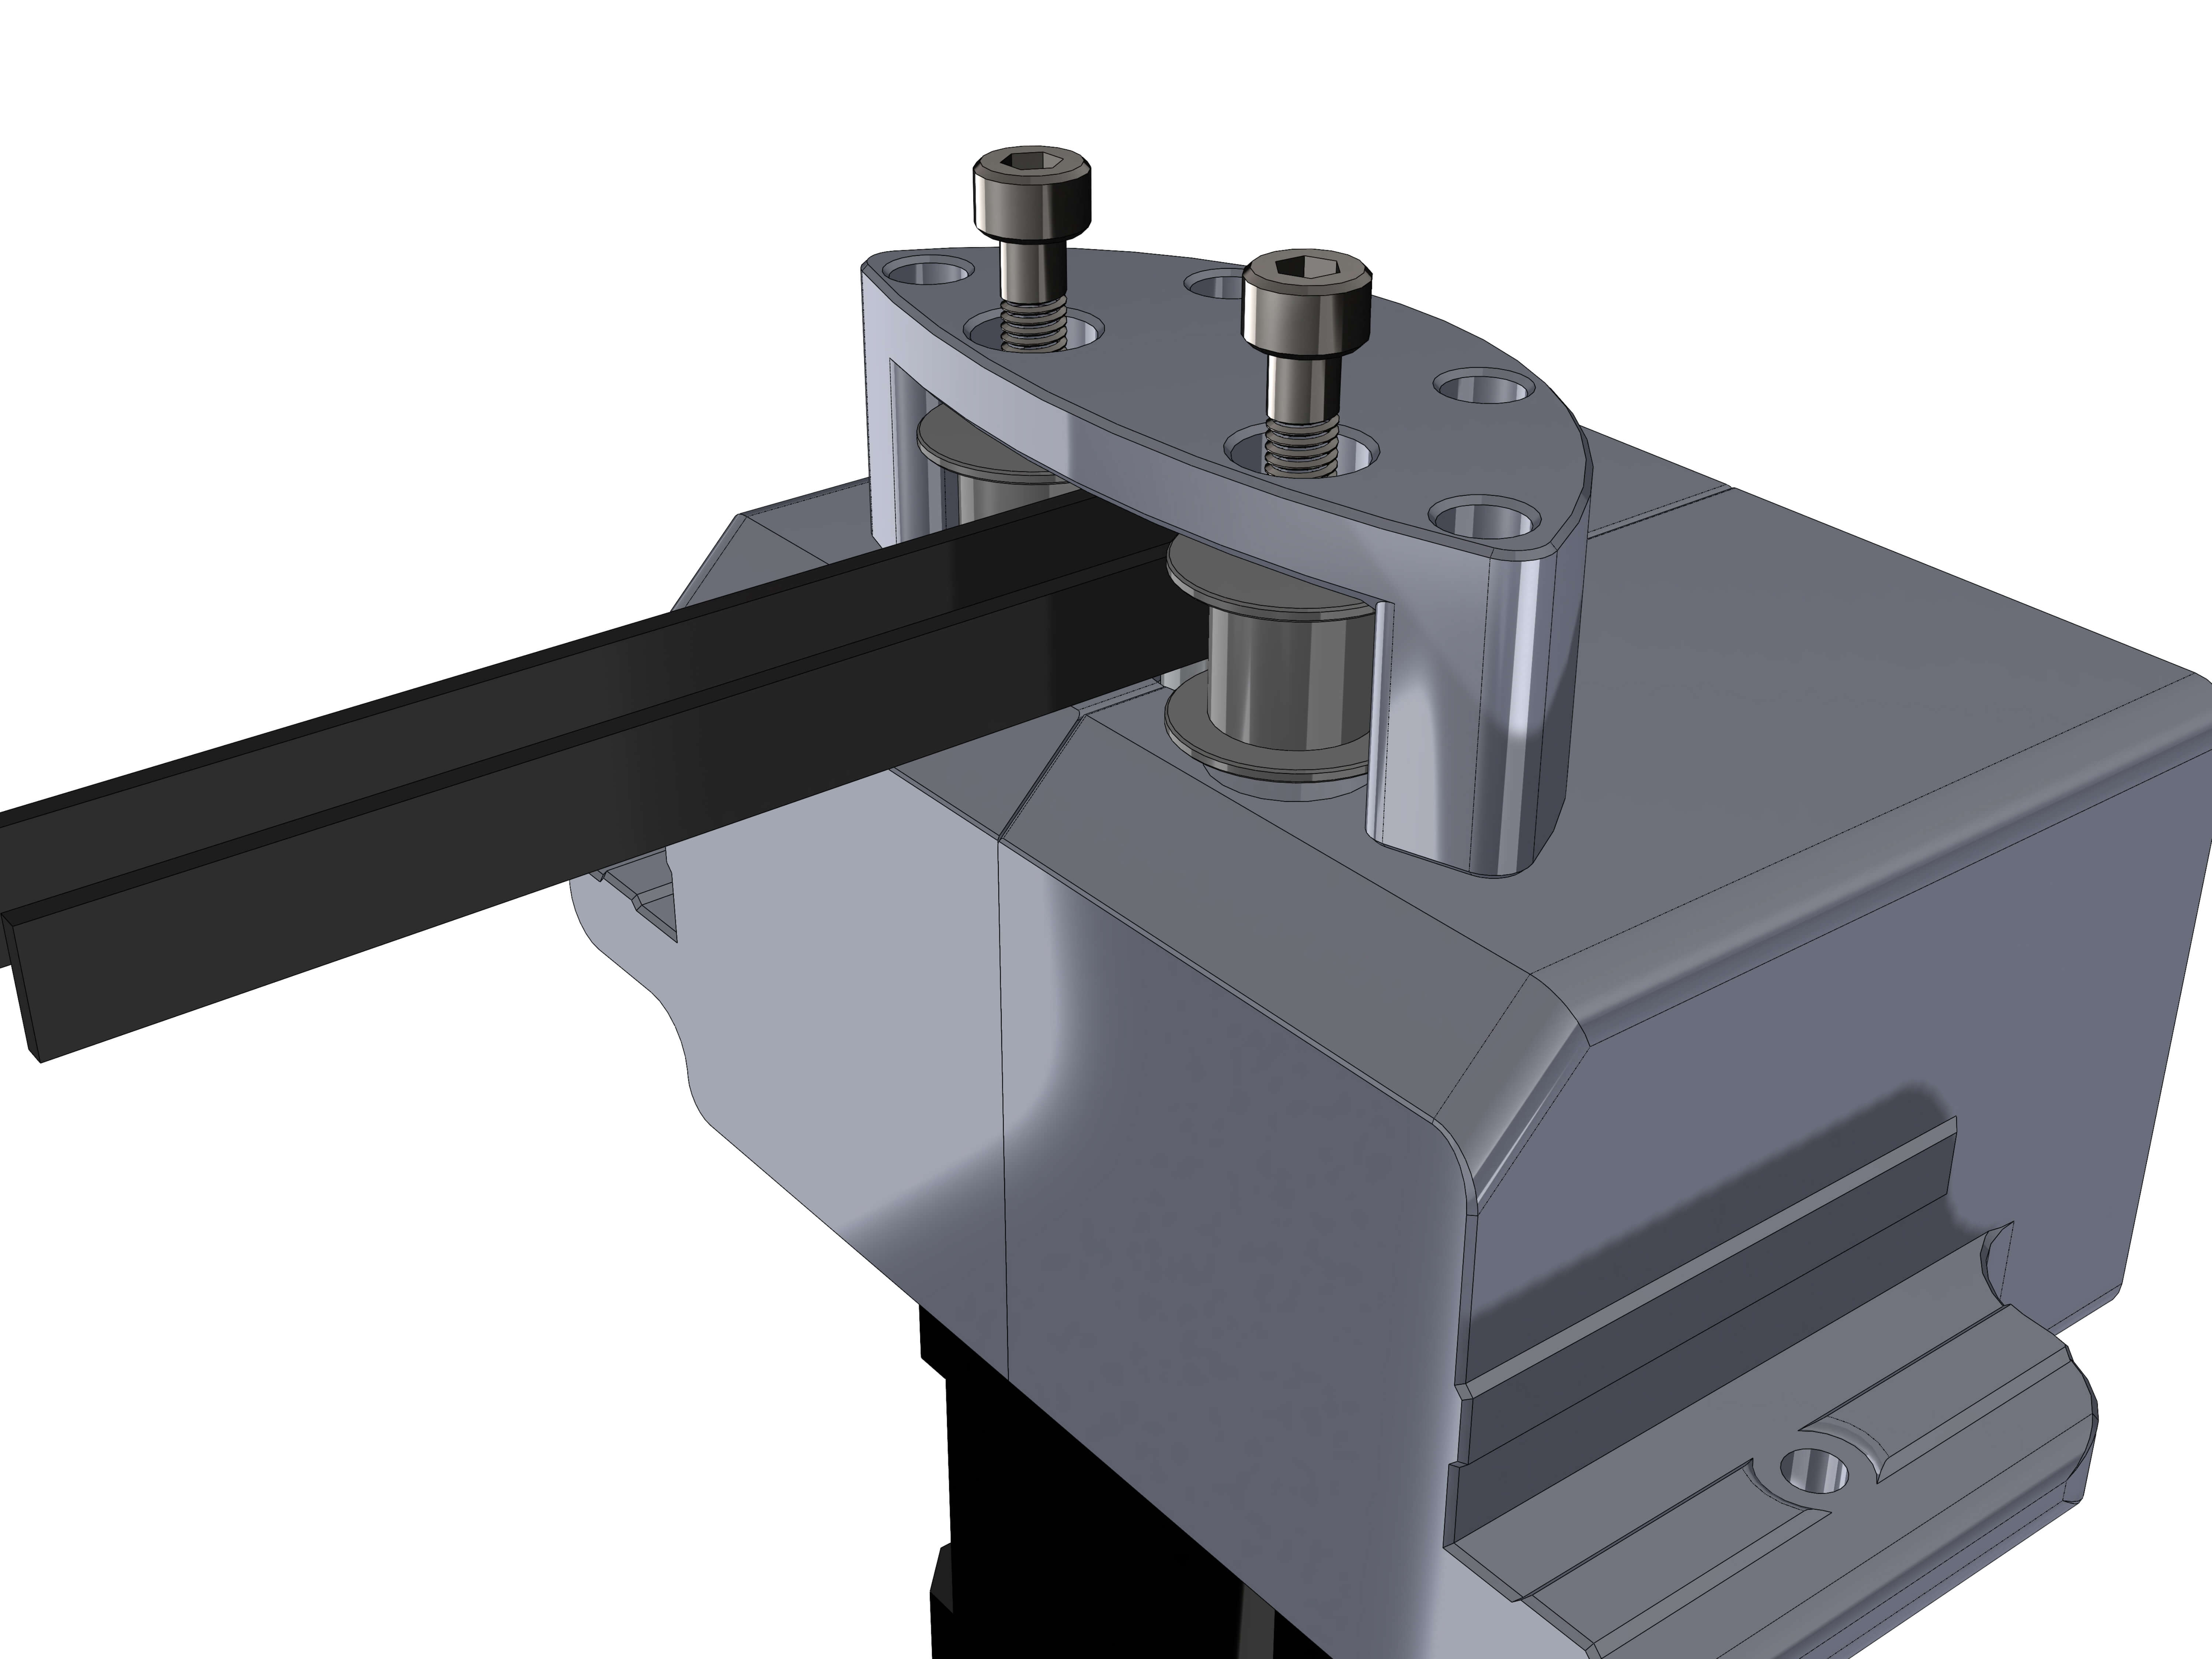
Parts:
- Lid
- M3x12 screws (4)
- M3 washers (4)
Take the Lid and attach it with 4 M3x12 and M3 washers. On the inside you'll find a tiny arrow, this arrow should point towards the stepper.
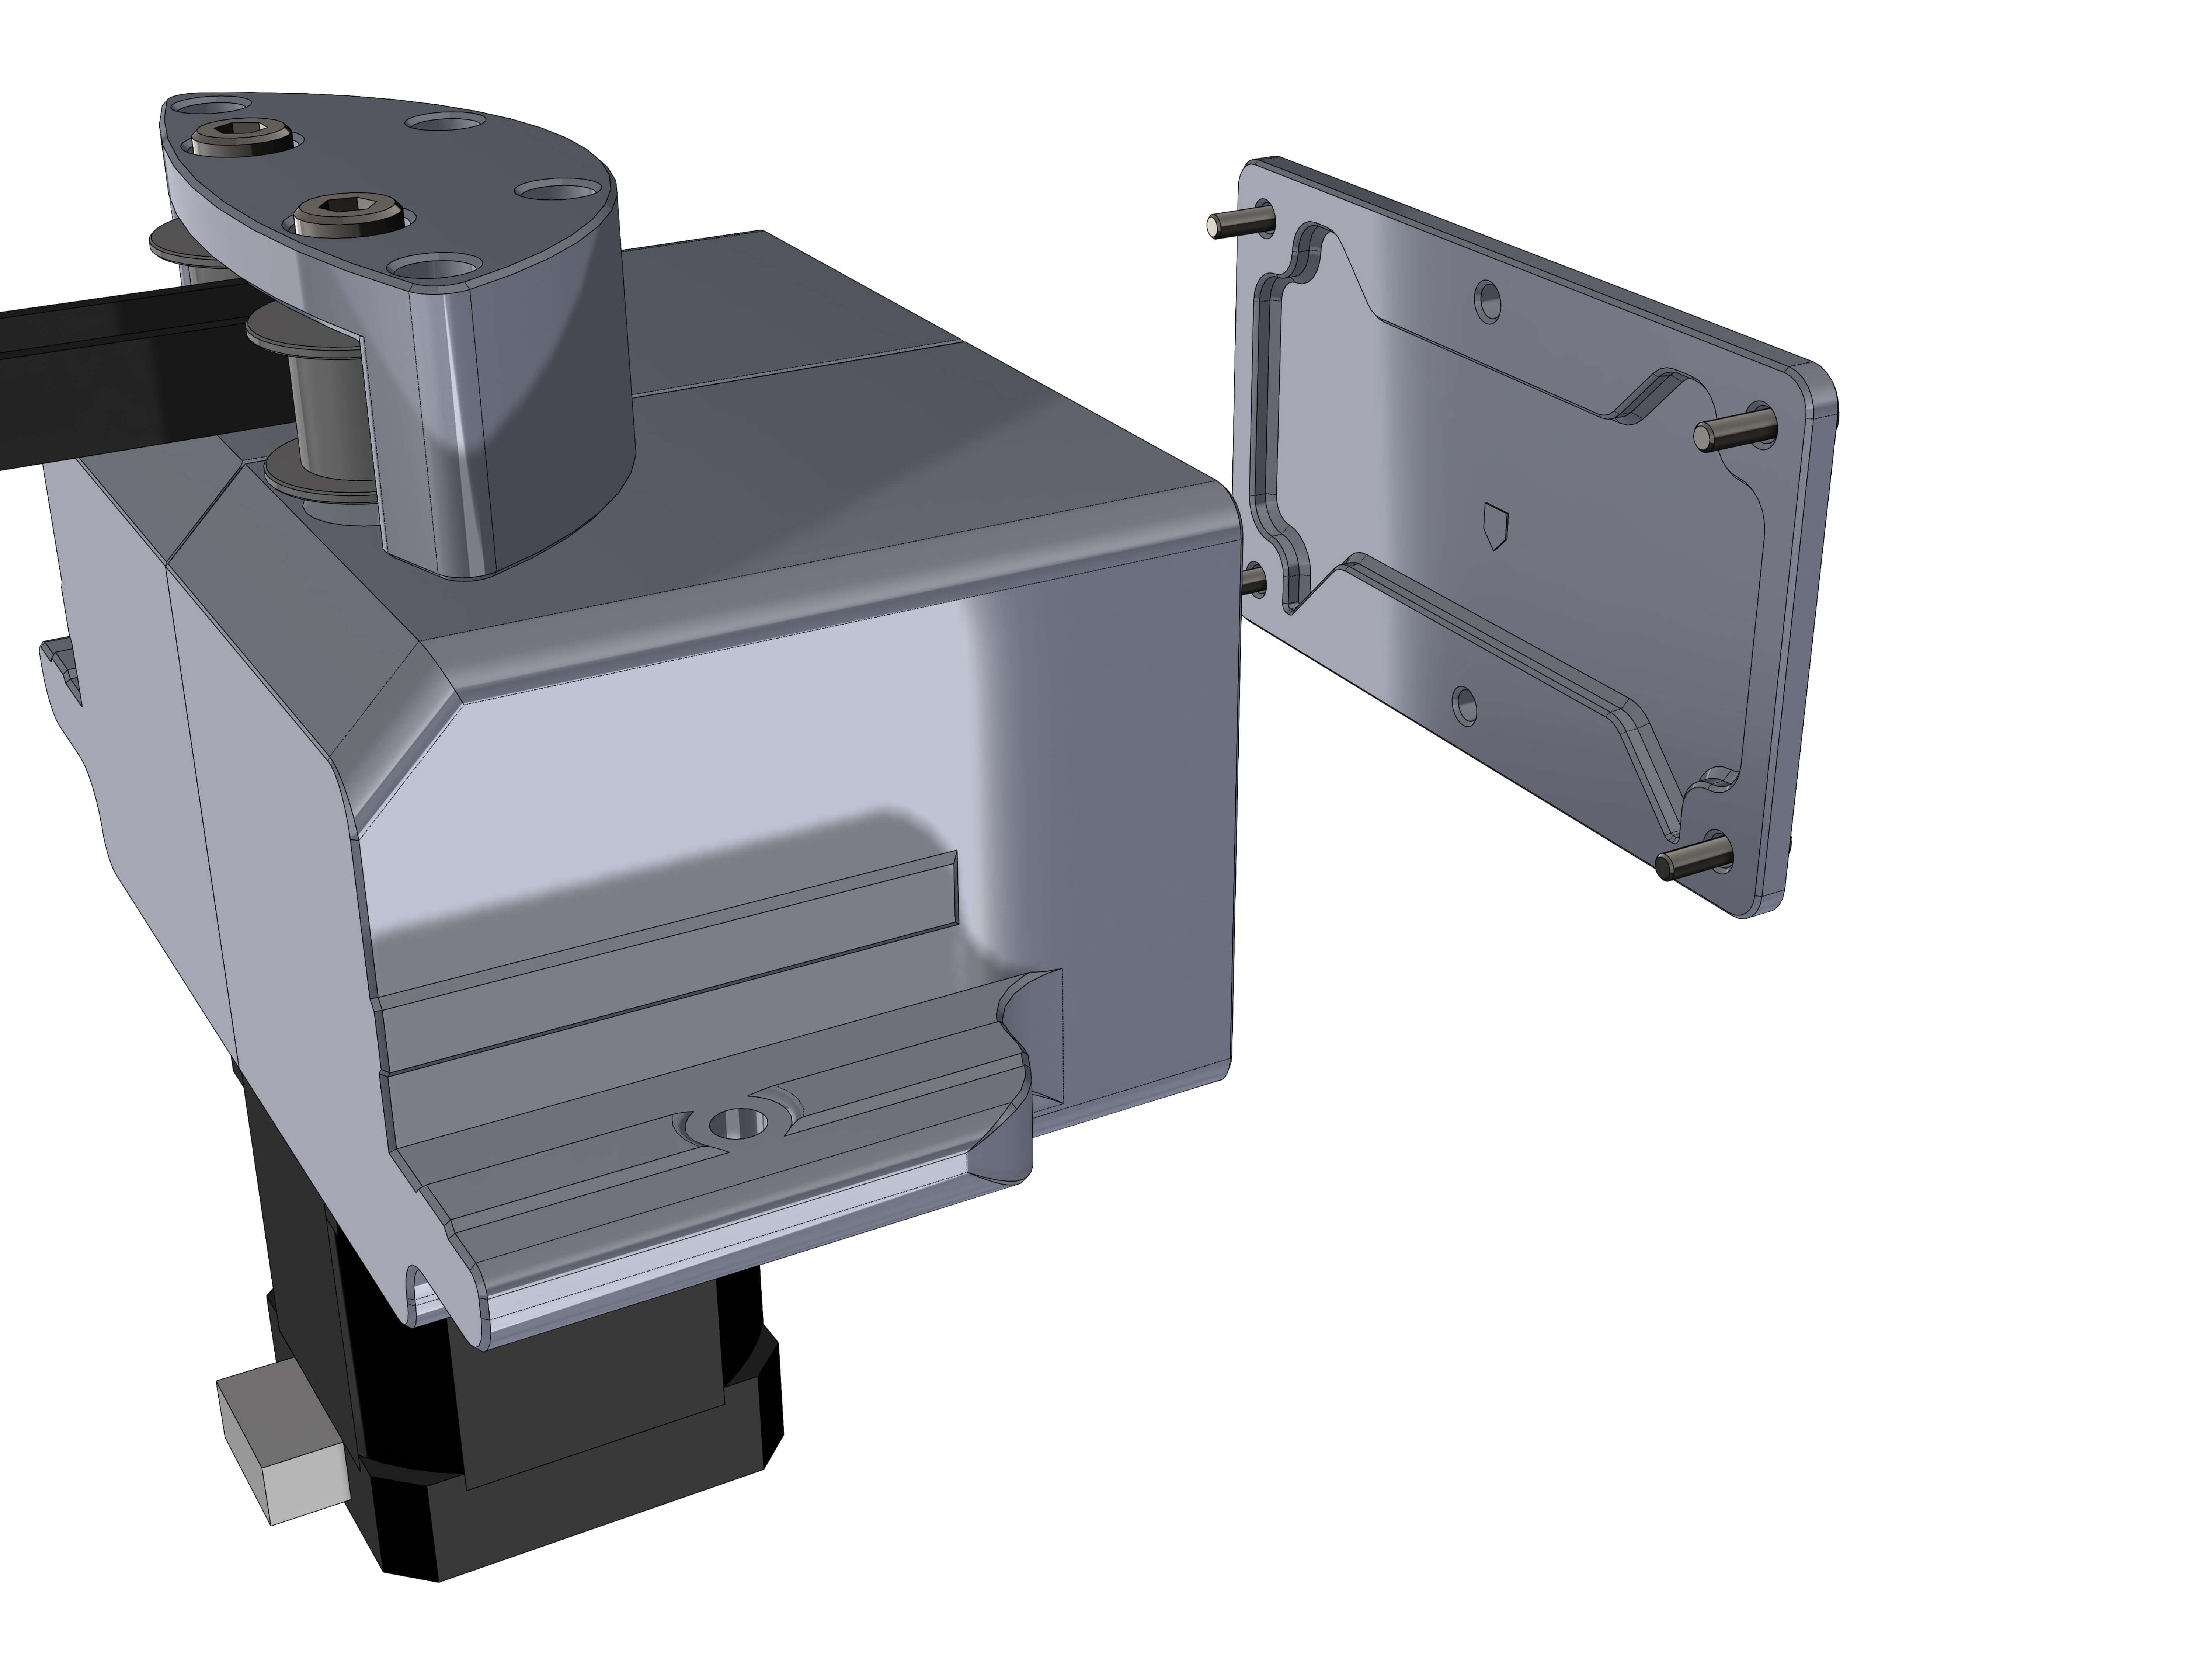
Hardware:
- M3x12 thumbscrews (2)
Attach two M3x12 thumbscrews and M3 washers in the two center holes. These are used to tighten the belts inside the gearbox.
Tighten the thumbscrews hand tight. Dont crank them down with all you got, having the belts too tight will reduce performance.
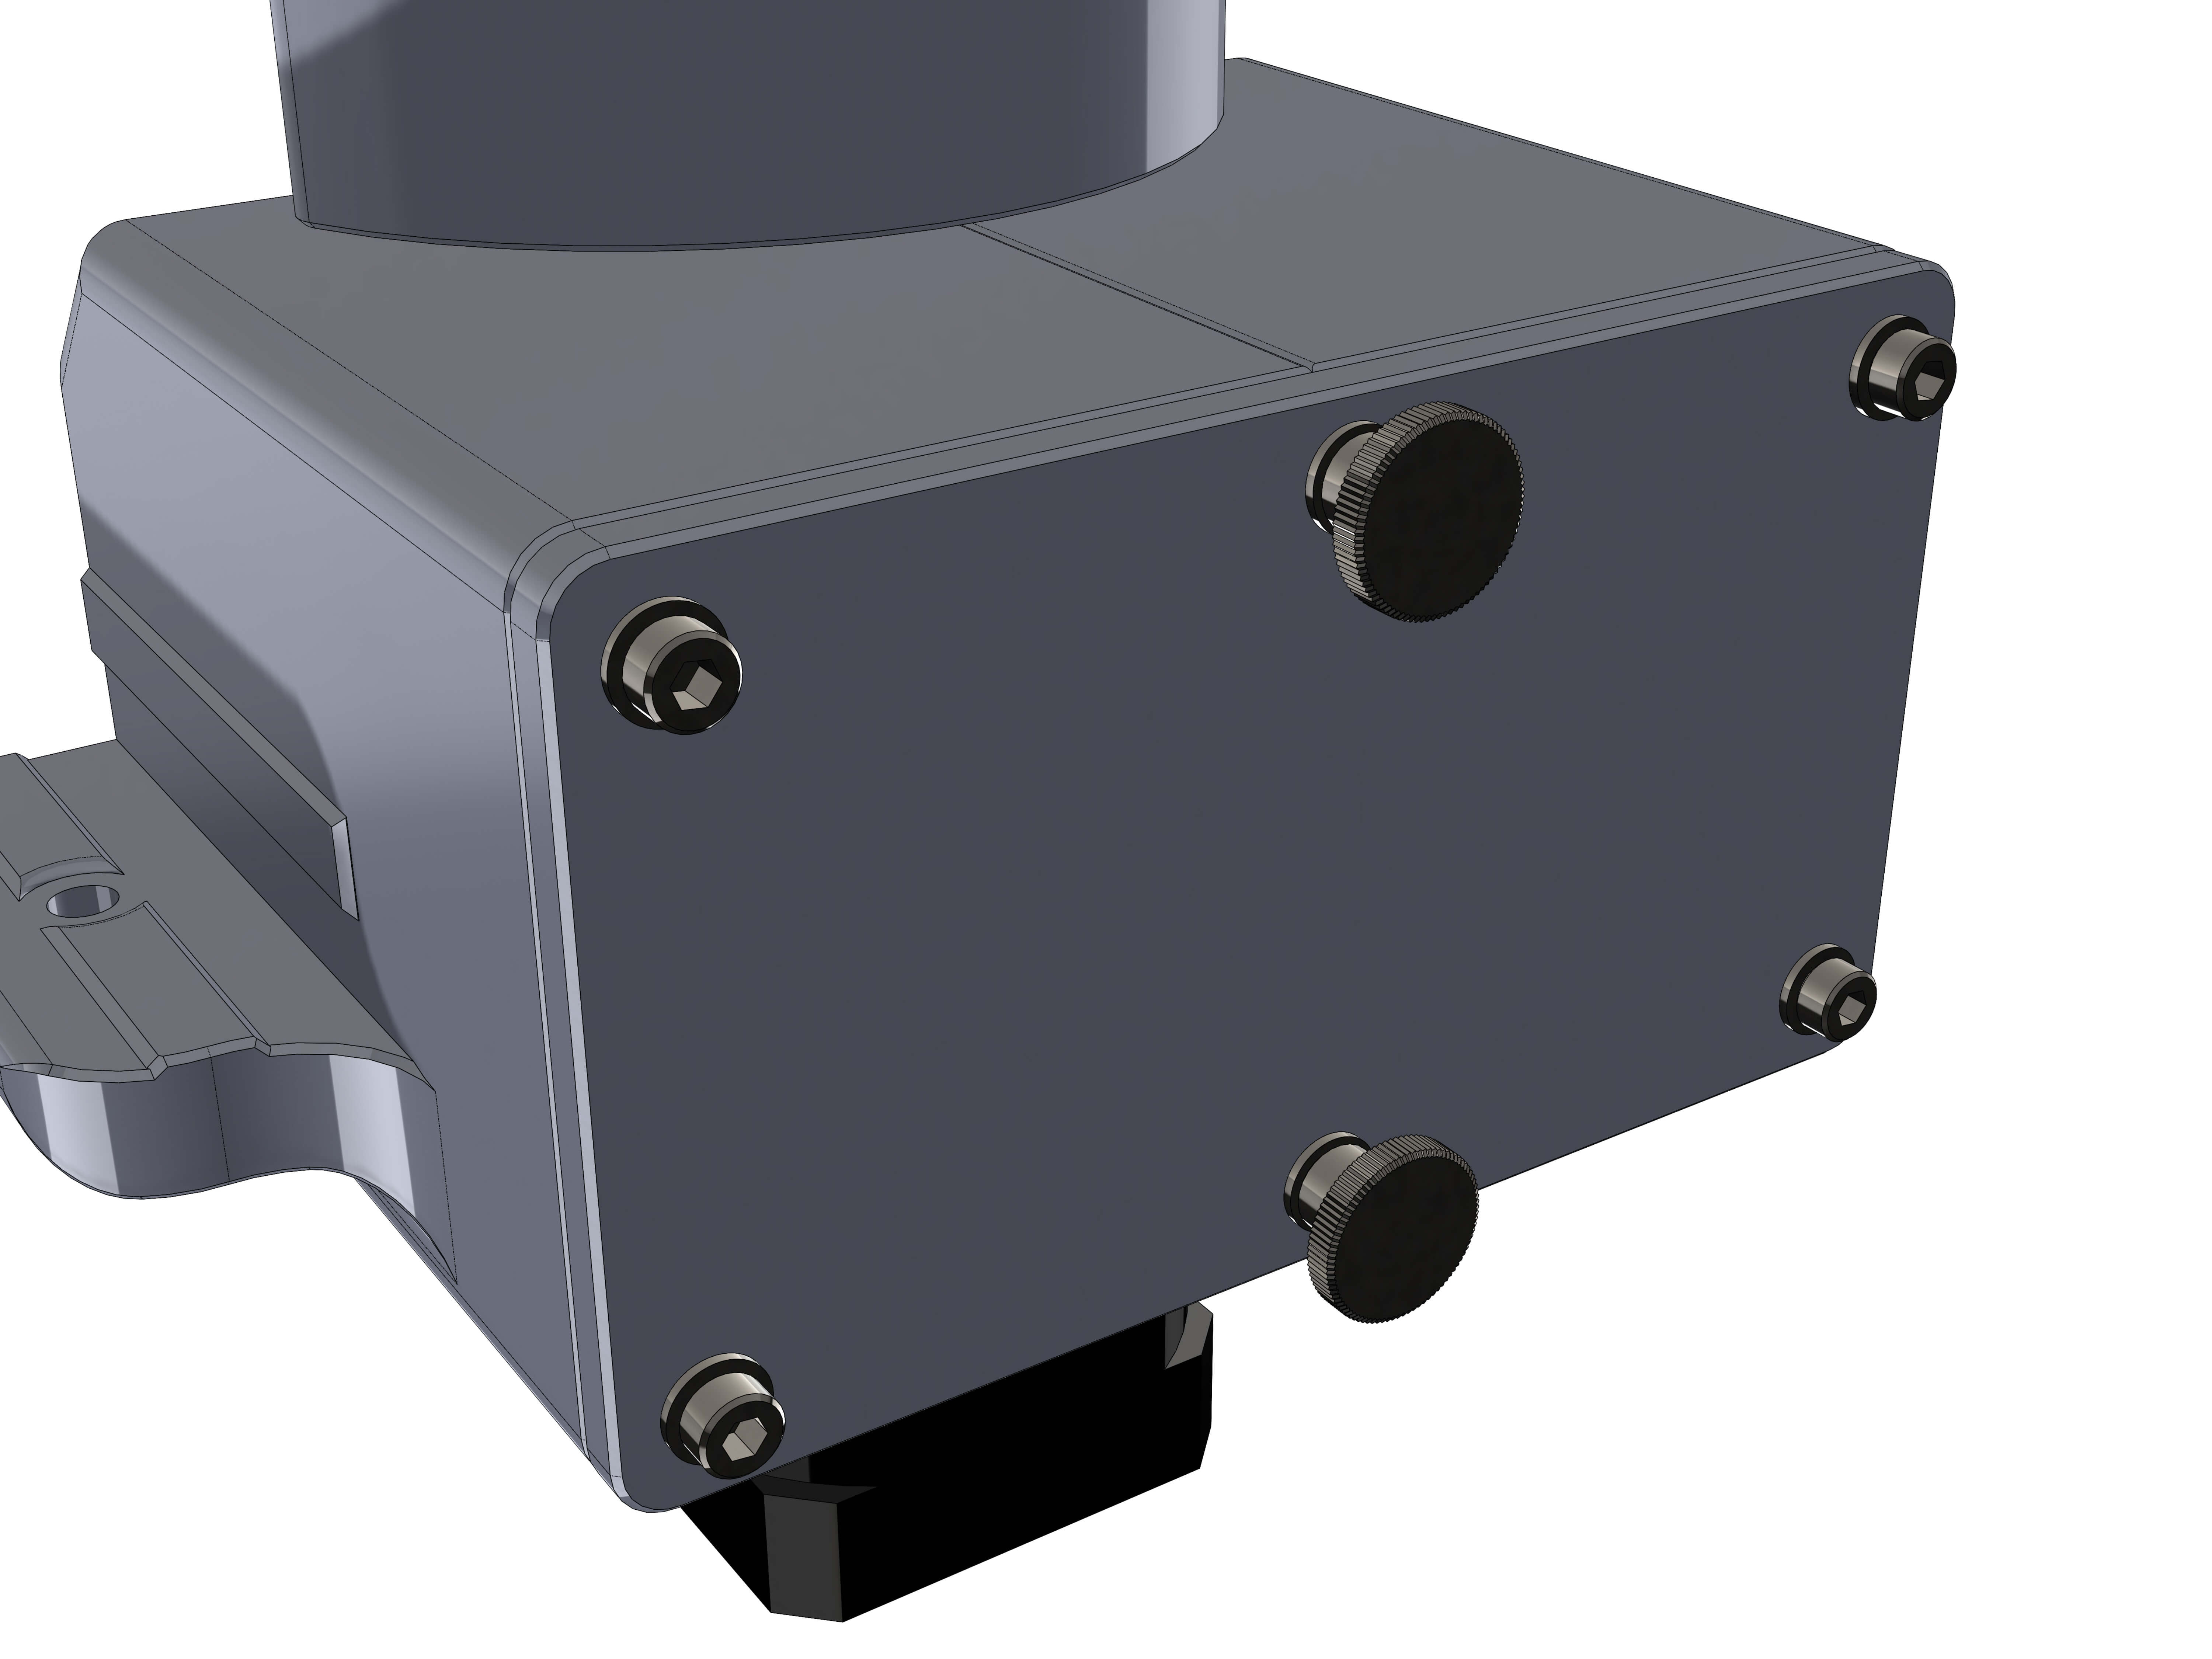
Hardware:
- M4x12 thumbscrews (2)
- M4 T-nuts (2)
Lastly, attach two M4x12 and M4 TNuts on both sides of the gearbox.
These will later attach to 2020 extrusions. To tighten the RA/DEC belts you loosen the M4 thumbscrews, push the gearbox outwards and tighten the thumbscrew again. This way all belts can be adjusted without having to use tools.
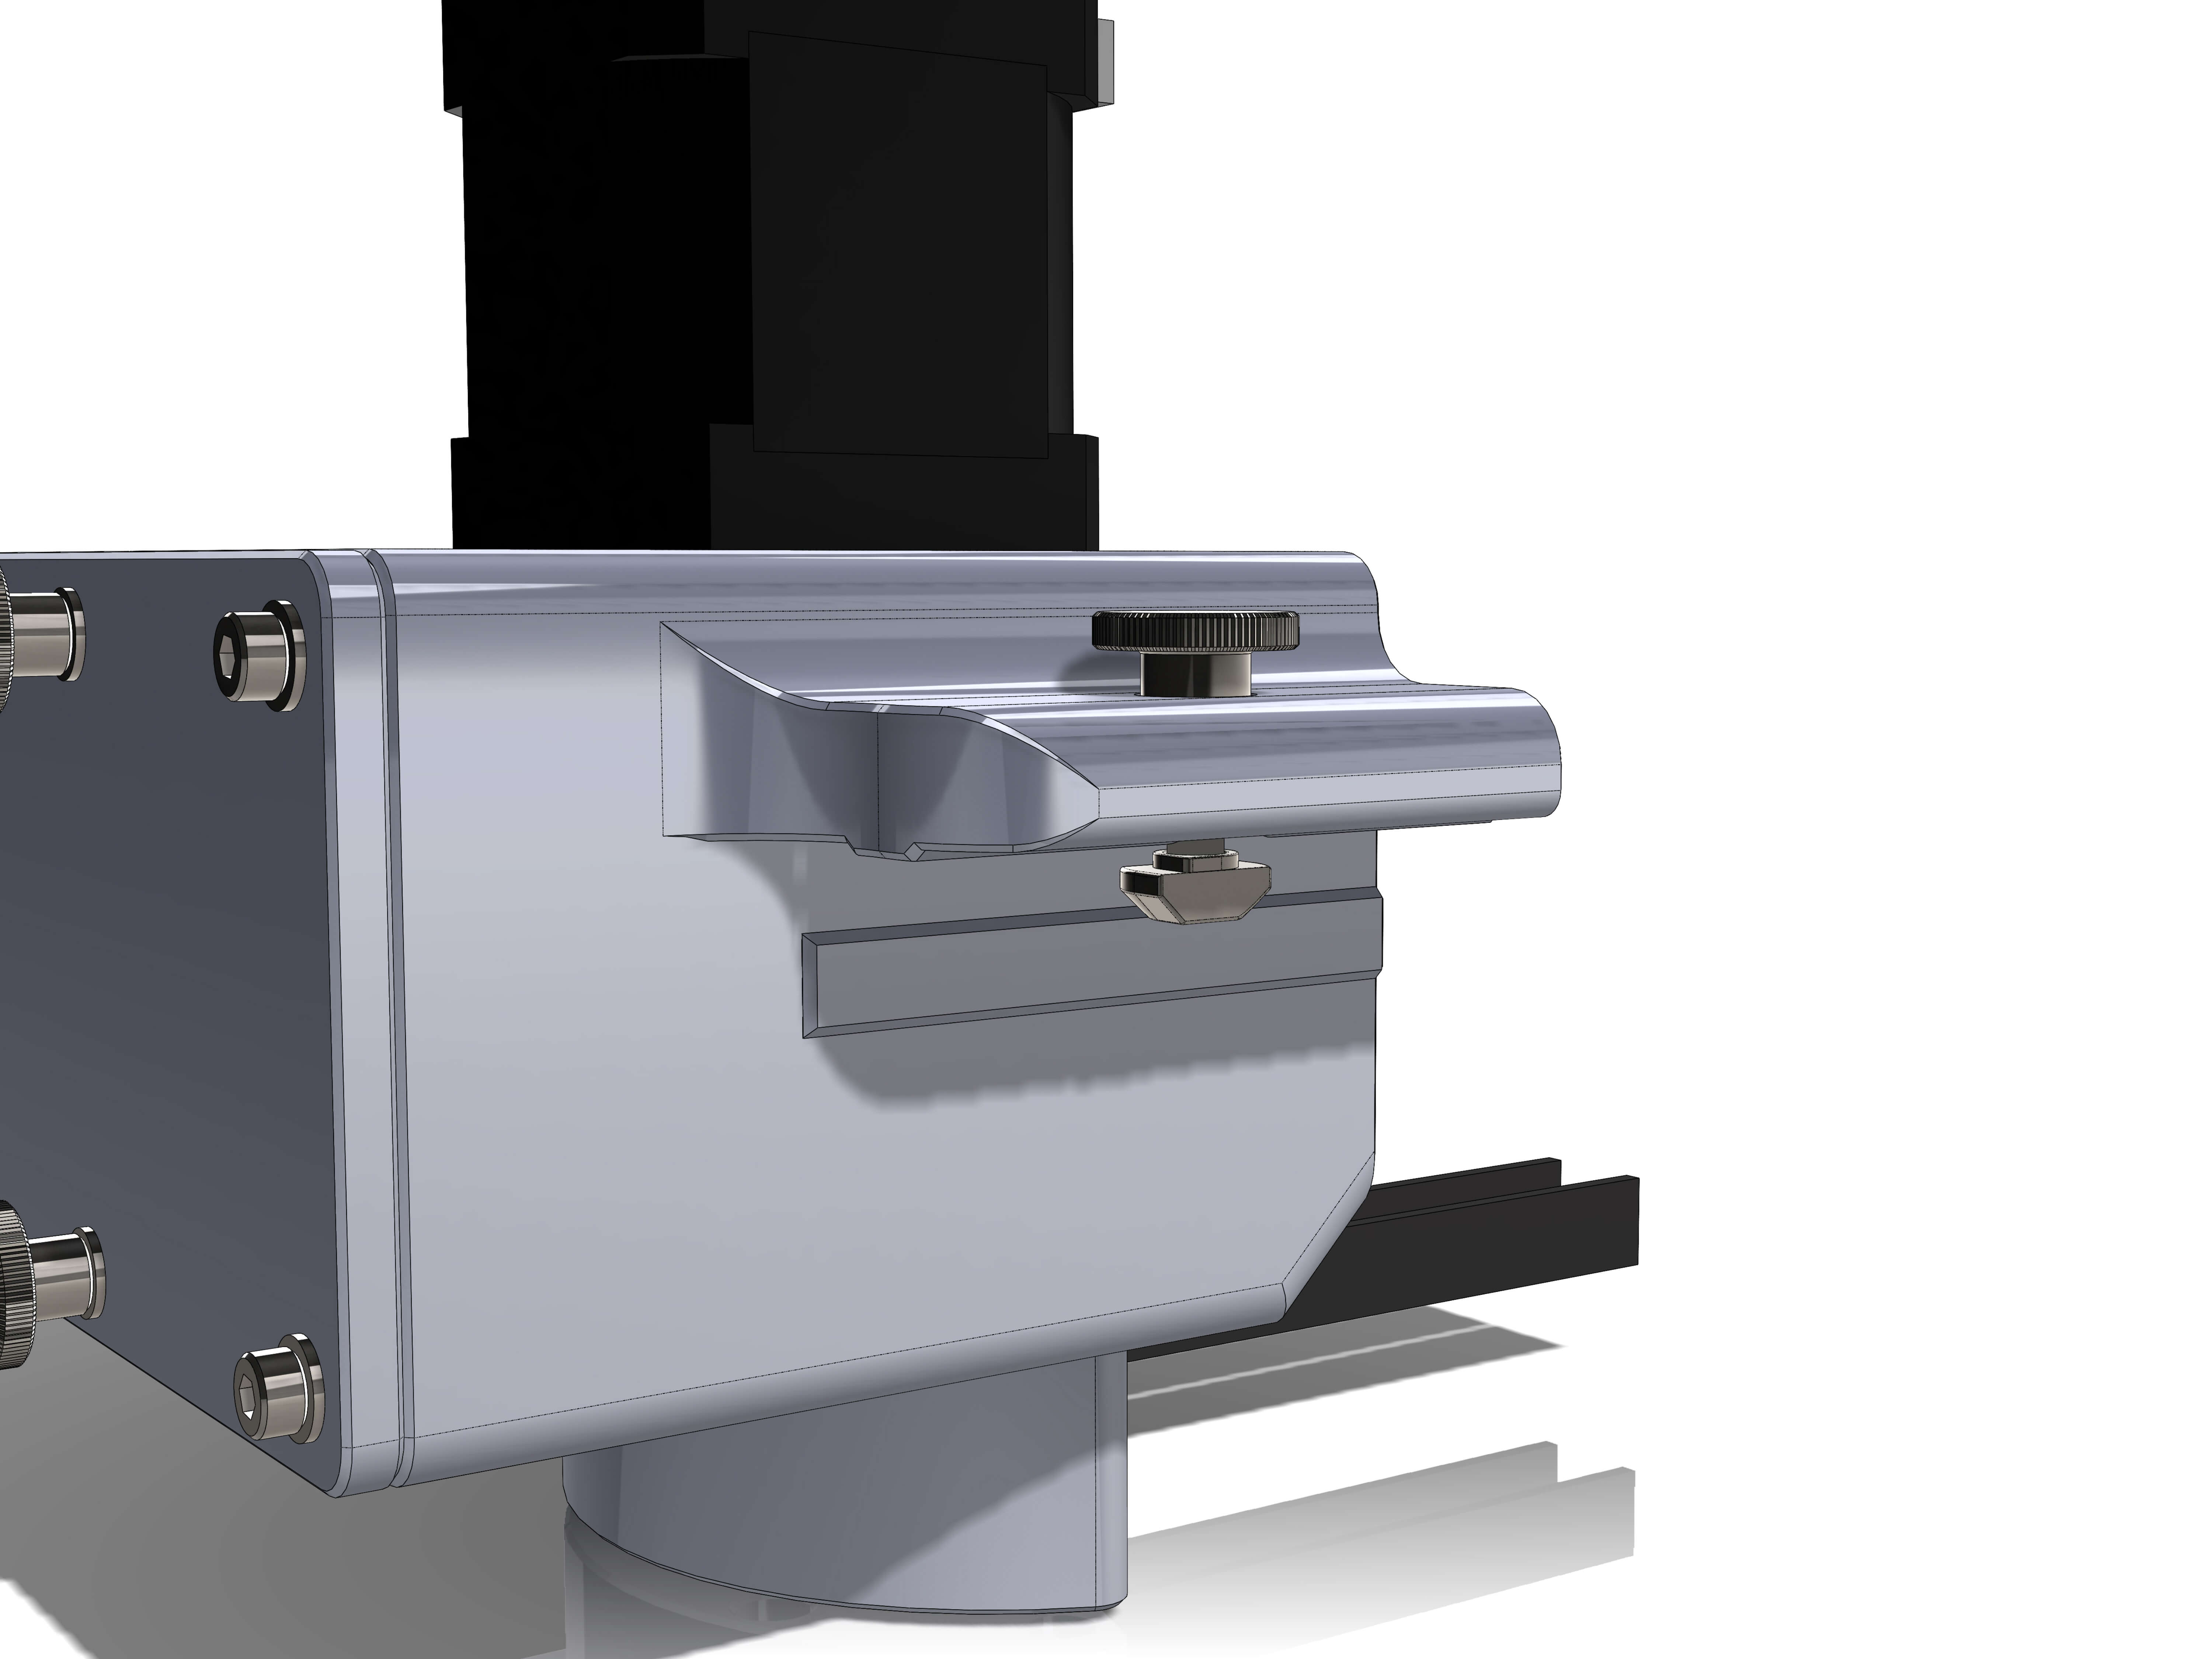
You have completed the gearboxes of you OAM!

Continue with the final Assembly Step 5:
OAM Assembly Part 1: Base
OAM Assembly Part 2: ALTAZ base
OAM Assembly Part 3: Top Assembly
OAM Assembly Part 4: Gearboxes
OAM Assembly Part 5: Final Assembly